
2.4 Cutting imported Animation Clips
Tutorial
Beginner
+10XP
40 mins
(400)
Unity Technologies
In this tutorial, you’ll select your own cut from a running Animation Clip.
Languages available:
1. Overview
In this tutorial, you’ll use animation-specific settings to cut an imported Animation Clip. One of the most common uses for cutting animation is using motion capture (or mocap) data, but it can be used to adjust any imported animation.
In 2.3 Model-specific animation import settings, you reviewed the settings of an imported model that applied to all the animations of that model. In this tutorial, you’ll be using the settings that apply to animations individually.
2. Before you begin
This tutorial uses the Introduction to 3D Animation Systems Unity project. If you haven't already done so, download this before continuing.
When you’ve downloaded the project:
1. Open the project in Unity Editor.
2. In the Project window, go to Assets > 2.4 - Animation Import Settings.
All the assets you’ll need for this tutorial are in this folder.
3. Cutting and configuring Animation Clips
Over the next three tutorials, you will cut and configure a humanoid run Animation Clip in Unity Editor. This Animation Clip uses mocap data.
You can follow the tutorials sequentially or use the prepared resources in the project for this course to do each stage in isolation.
4. Open the Animation Clip
First, open the Animation Clip for this tutorial so that you can review the settings in context:
1. In the Project window, select the HumanoidRun model.
2. In the Inspector, select the Animation tab.
3. Change the Name property from “Take 001” to “Run”. (Take 001 is the default when Animation Clips are imported without a name.)
Changing the name to something specific will help you identify the Animation Clip’s contents more easily.
5. Review the animation timeline
Now that you’ve renamed the Animation Clip, let’s review the timeline. The animation timeline shows all of the animation data for the current Animation Clip (or take).
There are handles you can drag to set the start and end of the Animation Clip to cut the take.
For more precision, you can set the frame number for the start and end of the Animation Clip using the fields just underneath the animation timeline.
6. Review the loop quality traffic lights
You can use the tools in the Animation tab to create a nicely looping run animation from the mocap data in this Animation Clip. However, to do this, you’ll need to know whether you’ve identified a good loop to cut.
To help you do this, there is a traffic light system beside the different settings in the tab:
- A green circle next to the setting indicates that there is a good loop
- A yellow circle yellow indicates that the loop is reasonable, which may or may not be appropriate for your circumstances
- A red circle indicates that it is a bad loop
It might seem obvious that both start and end point should have good (green) indicators for all the settings. However, not all settings need to be green for all animations — it depends on what you’re trying to create. In some circumstances, a bad loop may be perfectly adequate for your needs.
7. Play the full animation
At this point, let’s review the animation:
1. In the Inspector, find the preview pane.
Note: Your preview pane may be collapsed. If this is the case, select the bar at the bottom of the Inspector to expand it.
2. Press the Play button in the preview pane to watch the full animation.
3. When it’s finished, press the Pause button in the preview pane.
Yikes! The animation data is pretty bad. It’s going to be challenging to make a good Animation Clip out of this. Let’s give it a go though!
8. Review example loop traffic lights
To help you find a good loop, the Model Importer will show you a coloured graph for each of the traffic lights when you drag either of the timeline handles.
Let’s review this in detail:
- There are several parts of the graph that are just flat lines. These are the points where the animation has frozen, probably because the mocap didn’t record properly. Don’t include these bits in your cut of the Animation Clip.
- At the start of the take, the model is leaning forward more than it would normally in a run. This is not ideal for a normal run animation.
- There does seem to be a small section of usable animation about 10 seconds into the take. Let’s find a loop there.
9. Create your own animation cut
To create your own cut of the Animation Clip:
1. Drag the start handle to a point between frame 290 and frame 330.
2. Drag the end handle to make a loop.
The example above uses frame 317. If you used a different start frame, try to find an appropriate end frame using the coloured graph.
Tip: Green peaks in the graph are good places to check for loops.
3. Press the Play button in the preview pane to preview your animation.
4. When you’ve finished, press the Pause button in the preview pane.
If you used different frames and they don’t quite look right, don’t change them just yet. There are some more settings that might help.
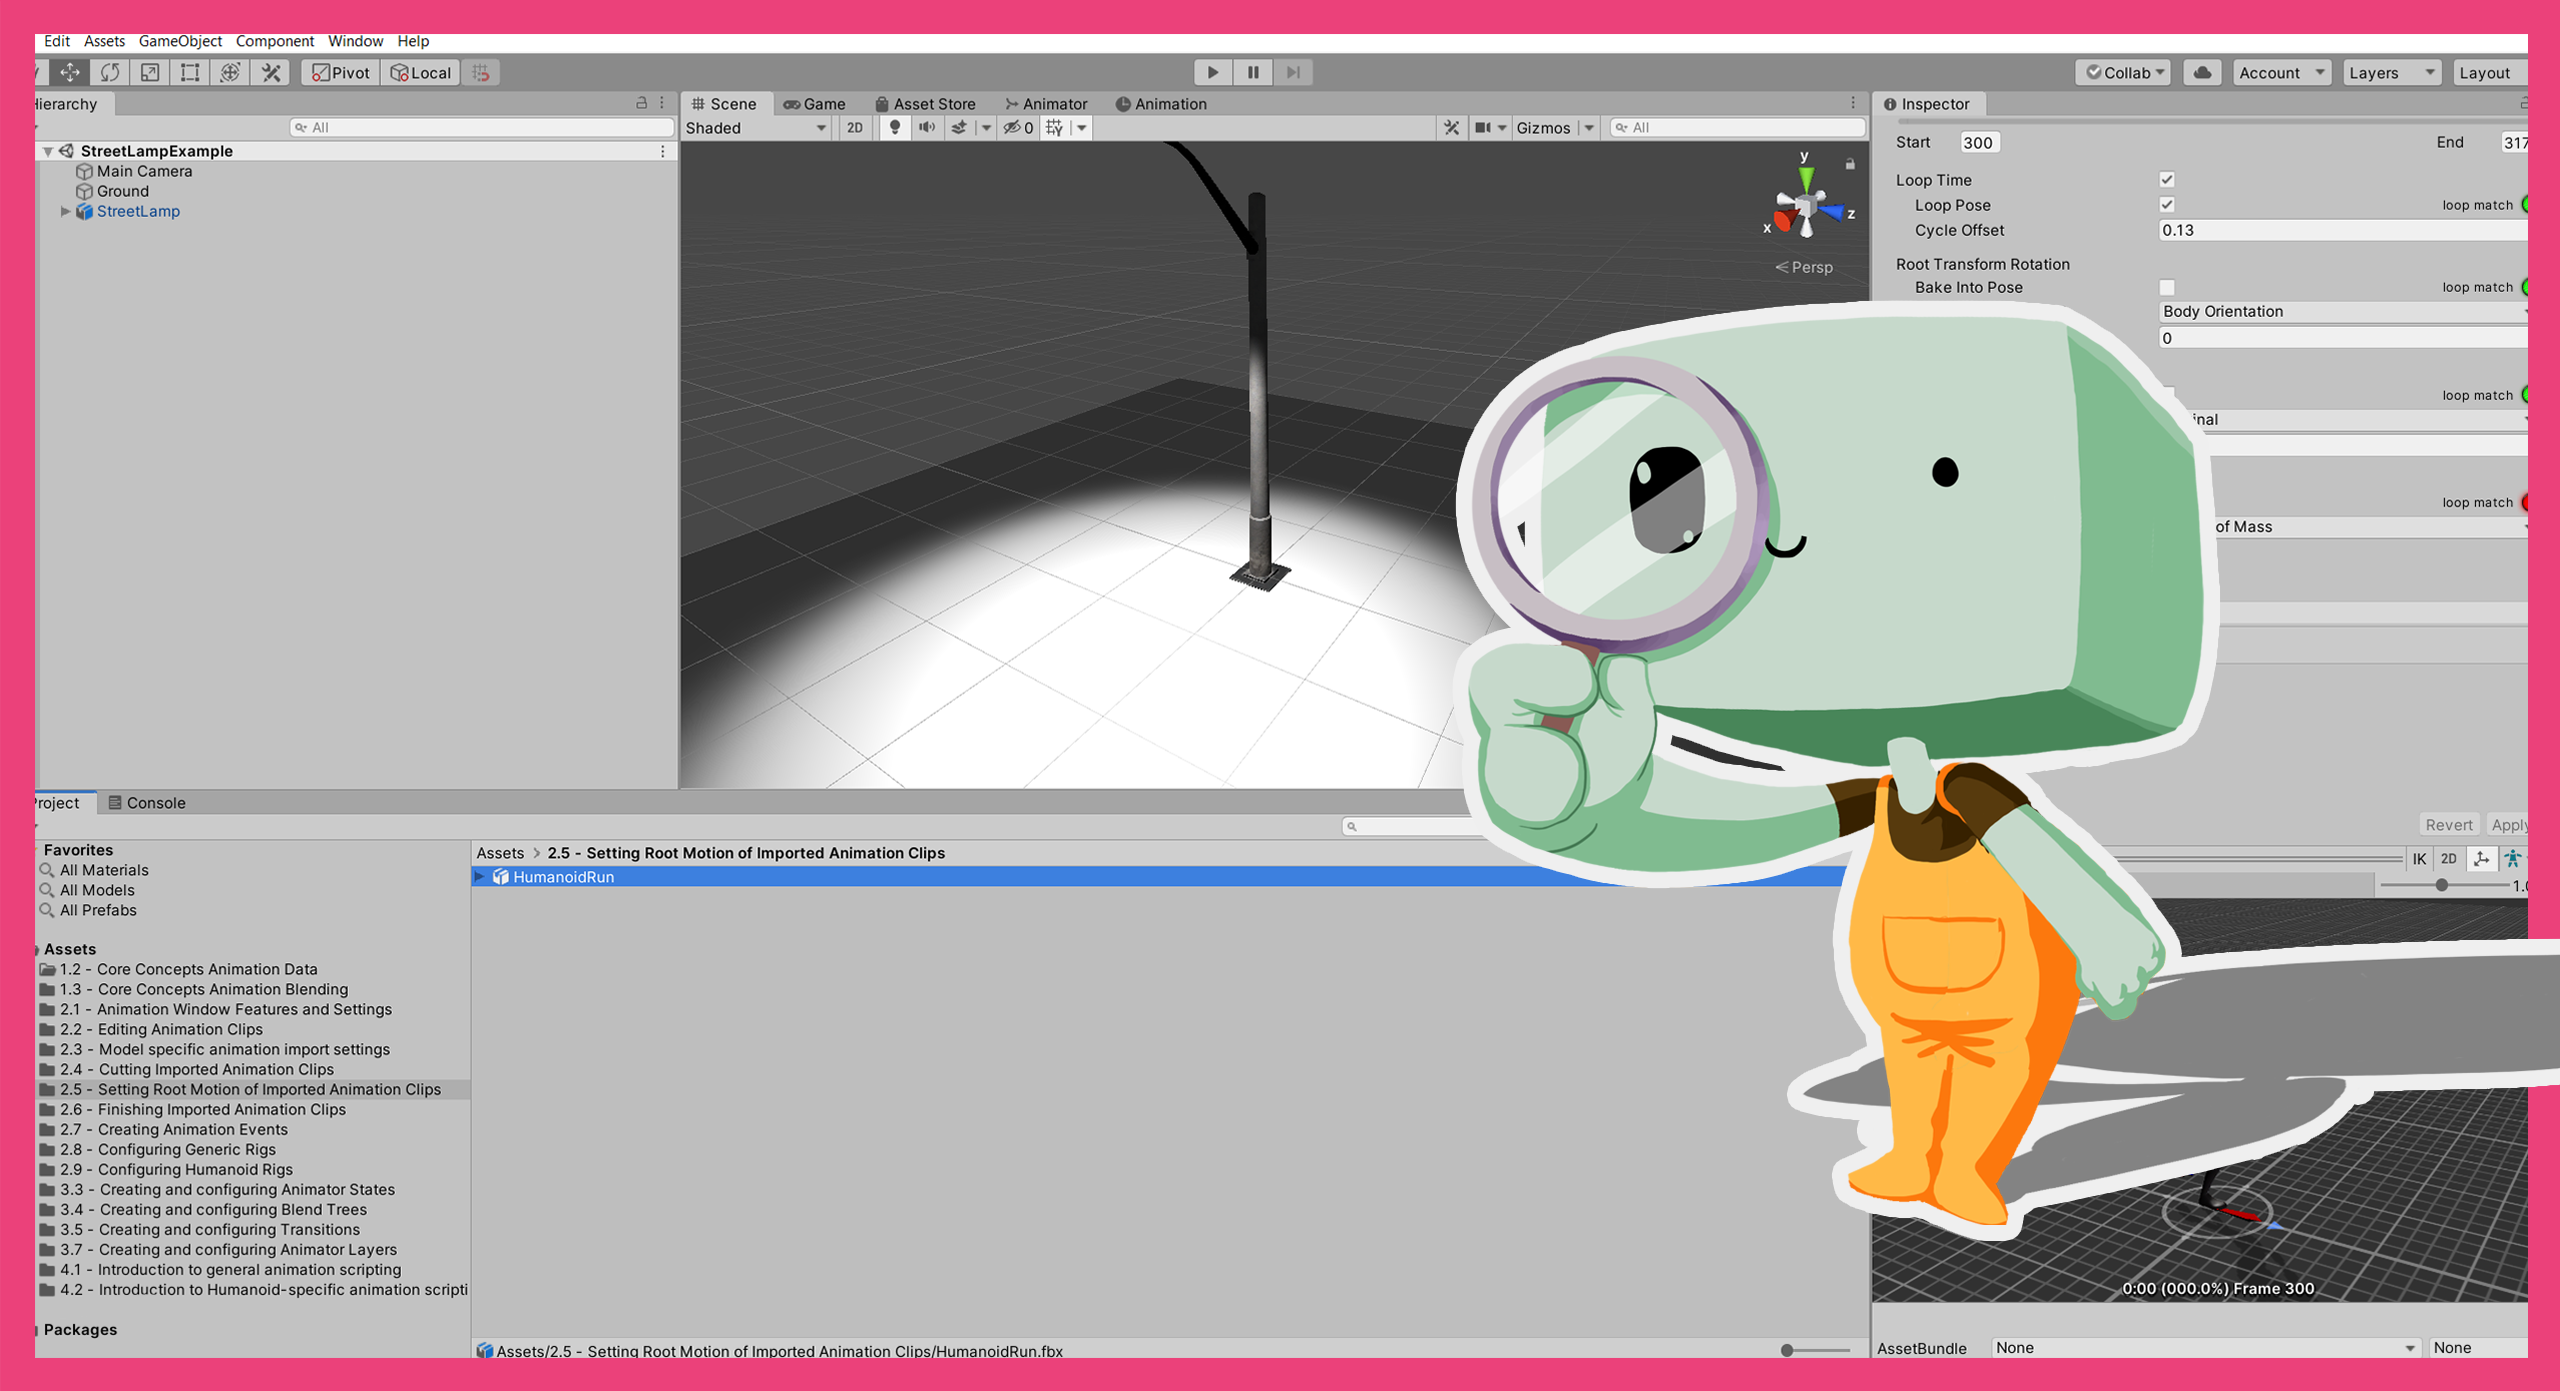
10. Enable Loop Time
The first group of settings below the timeline control the looping.
If the Loop Time setting is enabled, the animation will begin again at the start once it finishes.
This definitely makes sense for a run animation, so let’s do that:
- Enable the Loop Time setting.
This will enable further configuration options.
11. Enable Loop Pose
The Loop Pose setting changes the values of the keyframes in the Animation Clip so that they match at the start and end.
In simplified terms, Loop Pose is used to make sure animations don’t have a sudden change between the start and end that leads to a jitter in the animation. This is especially useful when using mocap data, which rarely matches up exactly.
Since your animation needs to seamlessly loop, you should use this setting:
- Enable the Loop Pose setting.
How is this calculated?
The approximate formula used to calculate this is as follows:
newValue = originalValue - normalizedTime * (endValue - startValue)
If the start and end values of an Animation Curve are the same, then the new value for any given keyframe on that curve will be the same as the original value. As the difference increases between the start and end values, the change in keyframes further from the start becomes more apparent.
If you have managed to cut a good loop for your run animation, then Loop Pose will smooth the start and end without changing the overall look of the animation. Generally speaking, if you have an animation that you want to loop smoothly then it is a good idea to enable Loop Pose, as it has no impact on performance.
12. Review the Cycle Offset setting
Cycle Offset adjusts when the Animation Clip actually starts in the frame range you have selected.
It is measured in Normalized Time, which means that a value of 0.2 would start the Animation Clip 20% of the way into the selected frame range.
There is usually no reason to change the Cycle Offset of an Animation Clip when you think about it independently. However, when blending similar animations, it makes sense for them to be in phase.
For humanoid character animation, this usually means making sure the legs are in similar positions at the same Normalized Times across all the Animation Clips you want to blend. An easy way to ensure this is the case is to have a standard for where the legs are in their cycle at the start of each Animation Clip.
Let’s set the following standard for this Animation Clip:
- The character’s right foot is planted on the floor
- The character’s left knee is passing the right one when viewed perpendicular to the direction of motion.
13. Set the Cycle Offset for your animation
To set the Cycle Offset and start your cut with the defined pose:
1. In the preview pane, right-click and drag to view your animation cut side-on.
2. Drag the preview playhead to a point where the right foot is planted on the floor, and the left knee is overlapping the right knee.
3. Note the Normalized Time shown for this pose in brackets at the bottom of the preview pane.
If you are using the given example range, then it should be approximately (013.0%).
4. Set the Cycle Offset to the Normalized Time for your chosen pose.
In the example, this is 0.13. This will start the animation loop at the pose you have selected.
14. Summary
In this tutorial, you have selected your own cut from a running Animation Clip. This is a fundamental process for working with animation in Unity.
In Setting the Root Motion of imported Animation Clips, you’ll build on this by exploring how root motion can be used to create realistic and engaging animations with a pre-cut Animation Clip.