
Touch Input for Mobile Scripting
Tutorial
intermediate
+10XP
20m
(666)
Unity Technologies
Unity’s Touch system for mobile development can monitor several properties of touches, allowing a wide variety of control systems for both games and applications. Touches are tracked individually, each associated with the finger that made it, and carry with them several data elements. In this tutorial, you will learn about Unity's Touch system and how to use it in mobile development.
Languages available:
1. Touch Input for Mobile Scripting
This tutorial has been verified using Unity 2019 LTS https://learn.unity.com/tutorial/touch-input-for-mobile-scripting-2019
Unity’s Touch system for mobile development can monitor several properties of touch, allowing a wide variety of control systems for both games and applications. Touches are tracked individually, each associated with the finger that made it, and carry several data elements. For our purposes, we’re concerned primarily with the phase and screen position of the touch, though the touch radius, tap count, and finger ID may also be useful. In the exercises that follow, we will process this data, beginning with the touch phase.
There are five possible touch phases:
- Began: A finger has just begun touching the screen
- Moved: The finger has moved position without breaking contact with the screen since it was last polled
- Stationary: The finger has remained in position without breaking contact with the screen since it was last polled (not covered in this tutorial)
- Ended: The finger is no longer touching the screen
- Cancelled: Tracking for this touch has been cancelled (not covered in this tutorial)
It’s important to note that a long-standing property of the Touch system has been removed. From Unity 2019.2 onward, touch is no longer detected as a mouse click. Mobile projects using touch that check for mouse clicks rather than touches will need code updates.
2. Reading the Touch Phase
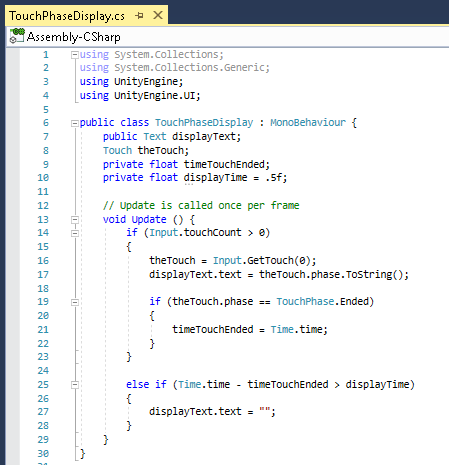
For this first demonstration, we are concerned only with the phase of a single touch. Create a new script called TouchPhaseDisplay. Delete Start, as we won’t be using that method.
1. For this demonstration, we’ll be using Unity’s UI. This isn’t a requirement for mobile touch, but we’re using it for our purposes in displaying the touch phase. On line 4, type:
using UnityEngine.UI; 2. Now we’ll declare our data members. Beginning on line 8, type:
public Text phaseDisplayText;
private Touch theTouch;
private float timeTouchEnded;
private float displayTime = 0.5f;
3. In Update, type:
if(Input.touchCount > 0 )
       {
           theTouch = Input.GetTouch(0);
           if(theTouch.phase == TouchPhase.Ended)
           {
               phaseDisplayText.text = theTouch.phase.ToString();
               timeTouchEnded = Time.time;
           }
           else if(Time.time - timeTouchEnded > displayTime)
           {
               phaseDisplayText.text = theTouch.phase.ToString();
               timeTouchEnded = Time.time;
           }
       }
       else if (Time.time - timeTouchEnded > displayTime)
       {
           phaseDisplayText.text = "";
       }
4. TouchPhaseDisplay is now complete (Figure 01). Save changes and return to the Unity Editor.
5. Back in the Unity Editor, from the GameObject drop-down, select Create Empty, name it TouchDisplay, and attach the Touch Phase Display component.
6. From the GameObject drop-down, select UI > Text, name it InfoDisplayText, and enter Stationary in the Text box.
7. In the Inspector select the placement button in the upper left of the Rect Transform component. Set the Rect Transform Pivot and Position to stretch in both axes (Figure 02).
8. In the Text component, set both Alignment options to center and check Best Fit (Figure 03).
9. Drag the newly created UI text object into the slot marked Info Display Text in the Touch Phase Display component of TouchDisplay (Figure 04).
10. Build and run your project on your physical or emulated mobile device. Tap the screen and note the status display. Try moving your finger while touching the screen, or just holding it in one place.
11. Exit the demonstration.
3. Virtual Control
For this exercise, we’ll use the change in phase and position of a single touch to act as a simple, virtual four-way directional pad (D-pad). We’ll reuse the UI text object from Exercise 1 to display the D-pad’s direction. Create a new script called VirtualDPad and delete the Start method. The Update method uses a few levels of nesting, so be sure to pair each opening brace { with a closing }.
1. On line 4, type:
using UnityEngine.UI;2. Beginning on line 8, type:
public Text directionText;
private Touch theTouch;
private Vector2 touchStartPosition, touchEndPosition;
private string direction;
3. In Update, beginning on line 16, type:
if (Input.touchCount > 0)
{
 theTouch = Input.GetTouch(0);

 if (theTouch.phase == TouchPhase.Began)
 {
  touchStartPosition = theTouch.position;
 }

 else if (theTouch.phase == TouchPhase.Moved || theTouch.phase == TouchPhase.Ended)
 {
  touchEndPosition = theTouch.position;

  float x = touchEndPosition.x - touchStartPosition.x;
  float y = touchEndPosition.y - touchStartPosition.y;

  if (Mathf.Abs(x) == 0 && Mathf.Abs(y) == 0)
  {
   direction = “Tapped”;
  }

  else if (Mathf.Abs(x) > Mathf.Abs(y))
  {
   direction = x > 0 ? “Right” : “Left”;
  }

  else
  {
   direction = y > 0 ? “Up” : “Down”;
  }
 }
}

directionText.text = direction;
4. VirtualDPad is now complete (Figure 05). Save changes and return to the Unity Editor.
5. In the Hierarchy window, right-click TouchDisplay and select Rename. Type DpadTester. In the Inspector, click the gear in the upper-right corner of the Touch Phase Display component, or right-click Touch Phase Display (Script) and select Remove Component (Figure 06).
6. Add the Virtual D Pad component and drag the UI text into the Direction Text slot.
7. Build and run your project on your physical or emulated mobile device. Try tapping the screen and lifting your finger or stylus without moving it. Swipe in different directions and notice how even the smallest movement registers a direction. In an actual game, you would probably want to have a minimum change in touch position before movement is registered, and/or scale movement by how far the virtual D-pad is moved.
8. Exit the demonstration.
4. Multi-touch Information Display
This exercise covers a few data members of the Touch class that we haven’t explored yet. Of note is the max tap count, which could be useful for tracking personal bests in a clicker game. We also track the radius (but not the shape) of the touch, which (when compared with the maximum possible radius) could translate to pressure in a tactile physics puzzler or natural media painting app. Pressure is tracked separately, as is the orientation of a stylus, but we’ve omitted those here as they’re not available on every device. We’ll reuse the UI Text and Scene object from earlier exercises.
1. Create a new script called MultiTouchDisplay and delete Start.
2. On line 4, type:
using UnityEngine.UI; 3. In the main class definition, beginning on line 8, type:
public Text multiTouchInfoDisplay;
private int maxTapCount = 0;
private string multiTouchInfo;
private Touch theTouch;
4. In Update, type:
multiTouchInfo = string.Format(“Max tap count: {0}\n”, maxTapCount);

if (Input.touchCount > 0)
{
 for (int i = 0; i < Input.touchCount; i++)
 {
  theTouch = Input.GetTouch(i);

  multiTouchInfo +=
   string.Format(“Touch {0} - Position {1} - Tap Count: {2} - Finger ID: {3}\nRadius: {4} ({5}%)\n”,
   i, theTouch.position, theTouch.tapCount, theTouch.fingerId, theTouch.radius,
   ((theTouch.radius/(theTouch.radius + theTouch.radiusVariance)) * 100f).ToString(“F1”));

  if (theTouch.tapCount > maxTapCount)
  {
   maxTapCount = theTouch.tapCount;
  }
 }
}

multiTouchInfoDisplay.text = multiTouchInfo;
5. MultiTouchDisplay is now complete (Figure 07). Rename DPadTester to MultiTouch as in earlier exercises.
6. Remove the Virtual D Pad component.
7. Add the Multi-Touch Display component to MultiTouch and drag the UI text object into the Multi Touch Info Display slot.
8. Build and run your project on your physical or emulated Android device. Using as many fingers as you can, experiment with mixing the order in which you touch and lift fingers. Try holding three or more fingers on the screen, then temporarily lifting one of the middle (in the sequence of touches) fingers. Watch how the position coordinates jump, but Unity is able to tell which finger was lifted, indicated by the finger ID. Try getting the tap count past 100. Notice how each finger contributes only to its own tap count. Using just a single touch, the tap count times out and resets to zero briefly after a touch ends. What strategy can you use with multiple touches to keep it from resetting? Try rolling your finger tip on the screen as if you were being fingerprinted, or just barely tapping the screen and monitoring how the radius changes.
9. When you’re ready, exit the exercise application.
5. Conclusion
Touch input for mobile is full of possibilities. How you apply the information provided by the Touch system can significantly shape user experience. Though we didn’t cover everything that the Touch Input system offers, we did cover what is most useful for games. For more information on what Touch has to offer, check out Touch in the Unity script reference.