Refine surfaces with more texture maps
Tutorial
·
Beginner
·
+10XP
·
25 mins
·
(290)
Unity Technologies

Once you are familiar with the basic properties of the URP/Lit shader, you will know how to use many shaders, materials, and textures that you’ll encounter as a 3D creator. This tutorial will complete your education on this shader.
By the end of this tutorial, you'll be able to:
- Explain the use of Detail Inputs for the URP/Lit shader
- Explain High Dynamic Range color
Languages available:
1. Overview
You now have all the skills you need to work with textures in Unity: you can identify them and apply them to your materials. However, there are a few more types of textures for you to discover.
In this tutorial, we’ll show you these additional types of textures and let you work on your own to apply them to pieces in the gallery. Then, you’ll test your knowledge with a creative challenge.
2. Intensify shadows with occlusion maps
Occlusion, in 3D graphics, is the blockage of light by an object. A crack in a sidewalk and the thin dark shadow line between the fingers of a closed fist are examples of occlusion.
Even in PBR, ambient light can reflect in odd ways where it should be occluded. An occlusion map adds shadows to these occluded areas.
Occlusion maps are produced along with most models in 3D modeling software. The effects are sometimes subtle, but they make the light on surfaces more realistic and can enhance detailed shadows in ways that base maps and bump mapping can’t.
For Ellen’s model, the occlusion map is displayed in the Textures Exhibit. It is a grayscale (single channel) map simply indicating light and shadows, and is second from the right.
To see the effect of an occlusion map:
1. In the Hierarchy, find the Ellen GameObject and select the Ellen_Body child object. Double-click it in the Hierarchy to zoom in.
2. Orient your view to get a close look at Ellen’s collar on the front of the model.
3. In the Inspector, locate the Ellen_Body material and expand its Material Inspector.
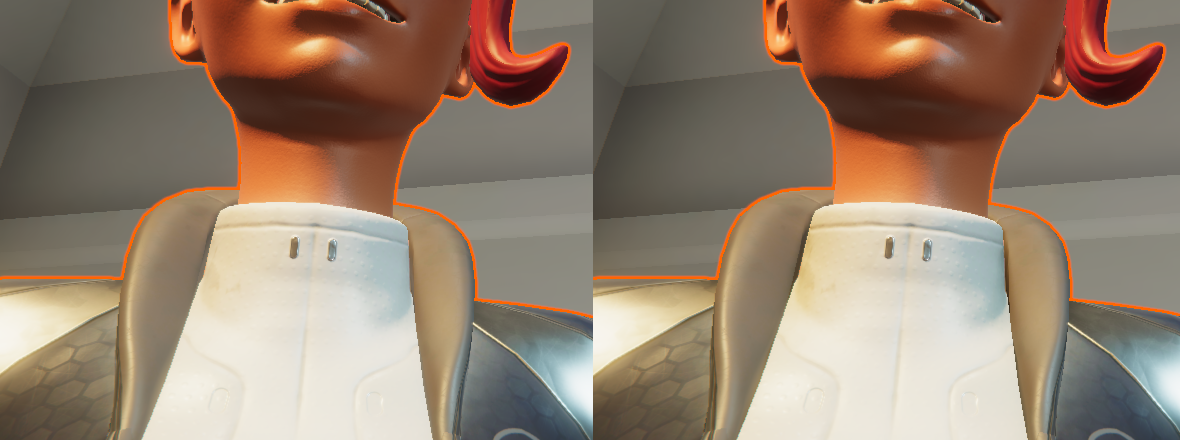
4. Adjust the Occlusion Map from 1 to 0 and back again to see the effect of the occlusion map.

Without the occlusion map, there is no shadow on either side of Ellen’s collar, which makes that area look flat. In fact, without the occlusion map, it looks like there is light coming from behind her neck at close range. With the additional shadows, the collar looks rounder and the shadow gives the appearance that her collar and vest are two different objects (even though on this model they are one).
Now it’s your turn to apply an occlusion map. On your workbench, return to your kettle. Open the Textures > Kettle folder and try to identify the occlusion map. Apply it to the kettle and compare the effect with and without the occlusion map.
3. Add detail with microsurface maps
Look very closely at a real-world object that has a smooth surface, such as the glass on your smartphone, covered with fingerprints, or your favorite coffee cup that has become scratched and worn. If you wanted to model these items and include details like the fingerprints or scratches, you can use microsurface mapping to add a level of detail that isn’t otherwise captured in your base map or normal map.
Investigate a microsurface map on Ellen:
1. Zoom in on Ellen’s face.
2. In the Hierarchy, select the Ellen > Ellen_Body object.
3. In the Inspector, open the Ellen_Head Material Inspector.
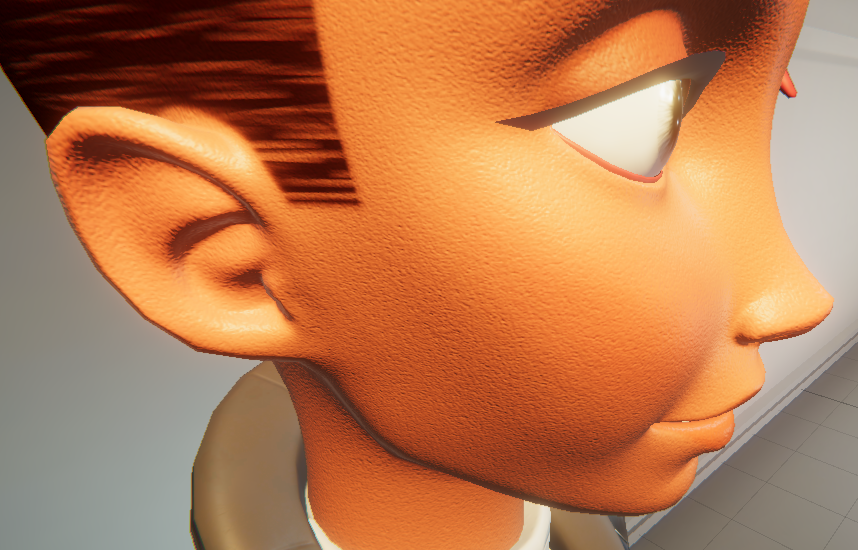
4. In the Detail Inputs section (below the Surface Inputs section where you have been working), locate the Normal Map. Adjust the slider to see the effect of this map on Ellen’s skin. This is a tiled texture that works on top of the regular normal map.
5. Compare the two normal maps used in the Surface Inputs and Detail Inputs sections of the material, and you’ll see how these two maps can work together to create a very detailed effect. To do this, select their thumbnails in the Material Inspector to find the texture files in the Project window.
There are two additional textures in the Detail Inputs section of the URP/Lit Shader materials:
- A Detail Inputs Base Map can add detailed color, such as threads in fabric.
- The Mask is an alpha channel map that shields specified areas from the Base Map and Normal Map microsurface maps.

4. Light up surfaces with emission maps
Emissive materials appear to give off their own light. You can use an emission map to specify areas where your surface will glow.
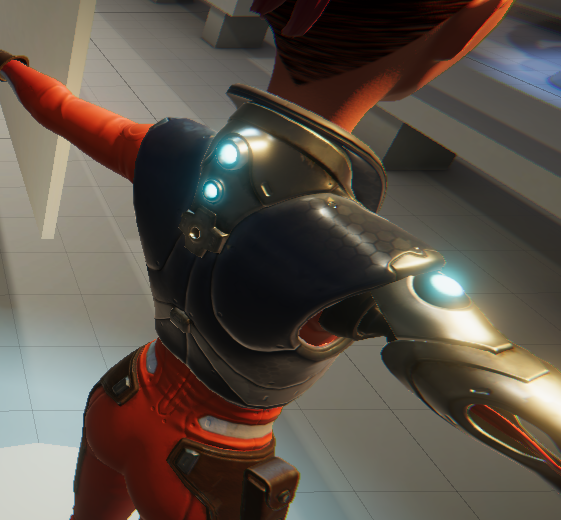
Observe the emission map for Ellen, the last on display in the Textures Exhibit of our gallery. It is mostly black, but look closely and you will see three green dots. The dots in this map line up with the lights on the back of Ellen’s neck and the top of her robot arm.
To see how it is applied, go to the Surface Inputs section of the Ellen_Body material. The color on the map affects the color of the light. In addition, The HDR color picker gives the non-black areas of the emissive map glowing colored light.
HDR stands for high dynamic range. HDR colors have an additional luminosity outside the regular range of display colors. These are useful for glowing objects and intense specular reflections. The HDR color picker has an intensity slider to control how much additional luminosity is added to the color.

You’ll use an emissive map in the next tutorial, Get started with Shader Graph.
5. Next steps
This tutorial was a quick tour of the texture maps you can use to refine your materials and add interesting details. You now know all of the properties (except the Advanced section) of materials for the URP/Lit Shader!
Next, you’ll apply your comprehensive knowledge of shaders and materials to create your own shader in Shader Graph.