Select your camera projection type
Tutorial
Beginner
+10XP
20 mins
132
Unity Technologies

In this tutorial, you’ll learn about projection settings: the parameters that control how the camera renders what appears inside its frame.
By the end of this tutorial, you'll be able to:
- Identify use cases for a perspective camera view in a 2D or 3D scene.
- Identify use cases for an orthographic camera view in a 2D or 3D scene.
- Capture the desired view of the scene by controlling the position and rotation of the Main Camera.
- Set up a camera for a specified/predetermined point of view.
- Set up a perspective camera view in a 3D scene.
- Set up an orthographic camera view in a 3D scene.
Materials
Languages available:
1. Overview
At first glance, it may seem like Unity cameras have a lot of technical components that require configuration, but you only need to work with a few settings to create dynamic shots. In this tutorial, you’ll learn about projection settings: the parameters that control how the camera renders what appears inside its frame.
2. Adjusting the Camera in the Editor
Just as with any other object in the Scene view, you can move the Camera object around using the Move and Rotate tool. However, moving it this way can be slow and imprecise. Instead, you can make use of the scene camera and the Move To View functionality to get the look you’re going for.
1. From the Scenes folder, locate and open Camera_Projection_Scene.
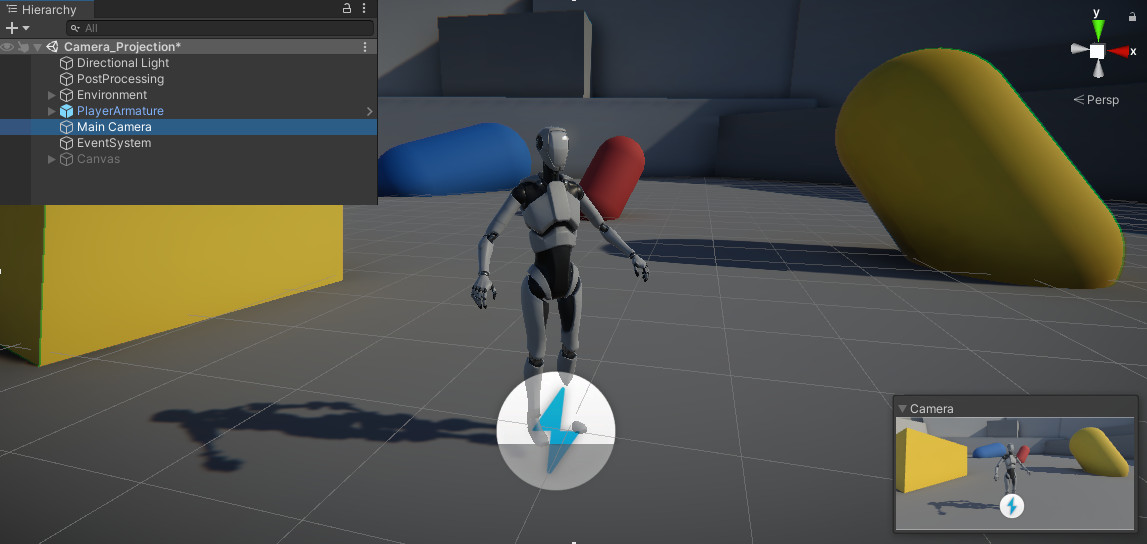
2. Locate the PlayerArmature mesh in the scene, or alternatively, select it in the Hierarchy, and with your cursor in the Scene view, press the F key on your keyboard to focus on the character.
3. Frame the PlayerArmature character in the scene in any way that you prefer.
4. Select the Main Camera in the Hierarchy and press Ctrl+Shift+F (Windows) or Cmd+Shift+F (macOS) on your keyboard, or go to GameObject > Align With View.

The Main Camera will snap to the same position and rotation as the current Scene view. You can use this technique with any GameObject, but it is particularly useful for framing shots!
3. Explore the qualities of a perspective camera
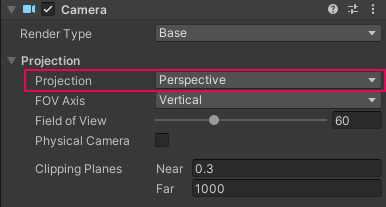
Cameras in Unity render scenes based on one of two projection types: Perspective and Orthographic. When a 3D project is created in Unity, by default all camera projections are set to Perspective.

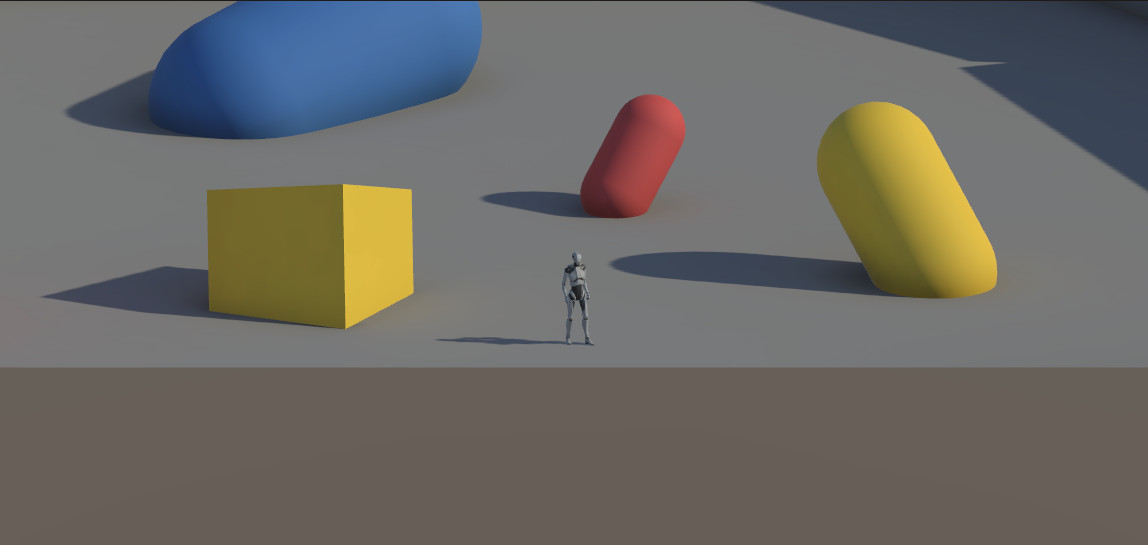
As the name suggests, a perspective camera renders everything in the scene with depth. It simulates the typical way we experience the world around us: objects farther away from the camera appear smaller, and objects closer to the camera appear larger. Most 3D and even some 2D interactive experiences make use of this projection type.
4. Set the field of view
The field of view (FOV) represents the camera’s view angle, or how much of the scene is visible in the camera at one time. This value is represented in degrees, and by default it is set to a vertical axis measurement of 60 degrees.
1. Switch over to the Game view to view the following steps. You’ll see that the player character is centered in the view a distance away from the camera.
2. Select the Main Camera in the Hierarchy, and in the Inspector, set the Field of View to 30 degrees.
Notice that the camera appears more zoomed in. The amount of environment visible on screen is significantly reduced, and the character is partially cut off. This is roughly equivalent to moving the camera a full Unity unit closer to the character in the scene: however, this is not the same as physically moving the camera!

Compare the image above with the image below. On the left in both images, the camera is in the original location and has a FOV of 30 degrees. Below, the image on the right uses an FOV of 60 degrees, but the camera is closer to the character to simulate the same view. While the characters may be in similar positions, the lower FOV significantly limits the visibility of the objects in the background.

A camera’s field of view is actually an important accessibility consideration! Interactive experiences with a low field of view can make users feel motion sickness. The value of the FOV should ideally be something that users can configure themselves, but if custom configuration isn’t possible for your application, be sure to set the FOV to meet accessibility guidelines.
For games that will be played on a TV or a device where the distance between the user and the screen is at least a few feet, a camera’s field of view should be set to at least 60 degrees, meaning that you can safely leave it at the default that Unity sets. However, if the experience is played on a monitor or other device where the screen is much closer to the user’s eyes, the FOV should be much higher, at a minimum of 90 degrees.
Let’s explore the Field of View parameter in greater depth:
3. Change the Field of View to 120 degrees.
4. Open the Game view so you can see a larger version of the camera view.
5. With the Main Camera selected, left-click and drag over the Y rotation value to rotate the camera left and right while still in the Game view.
Notice that the wider the field of view becomes, the more warping you’ll see in the camera view as it moves. Even in still shots, the scene will appear unnaturally stretched. You can use this distortion to achieve certain artistic effects, but be aware that FOVs beyond 90 degrees can produce the same sense of motion sickness as a narrower FOV.
5. Explore the qualities of an orthographic camera
Orthographic cameras, also known as 2D cameras, render only the X and Y values of a scene, completely disregarding the Z, or depth, axis.
1. With the Main Camera selected, set the Projection type to Orthographic in the Inspector.
The scene may seem to shift significantly as everything adjusts to appear as if it's on the same plane.

Let’s explore how an orthographic camera changes navigation:
2. In Play mode, use the WASD keys to make the player character run away from the camera.
Notice that no matter how near or far from the camera that the player character gets, their size on the screen never changes, which is due to the fact that the Z axis isn’t being rendered. For this reason, orthographic cameras are useful in experiences such as side-scrolling games, where the third axis is completely ignored.
6. Adjust the camera size
Instead of a field of view, orthographic cameras have a size value that can be adjusted.
1. Exit Play mode and return to the Scene view.
2. Select the Main Camera in the Hierarchy, and in the Inspector, adjust the Size value.
In the camera preview window, it appears as if the camera is zooming in and out, but in the Scene view you can see that the entire camera scale is changing. Orthographic cameras can only scale universally: you cannot change the scale of one axis independently of another.
7. Extend: Make the scene more dramatic
Applying what you’ve learned about projection types, create two new dramatic looks for this scene.
- Select one section of the scene that will be your area of focus.
- Either create two new cameras or take screenshots of the first scene before you move on to the next.
- Create two shots that look drastically different from each other by altering the projection properties.
8. Next steps
In this tutorial, you learned about the projection properties of Unity cameras. Determining these values is often the first step in the process of designing a camera shot. In the next tutorial, you’ll learn how to control the visibility of objects that appear within a camera’s field of view.