Refine and troubleshoot the indoor scene
Tutorial
Beginner
+10XP
30 mins
157
Unity Technologies
You’re nearly at the end of your indoor and outdoor scene journey. So far you’ve lit the outdoor scene from scratch and made some minor additions to the indoor scene. Now you’re ready to refine the lighting in this scene.
By the end of this tutorial, you'll be able to:
- Configure indirect lighting to improve the overall lighting level in an indoor scene.
- Identify common troubleshooting issues for beginner-level lighting in Unity.
- Improve light leaks through exploratory adjustment of lighting properties.
- Identify when an important model has incorrect lightmap UVs.
- Generate lightmap UVs for a model imported without them.
Materials
Languages available:
1. Overview
You’re nearly at the end of your indoor and outdoor scene journey. So far you’ve lit the outdoor scene from scratch and made some minor additions to the indoor scene.
By the end of this tutorial, you'll be able to:
- Configure indirect lighting to improve the overall lighting level in an indoor scene.
- Identify common troubleshooting issues for beginner-level lighting in Unity.
- Improve light leaks through exploratory adjustment of lighting properties.
- Identify when an important model has incorrect lightmap UVs.
- Generate lightmap UVs for a model imported without them.
2. Check the shadow configuration
First, check that the shadows are properly configured in the scene:
1. In the Hierarchy, expand the Environment GameObject and then the GalleryInterior GameObject. Select all of the child GameObjects within GalleryInterior.
2. In the Inspector, enable the Static property (next to the field for the GameObject name).

3. In the Inspector, find the Mesh Renderer component and go to the Lighting section.
4. Set the Cast Shadows property to Two Sided.
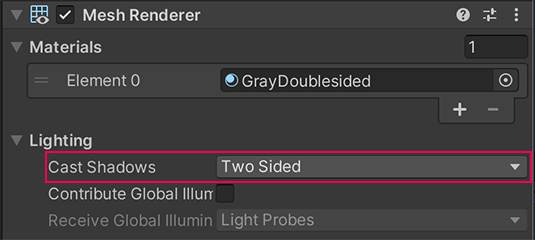
This means that the environment GameObjects will cast shadow from either side of their GameObject meshes, which will make it look more realistic — not using this setting can cause issues with shadows displaying correctly if you use single-sided shapes like planes to stand in for more complex meshes when constructing an environment.
5. In the Hierarchy, select the Windows GameObject (child of GalleryInterior).
This is the GameObject for the gallery skylights. For GameObjects that represent window glass to work as expected when you bake a lightmap, you need to turn the shadows off before you bake, and then switch shadows on again afterwards.
6. In the Inspector, set Cast Shadows to Off.
7. In the Lighting Window, select Generate Lighting to update the lightmap.
Note: For the rest of your time working on this scene, you’ll leave the skylight shadows turned off to avoid completing this process each time you rebake the lightmap. If you want to, you can turn them on again when you’ve finished customizing this scene at the end of the next tutorial.
3. Increase the light in the room
The emissive light beam helps a little, but overall the gallery is still a little dark. You don’t necessarily need to add additional light sources to address this — in fact, given the relatively naturalistic approach in the scene, that wouldn’t be ideal.
Instead, you can improve it using indirect lighting:
1. In the Lighting window, go to the Scene tab. The Lightmapping Settings section includes properties you can configure to adjust the indirect lighting in the scene.
Tip: If the window is currently closed, go to the top menu and select Window > Rendering > Lighting. Dock the Lighting window next to the Inspector.
2. Set the Max Bounces property to 4. This increase will include more bounces in the calculations for the scene’s baked indirect lighting without lengthening the bake times too much.
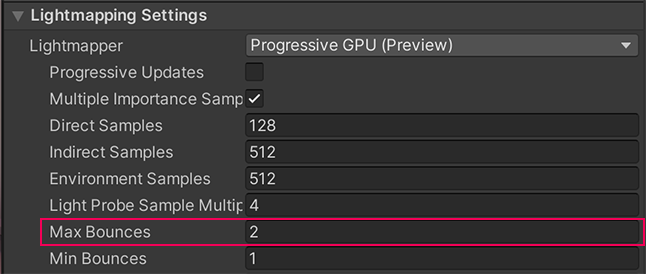
Tip: Increasing Max Bounces beyond this value provides little extra light, but leads to much longer bake times.
3. Set the Indirect Intensity to a value between 2 and 2.5. This increase in intensity will make the gallery space seem brighter.

4. Select Generate Lighting to rebake the lightmap.
You should notice that now the overall light levels in the gallery room have increased, making it easier to see everything in the space.
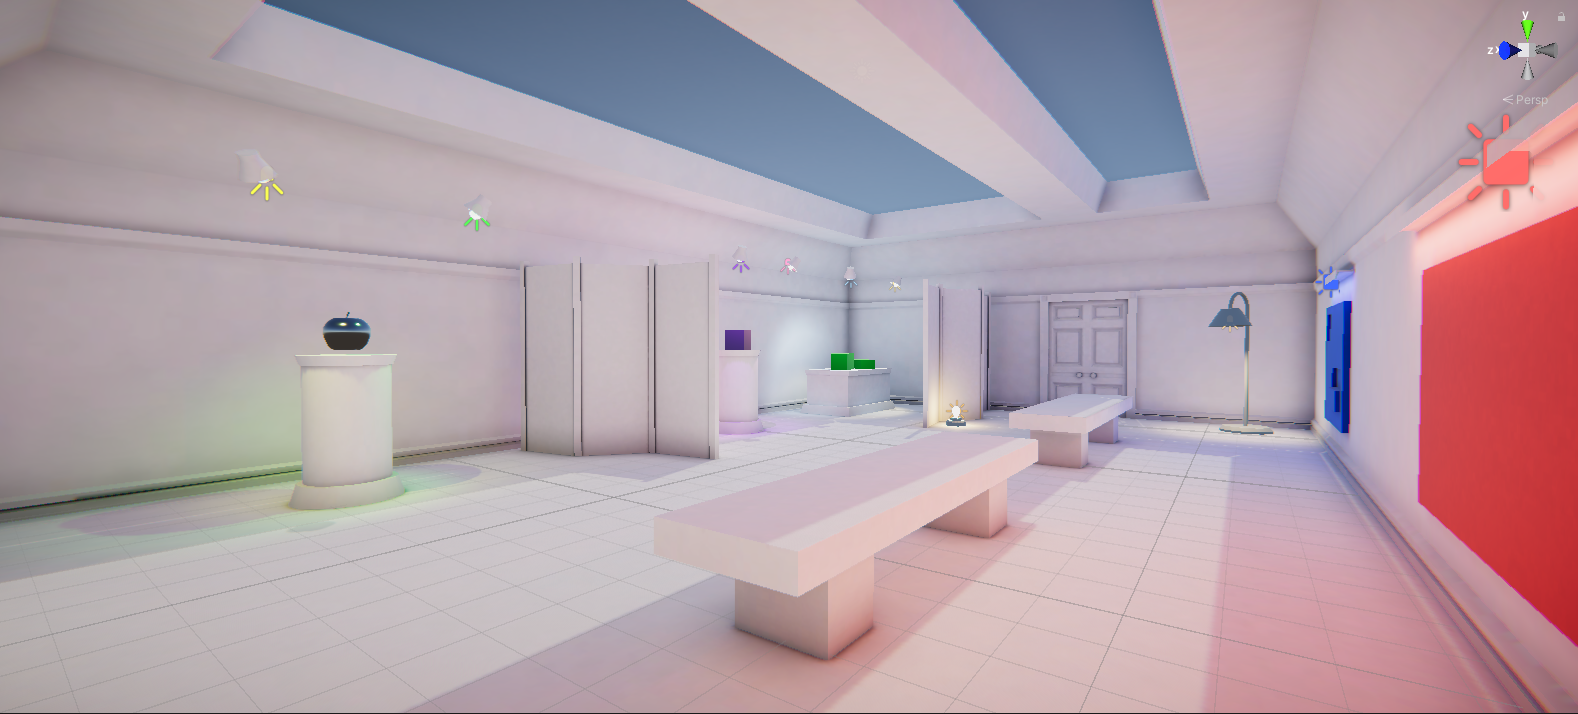
Note: Your own scene doesn’t have to be as bright as the example image above if you’d prefer to keep the gallery space a little darker. Find the right balance that works for you!
4. Improve the light leaks
Light leaks are when light is present around GameObjects when it shouldn’t be. This happens when light passes where it shouldn’t be able to go — for example, through or between walls or other geometry. Depending on your project setup, it can be tricky to fix this completely as a non-expert (remember, lighting artist is a specialized job!), but there are things you can do to address this in your light baking.
You should notice that there is currently some light leaking through the door and wall next to the tall standing lamp.
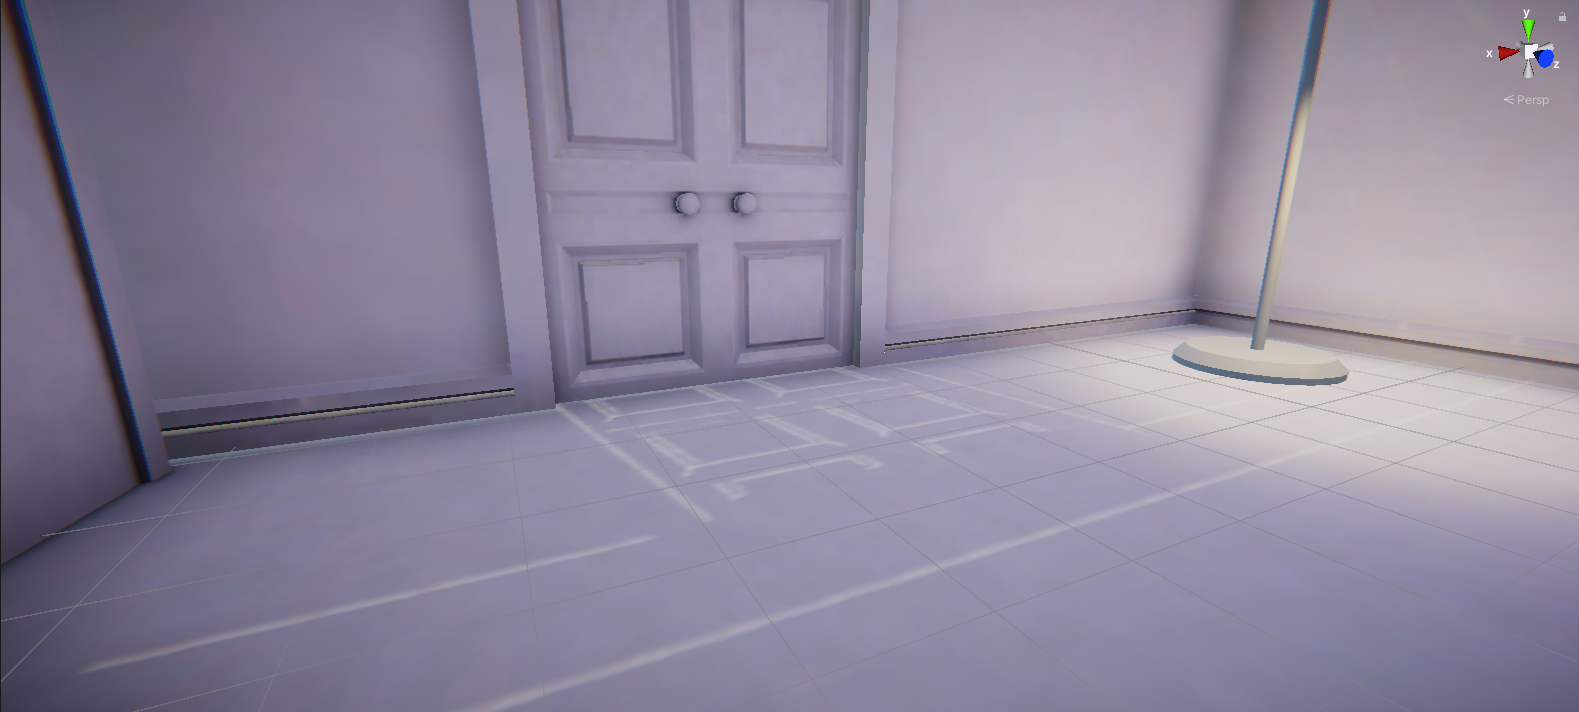
To reduce the light leaks in the scene:
1. In the Scene view, navigate in front of the door so you can observe how your actions impact the light leaks.
2. In the Hierarchy, select the Directional Light.
3. In the Inspector, reduce the Bias Normal value down to 0 slowly using the slider, observing what happens in the Scene view as you do.
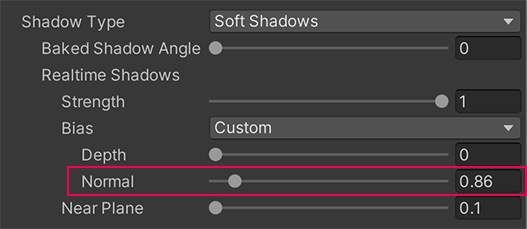
Your goal is to reduce or completely eliminate light leaking through the door.
4. Experiment with the Depth, Normal, and Near Plane property value sliders. Try to minimize light leaks, but find a balance that works for you and your scene. You can learn more about these properties in the documentation.
Tip: When setting Bias values, don’t set them too high. This can result in shadows that don’t match the object they are cast from or appear to be disconnected, as well as making light leaks visible.
5. In the Lighting window, select Generate Lighting to rebake the lightmap.
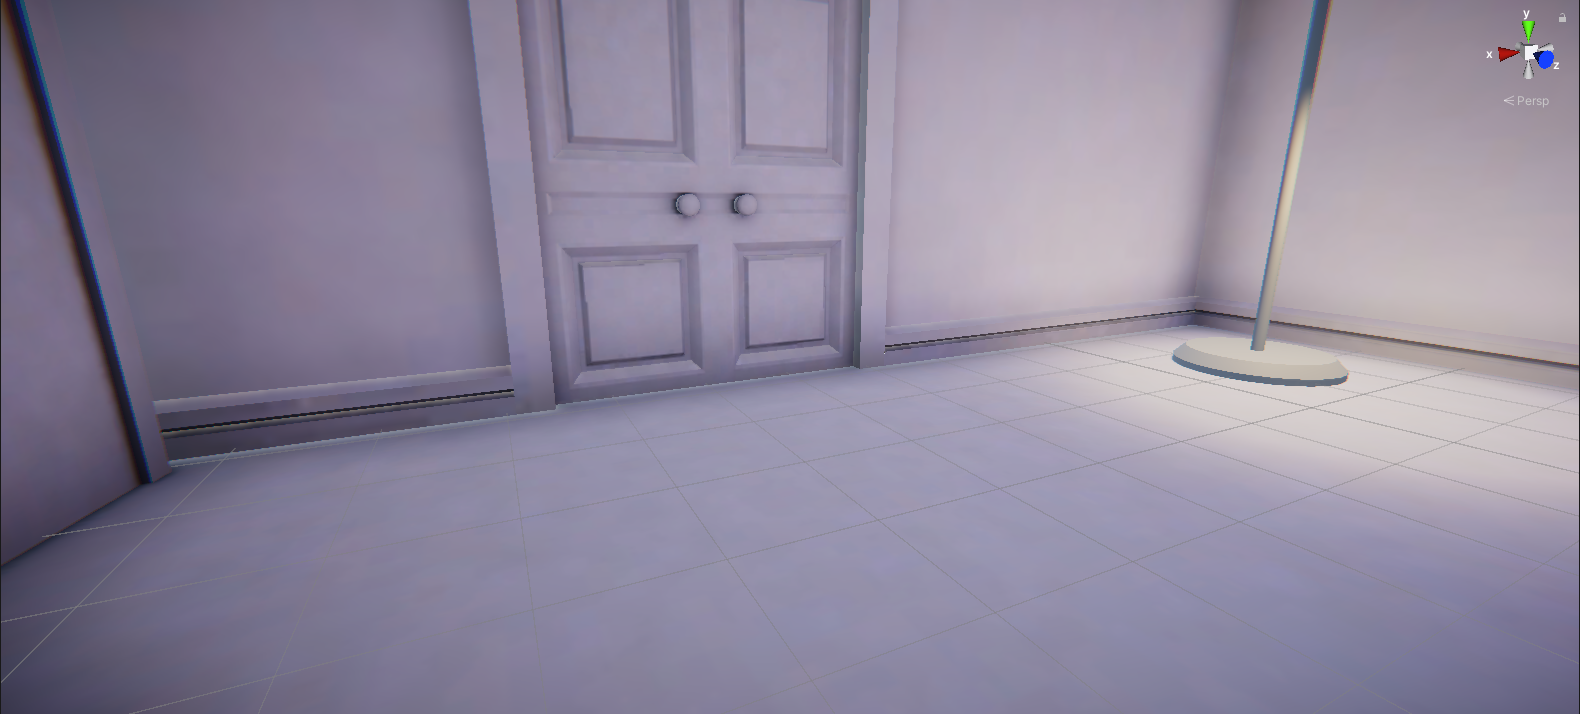
This is often an iterative and incremental process, so don’t worry if it takes a little time to adjust the shadows and address the light leaks to an extent that you’re happy with.
Addressing light leaks in other projects
In this project, the Realtime Shadow Bias values are being controlled in the Directional Light GameObject because we have set the Bias property there to Custom. This means that the values are specific to this scene only.
By default, these settings are handled in the Shadows setting section of the render pipeline asset. This asset can, however, apply to a whole project — if there was an issue in the settings for the asset, it would impact all the scenes in this learning experience.
To review the asset in your project, go to Assets > CreativeCore_Lighting > Settings > Rendering and select the UniversalRP-HighQuality asset.
If you’re trying to address light leak issues in one scene in another project, you may find it helpful to configure scene-specific Bias values in the Directional Light too.
5. Import a new model
All the models in this scene have been set up for you, but it’s helpful to be able to troubleshoot when a model you import has an issue.
To simulate this, you’ll need to import a new model into the project:
1. Download the Apple_BrokenLightmapUV.fbx model file from Tutorial Materials.
2. In the Project window, go to Assets > CreativeCore_Lighting > Models.
3. Import the new model into your Unity project.
4. Place the model in the middle of your scene.
5. Set the model as Static, including its child GameObjects.
6. Rebake the scene’s lightmap. You should notice something wrong with the apple immediately — strange distorted patterning is present on half of the model.
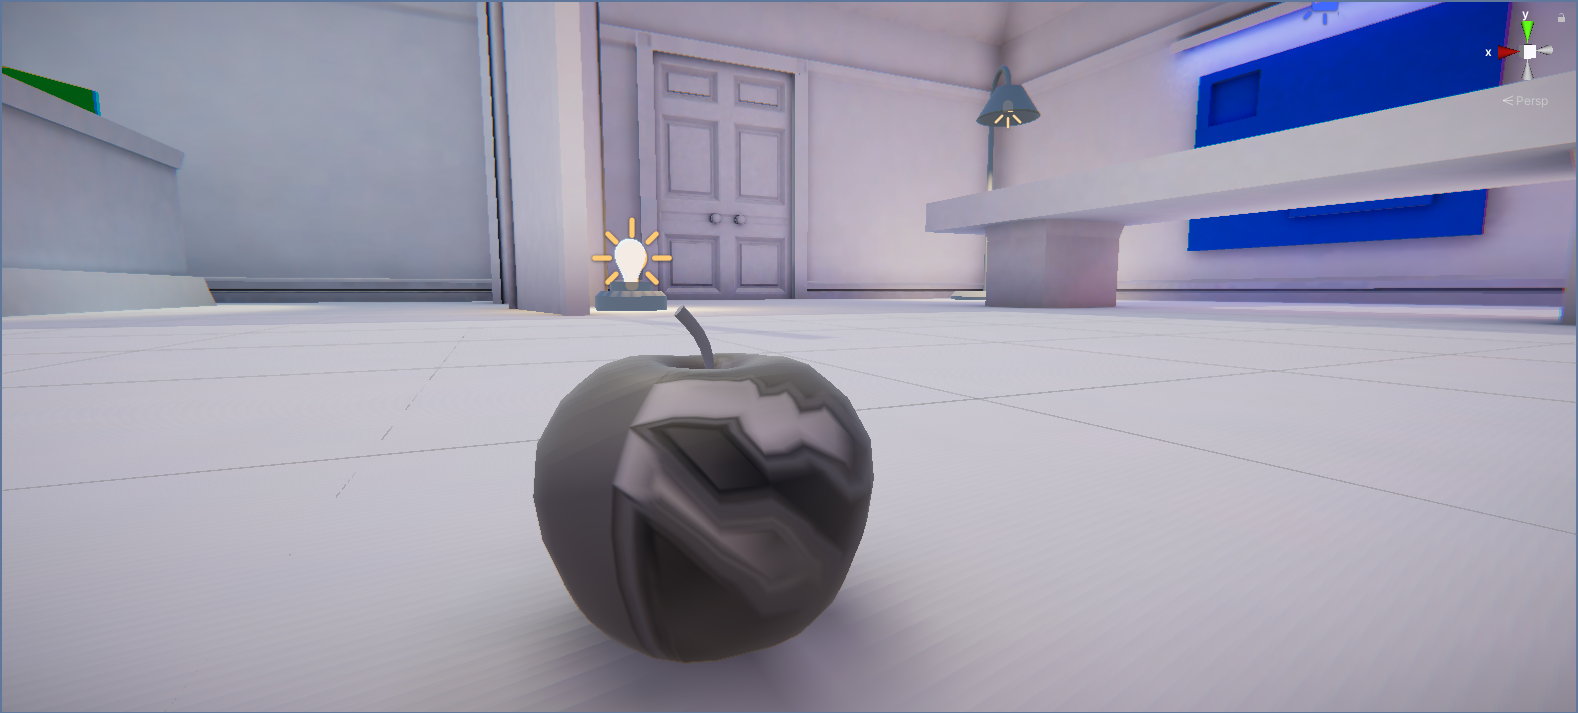
This is because the model does not have the correct lightmap UVs. This can cause issues with lighting in a scene if it isn’t addressed.
6. Check the Baked Lightmap diagnostic view
Configuring models appropriately for baked lighting is very important. When you don’t do this correctly, you can get some unexpected or undesirable results in your project. Diagnostic views can be very helpful for checking this, especially if the issue is not as obvious as the current problem with the apple model.
To check this scene and your new model:
1. In the Scene view control bar, use the Debug Draw Mode dropdown (top middle) to select Baked Lightmap.
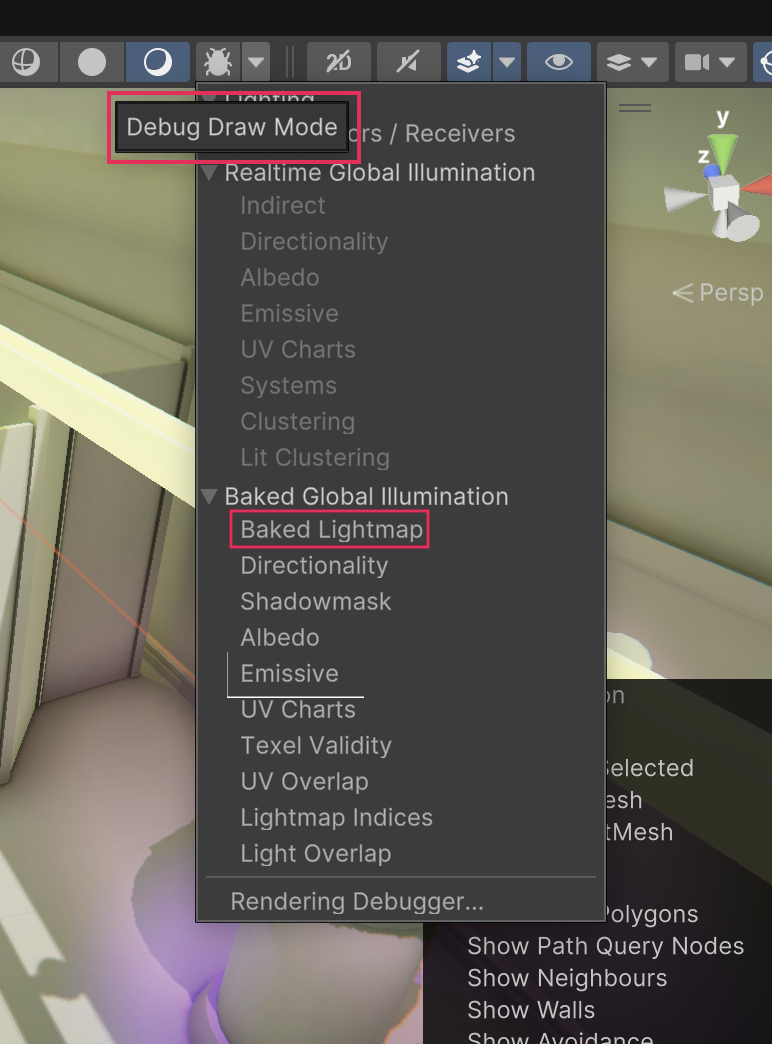
2. You’ll see that an overlay has appeared in the Scene view:
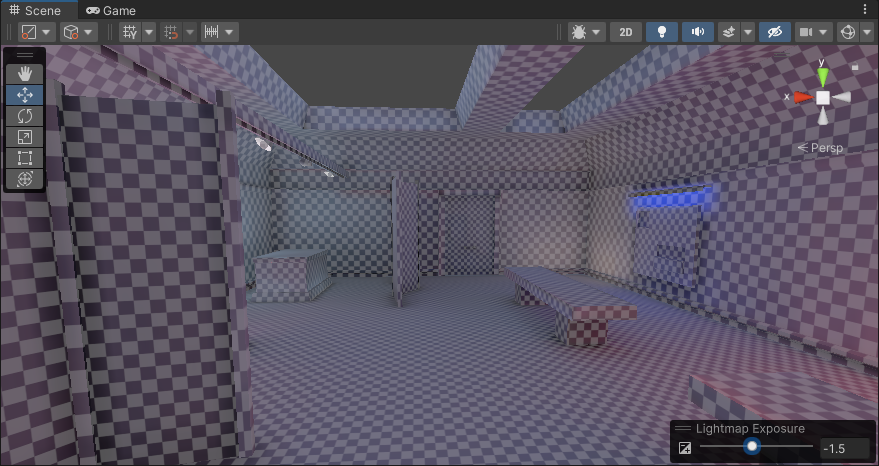
The Baked Lightmap Draw Mode view displays baked lightmaps applied to the scene geometry (meshes) as a checkered overlay. This diagnostic view can help you identify issues with models. You can use the Lighting Exposure control to make it easier to see the checkerboard effect in the scene.
3. Zoom in close to the model you have just added — is there a difference to the checkered overlay pattern?
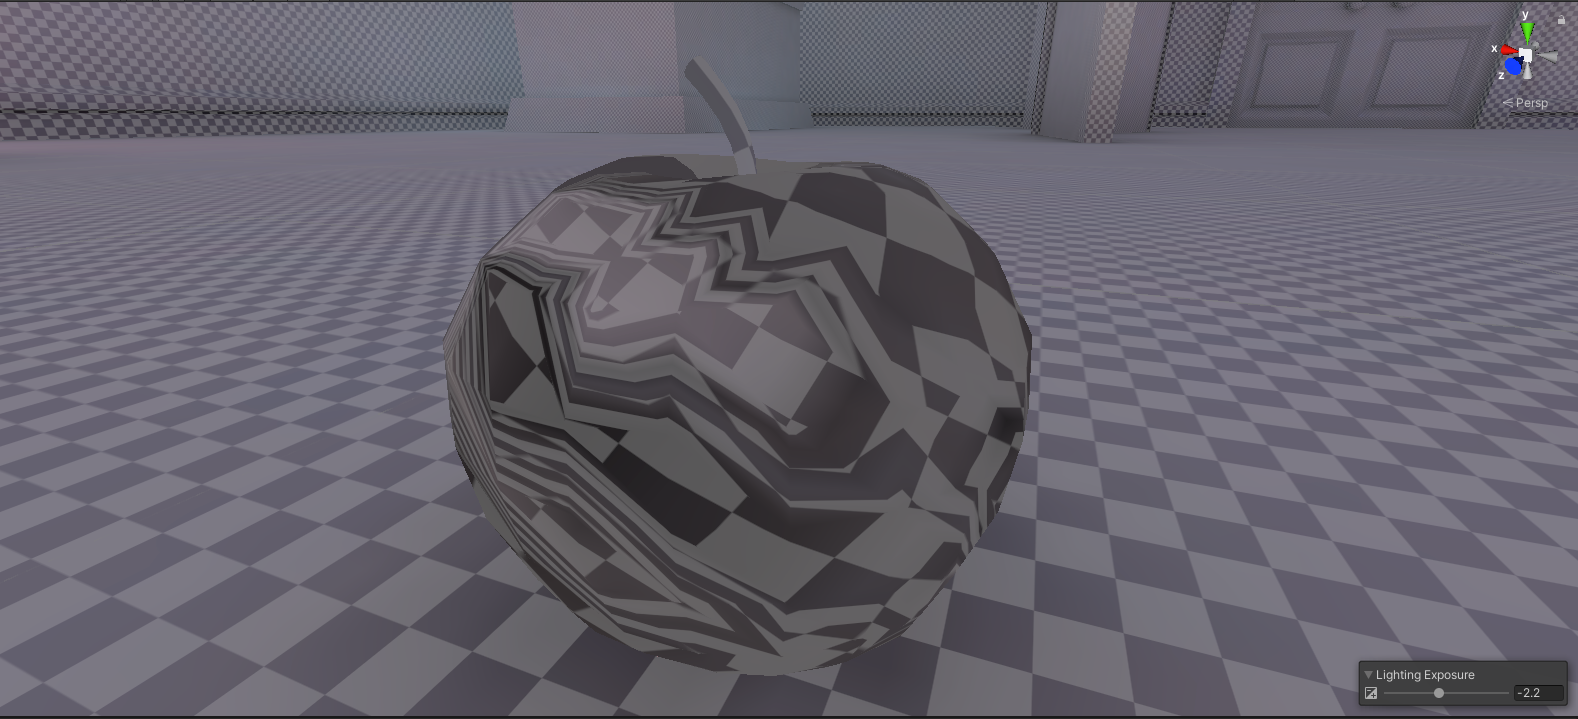
You should notice that the checkerboard pattern is significantly distorted on the new apple model.
7. Generate Lightmap UVs for the model
Now that you’ve identified the issue, there is a way you can try to address this issue in the Unity Editor:
1. In the Project window, select the model you imported.
2. In the Inspector, find the Generate Lightmap UVs property in the Model Import Settings. This is the final property listed in the Model tab.

3. Enable Generate Lightmap UVs and then select Apply.
4. You should notice that the pattern of the checked overlay over the model in the Scene view now looks as expected. In the Scene view control bar, set the Draw Mode back to Shaded when you’re done.
5. Rebake the lightmap and save your changes.
Important: While helpful, the Generate Lightmap UVs feature will not replace an artist. The results produced can provide a baseline of improvement, but you should always have a UV artist review and fix the texture when this is possible.
8. Next steps
In this tutorial, you’ve gone through a range of common, basic troubleshooting checks to address issues in your scene. Light leaks are a particularly common issue in indoor scenes due to the nature of the environment required for those, but they can occur in any scene.
Issues with shadows and incorrect model configuration can also happen in any project. It’s a good idea to run through these checks if you encounter any unexpected behavior with lighting in your project before escalating to deeper investigation.
This scene isn’t quite complete — next, you’ll work on correcting reflections in the gallery.