Add and configure an interactable object
Tutorial
Beginner
+10XP
20 mins
735
Unity Technologies

In this tutorial, you’ll:
- Add your choice of objects to the Prototype Room
- Configure the object and add interactivity in VR
- Test the object in VR
Languages available:
1. Overview
In this tutorial, you’ll:
- Add your choice of objects to the Prototype Room
- Configure the object and add interactivity in VR
- Test the object in VR
2. Before you begin
In this tutorial, you’ll use the VR Beginner Unity Project and your VR hardware. Before you begin:
1. Open the VR Beginner Unity Project.
2. Check that your hardware is ready. If you’re using Oculus Link with the Oculus Quest, enable and connect this now through the Oculus app.
3. Add a new object to the Scene
Now that you can teleport to one of the table boxes, it’s time to add an interactable object to the experience. We’ve created a few different object Prefabs; you can add any one of them in this tutorial.
To add a new interactable object to your Scene:
1. In the Project window, navigate to Assets > VR Beginner > Prefabs > Tutorial > Objects.
2. Select one of the available objects.
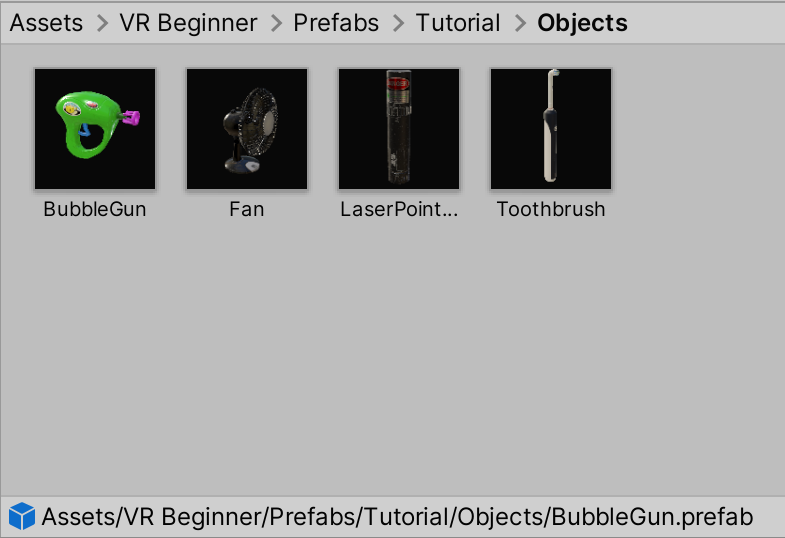
3. Drag your chosen object Prefab into the Scene view.
4. In the toolbar, select the Move Tool and position the object on top of the box table near your teleporter.
5. Press Ctrl + S to save your changes.
4. Configure your object
To simplify the process of creating interactable objects, the objects in this Unity Project have custom scripts attached which control what happens when the object is activated. This is controlled using the XR Grab Interactable component.
To configure your new interactable object:
1. In the Hierarchy, select the arrow to the left of the interactable object GameObject to expand the view of its child GameObjects. Make sure that parent GameObject is still selected.
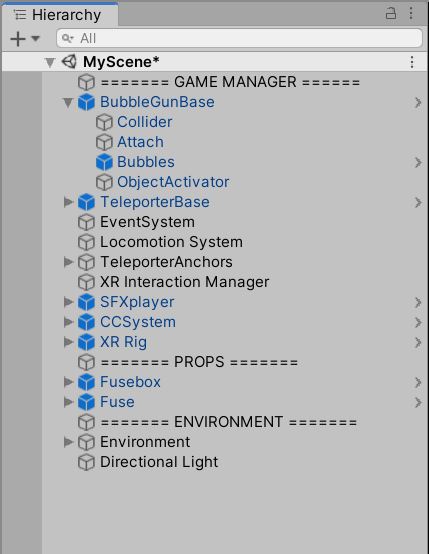
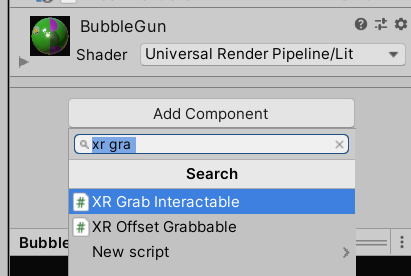
2. In the Inspector, select the Add Component button.
3. Search for “XR Grab Interactable” and select the component from the list.
4. At the bottom of the component, select the arrow to the left of the Interactable Events section header to expand it.
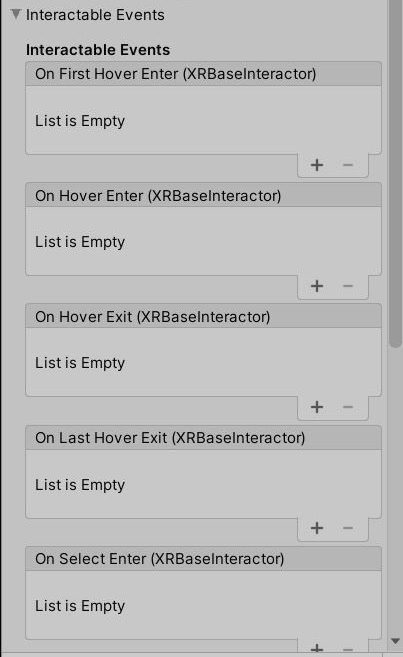
5. Find the On Activate list at the bottom of the component. Select the Add button (+).
6. In the Hierarchy, drag the ObjectActivator child GameObject of the interactable object to the None (Object) field in your new list entry.
7. In the Function field, select the dropdown menu arrow. Go to ObjectActivator > Activated().
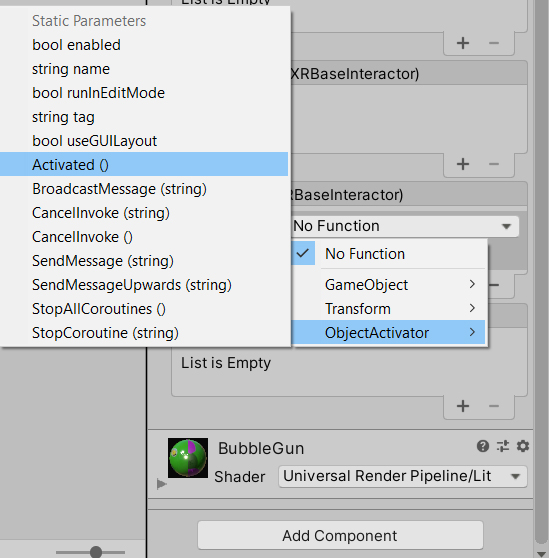
This makes the interactable object work by triggering a specific event (for example, the bubble gun emitting bubbles) on the activation of the object.
8. Press Ctrl + S to save your changes.
5. Test your interactable object
To check that the interactable object works properly:
1. In the Unity Editor toolbar, press Play to enter Play Mode or build for your Oculus Quest.
2. Press forward on your controller to display the Teleporter Ray.
3. Use your controller to touch the Teleporter Base with the Ray.
4. Release the thumbstick to transport yourself to the box where you placed your interactable object.
5. Reach for the interactable object and press and hold the grip button to pick it up.
6. Press the trigger button to activate the interactable object.
7. If you’re testing from Unity Editor, remember to select Play on toolbar again to exit Play Mode when you’ve finished.
6. Summary
In this tutorial, you have added, configured and tested an interactable object for your VR experience using the functionality of the XR Interaction Toolkit.
Next, you’ll enhance the experience by implementing sound effects and closed captions.