Add components to 2D GameObjects
Tutorial
foundational
+10XP
60 mins
4408
Unity Technologies

In this tutorial, you will see how components add functionality to Sprites. The component you will see in action here, the RigidBody 2D Component, lets a Sprite behave like a physical object instead of floating in space. In this tutorial, you will:
- Position the Main Camera to display action in the Game view.
- Add physical properties to a 2D GameObject by applying the RigidBody 2D component.
- Experiment with 2D physics in Unity.
Languages available:
1. Overview
Components add behaviors and functionality to a GameObject. GameObjects have default components, such as the Transform and Sprite Renderer Components that you can see immediately when you create a new Sprite. In this tutorial, you will add another component, the RigidBody 2D Component, which gives a Sprite physical properties so that it can interact with gravity and other Sprites. You will position the Main Camera to watch how a Sprite responds to gravity in 2D.
2. Before you begin
In the previous tutorial you created a Sprite GameObject named Circle. In this tutorial you’ll use that Sprite again. If you did not complete the previous tutorial or did not save the Scene, create the Circle Sprite as you did in the previous tutorial.
3. Position the Main Camera
In every new Scene, there is a camera, indicated with a camera icon in the Scene view. This camera, named Main Camera in the Hierarchy, captures and displays your Scene to the player as it appears in the Game view.
1. Select the Main Camera in the Hierarchy window.
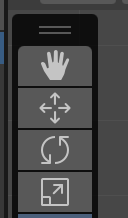
2. Move the Main Camera so that you can see the Circle. You can move and rotate the Main Camera in 2D space just like any other Sprite using the transform tools.

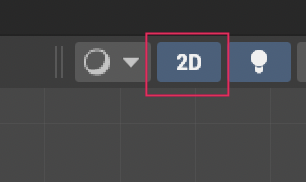
Note: In the Scene view, you can switch between a 2D and 3D view by selecting the 2D button at the top of the window.

4. Give the Sprite mass
1. In the Hierarchy window, select the Circle.
2. Select the Add Component button in the Inspector window.
3. Use the search bar to find a Rigidbody 2D component and select it. Note that there are two options available, Rigidbody and Rigidbody 2D. Make sure you select the Rigidbody 2D component, not the regular (3D) one.
4. To see the effect of these properties, start the game by pressing the Play button, which will display the Game view.
The Sprite will fall and keep falling until you stop the game.
5. Stop the game again by selecting the Play button again at the top of the screen.
5. Add a collider
Since an object bumping into another object is more fun than an object falling into infinity, let’s discuss colliders, which give objects a shape in physical space. In the 3D project of this course, the primitive GameObjects you created had colliders built-in already. For the Sprite you created from an image, you must add the collider yourself.
The RigidBody 2D Component also gives a Sprite physical properties, so what is the difference? RigidBody properties control how the GameObject interacts with gravity and air density. For example, the RigidBody properties on the Circle Sprite make it fall, but when it hits another GameObject, it will pass through it. The Collider Component adds additional properties that determine how objects interact with each other. By adding a Collider Component to the Circle and a Sprite below it to represent the ground, the Circle will stop its downward trajectory when it reaches the ground.
1. Create a new Sprite by right-clicking in the Hierarchy panel and selecting 2D Object > Sprite Shape.
2. Select the new Sprite Shape, rename it to Ground, and change the Y Scale property to 0.1

3. Add a RigidBody 2D component to the Ground Sprite.
4. Run the game. Both the Circle and the Ground will fall. To keep the Ground in place, go to the RigidBody 2D Component for the Ground Sprite, expand the Constraints, and select the Freeze Position checkbox for the X, Y, and Z axes. These options will tell the Sprite that it should remain in place and not fall when the game is running.
5. Run the game again. You will see the Circle fall to the Ground, but it will keep falling past it. This is because the two objects don’t have physical boundaries, so the Circle can still pass through the Ground. Collider Components will fix that.
6. Select the Circle Sprite, and select the Add Component button in the Inspector window. Add a Circle Collider 2D and leave the default settings as they are.
7. Follow the same process for the Ground Sprite, adding a Box Collider 2D Component.
8. Run the game. The Circle will fall onto the Ground and stop.

6. Experiment with falling Sprites
Try variations of this exercise. Move the Circle Sprite and the Main Camera to get the results you want.
More things to try:
- Add more circles at varying heights.
- Add other Sprites in different shapes by importing small images.
- Drop objects in different places.
One thing to note is that you can change the properties of a selected Sprite while the game is running, but when the game is stopped all values will revert back to what they were before the game was started. This is useful to test different parameters during runtime, but if you want the changes to be permanent, you need to make the changes while the game is stopped.
7. Next Steps
You have seen how to add properties to Sprites through components, and you used the RigidBody 2D Component to make a Sprite respond to gravity in the Game view. You also saw how the Game view differs from the Scene view, and you manipulated the Main Camera to change the Game view’s display.
As in a 3D project, you can edit and create scripts to customize components and take even more control over your GameObjects. If you like, you can review the get started with scripts tutorial and create your own script in this 2D project.
Next, in preparation for a 2D challenge, you’ll discover 2D assets in the Unity Asset Store.