
Add teleporters for movement
Tutorial
Beginner
+10XP
20m
(901)
Unity Technologies
In this tutorial, you’ll:
- Create your own Prototype Room Scene
- Create a new teleporter
- Configure the teleporter
- Test your changes in VR
Languages available:
1. Overview
Now that you’ve explored the example Prototype Room, you’re ready to work on your own VR experience. In this tutorial, you’ll:
- Create your own Prototype Room Scene
- Create a new teleporter
- Configure the teleporter
- Test your changes in VR
2. Before you begin
In this tutorial, you’ll use the VR Beginner Unity Project and your VR hardware. Before you begin:
1. Open the VR Beginner Unity Project.
2. Check that your hardware is ready. If you’re using Oculus Link with the Oculus Quest, enable and connect this now through the Oculus app.
3. Create a new Prototype Room Scene
This Unity Project includes a simple Prototype Room Scene template, so you don’t need to begin with a completely blank Scene.
To create a new Scene using this template:
1. In the top menu, go to VR Kit > Create new Prototype Scene.
2. Choose a name for the new Scene, then select Save. By default, the Scene will be saved in Assets > MyScenes.
3. Your new Scene will automatically load and open in the Scene view when you have saved it.
4. Create a new teleporter
Now that you have your own Prototype Room, you can begin to create a custom VR experience. The first step is to create a teleporter, so the player can move closer to one of the two simple box tables. This will make it easier for them to pick up interactable objects in the Scene.
To create a new TeleporterBase for your Scene:
1. In the Project window, navigate to Assets > VR Beginner > Prefabs > Tutorial.
2. Select the TeleporterBase Prefab.
3. Drag the TeleporterBase Prefab from the Project window into the Scene view.
4. In the toolbar, select the Move Tool and position TeleporterBase next to one of the two simple box tables.
5. Press Ctrl + S to save your changes.
5. Configure your new teleporter
To configure your new teleporter:
1. In the Hierarchy, select the arrow to the left of the TeleporterBase GameObject to expand the view of its child GameObjects. Make sure that TeleporterBase is still selected.
2. In the Inspector, select the Add Component button.
3. Search for “Teleportation Anchor” and select the component from the list.
4. At the top of the Interactable Events section of the component, find the On First Hover Enter list. Select the Add button (+).
5. Drag the TeleporterBeam child GameObject of TeleporterBase from the Hierarchy to the None (Object) field in the On First Hover Enter list entry.
6. In the Function field, select the dropdown menu arrow. Go to TeleporterAnim > StartHighlight. This is a custom script which provides a fade-in and fade-out effect.
7. In the Interactable Events section of the Teleportation Anchor component, find the On Last Hover Exit list. Select the + button (Add to list).
8. As you did before, select the TeleporterBeam GameObject in the Hierarchy and drag it to the None (Object) field in the new list entry.
9. In the Function field, select the dropdown menu arrow. Go to TeleporterAnim > StopHighlight. This will stop the special effect after the teleporter is used.
10. Press Ctrl + S to save your changes.
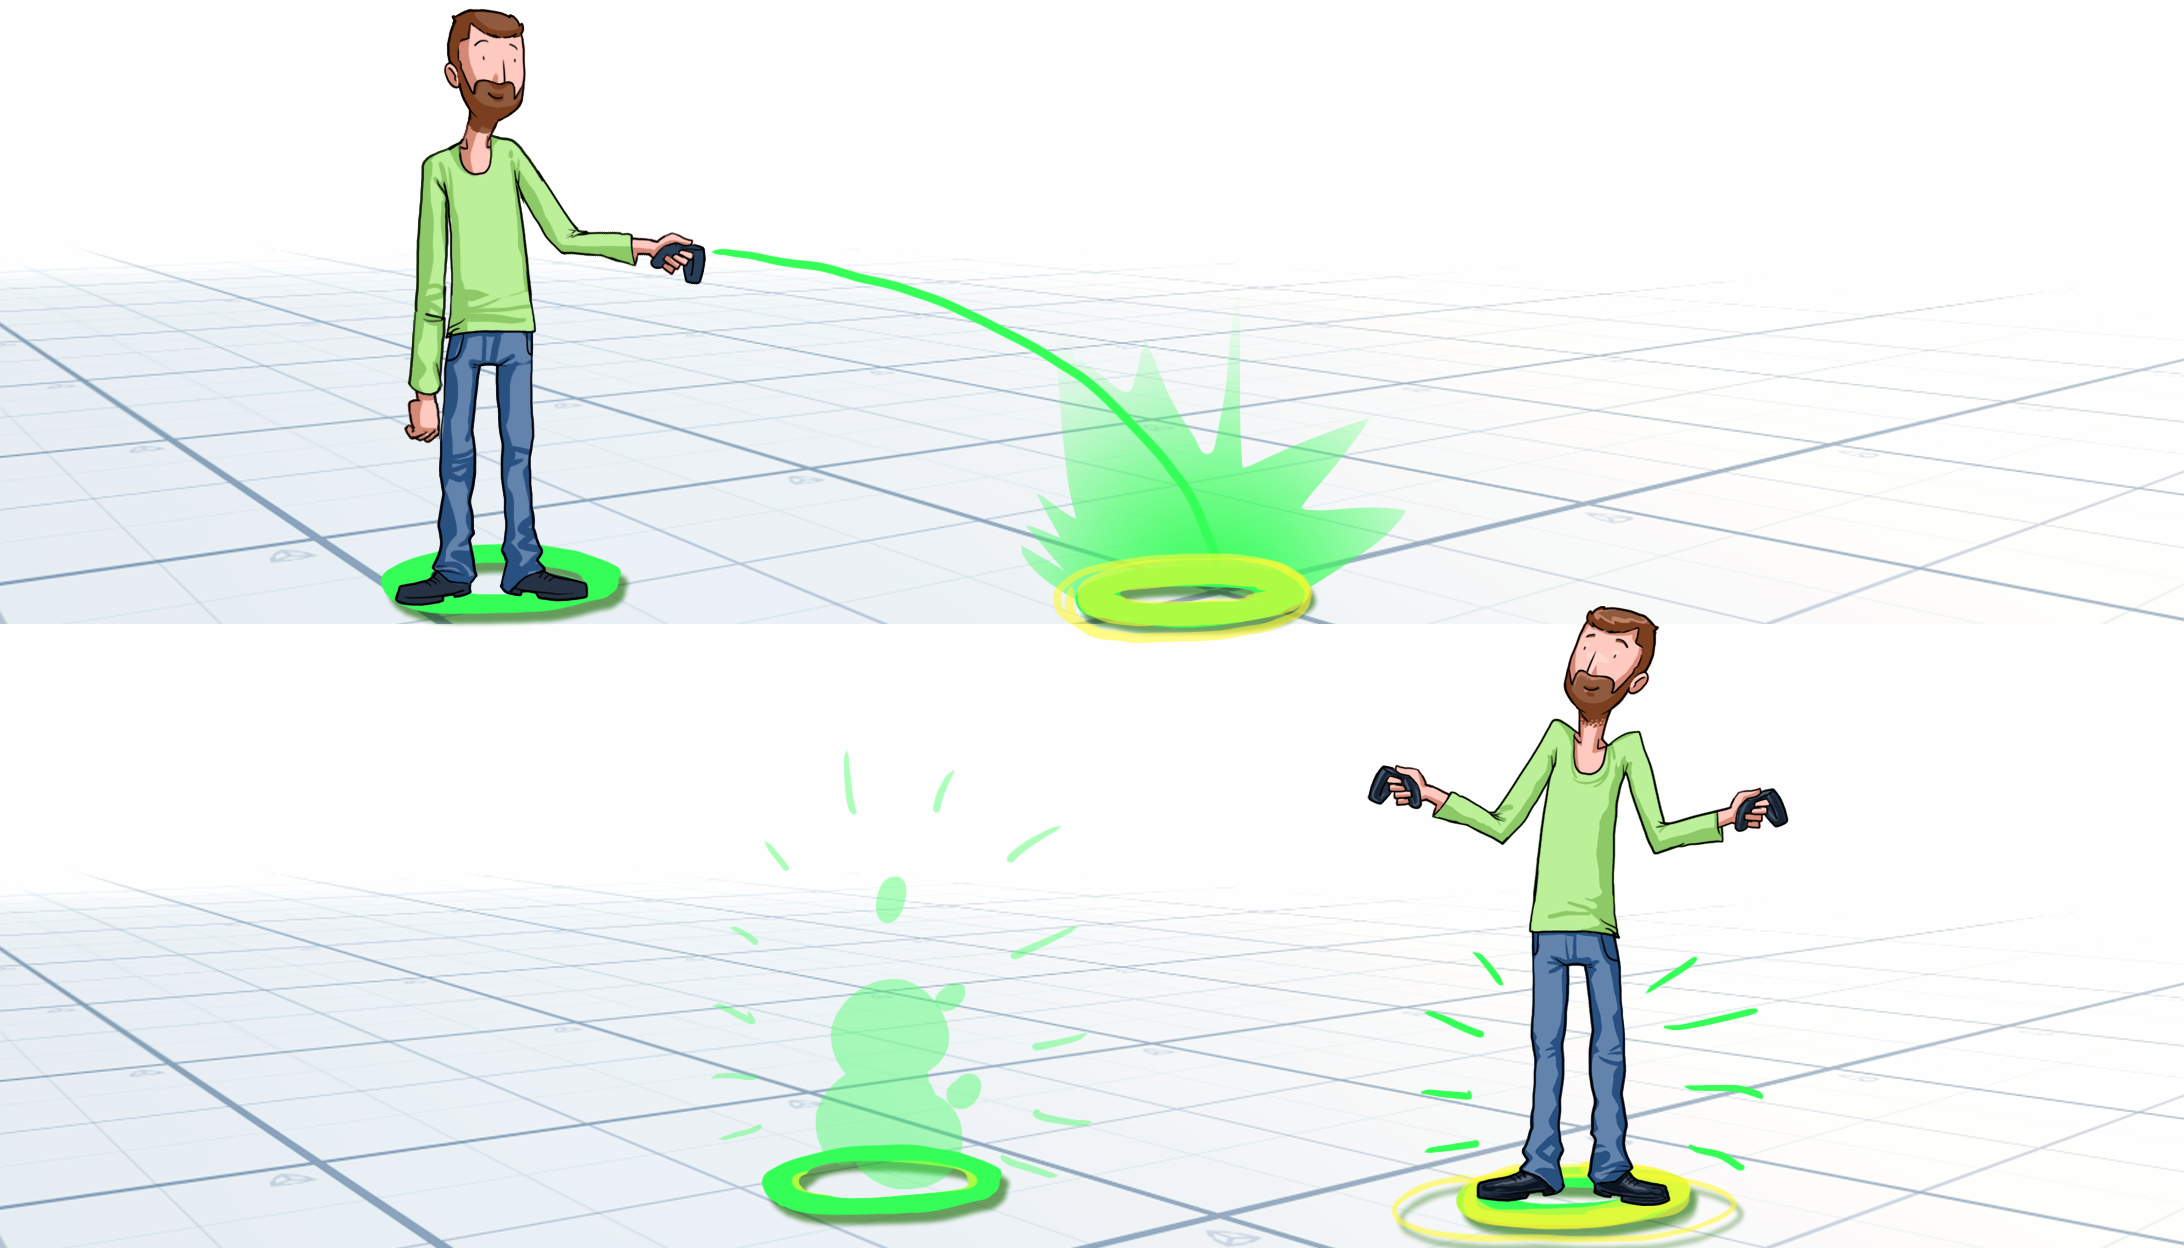
6. Test your new teleporter
To check that the teleporter works properly:
1. If you have an Oculus Quest without Oculus Link, create an Android Build to test your changes. For all other devices, press Play on the toolbar to enter Play Mode. Put on your headset.
2. Move the directional input on your controller forward to activate the Teleporter Beam.
3. Use your controller to touch the Teleporter Base with the Teleporter Beam.
4. Release the directional input to move to the new location.
5. If you’re testing from Unity Editor, press Play on the toolbar again to exit Play Mode when you’ve finished testing. Remember, changes made while Unity Editor is in Play Mode can’t be saved.
7. Summary
In this tutorial, you created, configured and tested teleporters for your VR experience. Next, you’ll add and configure your choice of object.