
Advanced concepts
Tutorial
Beginner
+10XP
15 mins
(90)
Unity Technologies
Are you a teacher or educator? This section is a must-read for you, and is also suggested for advanced users who want to understand the Playground better.
Languages available:
1. Introduction
Are you a teacher or educator? This section is a must-read for you, and is also suggested for advanced users who want to understand the Playground better.
2. Cheat sheets
It might be hard to understand how many scripts are in the Playground at first glance. For this, the Playground comes with a series of cheat sheets, which consists of six pages with the icons for all of the scripts and a one-line description. These cheat sheets are organized into categories (Movement, Gameplay, etc.) and are color-coded.
The cheat sheets are included in the Unity project as both PDFs, for printing, and individual JPGs, for use on screens. In workshops with users who are very new to Unity, it might be nice to print out a few copies of the cheat sheets and bind them together to give the users a sense of scope and show them all the possibilities they have.
In addition to these cheat sheets, a seventh page features some extra challenges of a different nature. If you are running a workshop, you can use these activities to encourage participants to try something new or give them constraints (kind of like the theme of a game jam).
3. Project structure
To use the project in a workshop, you can either have people download it from the Asset Store (free of charge) or, if internet access is an issue, you can manually distribute the assets and ProjectSettings folders to the students.
4. Assets folder
The Documentation folder contains documentation in .pdf format, including this very document! You can use this document as a starting point, then dig into the details of each script by opening the Reference guide document. Finally, the cheat sheets are documents you can print out and distribute to learners so they have a quick reference guide for what the scripts do, for inspiration.
The Images and Particles folders contain graphic assets, which could be used as characters, enemies, or to compose the scene, but the developers are free to import new graphics if they want.
The heart of the Playground, the scripts, are located in the Scripts folder and are organized by category. Most of them should work out of the box, although some require objects to be tagged in a specific way to work (you can learn more about tags in the Tags section below.)
There’s also a folder called Examples, in which you can find a handful of little games already made. You can use these games as learning materials or as starting points that you can customize.
There’s a special folder in the project called _INTERNAL_. As the name implies, this folder shouldn’t be touched unless you want to mess with the inner workings of the Playground. The _INTERNAL_ folder contains base scripts, fonts, gizmos, and other things that students shouldn’t really care about. However, the folder needs to be in the project for the Playground to work correctly.
The following section goes a bit deeper into some of the parts of the Playground, in order for you to better understand its inner workings. It is recommended that educators who have to assist students and fix problems in their games take some time to read over this section.
5. Tags
Tags are used by some scripts to filter objects and decide when to produce their effects. Some scripts filter objects OnCollisionEnter2D or OnTriggerEnter2D, while others (like HealthSystemAttribute) behave differently depending if the object is tagged as Player or not.
If you import the ProjectSettings folder at the start, the following extra tags are already defined:
- Player and Player2: These tags have to be used on the two players respectively to enable the UI to work properly (tracking damage to players, points scored, etc.)
- Enemy: The Enemy tag, though not currently used in any script, is useful to define enemies on which to apply the effects of bullets and weapons.
- Bullet: Used for projectiles.
- Ground: Used for checking what is ground when the player jumps.
With the exception of the Player tags, many scripts allow you to define which tag to look for. For instance, the Jump script asks you to define what is considered ground, so you don’t necessarily need to choose the Ground tag. Take them only as a suggestion.
You can also filter tags in Condition scripts. You might do this so that something happens only when you collide with objects tagged in a certain way, for example. The tag list updates automatically to show the whole list of tags, so there's no possibility of making typos.
6. User interface
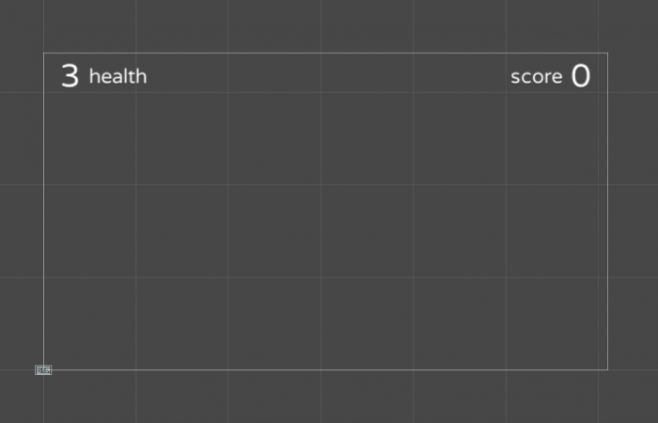
The UI is implemented in a prefab, contained in the Prefabs folder. By dragging the UI prefab into the scene, the health and score of Player 1 is automatically displayed. You can also choose to make the game a 2 player game; in that case, the score and health will be displayed for both players.
The UI also allows you to define the type of game from a choice of three modes: Score, Life, and Endless. Depending on the selected game mode, the “Game Over” or “You Win” screens (or no screen at all) will be displayed:
- In Score mode, if the Player reaches the score chosen,”You Win” will be displayed. When two players are present, the UI will only display scores and the first one to reach the score wins.
- In Life mode, if the player reaches 0 health, “Game Over” will be displayed. With two players, the health of both is displayed. There’s no way to win.
- In Endless mode, no end game screen will be displayed and there’s no way to win or lose the game.
7. Custom game types
When using Condition scripts, you can connect the GameWon and GameOver functions of the UIScript to a UnityEvent. That way, you can create custom win and lose conditions by leveraging collisions and other events.
Similarly, you can tap into the AddOnePoint and RemoveOnePoint functions to do the same with the score.
8. Custom Inspectors
Unity Playground makes heavy use of custom Inspectors, both for the Playground’s own scripts (Move, Jump, etc.) and the default Unity components (Transform, Collider, SpriteRenderer, etc.). The goal is to remove some complexity from the Unity UI in order to give new users an easier introduction.
For this reason, some variable names have been changed too (for example, Drag in the Rigidbody2D has been changed to Friction).
9. Disable the Playground
You can turn the custom Inspectors on and off from the top menu bar. This allows you to visualize what the Playground scripts are hiding. You can always make your changes and then turn the Playground back on. Since Playground is only customizing Inspectors, it will keep working fine.
This trick is recommended for teachers who need to temporarily make changes to properties that the Playground is hiding (for instance, editing the shape of a Collider of any type).
10. Tilemaps
Included in the graphic assets there is a series of tile sprites (grass, cobblestone, wood) that have been used to build the example games and that you can use to build your own levels using Unity’s Tilemap feature.
If you want to know more about Tilemaps, you can find a detailed guide in the Unity Manual.
The Learn website is also full of great tutorials about Tilemaps. We recommend starting with the Intro to Tilemaps video, or you can find a short text explanation in the Painting a Level section from the 2D Gamekit.
11. Appendix
Credits
Unity Playground has been created by Ciro Continisio. Graphics by Stefano Guglielmana.
Special thanks to:
Unity Technologies, and especially the Brighton Content team for helping with the final push to put the Playground on the Asset Store.
Kenney.nl for the free graphics which have been used for the first iteration of the Playground.
Dioselin Gonzalez and John Sietsma for believing in the project and using it in their workshops first.
Stine Kjærbøll for some precious early feedback, and the Note: for the logo design.
Nikoline Høgh and Nevin Eronde for more UX early feedback and enthusiasm.
Phil Jean for suggesting an important change that would end up being a turning point for the project.
Numerous contributors to the Github repository: Sophia Clarke, Ethan Bruins, Mark Suter, Jim "Jimbo" Picton, “Arche-san”, and all the others who helped along the way!
Everyone at Coderdojo Brighton and the attendees of New Employee Orientation at Unity, who have been the first involuntary test subjects.
Finally, all the teachers and educators who are using the Playground in any capacity today!