
Build an arcade machine
Exercise
foundational
+60XP
30m
Unity Technologies
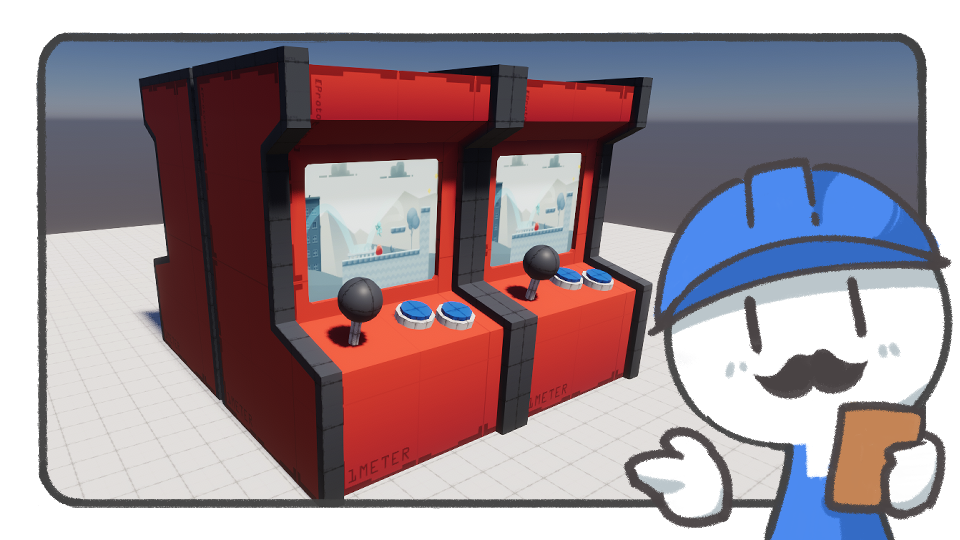
In this tutorial, you'll build a simple arcade machine model based on what you have learned from the ProBuilder tutorials.
Resources
Languages available:
1. Set up existing shapes
Prepare a basic cube to build an arcade machine. It’s recommended that the height is greater than its width. Picture an arcade machine you’re familiar with!
2. Edit the front
Edit the front to create the distinct look of an arcade machine. In order to do that, select both vertical edges of the front face and create a new edge that connects them using the Connect Edge tool. You need at least four horizontal edges. After they are created, adjust the location properly, select the face, and move it around to make it stick out or go in
3. Create border surfaces
The sides of an arcade machine usually protrude. Select the left and right sides and use the Extrude Face tool to add a new bordered surface.
4. Extend the borders
Multi-select the surfaces that are connected around the new bordered faces using the Select Face Ring tool. Then, use the Extrude Face tool again to make it protrude a little. Exclude the bottom faces when you do this.
5. Build a screen
Select the center of the front surface and use the Shift+Scale tool to create an inside surface. Hold Shift while you push the new face in to make it look like a display screen.
Afterward, select each edge line and use the Bevel tool to soften the display screen.
6. Build controls
Prepare three basic shapes: one sphere, one slender cylinder, and another wider cylinder. Put the sphere on top of the slender cylinder to make a joystick. Use the Shift+Scale tool to make a button from the top face of the wider cylinder. After making a button, copy the whole cylinder using Ctrl+D (macOS: (Cmd+D) and paste it in the space right next to the first one.
It's important to use the Freeze Transform tool to locate the pivot of the controller model in the center of the bottom face. After setting up the pivot, place it in the body model, in a suitable location, and use the rotation component to arrange them properly.
It's important to use the Freeze Transform tool to locate the pivot of the controller model in the center of the bottom face. After setting up the pivot, place it in the body model, in a suitable location, and use rotation to make it look like an arcade machine.
7. Refine the UV mapping
Select the UV Editor tool and go to Fill Mode > Fit to set the UV maps for the sides faces. As for the front, multi-select the faces, excluding the one for game screen, and assign the fit to flatten them as a group.
8. Apply colors and materials
For the game screen in particular, download the image provided and make it into a new material, then apply it to the central face to make it look like a real game screen.
9. Complete the procedure
Assetize the ProBuilder model you completed to use in the future. First, move the model until the center of the bottom is positioned at (0, 0, 0). Then, use the Freeze Transform tool to change the reference point so that the pivot is in that location. Finally, export it to use later.
Before using the Export tool, put the controllers as child GameObjects of the machine so that they form a single model. Then, enable the Include Children option when setting it to a prefab format in Export Settings.
10. Share your creation
After you've completed your model, take a screenshot or record a video of it and share it for others to see.