
Challenge: Create a local volume
Exercise
Beginner
+60XP
60 mins
Unity Technologies
A Local Volume allows you to define a completely different visual style within a single scene. In this tutorial, you’ll create a new post-processing profile and apply it to a particular area of the scene.
By the end of this tutorial, you'll be able to:
- Add a new local post-processing volume to the scene and edit its boundaries.
- Describe scenarios where a global volume or local volume would be more appropriate.
- Demonstrate your new skills in post-processing.
Languages available:
1. Overview
Up to this point, you have been using a Global Volume to apply post-processing, which affects the entire scene. In this challenge, you will use a Local Volume to apply post-processing effects to a defined local area of the scene.
2. Why use a Local Volume?
A Local Volume can be helpful if you want the visual style of a scene to change when the user enters a particular physical space.
In a video game, you might make the scene a bit more dark and ominous when a boss battle is going to begin. Or you could apply some lens distortion and motion blur to indicate that the player has entered a toxic area that is making them woozy or nauseous.
3. Review: How does a Local Volume work?
When you use a Global Volume, post-processing effects will apply to a camera, no matter where it is in the scene. You have only used global volumes up to this point.
A Local Volume, on the other hand, is a defined smaller area within your scene. Post-processing effects will only apply when a camera is inside that defined area.
4. Add a local volume to the gallery scene
Here’s your challenge:
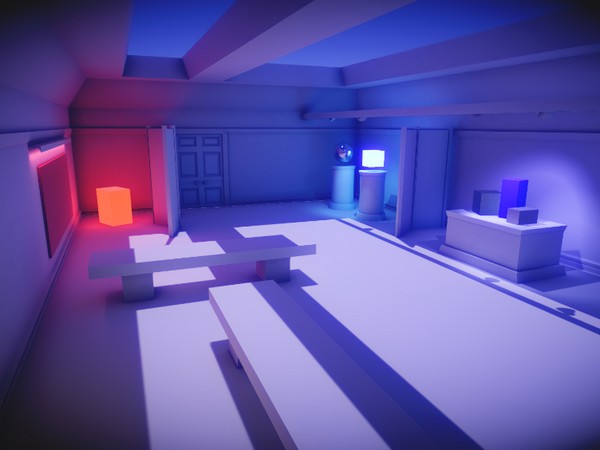
In the indoor gallery scene, add a local volume around one of the objects in the gallery, changing the post-processing profile as the user approaches it.
For example, when complete, it might look like the example below, where the blue cube artifact seems to have a mysterious and powerful aura around it.
Since this is a challenge, you will not be given step-by-step instructions here. For help figuring out how to do this, you can refer to Unity’s documentation on volumes or do some Googling.
You should expect to spend at least 30 minutes on this challenge.
5. Challenge criteria
You’ll know you’re successful if you’ve met these criteria:
- The post-processing profile changes when you approach one of the objects in the gallery.
- The post-processing effect gradually changes over the course of a few meters.
6. Next steps
Congratulations! You have completed the learning required for Core Post-processing.
You have the core skills and knowledge for one of the primary creative domains within the Unity Engine.
Now you’re ready to apply these skills in other projects! We can’t wait to see what you make next.
7. Submit your project
When you’ve completed this challenge, please submit and share your project. This isn’t required but it’s a great opportunity to share your progress and learn from the work of others.To submit your project:
1. Review the specific guidance for this challenge (above) and check your project to make sure that you have achieved the challenge criteria. Remember, there’s no deadline on submissions; you can take the time that you need to do this.
2. Take some screenshots or a screen recording of your project.
3. Add a submission title and description.
- Make sure to include the screenshots or video recording. If you have additional details to share about your process or the project that you have created, you can share them in the description too.
4. Set who can view your submission:
- Public: Anyone who views this tutorial.
- Private: Just you.
5. Select Save and preview submission.
6. Check your submission preview and then complete the CAPTCHA test and select Submit and continue.
Please login to submit
Complete this Tutorial
Submission Gallery

The glowing cube
Move closer to the cube to experience the local post processing volume

Local Post Processing
Added local volume to the blue cube

the betrayals
the 3 betrayals cubes

Post Processing Challenge
Local Volume
POST-PROCESSING STUDY
It is a Simple Prototype to Demonstrate Different Effects in Post-Processing like Bloom, Tonemapping etc. You can use WASDEQ Keys and mouse to Navigate Around in the Scene.

Local Post Processing Volume Challenge
Submission for Local Post Processing Volume Challenge.