
Challenge — Enhancing Visual Quality with Unity's Post-Processing Effects
Tutorial
Beginner
+10XP
30 mins
Unity Technologies
In this challenge, you will add post-processing effects to improve aesthetics, making your Scene look and feel more realistic.
Resources
Languages available:
1. Overview
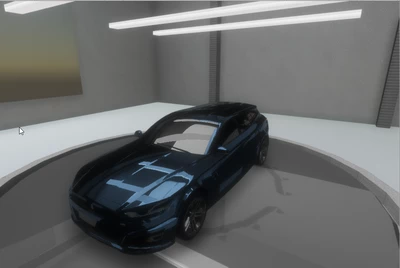
In this challenge, you will make a new Post-Processing Profile to activate image effects such as Bloom, Anti-aliasing, Ambient Occlusion, and Color Grading. These effects will add aesthetic polish and realism to your garage Scene.
To do so, you will:
- Set up your Scene for post-processing effects
- Select the appropriate settings to visually enhance your Scene
2. Import or Update the Post-Processing Package
Use the Package Manager to import the Post-Processing stack, so you have access to all of the effects.
- Navigate to Windows > Package Manager.
- Select All Packages and click Post Processing.
- Confirm that the latest version is selected (by checking the version number on the upper right), and click Install to bring in the Post-Processing stack.
3. Set Up the Camera
Set up your Main Camera for post-processing effects by changing its Layer to PostProcessing. Add the Post-Processing Layer script, assign the Main Camera as the Trigger (if it isn’t already), and change the Post-Processing Layer script’s layer to PostProcessing as well, so it matches the Camera’s layer.
(Note: You will need to make a new layer and call it PostProcessing if this is the first time you're setting up post-processing effects.)
- Select the Camera, and add a new Layer. Change the Camera’s Layer to PostProcessing.
- With the Camera selected, in the Inspector, add the Post-Processing Layer script component by dragging the Post-Processing script into the Camera’s Inspector under Add Component.
- Change the Post-Processing Layer component’s Layer to PostProcessing (so it matches the Camera).
- Turn on Fast-Approximate Anti-Aliasing so the Scene’s objects appear smoother.
4. Create the Post-Process Volume
Setup your PP Volume by creating an empty GameObject. Name it PP Volume, change its Layer to PostProcessing and add the Post-Processing Volume component so you can control which areas of the Scene receive post-processing effects.
(Note: Controlling which areas receive post-processing effects means your user can experience different effects when they are in different locations, such as indoors vs. outdoors.)
- Make a new empty GameObject in the Scene.
- Select the GameObject and change its Layer to PostProcessing so it matches the Camera.
- In the new GameObject’s Inspector, add the Post Process Volume component.
- In the Inspector, enable Is Global so the PP Volume affects the entire Scene.
5. Make and Add a New Post-Processing Profile
Make and add a new Post-Processing Profile to the Post-Process Volume so we can control which effects the camera uses.
- Create a Post Processing Profile by selecting the PP Volume GameObject and clicking “New” in the Inspector. This automatically creates and assigns a new PP Profile.
- Add Ambient Occlusion, Bloom, and Color Grading to the new profile.
- Choose the Filmic (ACES) Tonemapper and boost the Post-Exposure to 1 to help emphasize the lit objects in the Scene. (As a review, Filmic (ACES) is a popular effect used to increase realism and contrast in objects and is commonly used in commercials.)
(Note: Some effects require you to turn on specific settings. Adjust the intensities and modify the settings by selecting the boxes under each effect in the profile.)
To increase the realism of the Scene’s shadows, use the Post Processing Profile's Inspector to add Ambient Occlusion.
To enhance the Scene’s lighting, use the Post Processing Profile's Inspector to add Bloom.
To give the Scene a more realistic look, use the Post Processing Profile's Inspector to add Color Grading. Explore the Neutral Tonemapper and Filmic effects.
--------------------
Explore — Modify Auto-Exposure for more light
Is your Scene is a little too dark? Adjust the Camera’s auto-exposure level with the EV parameters in the Post-Processing Profile. This will make your Scene appear a bit brighter, due to the increase in exposure (similar to increasing the exposure time on a camera in the real world).
Tip — Turn off the grid
You can turn off the grid by toggling off Show Grid in the Scene’s navigation bar (Scene Window > Gizmos > Show Grid).
6. Key Takeaways
You've now added post-processing effects to your Scene, increasing the realism with more consistent lighting, shadows, and textures. By completing this tutorial, you’re now able to:
- Use Bloom to add more realistic light reflection to your Scene
- Use Ambient Occlusion to increase shadow realism
- Use anti-aliasing to smooth out objects
- Use Color Grading and ACES to fine-tune the Scene’s look and feel.