Challenge — Importing CAD Models with the PiXYZ Unity Plugin
Tutorial
Beginner
+10XP
30 mins
Unity Technologies

In this challenge you will be using a web-streamed editor to learn the PiXYZ Plugin, an easy to use tool for bringing CAD models into Unity. The Sandbox showed this process using a demo model and this Challenge will build off of that with a few pro tips.
Languages available:
1. Overview
This challenge tutorial will teach the PiXYZ Plugin, an easy to use tool for bringing CAD models into Unity. The previous tutorial showed this process using a demo model and this Challenge will build off of that with a few pro tips.
Bring the given model into Unity using PiXYZ Plugin. The process taught in this Challenge tutorial will be the same for other CAD models relevant for industrial applications.

What you will do:
In this tutorial, you will learn how to import CAD models via the PiXYZ Plugin:
- Import PiXYZ Plugin.
- Import CAD Model.
2. Import a CAD Model
Download the Crank Piston CAD model here. To do so, you’ll need to:
- Create a new Unity project on your desktop
- Import PiXYZ plugin and ensure proper licensing
- Download and import provided CAD model or one of your own
This tutorial will teach you how to utilize PiXYZ Plugin to import CAD models
3. Create a New Unity Project
On your desktop create a new Unity Project so that you can import a CAD model
Step by step:
- Open Unity Hub on your desktop
- Click the New button to create a new project
- Give it a name, save location, and choose a version (Unity 2017.4.10f is the version used in the sandbox)
- Click Create
4. Import PiXYZ
To import a CAD model in Unity import the PiXYZ Plugin package you downloaded in the Sandbox:

- Download the PiXYZ plugin if you haven’t already (see Sandbox for details)
- Click Asset > Import Package and select the PiXYZ Plugin Package (or drag it directly into the Project Window
- When prompted to in the Import Window, Click all then Import
Pro tip: Check Compatibility
5. Import a CAD Model
Use the PiXYZ drop down to import a CAD model from your computer into Unity
Step by step:
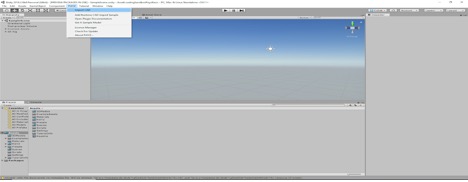
- Use PiXYZ>Import CAD and then select the wheel model that you’ve downloaded
- When prompted select the Assembly.CATPart (or any other model you have) Then click Import.
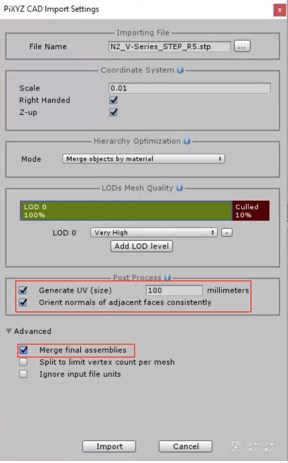
- For the best results with the PiXYZ plugin use the following settings. Each is visited in a dropdown below.

Pro Tip: Post Process and Merge Final Assemblies
The functions of generate UV (size) and Orient normals of adjacent faces consistently respectively, have to do with the way that the model appears. Generate UV (size) is used to add a new primary UV set (channel #0). Set the size of the projection box used to create UVs. If you wish to preserve the existing UV set, don’t use this setting. Orient normals is used to unify all triangles/faces orientation.
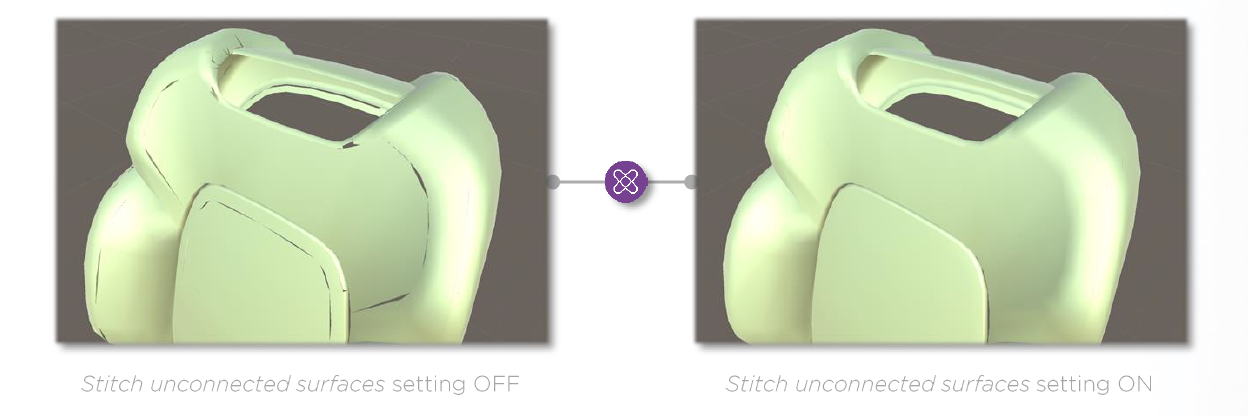
Merge final assemblies connects multiple sub-meshes that are supposed to have continuity.

Key Takeaways
You have now successfully imported a CAD model into Unity using the PiXYZ Plugin.
By completing this module, you’re now able to develop VR applications that use production 3D models that have been prepared for use in Unity so that all who see the applications you build will be seeing the real model. PiXYZ Plugin equips you to continue to bring sufficiently small assemblies into your applications. A quick recap of the process:
- Import and setup your Unity environment to include the PiXYZ Plugin.
- Import a CAD model.