
Challenge: Importing CAD Models with the PiXYZ Unity Plugin
Tutorial
Beginner
+10XP
30 mins
(14)
Unity Technologies
In this tutorial, you will learn how to import CAD models via the PiXYZ Plugin:
- Import PiXYZ Plugin.
- Import CAD Model.
Languages available:
1. Overview
This tutorial will reiterate our learnings on the PiXYZ Unity Plugin. The previous tutorial showed this process using a demo model and this Challenge will build off of that with a few pro tips.
Bring the given model into Unity (seen below) using PiXYZ Plugin. The process taught in this Challenge Tutorial will be the same for other CAD models relevant for industrial applications.
2. What Will You Do?
In this Tutorial, you will learn how to import CAD models via the PiXYZ Plugin:
- Import PiXYZ Plugin.
- Import CAD Model.
3. Import a CAD Model
Download the Crank Piston CAD model here.
To do so, you’ll need to:
- Create a new Unity project on your desktop
- Import PiXYZ plugin and ensure proper licensing
- Download and import provided CAD model or one of your own
This tutorial will teach you how to utilize PiXYZ Plugin to import CAD models
4. 1. Create a New Unity Project
On your desktop create a new Unity Project so that you can import a CAD model
Step by Step:
- Open Unity Hub on your desktop
- Click the New button to create a new project
- Give it a name, save location, and choose a version (Unity 2017.4.10f is the version used in the tutorial)
- Click Create
5. 2. Import PiXYZ
Import the PiXYZ Plugin package you downloaded in the tutorial so you can import CAD models.
Need a Hint?
Use the Import Package button (Assets > Import Package)
Step by Step:
- Download the PiXYZ plugin if you haven’t already (see tutorial for details)
- Click Asset > Import Package and select the PiXYZ Plugin Package (or drag it directly into the Project Window
- When prompted in the Import Window, click on Select All, and then Import.
6. 3. Import a CAD Model
Use the PiXYZ drop down to import a CAD model from your computer into Unity
Step by Step:
- Use PiXYZ>Import CAD and then select the wheel model that you’ve downloaded
- When prompted select the Assembly.CATPart (or any other model you have)
- Then click Import.
- Adjust the settings below for the best results with the PiXYZ plugin. Each is visited in a dropdown below. You’ll need to check the box for “Merge final assemblies” and “Post Process” settings should be set accordingly.
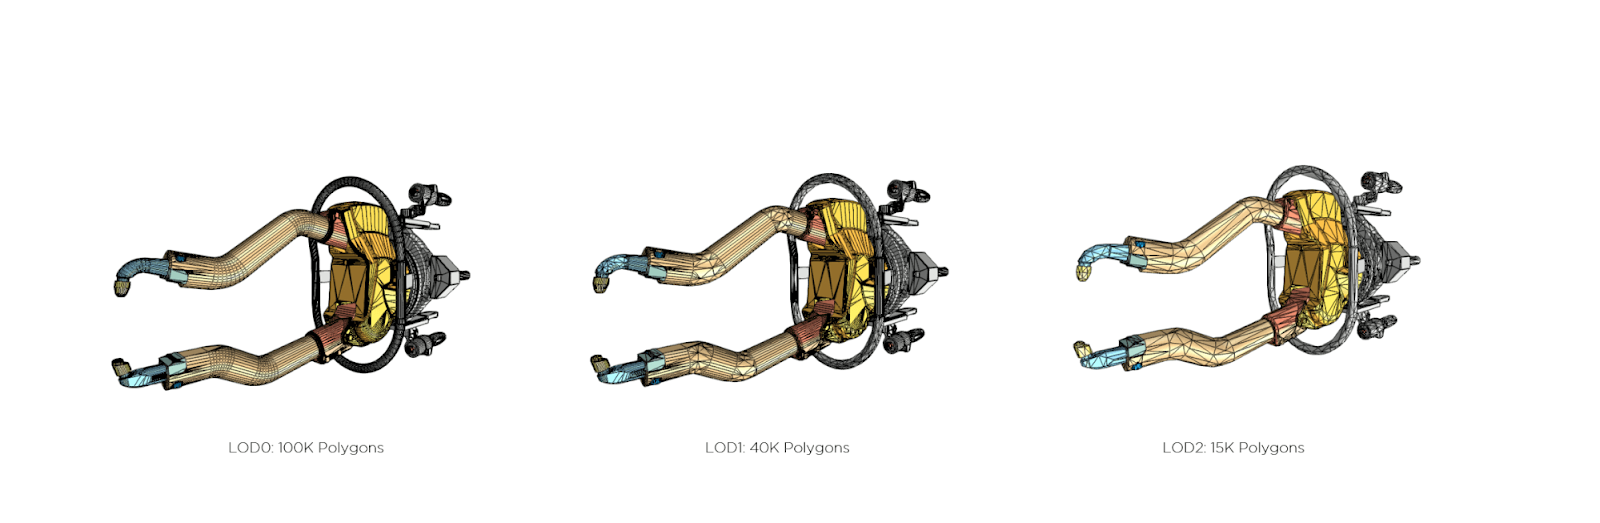
Pro Tip: For Mobile
For mobile devices, it’s really important to use LODs and reduce your poly counts whenever feasible without dampening the user’s experience. As such, you can set your scene’s objects to only render in “very high” detail when you are close by.
The image above demonstrates that your objects will render with 100% detail until you are far away. Once you reach the “far” threshold, your objects will render at 10% of detail.
7. 4. Add color to the model
Using the Toolbox, add new materials by selecting each child GameObject in the hierarchy, creating UVs, and then dragging on your newly created materials.
Step by Step:
- In the Hierarchy, select and right click the GameObjects to which you will add new materials.
- Add new UVs so we can add materials with textures (PiXYZ > Modify > Create UVs).
- Make new materials with textures, and drag them onto your object.
8. Key Takeaways
You have now successfully imported a CAD model into Unity using the PiXYZ Plugin
By completing this module, you’re now able to use CAD models in your AR scene by using the PiXYZ plugin. A quick recap on the process:
1. Import and setup your Unity environment to include the PiXYZ Plugin
2. Import a CAD model.
3. Adjust the setting to optimize their look performance.