Challenge — Sequencing Animations with Timeline
Tutorial
Beginner
+10XP
30 mins
56
Unity Technologies
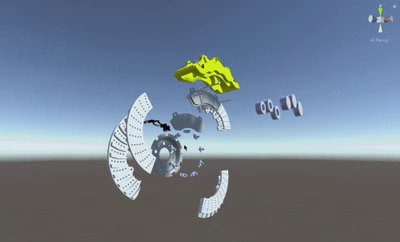
In this challenge, you'll be animating a brake model to demonstrate the brake’s components.
Materials
Languages available:
1. Overview
The goal of this challenge is to apply what you've learned about animations to a GameObject to visualize the anatomy of the object itself. We'll use an automotive brake to explore how we can animate its different child GameObjects to reveal all of it parts and pieces. The provided scene has a brake labeled “PiXYZ-DEMO-BRAKES.CATProduct.” The complete Scene uses a Timeline to coordinate the multiple animations.
To complete this challenge, you will:
- Animate the caliper on the Z axis
- Animate the bolts vertically on the Y axis
- Animate the brake’s back and front on the Z and Y axes
2. Create the Brake Caliper Animation
Create an animation that moves the brake caliper in the negative Z direction.
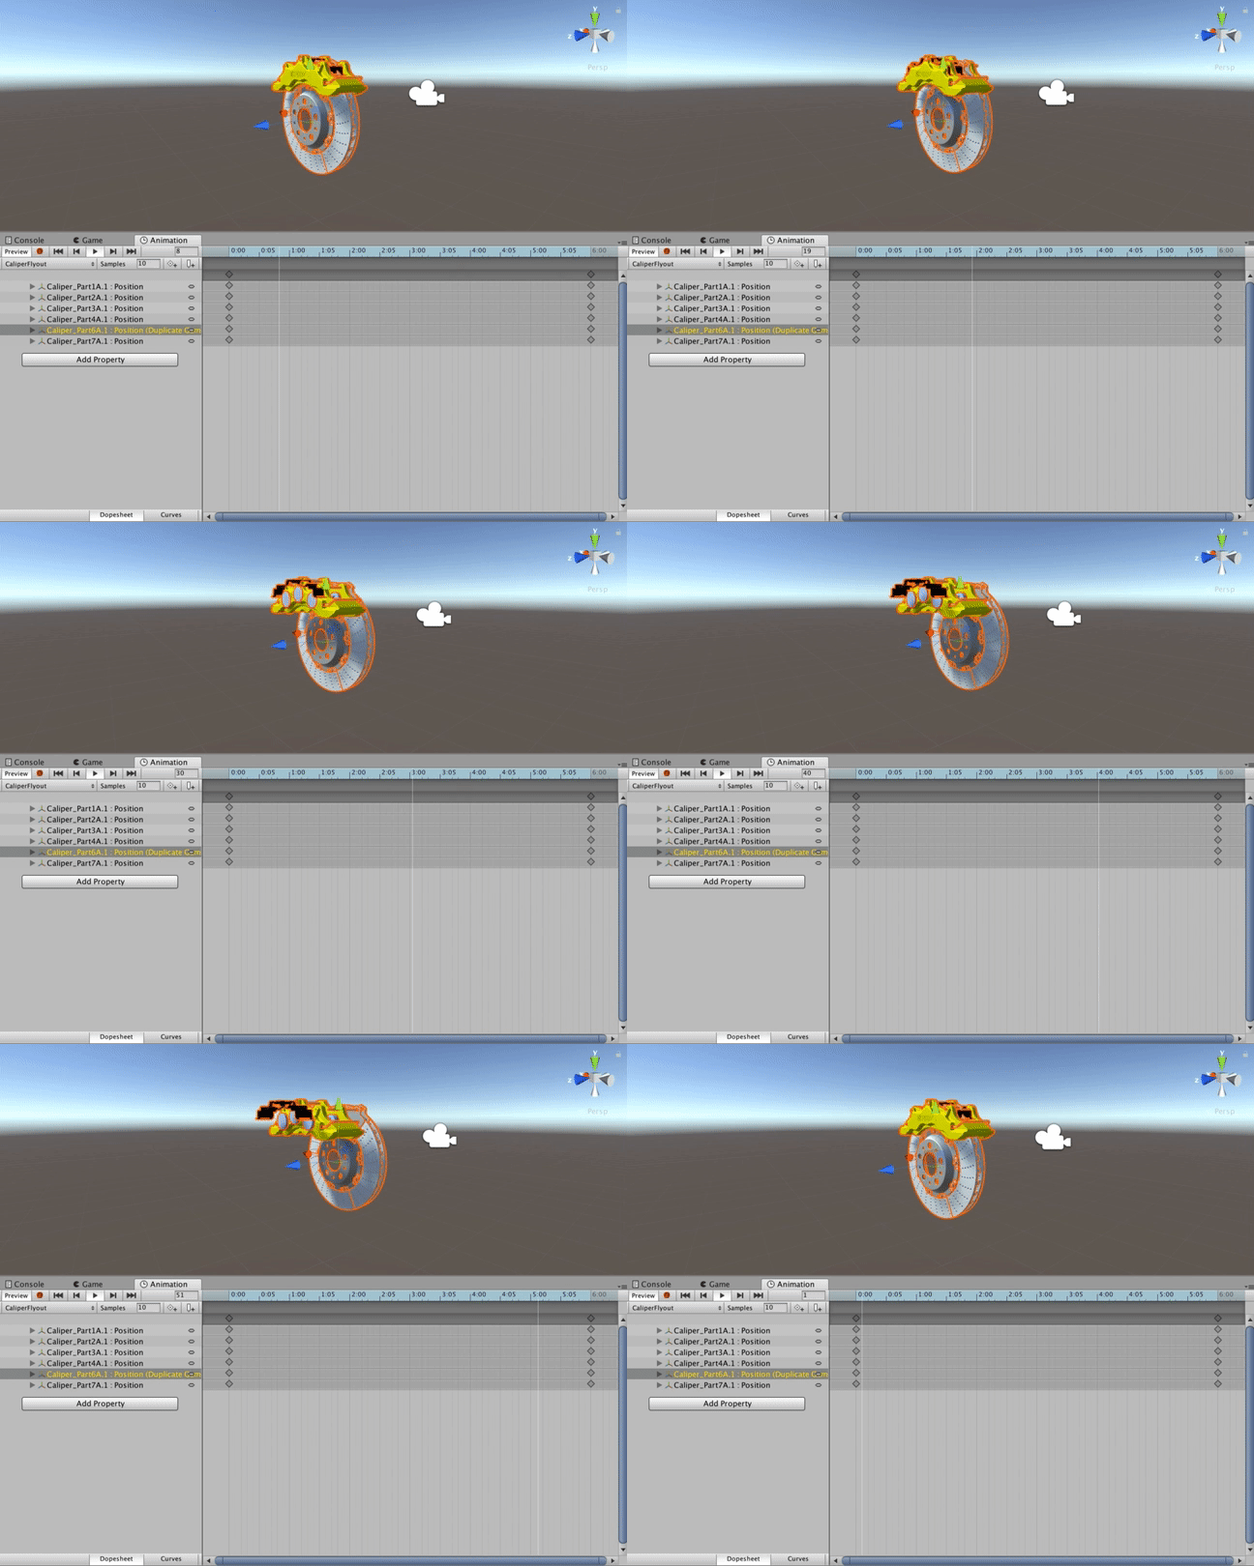
(Hint: Click on various pieces of the brake model to figure out which parts you need to use.)
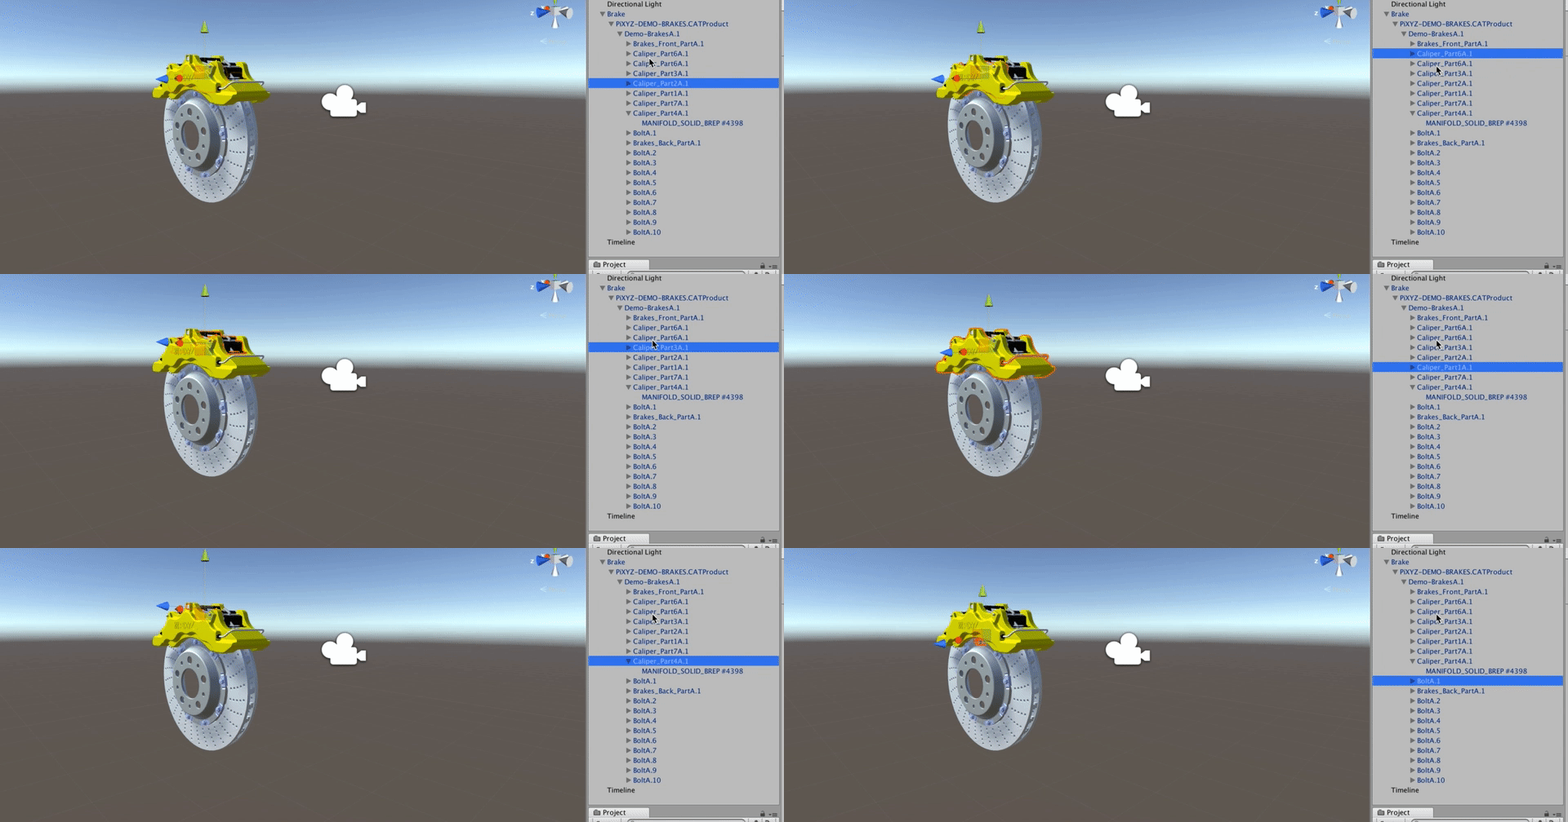
(Hint: You can find the Timeline and Animation windows by selecting Window > Animation or Window > Timeline)
1. Open the Animation window (Window > Animation).

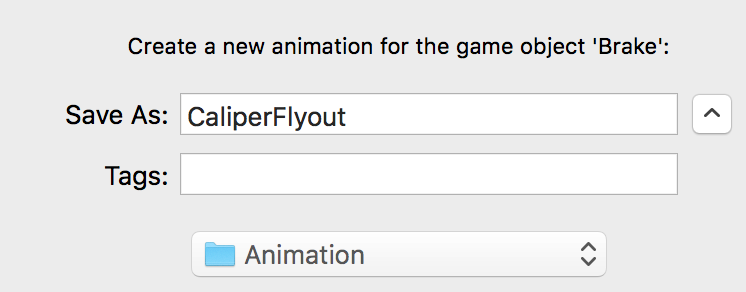
2. Create a new Animation Clip and name it CaliperFlyout.
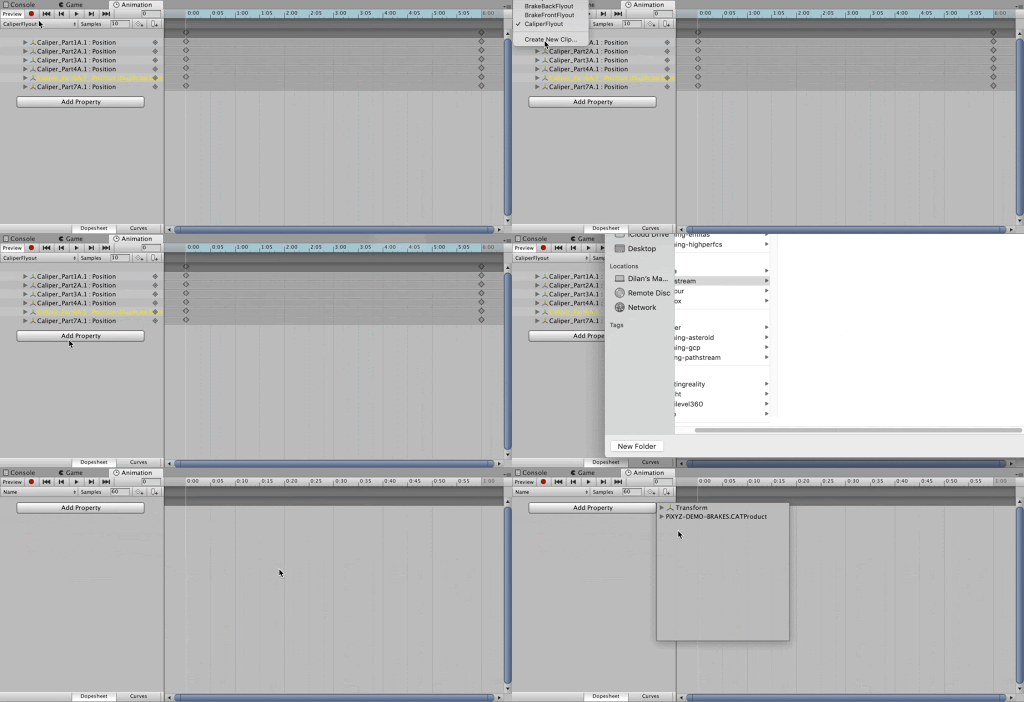
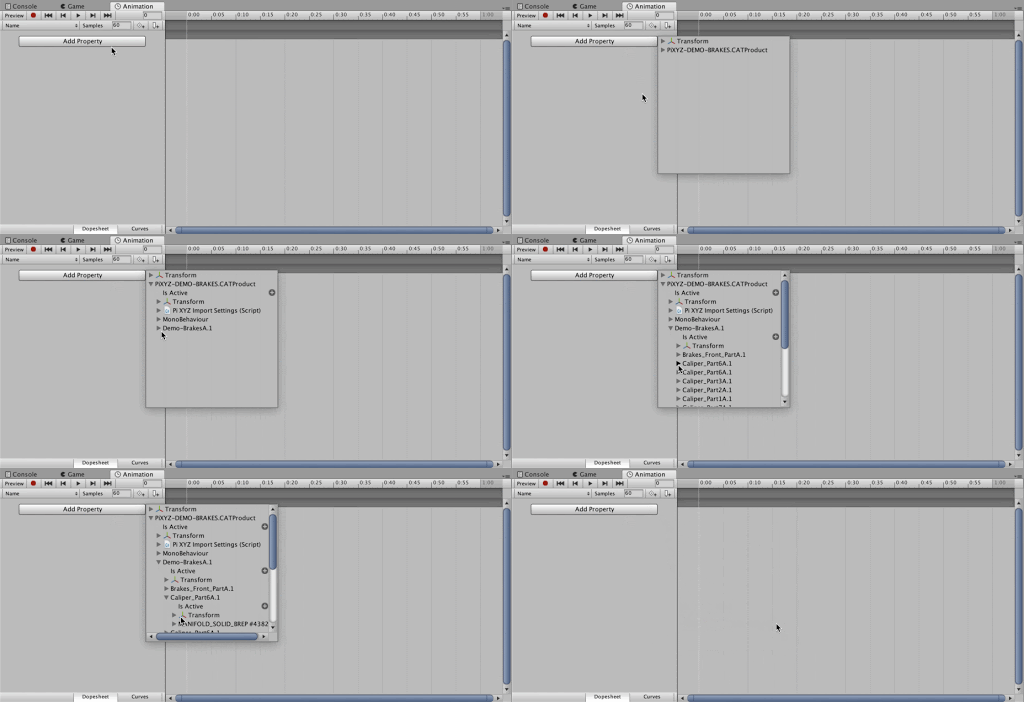
3. Click the Add Property button and grab the Transform/position of every caliper part in the Hierarchy.
4. Zoom out on the Timeline and add a Keyframe (to recap, a Keyframe defines the starting and ending points of any smooth transition) at around 6:00.

5. Click Record and drag each of the caliper parts backward in the Z direction within the Scene view.

Tip — Carefully Add Your Animation Properties
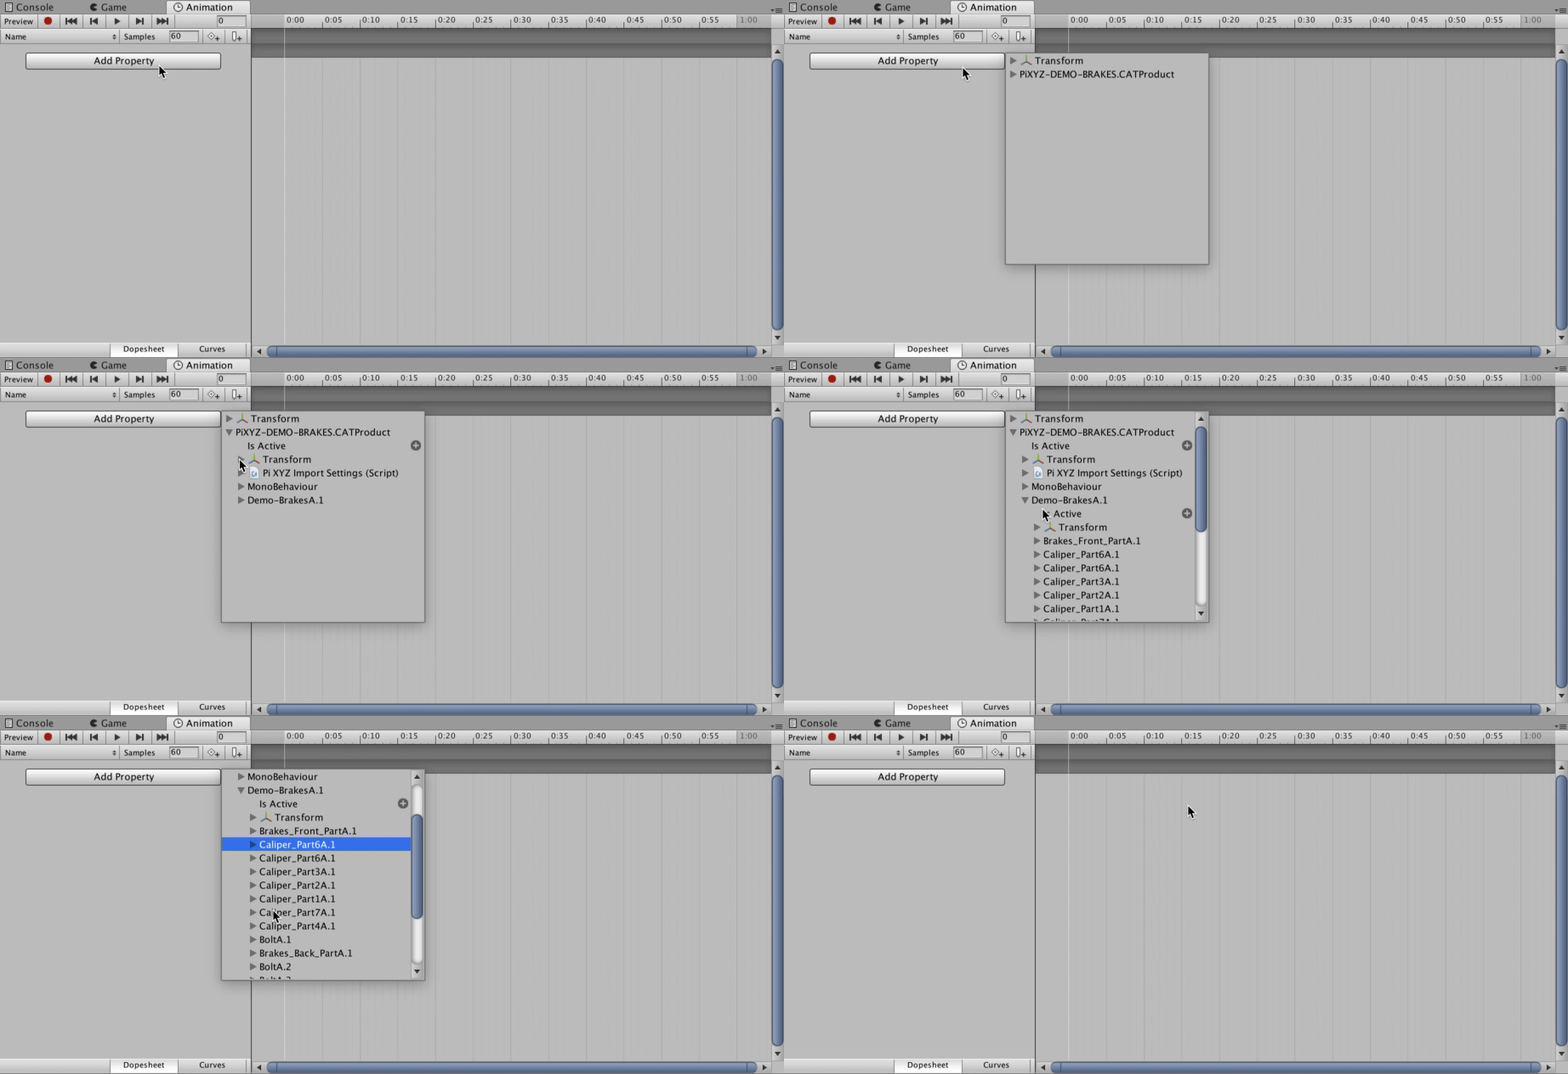
If you simply grab the high-level caliper parts, you will not be able to access the position property in the Animation Clip. Here’s what it looks like when you grab only the higher-level parts.
3. Animate the Bolts
Create a BoltFlyOut Animation for the bolts in the brake assembly.
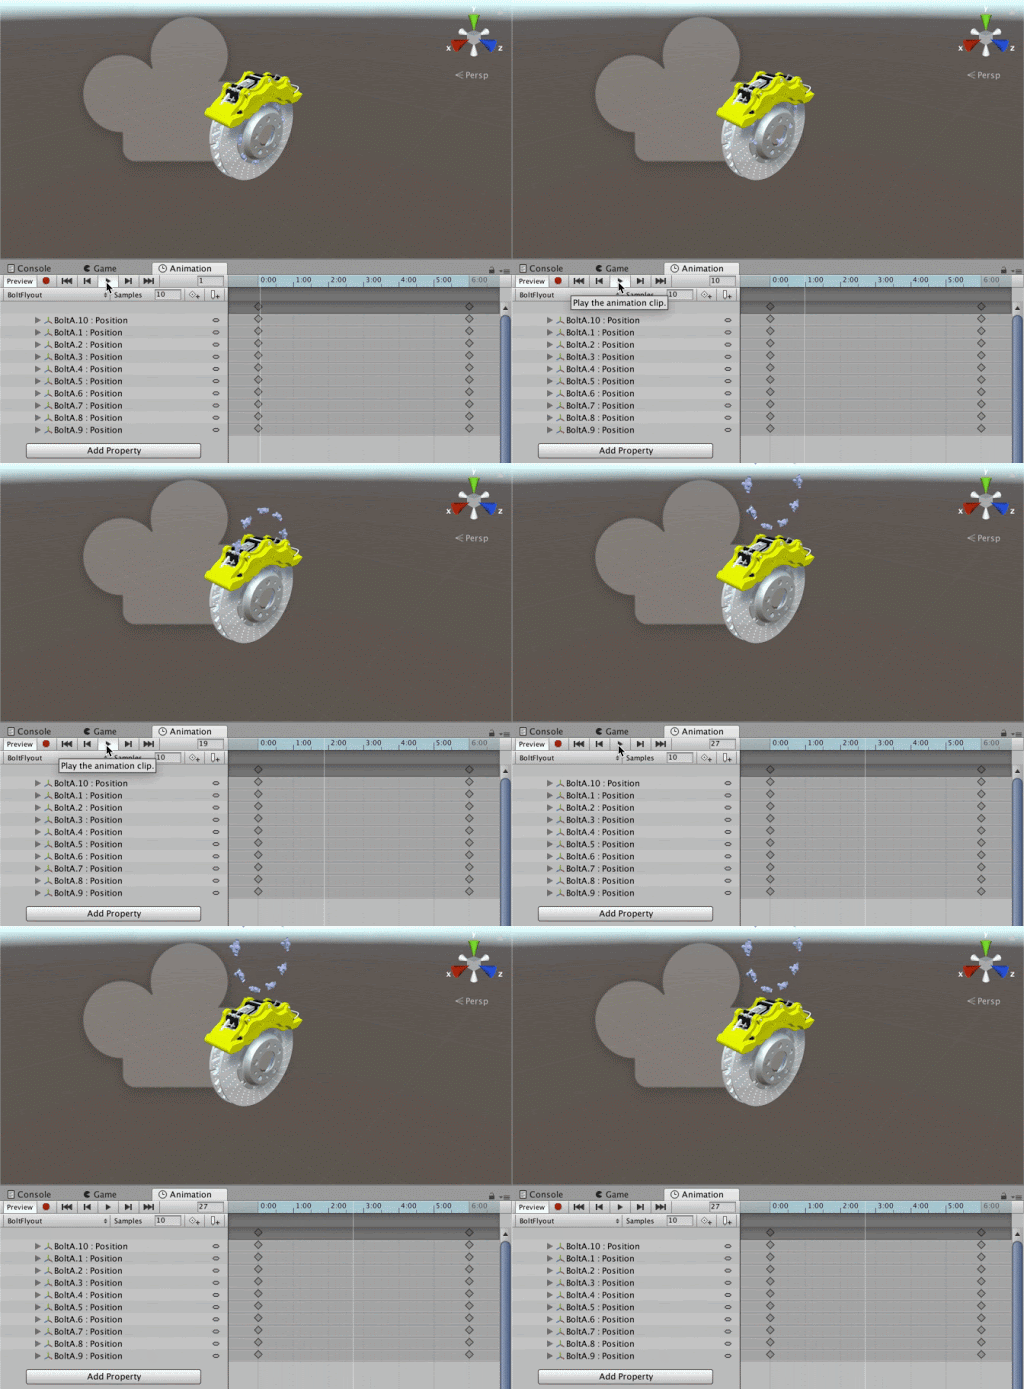
- Open the Animation window.
- Create a new Animation Clip and name it BoltFlyout.
- Add each Bolt Transform to the Animation window using the Add Property button.
- Add Keyframes that move the bolts in the negative Y direction (Note: Past -3 is a good number as a guideline to ensure the bolts get out of the way of the rest of the brake.)
4. Animate the Brake Backing Pieces
Use the Animation window to create an animation that moves the brake backs outward.
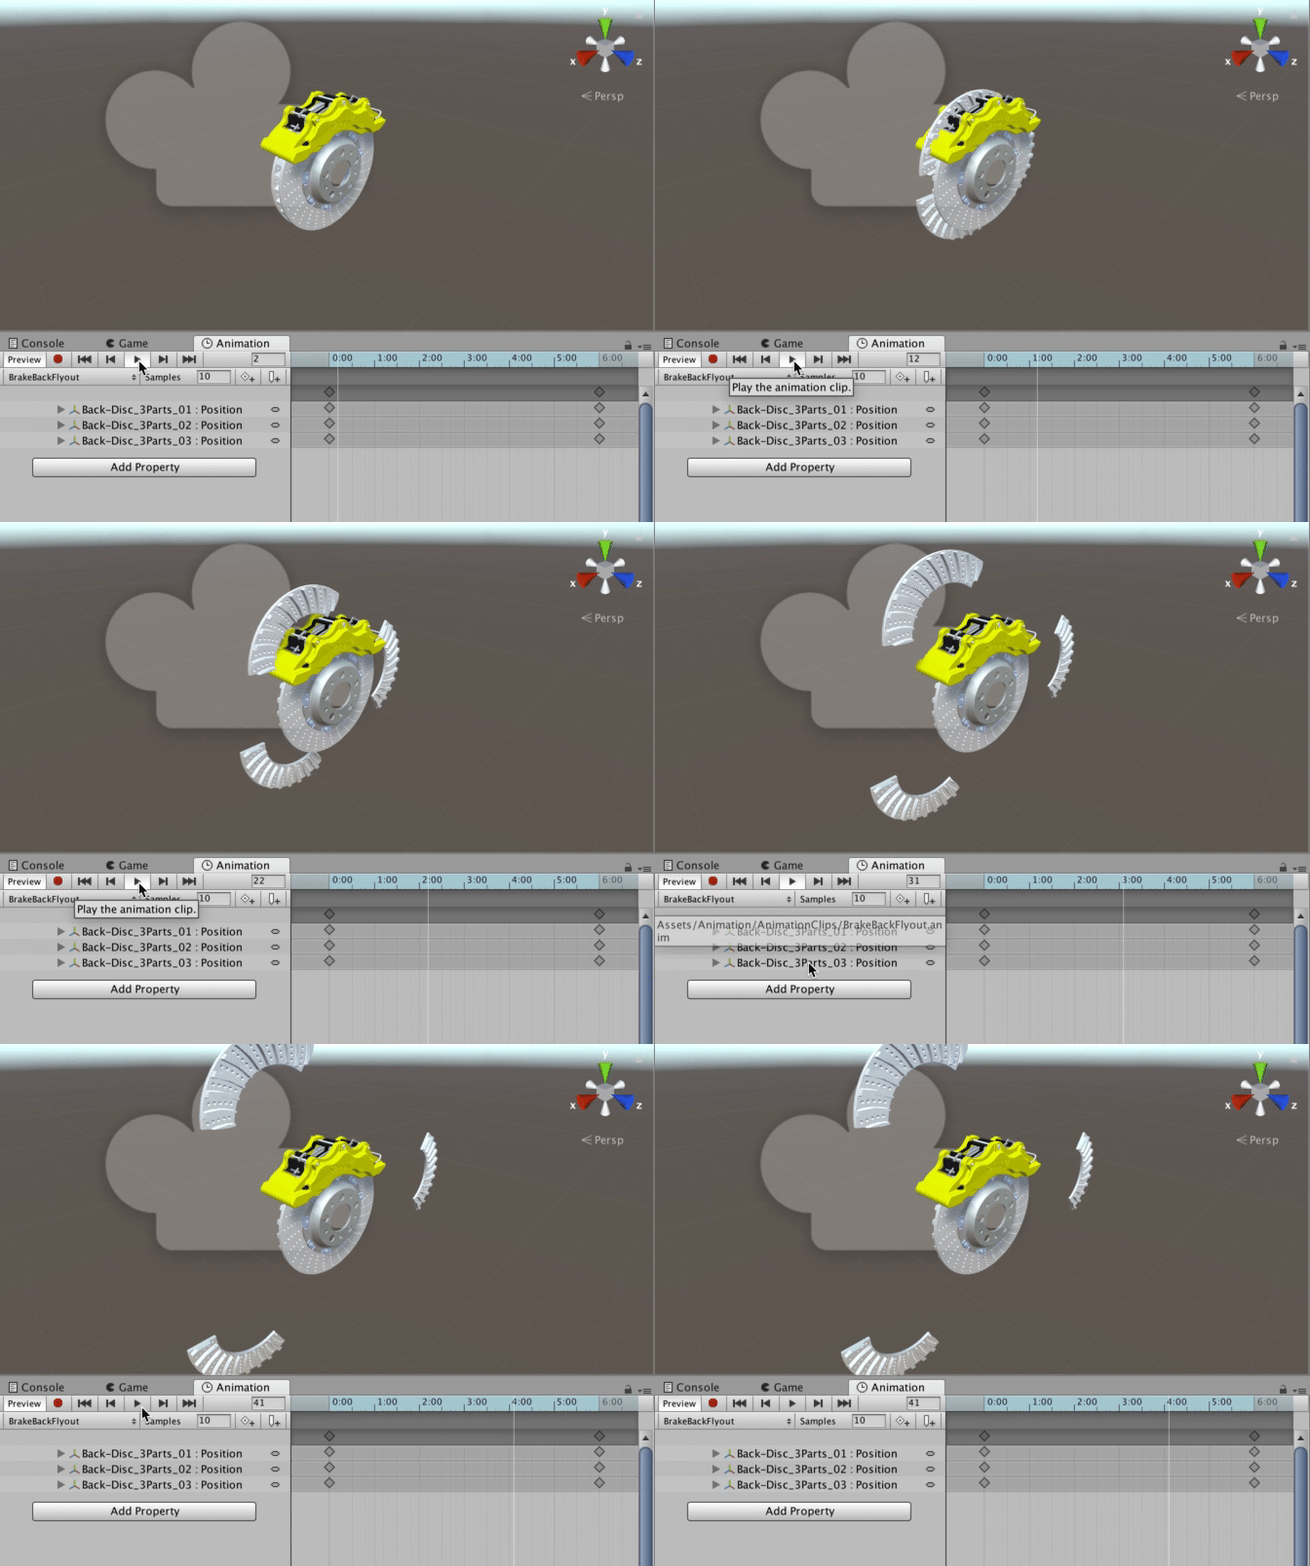
- Open the Animation window.
- Create a new Animation Clip and name it BrakeBackFlyout.
- Add each back disc part’s Transform to the Animation window.
- Move the GameObjects away from the center of the model, creating new Keyframes to lock in the changed Position values.
5. Animate the Manifold
Use the Animation window to create an animation that moves the manifold piece backward on the Z axis.
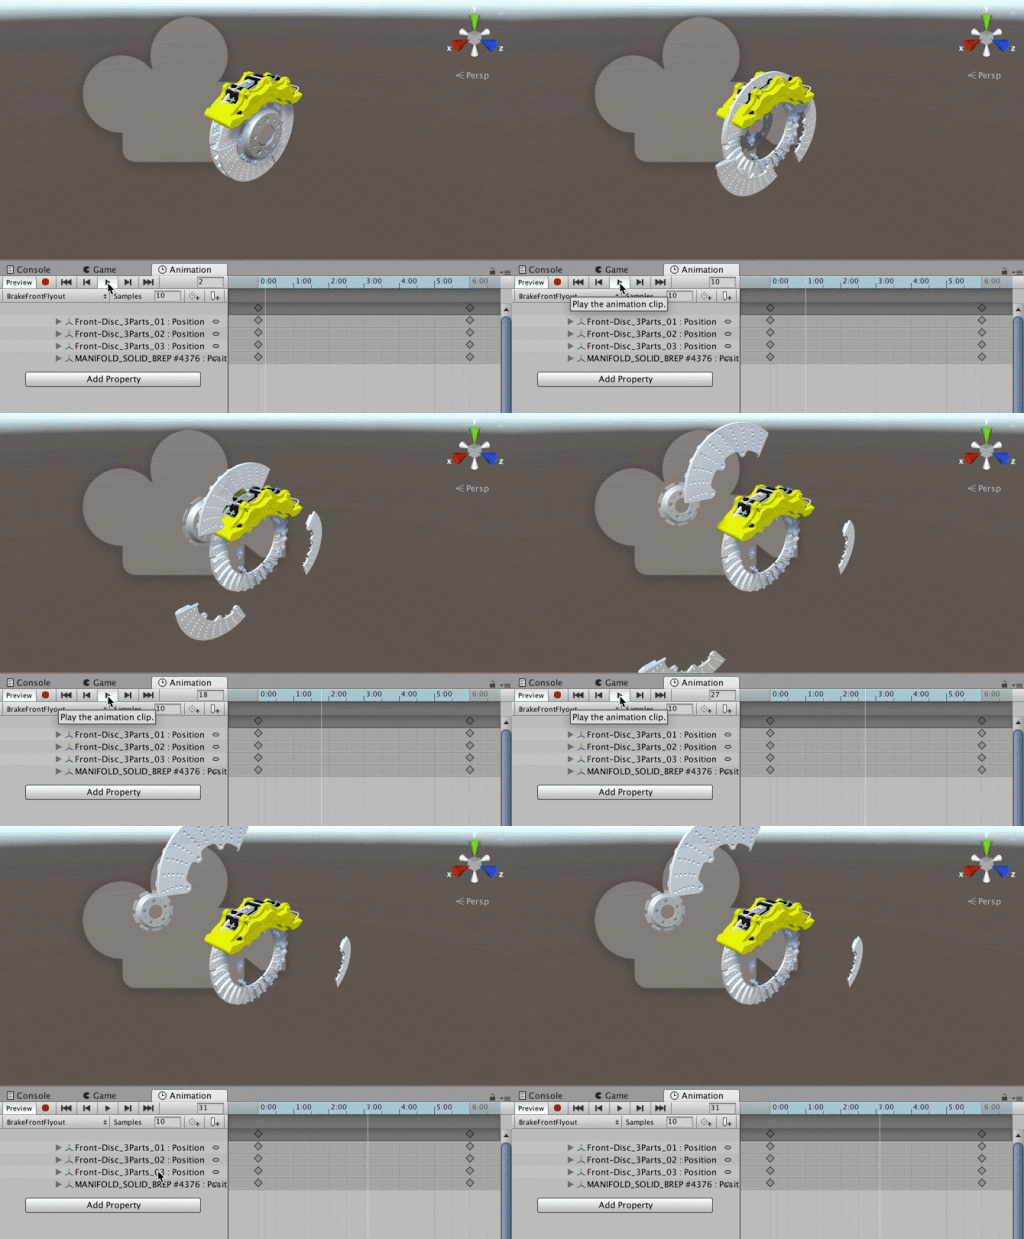
- Select the Manifold GameObject in the Hierarchy and add a new property.
- Add a new Keyframe approximately five seconds into the Timeline, and record the Manifold’s adjusted position on the Z axis.
- Deselect record to stop the edit and hit the play button to test the Manifold’s movement.
6. Sequence the Animation Clips with Timeline
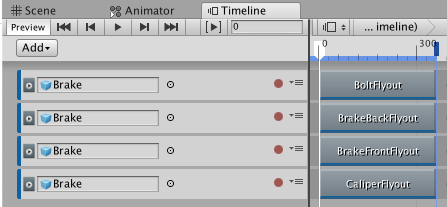
Create a Timeline and drag the four animations you created above into the Timeline editor. Drag each clip to the initial timestamp — we want all to play at the same time.
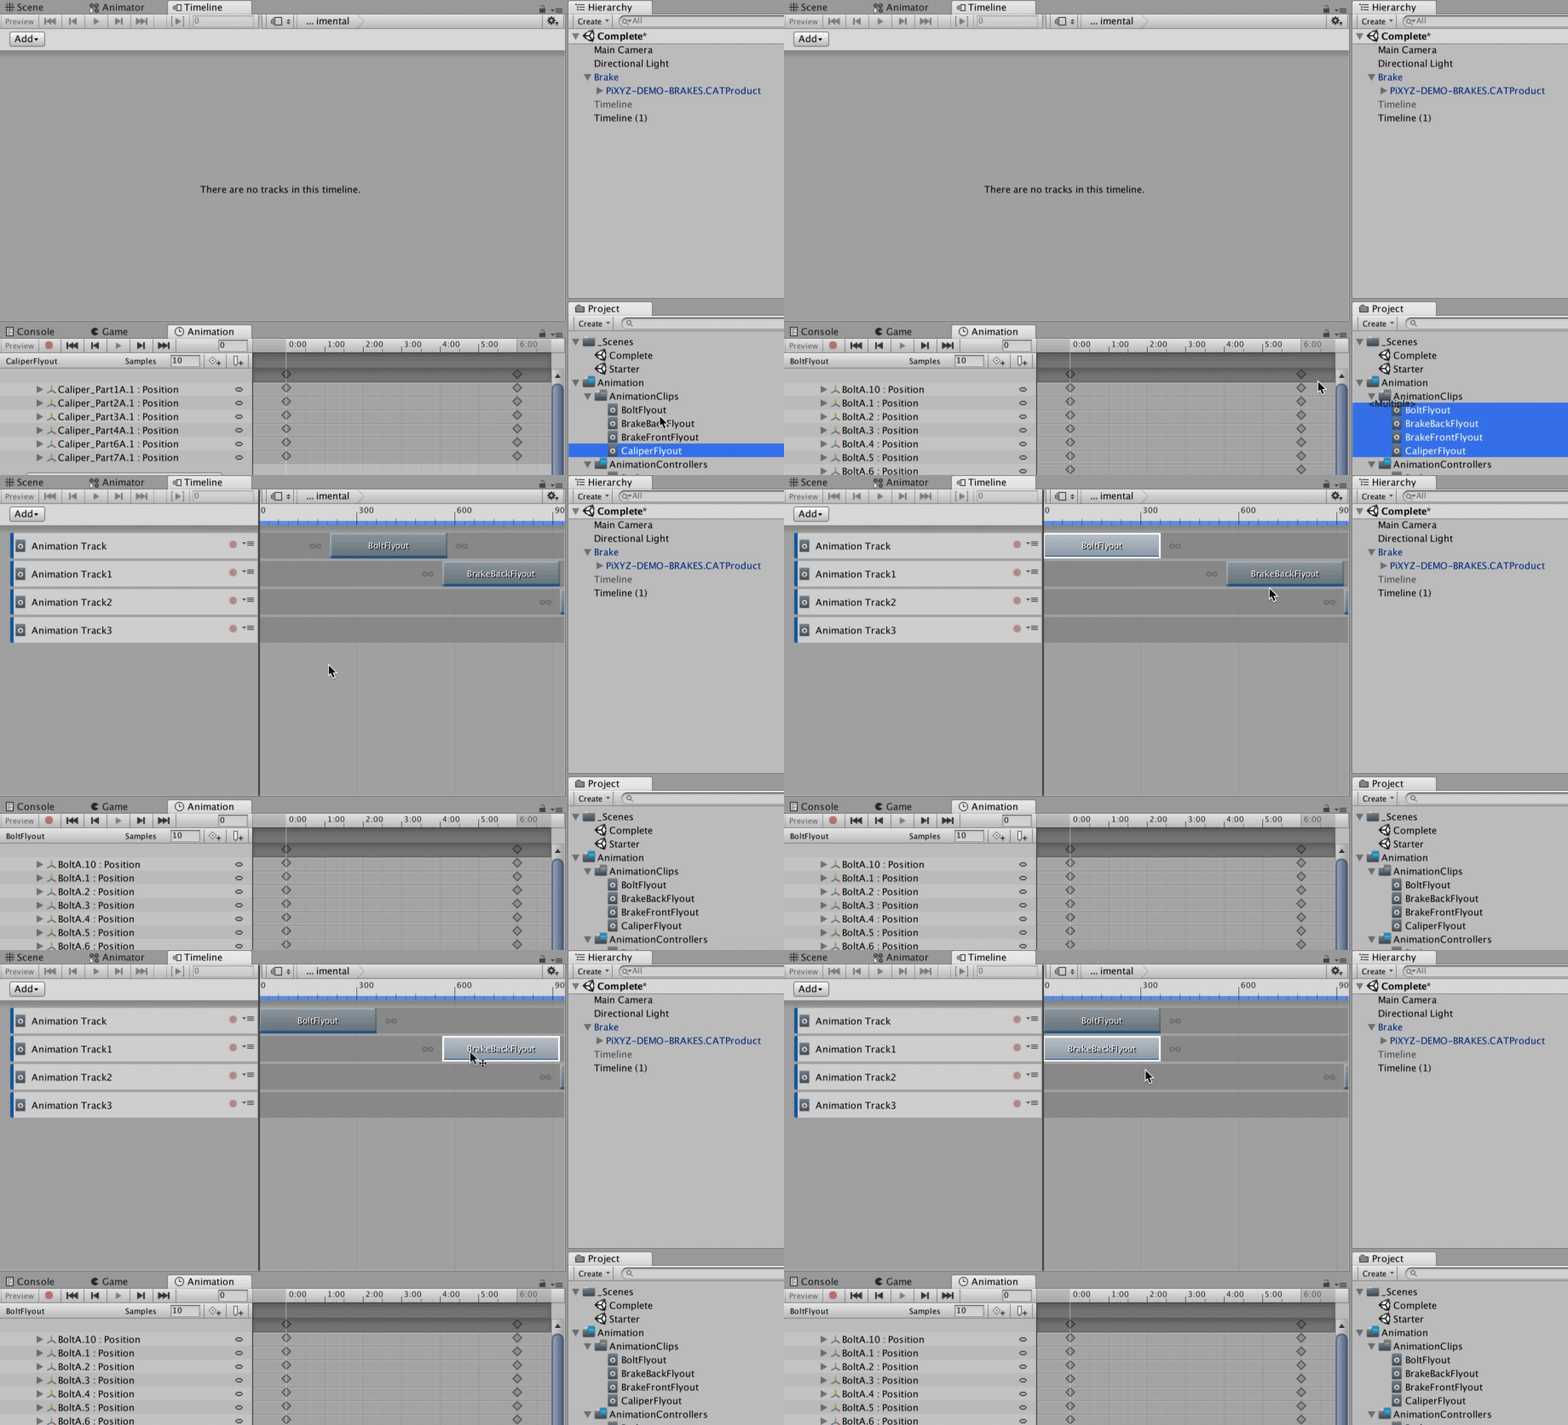
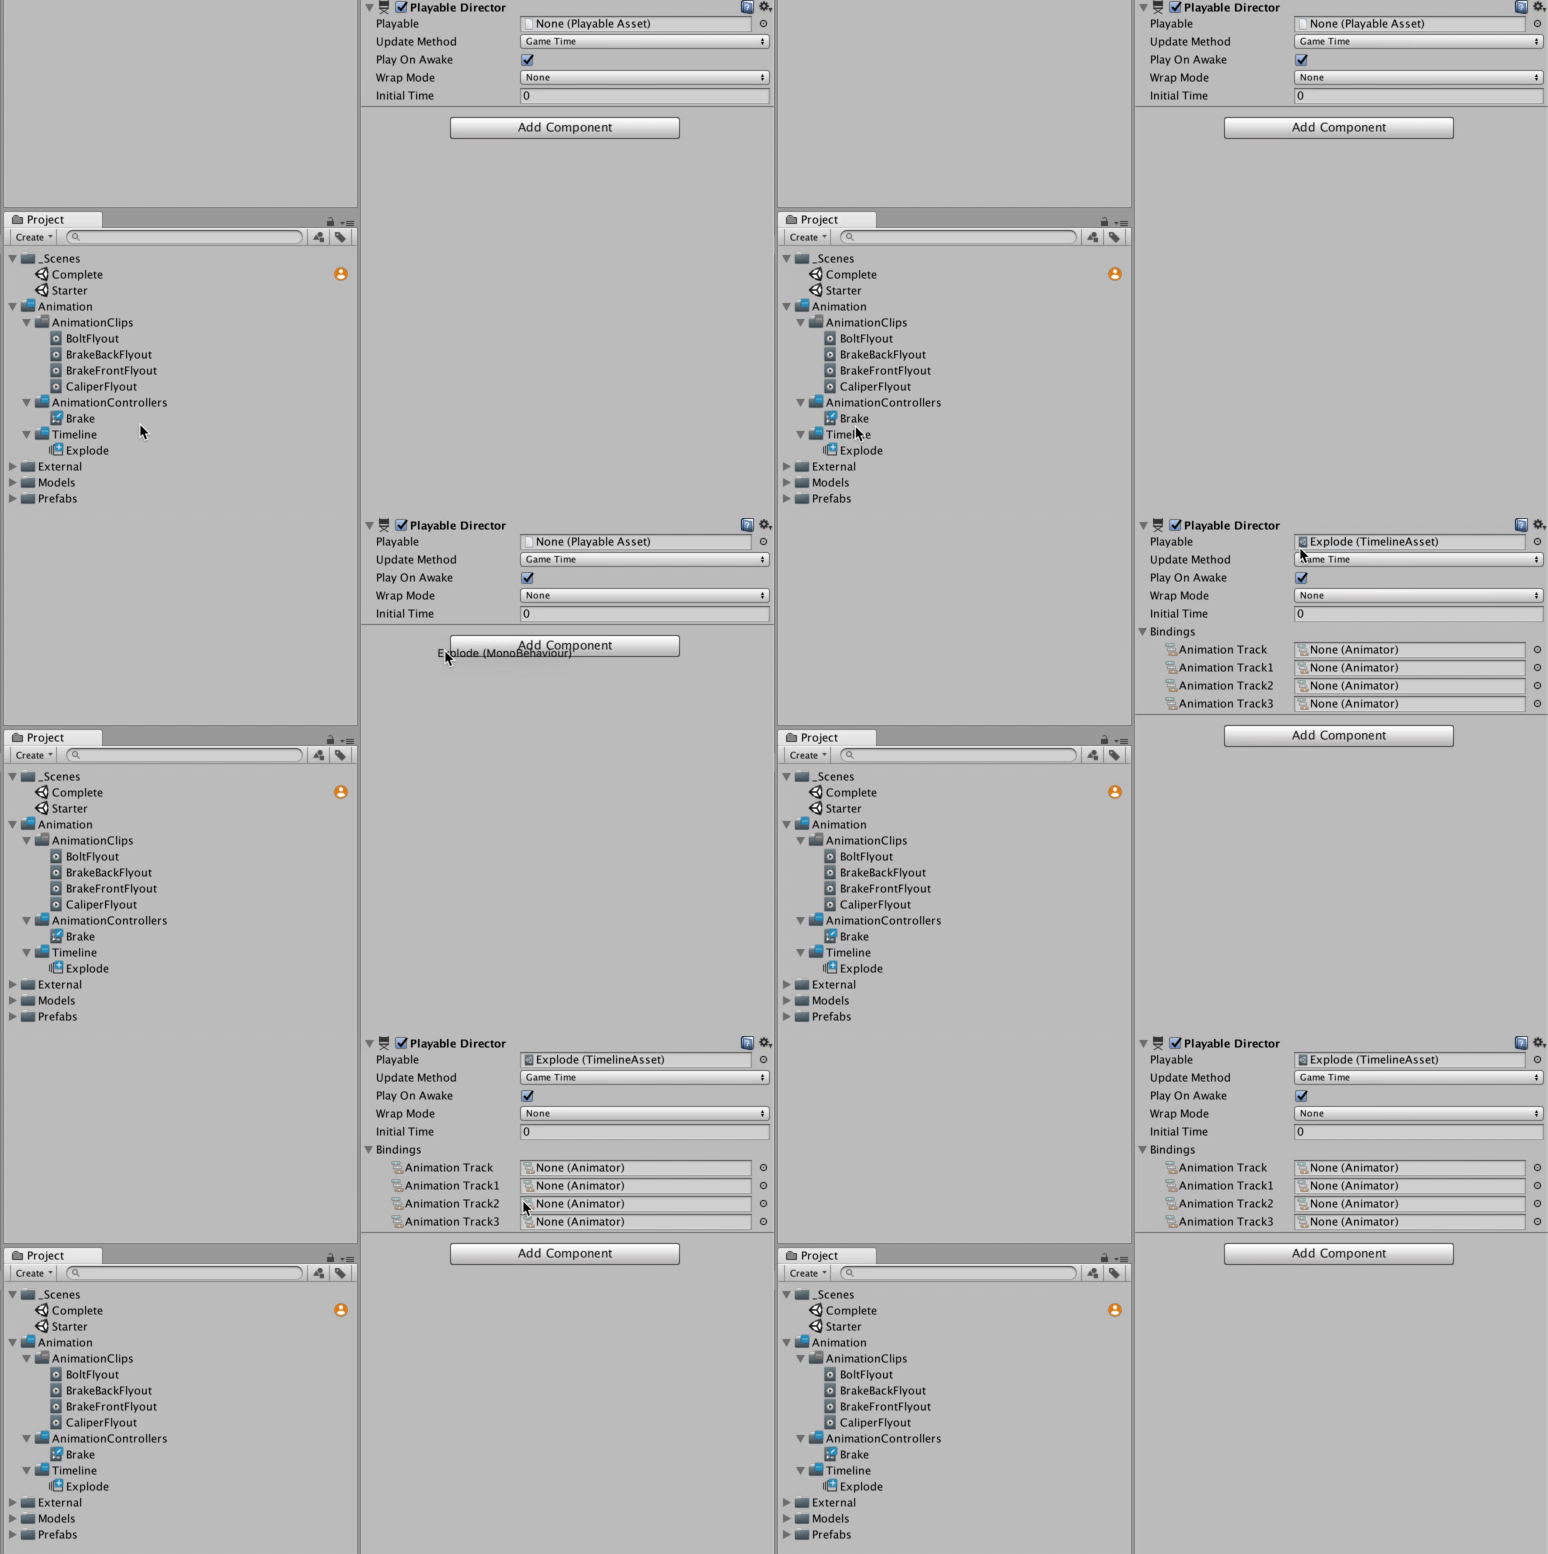
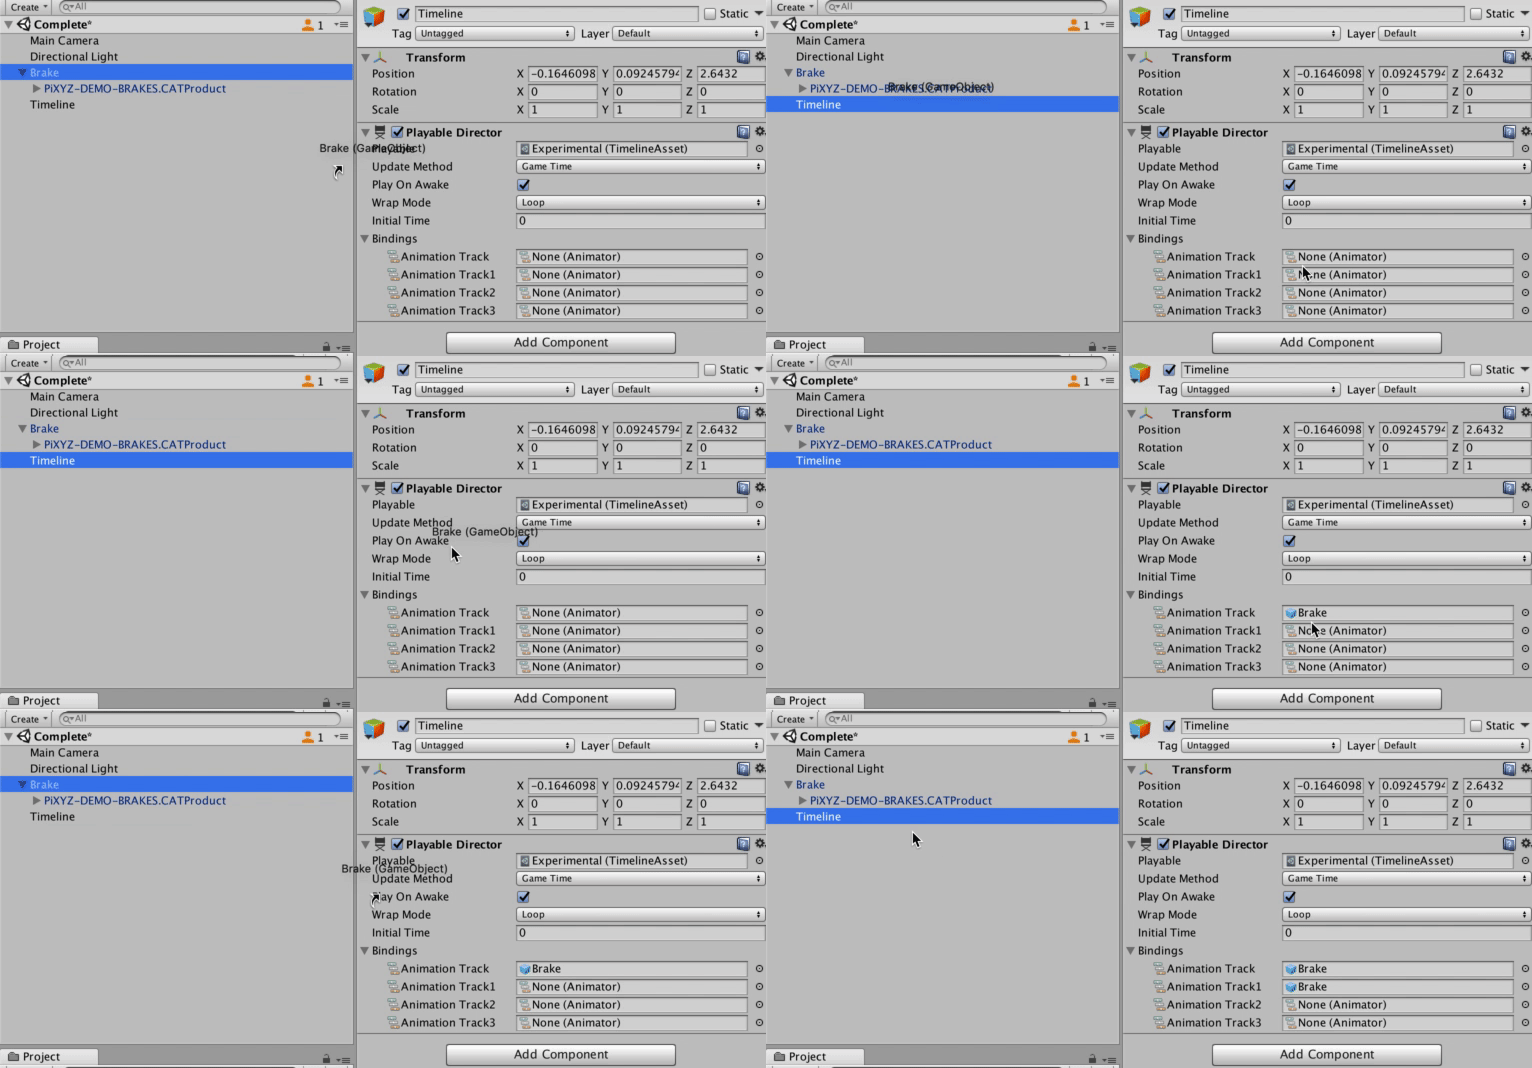
(Hint: The Timeline is responsible for executing Animations in a sequence, but needs an Animator to bind to as well.)
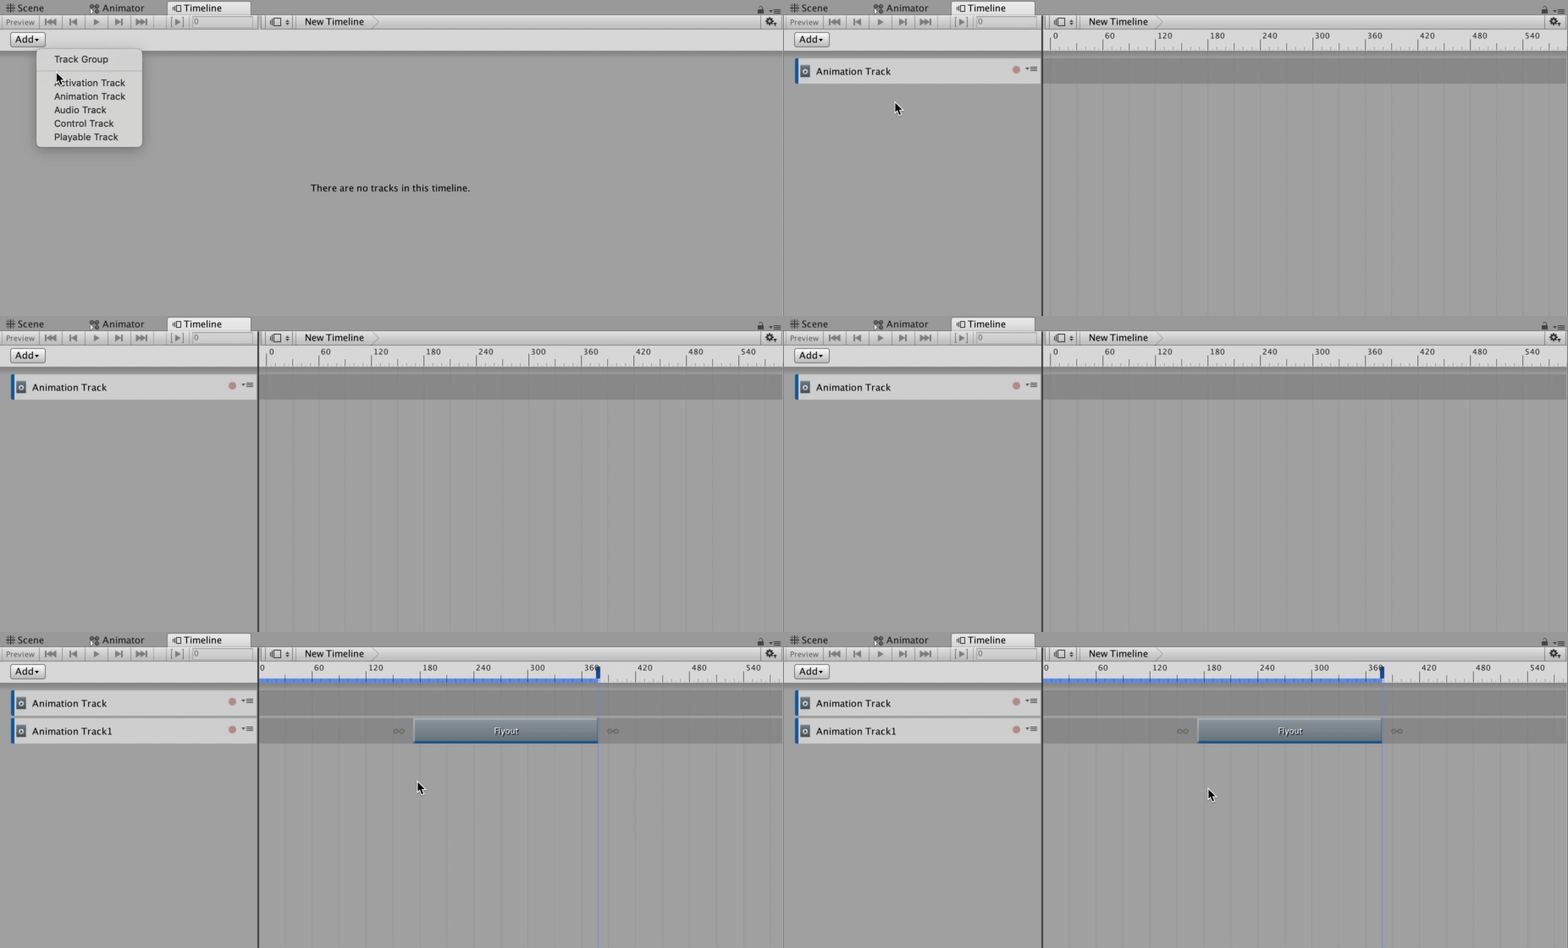
1. Create a new Timeline Asset and name it Explode.
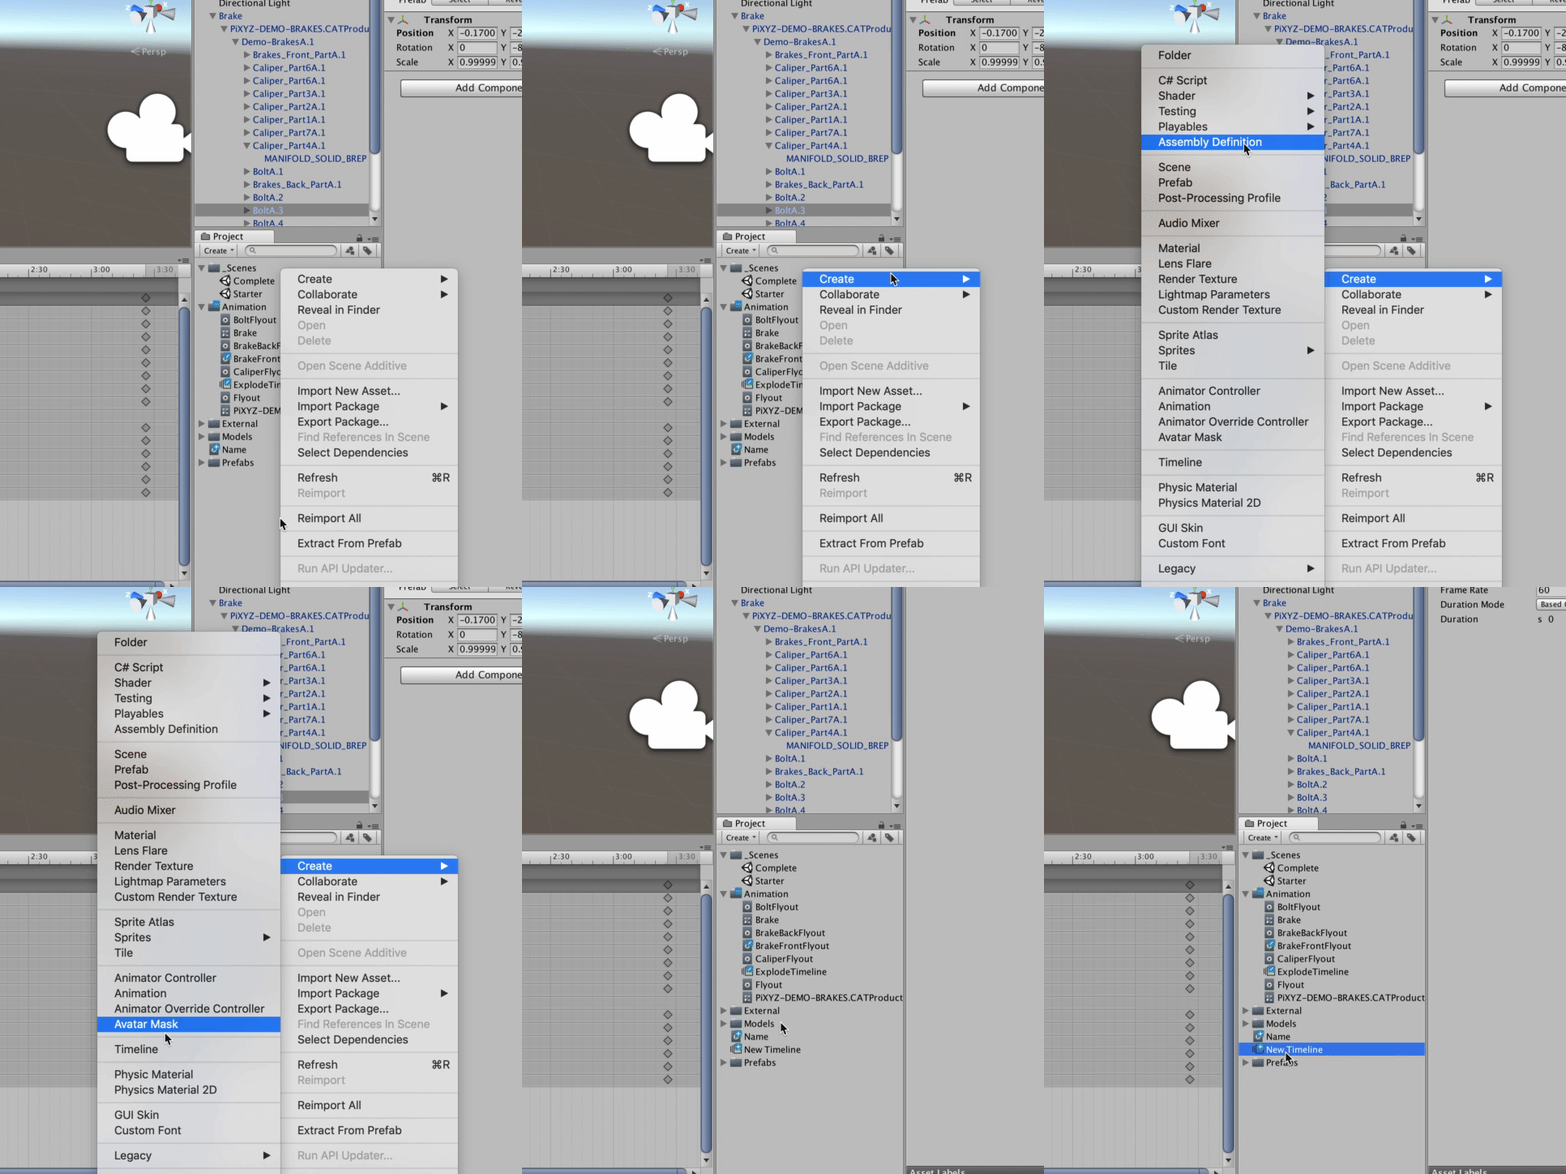
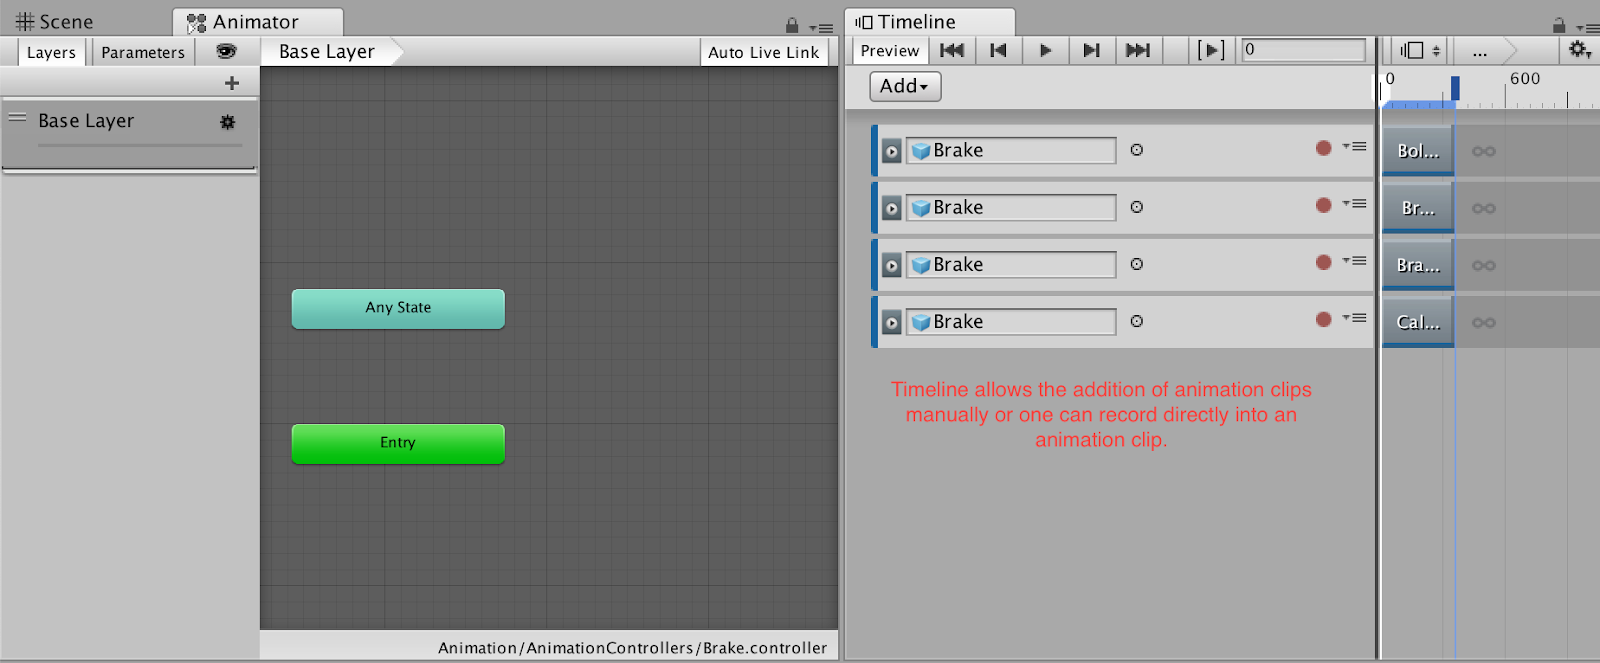
2. Double-click it to open the Timeline Asset in the Timeline window and create or drag the four Animation Clips you created from the Project window to the Timeline.
3. By the time you’ve finished adjusting the clips, your Timeline will look like this.
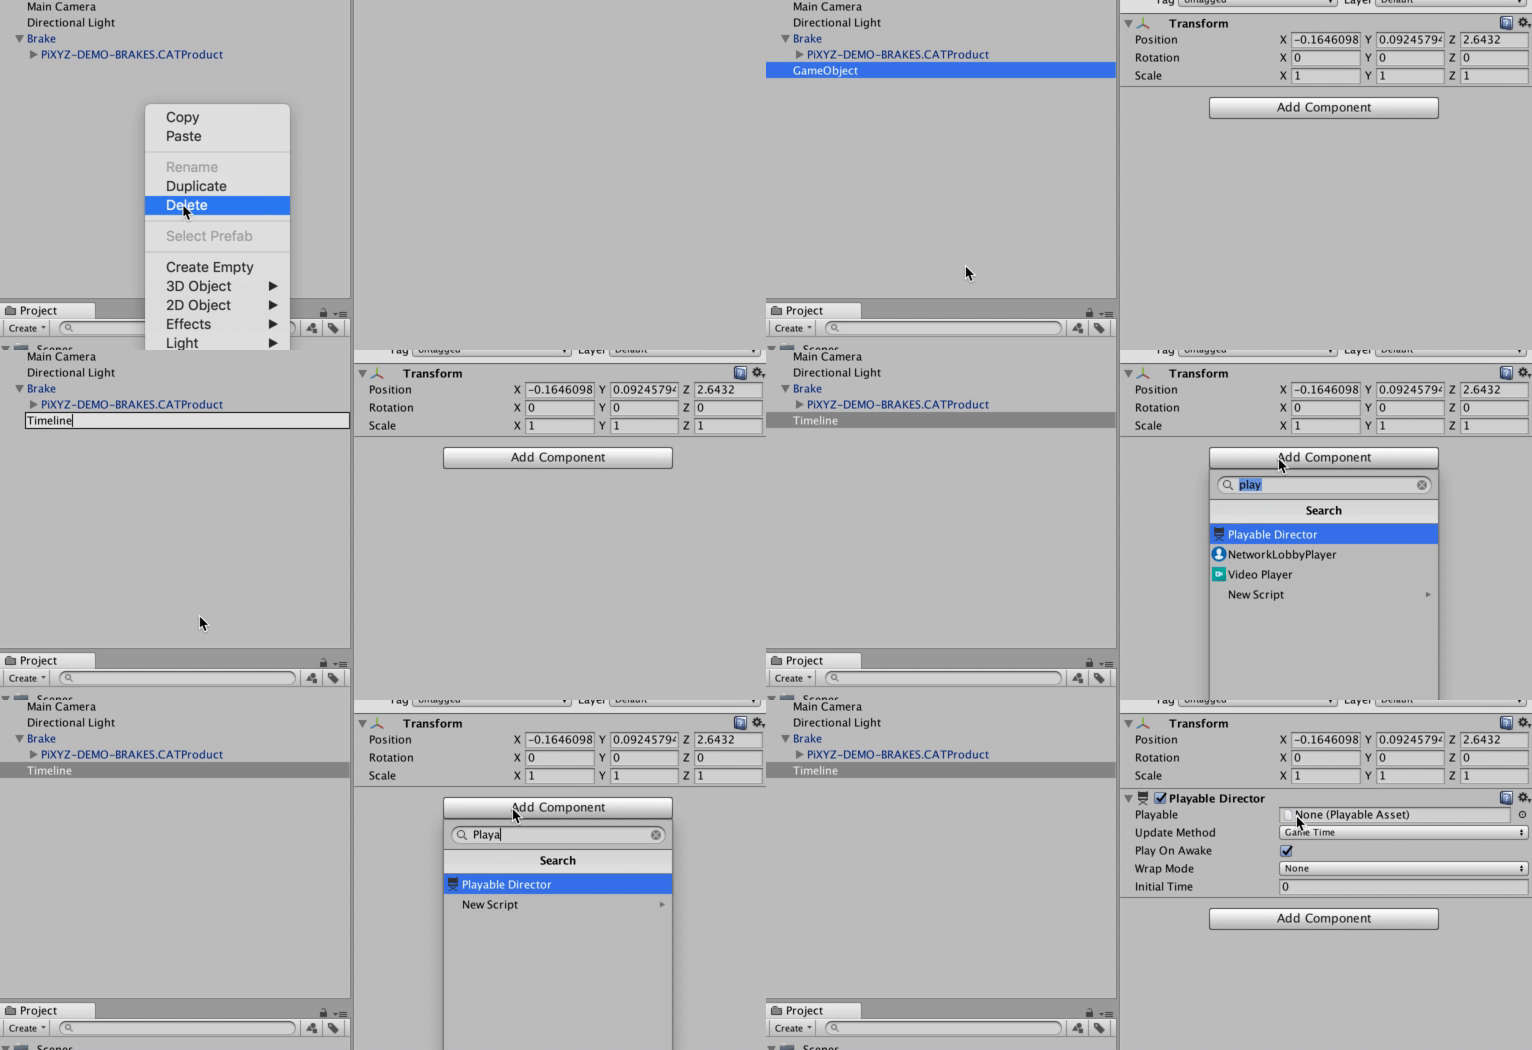
4. Create a Playable Director on an empty GameObject (called Timeline) and drag it into the Timeline Asset.
--------------------
Tip — Create Your Animation Clips Directly in Timeline
Create your Animation Clips directly in Timeline by adding a new GameObject, hitting the record button, and adjusting the object's Position, Rotation, or Scale (depending on your intention). This saves you the step of making them and then adding them to the Timeline.
Amazing! Now that you've built your own Timeline creation, feel free to explore more animations.
Tip — Un-looping your Animations
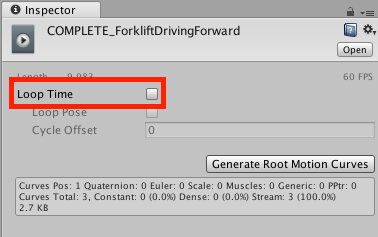
Having trouble with looping animations? Locate the animation in your Project window, select it to show the Animation Clip Inspector, then ensure Loop Time is unchecked.
7. Key Takeaways
You've now completed the animation challenge and have animated a brake model, providing users with a clearer view of the brake's many parts, which is helpful when engineering, designing, or reviewing a product.
By completing this challenge, you’re now able to:
- Create multiple Animation Clips using the Animation window and Keyframes
- Sequence multiple animations at once using Timeline to increase the amount of activity in a Scene.