
Cinemachine Cameras
Tutorial
Beginner
+10XP
20m
(217)
Unity Technologies
Cinemachine lets you to craft shots, build camera rigs, and dream up camera behaviors without any programming. In this tutorial, you'll add a Cinemachine Camera and Brain to your project.
Languages available:
1. Introduction
This tutorial has been verified using Unity 2019 LTS and Cinemachine v2.3.4.
Cinemachine allows users to craft shots, build camera rigs, tune and save properties in play mode and dream up camera behaviors without any programming. It allows them to easily make tracking shots of AI driven objects or any other performer with variable behavior, all with screen-based composition controls. It lets them build large and sophisticated camera setups very quickly and easily.
2. Adding Cinemachine
1. In the Menu Bar, select Windows > Package Manager
2. Wait for all packages to load and then choose Cinemachine from the list, then click Install
3. Adding a Cinemachine Brain
The Cinemachine Brain is the component that acts as the main hub for all of the other Cinemachine components. It takes control of the main camera and allows users to create and control a number of different Virtual Cameras.
1. Select the Main Camera in the Scene
2. In the Inspector, press Add Component
3. Choose Cinemachine > Cinemachine Brain (Figure 01).
4. Adding a Cinemachine Virtual Camera
Virtual Cameras are the key to creating certain camera behaviors and shots using Timeline. The behavior of the Virtual Camera, when viewed through the Game view, can be adjusted using the Dead Zone and Soft Zone bounds. These bounds can also be adjusted using the Virtual Camera parameters.
1. In the Menu Bar, select Cinemachine > Create Virtual Camera
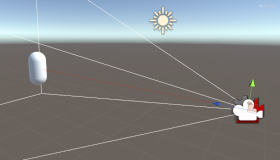
2. Select the Virtual Camera and assign a GameObject to the Follow and LookAt parameters (Figure 02)
3. Select the Game view and adjust the Dead Zone bounds
4. Adjust the Soft Zone bounds (Figure 03).
5. Modify the Lens parameters (Figure 04).
6. Adjust the Damping parameters (Figure 05).
By adjusting the Dead Zone and Soft Zone, the camera will not track the target until the target begins to go outside of the Dead Zone. The camera will track the target inside the Soft Zone depending on the dampening parameters that are set up on the camera. Dampening determines how loose or rigid the camera is when tracking the target.
5. Conclusion
Cinemachine adds intelligence to your cameras, making them active participants in your scene. Whether you need automatic entity tracking and scene composition, to simulate cameras from handheld shaky cams to Hollywood-style rigs, or to intelligently cut and blend between multiple cameras, Cinemachine puts the power in your hands without the need for code.