
Cinemachine Dolly Cart and Track
Tutorial
Beginner
+10XP
30m
(365)
Unity Technologies
In cinematography, the term “tracking shot” refers to a scene where the camera moves alongside whatever it’s filming. To get the shot, the camera is mounted on a dolly that’s then placed on a track. As the scene is being filmed, the camera moves along the track.
In this tutorial, you'll set up a Cinemachine camera to make a tracking shot.
Languages available:
1. Introduction
If you are using Unity 2019.1, click here. If you are using Unity 2018.4 or lower, click here.
In cinematography, the term “tracking shot” refers to a Scene where the camera moves alongside whatever it’s filming. To get the shot, the camera is mounted on a dolly that’s then placed on a track. As the Scene is being filmed, the camera moves along the track.
The ability to create a tracking shot using a dolly cart and track is one of the options in Unity’s Cinemachine package. Cinemachine is a unified automatic camera system that can be used for in-game cameras, cinematics and cutscenes, film pre-visualization, and virtual cinematography eSports solutions.
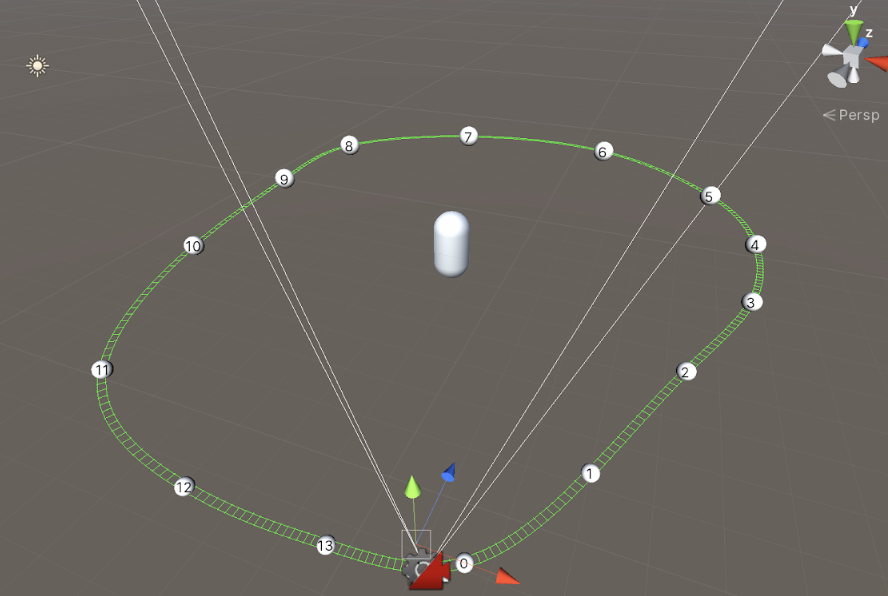
Cinemachine’s Track and Dolly feature allows you to track targets in scenes by setting path waypoints that virtual cameras move between. (Figure 01)
Like other Cinemachine camera features, you create a virtual camera to provide a control for the Scene’s main cameras. Instead of moving the virtual camera directly, you assign it to follow a dolly cart, which follows a waypoint-based track around your Scene.
You can keyframe the camera down the track, or you can use the Cinemachine Auto Dolly feature, which keeps the camera a set distance from the subject no matter what the subject does. This can be very useful in pre-production, allowing you to set up the shot and then modify the subject’s performance, or in games where you want to follow objects at variable speeds.
2. Adding Cinemachine
- In the Menu Bar, go to Windows > Package Manager.
- Wait for all the packages to load and select Cinemachine from the list, then click Install.
3. Adding a Cinemachine Brain
The Cinemachine Brain acts as the hub for all other Cinemachine components. It takes control of the main camera and allows users to create and control a number of different Virtual Cameras.
- Select the Main Camera in the Scene.
- In the Inspector, click Add Component.
- Select Cinemachine > Cinemachine Brain. (Figure 02)
4. Adding a Cinemachine Virtual Camera
Virtual Cameras are the key to creating certain camera behaviors and camera shots using Timeline. A Virtual Camera’s behavior, when viewed through the Game view, can be adjusted using the Dead Zone and Soft Zone bounds. If the target enters the Dead Zone, the camera will not rotate in this range. In the Soft Zone, the camera will gradually re-align to the target. These bounds can be adjusted using the Virtual Camera parameters.
- In the Menu Bar, select Cinemachine > Create Virtual Camera.
- Select the Virtual Camera and assign a GameObject to the LookAt parameter.
(Figure 03)
- Select the Game view and adjust the Dead Zone bounds.
- Adjust the Soft Zone bounds. (Figure 04)
- Modify the Lens parameters.
- Adjust the Damping parameters.
By adjusting the Dead Zone and Soft Zone, the camera will not track the target until the target begins to go outside the Dead Zone. The camera will track the target inside the Soft Zone depending on the dampening parameters set up on the camera. Dampening determines how loose or rigid the camera is when tracking the target.
5. Adding a Cinemachine Dolly Cart and Track
The Virtual Camera can be assigned to follow the cart, and a cart can be assigned to follow a track. You can create a track with as many waypoints as necessary, and provide the Vector 3 position of each point.
- From the Cinemachine dropdown, select Create Dolly Track and Cart.
- Select the Virtual Camera and assign the Dolly Cart to the Follow parameter. (Figure 05)
- Select the Dolly Cart in the Hierarchy window and make sure the Dolly Track is assigned to the Path parameter.
- Adjust the Dolly Cart’s parameters in the Update Method, Speed, and Position on the track. (Figure 06)
- Select the Dolly Track in the Hierarchy window.
- Click the + button in the Waypoints field to add as many new Waypoints as you need.
- Adjust the Waypoint values to set their Vector 3 location and Roll value for angle. (Figure 07)
- You can set the track’s smoothness with Resolution.
- Checking Looped will loop the last Waypoint back to the first Waypoint position.
With Cinemachine and the Dolly Track and Cart feature, you can quickly and easily create an immersive cinematic experience for your audience. You can create multiple tracks and assign the Virtual Camera to follow different tracks via Timeline.