
Collaborate with Unity Version Control
Tutorial
intermediate
+10XP
20m
(297)
Unity Technologies
The real power of Unity Version Control is the ability to collaborate on a Unity project while keeping your changes organized and your files backed up. In this tutorial, you’ll learn how to invite and work with collaborators through Unity Version Control.
Languages available:
1. Overview
A source control tool such as Unity Version Control is a must for Unity creators who work together on one project. Next, you’ll learn the basics of collaborating through Unity Version Control, and that is just the beginning! Unity Version Control is a robust source control application with many features. At the end of this tutorial, you’ll find resources for learning more.
2. Before you begin
It is necessary to complete the previous tutorials in this learning experience before continuing with this tutorial. You may also have completed the following tasks:
- Download and install the Unity Version Control Cloud Edition client application.
- Create a Unity Version Control account.
- Create a new workspace and repository.
- Check in a simple Unity project into the repository.
- Make a few additional changesets to the repository.
3. Invite a member to your organization
Follow these steps to invite a collaborator to become a member of your organization and give them access to your repositories there:
1. In the Unity Version Control window of the Unity Editor, locate the Settings (gear) button. Select it, and then select Invite Members to Workspace. A browser window will open to a page on plasticscm.com. If prompted, sign in, preferably with your Unity ID. The Users & Groups page will open.
2. In your browser, select Add new user.
3. Enter the email address of your collaborator. It will be simpler for them to join if you use the email address associated with their Unity ID, if they have one.
4. Don’t enable the Administrator option for this tutorial.
5. Select Save and your collaborator will receive an email invitation like the one below.
4. Join a project as a collaborator
This step is optional, if you happen to have a friend or coworker with whom you’d like to share this repository and collaborate. It is not necessary to have a collaborator to complete this learning experience.
Your collaborator does not have to create an organization and a repository as you did in the previous tutorial — they only need to create a workspace by downloading the Unity project you’ve already created.
Note: For best results, all collaborators should use the same Unity version.
Follow these steps, or have your collaborator follow them, upon receiving an email invitation to join the organization:
1. Make note of the name of the organization in the email, for example chrisjones@cloud.
2. Select Install Cloud Edition in the email. A browser window will open.
3. Select the Download button for the Cloud Edition (not the Try now button).
4. Run the installer and accept all the default settings to complete the installation.
5. Open the Unity Version Control application. If it doesn’t open to the home screen, navigate to Home.
Note: Unity Version Control offers both a legacy user interface and a new one. The images below represent the new user interface.
6. On the left, select the repository of the Unity project you want to collaborate on, if there is more than one.
7. Select Download repository. A popup window will appear.
8. If you prefer, you may change the Name of the new workspace, which will be the same as the name of the Unity project folder on your local disk. You may also select Browse to change the location of the folder on your disk.
9. Select Download.
You have now downloaded a new Unity project, but since you did not create it in Unity, it is not listed in your Unity Hub.
10. Add your new project to the Unity Hub. For best results, use the same Unity version as the project.
11. Open the project from the Unity Hub.
12. In the Unity Editor, make sure you are logged in, using your regular Unity ID.
13. With that project open in the Unity Editor, go to the main toolbar and select the Unity Version Control button, or go to the main menu and select Windows > Unity Version Control.
Note: You might have to open a different scene to view the project.
You and your collaborator may both follow the rest of this tutorial.
5. Manage changesets on the Branch Explorer
The Branch Explorer in the Unity Version Control client app provides a graphical view of all changesets, whether they were made by you or your collaborator(s). To view it, right-click the Branches button on the Unity Version Control toolbar, and select Branch Explorer. The Branch Explorer will come up in a new window.
Note: In the new Unity Version Control user interface, you might need to select your repository and the Branch Explorer option from the left menu.
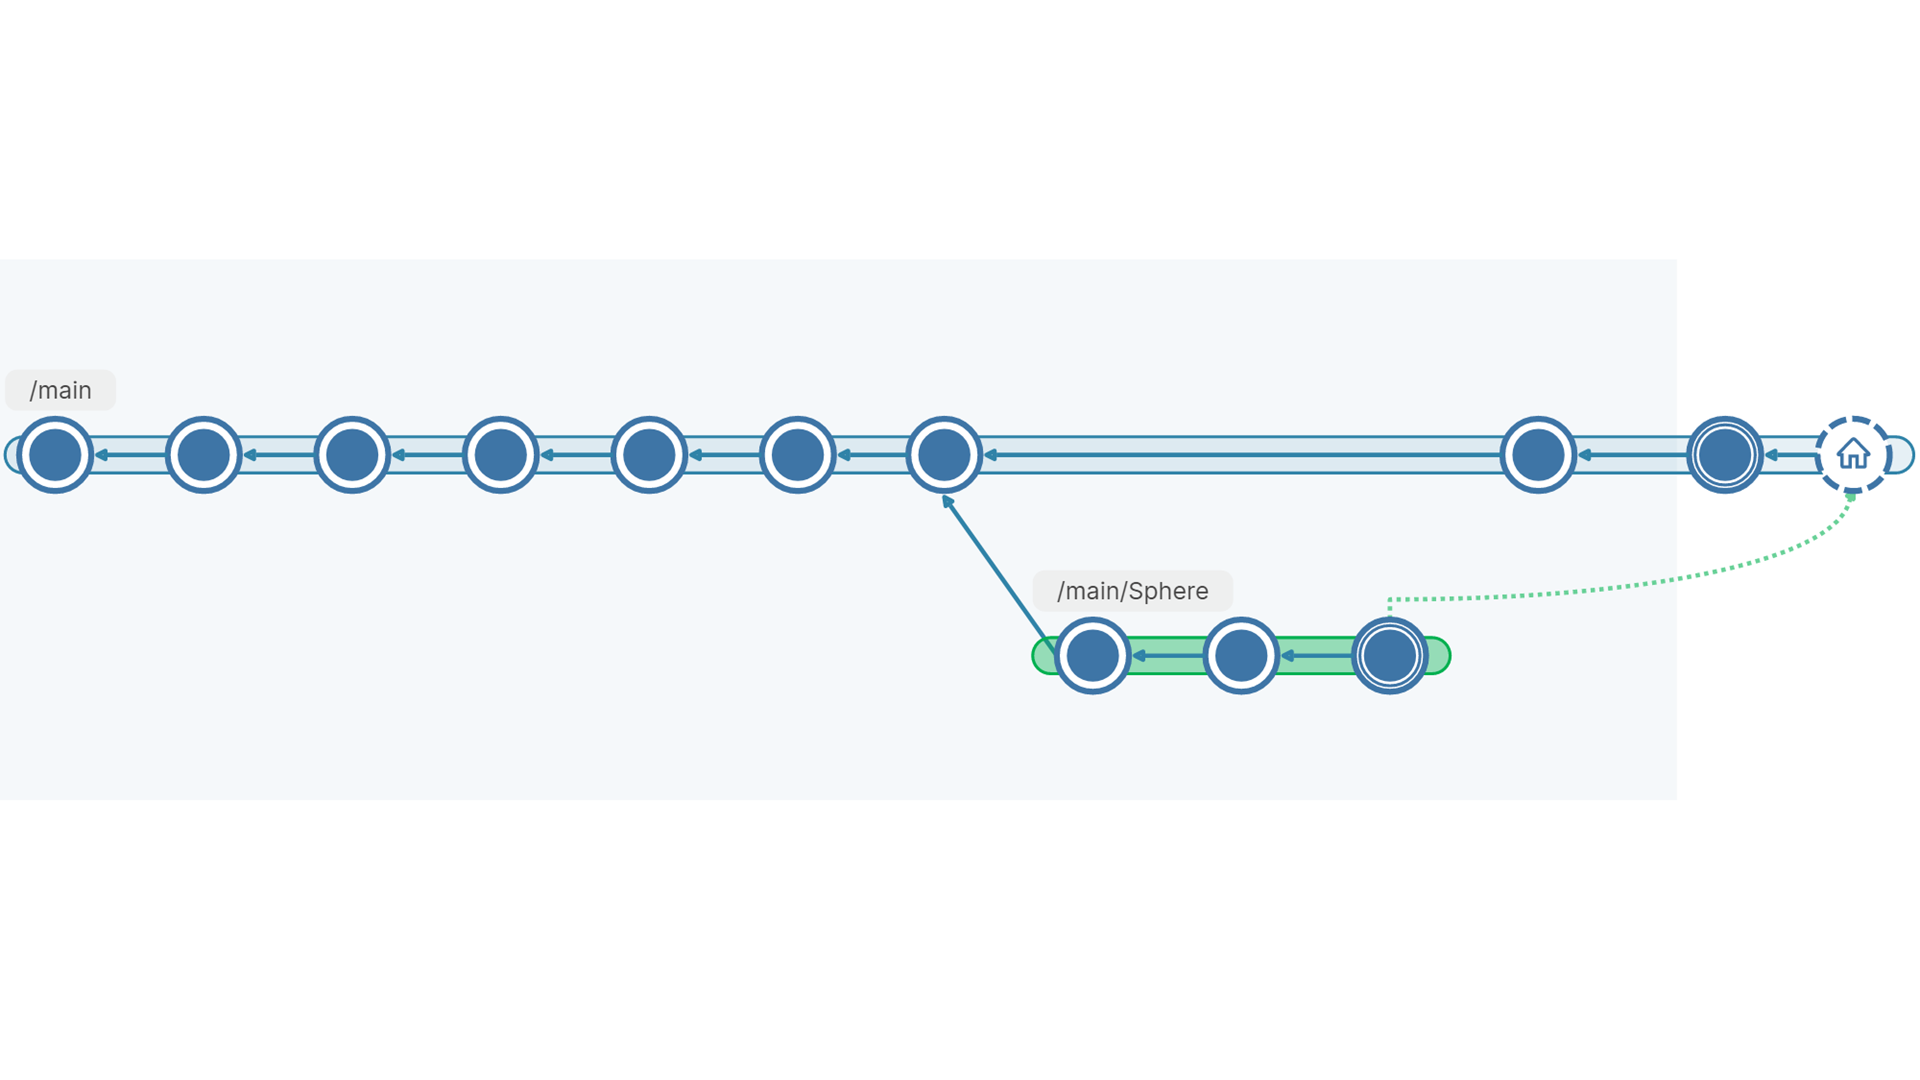
Each node in the Branch Explorer diagram represents a changeset. Hover over each node for details. Right now, it is just a single row, but later in this tutorial, it will have branches.
For now, the interesting thing you can see in the Branch Explorer is the home icon, which indicates which changeset is currently downloaded to your workspace.
Important: Whenever you return to the Branch Explorer window, be sure to select the Refresh button to view any changes your collaborators make to the repository.
6. Get incoming changes from your collaborator
As you and your collaborator(s) work together, you will each make changes to the project, and then you’ll want to download each other’s changes at certain intervals. You’ll be able to see their changesets listed on the Changesets tab in the Unity Version Control window of the Unity Editor and on the Branch Explorer.
When others check in changesets on the same branch you are working on (you’ll learn about branches next), the files they have changed will be listed on the Incoming Changes tab. The Unity Version Control window’s tab is updated with an icon to alert you that there are updates to the repository.
You can then select the Update workspace button to accept the changes and advance your workspace to the most recent changeset.
Follow these steps for a demonstration of how to use the Incoming Changes tab:
1. If you have a real collaborator set up on your repository, have them check in a changeset. Then skip the next instruction.
2. If you don’t have a collaborator, in the Branch Explorer, right-click on a previous changeset node (before the rightmost one), and select Switch workspace to this changeset. The home icon will move to the changeset you selected.
For the purposes of this demonstration, pretend you were working here all along and a collaborator checked in the newer changeset.
3. On the Incoming Changes tab in the Unity Editor, you’ll now see some files listed. These are the files that are newer in the repository than they are in your workspace. These are the files that your (real or imaginary) collaborator has changed.
4. Select the Update workspace button to accept the changes and advance your workspace to the new changeset.
5. Any time you update your workspace using Unity Version Control, you’ll see one or more prompts in the Unity Editor to accept the changes and reload your scene. Select the options that will allow all changes.
Your scene should update to display the change.
6. Return to the Branch Explorer and refresh it. Your home icon will move to the newer changeset because you have now downloaded those changes to your workspace.
Managing changes: a review
Now that you’ve used the first two tabs in the Unity Version Control window, here’s a review of what they show you and how to use them:
- The Pending Changes tab lists changes in your workspace, on your current branch, that are not yet uploaded to your repository. It allows you to update the repository (check in a new changeset) to match your workspace.
- The Incoming Changes tab lists changes that have been made to the repository, on your current branch, that are not yet downloaded to your workspace. It allows you to update your workspace to match the repository.
7. Review a previous changeset
At any time, you may update your workspace to view any changeset using the Switch workspace to changeset option. For example, if you had a blue chair in your scene and you replaced it with a green one, you can quickly switch back to the previous changeset to take another look at the blue chair, and switch back again.
Follow these steps to examine the Switch workspace to changeset feature:
1. Go to the Changesets tab, select any previous changeset, and right-click to select Switch workspace to this changeset. You can also do this by right-clicking a changeset node in the Branch Explorer.
2. Next, open the Incoming Changes tab. This is a list of the changes in the more recent changeset(s).
3. Select the Update workspace button to accept all these changes and restore your workspace to the most recent changeset.
You can use this feature to switch back to any changeset, even changesets in other branches. This technique is useful for viewing work at any point in the development of the project.
8. More things to try
This learning experience is just enough to get your started with Plastic SCM. There are many more features to explore!
Plastic SCM in the Unity Editor provides a simplified workflow called Transparent SCM. Read more about the transparent workflow in the Plastic SCM documentation.
The full Plastic SCM client application provides more advanced features for any of your source control needs. To learn more, read a primer on Plastic SCM workflows in the client app and command line interface.
For advanced use of Plastic SCM, review all of their documentation on the Plastic SCM website.