Configuring Additional Post Processing Override Scenarios
Tutorial
intermediate
+10XP
10 mins
15
Unity Technologies

Global Post-Processing settings aren’t always the best for a Scene with a variety of lighting conditions. Perhaps the settings work great for an outdoor Scene but fall apart as soon as you enter a cave. In this case, you can override global Post-Processing settings by adding Post-Processing Volumes with their own settings. By strategically using these overrides, you can adjust the global settings of the Post-Processing modules.
Languages available:
1. Configuring Additional Post-Processing Override Scenarios
This tutorial has been verified using Unity 2019.4.12f1 LTS
Global Post-Processing settings aren’t always the best for a Scene with a variety of lighting conditions. Perhaps the settings work great for an outdoor Scene but fall apart as soon as you enter a cave. In this case, you can override global Post-Processing settings by adding Post-Processing Volumes with their own settings. By strategically using these overrides, you can adjust the global settings of the Post-Processing modules.
Being able to tweak, adjust, or add additional post-processing effects can be very useful. For example, decreasing the saturation value or increasing the exposure to lighten a dark interior are great ways to use these Post-Processing adjustments to enhance visibility in different lighting conditions.
2. Setting up the Volume Profile
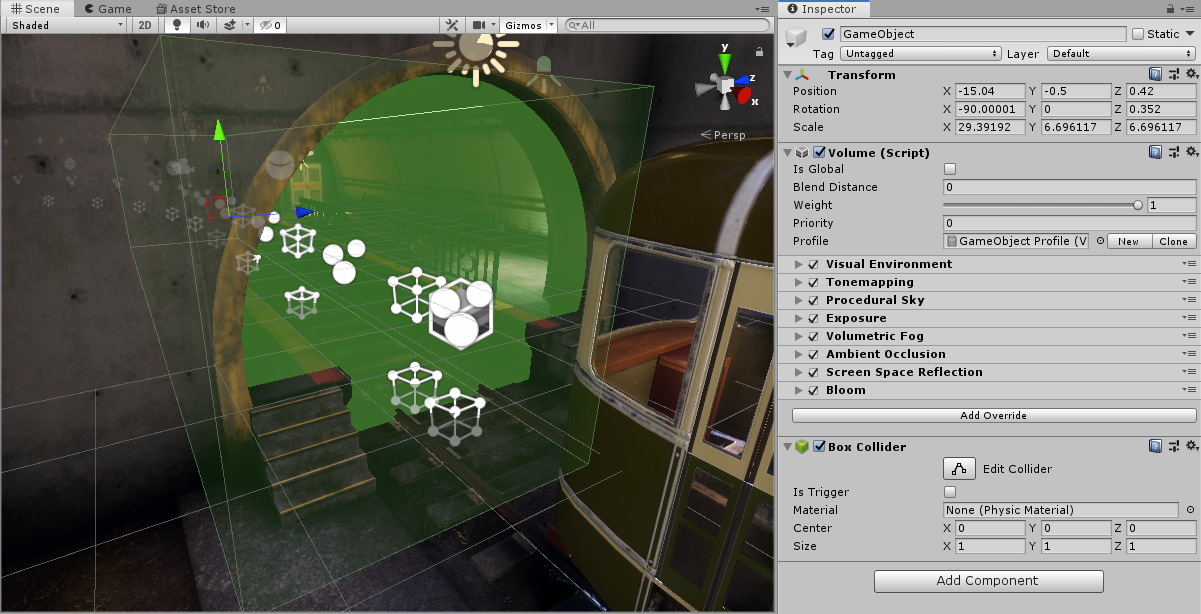
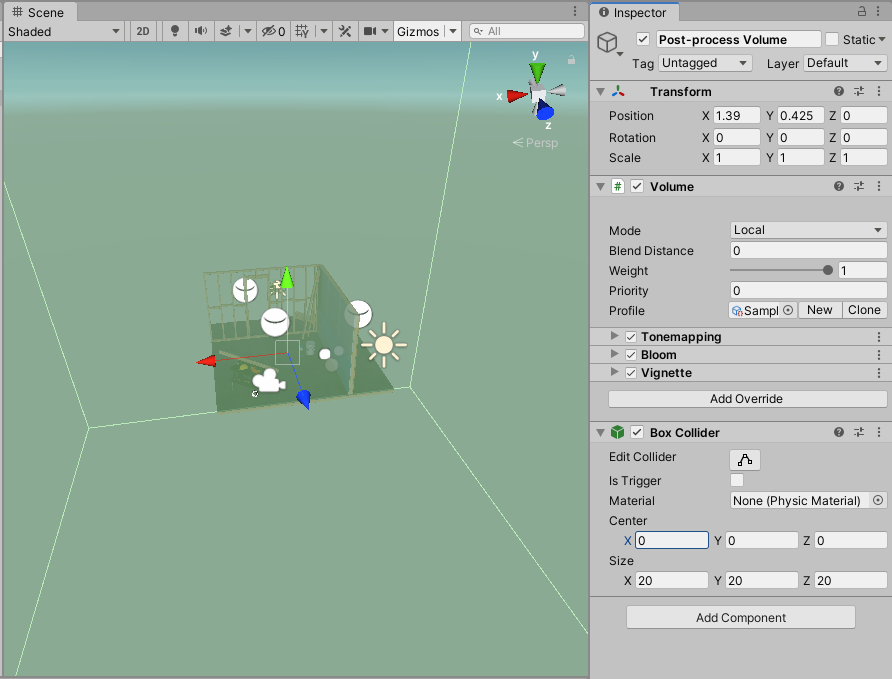
Creating a Volume profile will allow you to configure post-processing effects such as Bloom, Film Grain, Lens Distortion, and more. Use the recommended component settings shown in Figures 01 - 02 to make sure you’ve properly set up the Volume.
1. Add an empty GameObject to the Scene.
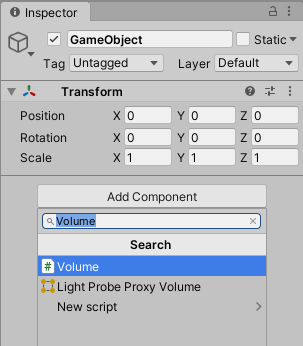
2. Click the GameObject and add a Volume component (Figure 01).

3. Next, add a Box Collider to the GameObject to define the area the Post-Processing Volume will override (Figure 02).

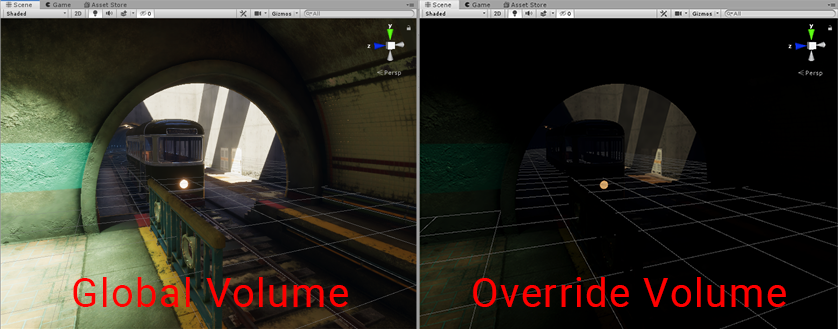
4. Add the overrides you need, such as thickening the Volumetric Fog, or changing the exposure or bloom. Figure 03 illustrates a significant change in the Post-Processing Volume.

You’ve now successfully added a second Post-Processing Volume to your Scene.
3. Conclusion
Adding Post-Processing Volumes to your Scene is useful to establish different post-processing effects depending on the location of the viewer. The ability to tweak and adjust your Volumes will help you create immersive experiences for your users. Experiment with the additional Post-Processing volumes and explore how minor changes can give more fidelity to your Scenes.