
Configuring Lightmaps
Tutorial
Beginner
+10XP
15m
(7)
Unity Technologies
Lightmapping is the process of pre-calculating the brightness of surfaces in the Scene. It stores the information it calculates in a chart or lightmap for later use. Lightmaps allow you to add global illumination, shadows, and ambient lighting at a relatively low computational cost. In this tutorial, we’ll get to know the lightmapping settings.
Languages available:
1. More Information on Lightmaps
The Unity Engine uses the Progressive Lightmapper system, which bakes lightmaps for your scene based on how your scene is set up. It takes into account all the meshes, materials, textures, and lights within the scene as it does its pass. When a lightmap is generated, GameObjects automatically use them as they are an integral part of the Unity rendering engine.
2. Getting to Know Lightmap Settings
Let’s get your Scene and lightmap set up:
1. From the Window dropdown at the top of the screen, select Rendering > Lighting Settings from the toolbar. This will open the Lighting Window (Figure 01).
2. Collapse all the windows and leave only the Lightmapping Settings drawer expanded.
3. Make sure the Lightmapper setting is set to Progressive CPU.
3. Progressive Settings
For now, we’re only concerned about the Lightmapping Settings in the Light Setting Window.
- Lightmapper: Use this to specify which internal lighting calculation to use when calculating the lightmaps in a scene. The options are Progressive CPU and Progressive GPU (Preview). The Enlighten option is also there, but has been depreciated and will be removed in the future so it is not recommended you use this.
- Prioritize View: Enable this to cause the Lightmapper to apply changes to the texels that are currently visible in the Scene View before applying changes to the out-of-view texels.
- Multiple Importance Sampling: Enabling this leads to a faster convergence when generating lightmaps, but leads to noisier lightmaps in certain low frequency environments.
- Direct Samples: This controls the number of samples shot from each texel. It ultimately controls the number of samples that Progressive Lightmapper uses for direct lighting calculations.
- Indirect Samples: This controls the number of samples shot from each texel. It ultimately controls the number of the samples that Progressive Lightmapper uses for indirect lighting calculations.
- Environment Samples: This controls the number of samples used for environment lighting calculations. Raising the value might improve quality, but it will also increase the time of the bake.
- Light Probe Sample Multiplier: This controls the amount of samples that are used for Light Probes. It is a multiplier of the values above. Using higher values can improve the quality of Light Probes while increasing the time of the bake.
- Bounces: This controls the number of indirect bounces to do when tracing paths. Usually for most scenes a value of 2 is enough.
- Filtering: Filtering is the way in which noise is removed from baked lightmaps. There are three methods to choose from here: None, Auto and Advanced.
- Lightmap Resolution: Use this to specify the number of texels per unit to use for lightmaps. The higher the number, the higher the quality, but this also increases the bake time. This setting refers to both Height and Width of the lightmap.
- Lightmap Padding: Use this to specify the separation between the different shapes in the baked lightmap.
- Lightmap Size: The size of the full lightmap texture.
- Compress Lightmaps: Toggle this to compress your lightmap. Compressed lightmaps use less disk space, but the compression process can introduce unwanted visual artifacting into the texture.
- Ambient Occlusion: Toggle this to adjust the additional settings of the ambient occlusion in your lightmap (Figure 02). The additional settings are: Max Distance, which controls how far the lighting system will cast rays. Indirect Contribution controls the brightness of the indirect light as seen in the final lightmap. Finally, Direct Contribution controls the brightness of the direct light.
- Directional Mode: This option allows you to store information about the dominant light at each point on a GameObject. It has two settings: Directional Unity will generate a second lightmap to store the dominant direction of incoming light. This allows for diffuse normal-mapped materials to work with the GI. Non-Directional Unity does not generate a second lightmap, but stores it within the same lightmap that is generated.
- Indirect Intensity: This controls the brightness of the indirect light that Unity stores in its Realtime and Baked lightmaps.
- Albedo Boost: This controls the amount of light Unity bounces between surfaces by intensifying the Albedo Materials.
- Lightmap Parameters: This allows you to select a few predefined settings for the Lightmap. The options you can select to set the default settings of the lightmap from Very Low, Low, Medium, and High defaults. This setting will also allow you to save your own custom settings into a new default option.
4. Setting up for Baking
No matter if you choose Progressive or Enlightened Lightmapper settings, you will understand how to properly set up your project for lightmap baking.
1. First, make sure any Mesh you want to apply a lightmap to has proper UVs for lightmapping. The easiest way to do this is to select your model to open the Model Import Settings and enable the Generate Lightmap UVs setting at the very bottom.
2. Within the Light Settings window, under the Lightmapping Settings, ensure your Lightmapper is set to use Progressive CPU or Progressive GPU if you want to try the preview.
3. Next, you want to set the resolution of the lightmaps. Adjust the Lightmap Resolution value to your preferred resolution.
4. Now you want to ensure the GameObjects / Terrain you wish to lightmap are able to receive the lightmap. Select the GameObject you wish to include and make sure Contribute Global Illumination is checked in the Mesh Renderer Component (Figure 03). This tells Unity that the GameObjects with this turned on don’t move or change. Unity will then add them to the lightmap when the lightmap is next generated.
5. Finally, you might want to adjust the settings of your Lights in the Light Explorer. To access this, go to the Window dropdown and select Rendering > Light Explorer (Figure 04).
6. Here, you can adjust which lights will be visible, their colors, intensities and so forth. This is for any fine-tuning you might need to make before baking the lightmap.
5. Baking the Lightmap
Now, with the set up done and the quick overview of the myriad settings, it’s time to bake our lightmap.
1. If the Light Settings window is not open, reopen it by opening the Window dropdown and selecting Rendering > Lighting Settings.
2. Ensure that you are within the Scene tab within the Lighting Window.
3. At the bottom of the window, click Generate Lighting. Depending on your setup, the Generate Lighting button might be greyed out and the Auto Generate tick box might be ticked. If it is ticked, your light maps will generate as you are working. To stop this, simply toggle off the tick box and the Generate Lighting button will become usable. (Figure 05).
4. Once that’s done, a Progress bar will appear in the Unity Editor status bar in the bottom-right corner (Figure 06).
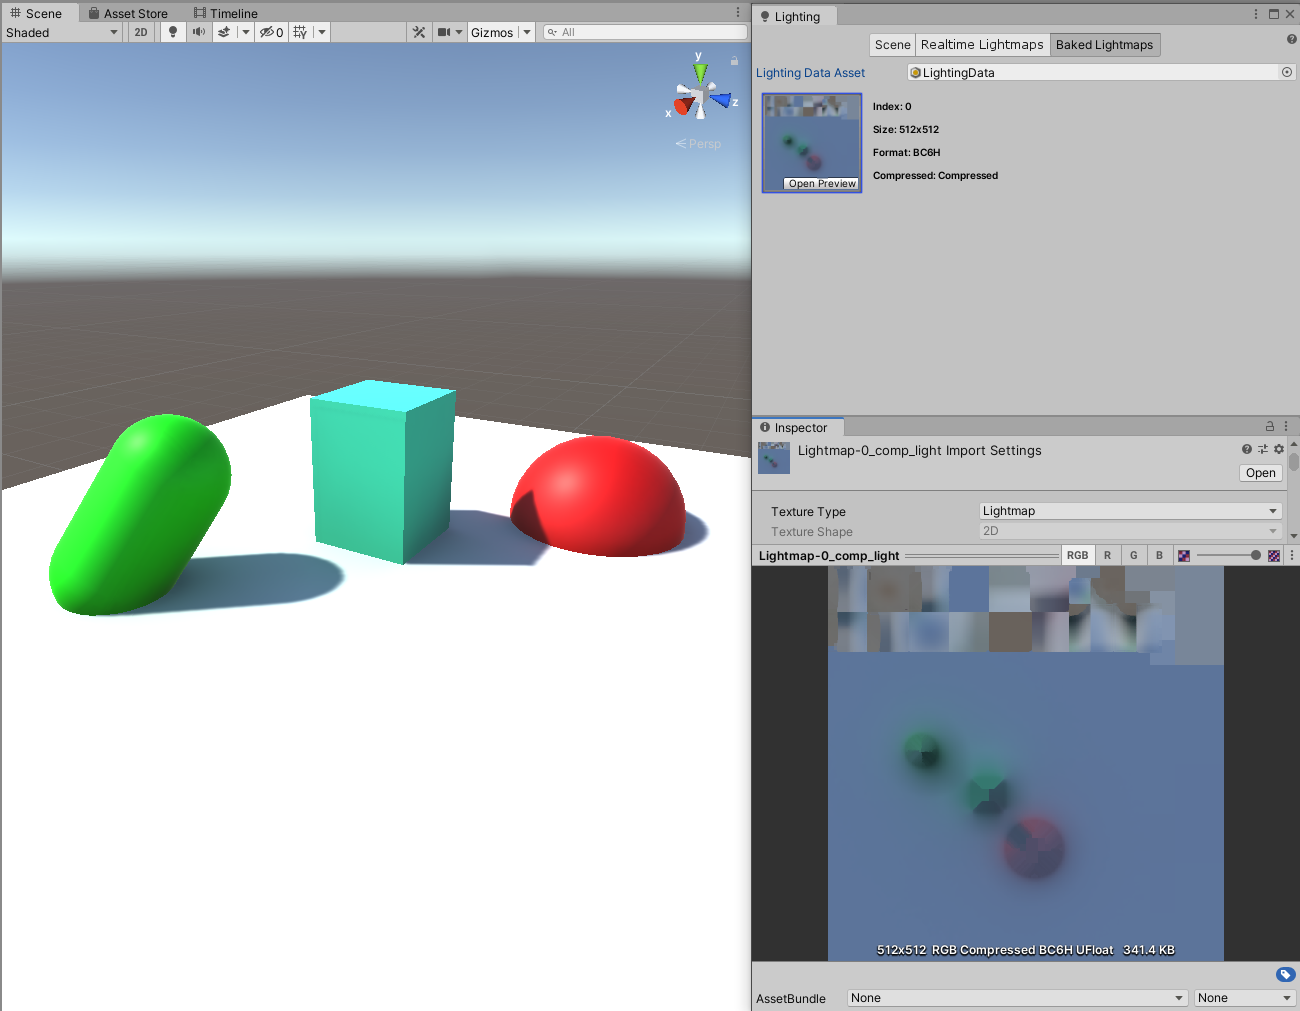
5. When the baking is complete, you will be able to see all the baked lightmaps in the Baked Lightmaps tab of the Lighting Window.
Once the Lightmaps have been generated, Unity will update the Scene view automatically so you can see the results and make any necessary adjustments.
6. Next Steps
Lightmaps provide a great benefit from scenes with many static light sources as it precomputes all the lighting and shading information and removes the cost from the runtime of the project. It can have potentially large savings with large complicated scenes with plenty of light sources.