
Configuring Planar Reflection Probes - 2019.4 LTS
Tutorial
intermediate
+0XP
15m
(14)
Unity Technologies
Planar Reflection Probes act as mirrors and give the user control over the accuracy of reflections in a Scene. They can also be used for special effects, such as magic mirrors. In this tutorial, we’ll explore Planar Reflection Probe settings and create a simple magic mirror using the default HDRP Scene.
Languages available:
1. Configuring Planar Reflection Probes
This tutorial has been verified using Unity 2019 LTS
Planar Reflection Probes act as mirrors and give the user control over the accuracy of reflections in a Scene. They can also be used for special effects, such as magic mirrors. In this tutorial, we’ll explore Planar Reflection Probe settings and create a simple magic mirror using the default HDRP Scene.
2. Setting the Scene
1. Create or load a project that uses the HDRP framework.
2. Create a folder named Prefabs.
3. In the default Scene, drag the Example Assets GameObject into Prefabs.
4. Create a new Scene and drag an instance of the Example Assets Prefab into the Scene.
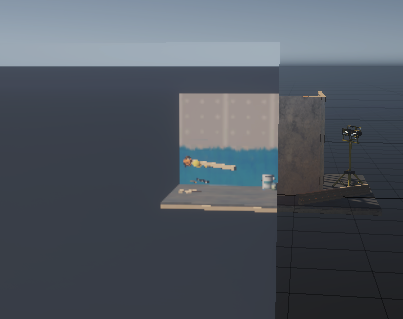
5. Move the Example Assets GameObject (included with the starting Scene in projects that use the HDRP template) to the origin, with no rotation, and scale it by 8 in all axes (Figure 01).
6. Move the Workshop Set’s local position to (0,0,0) with no local rotation or scaling (Figure 02).
7. Optionally, move the Props subobject (of Example Assets) into place (Figure 03).
8. Create an empty GameObject by selecting Create Empty from the GameObject drop-down. Name it PlanarReflectionProbe and zero out the position and rotation of its Transform.
9. Click Add Component at the bottom of the Inspector and add a Planar Reflection Probe component (Figure 04).
3. Configuring the Planar Reflection Probe
The Planar Reflection Probe Inspector is broken up into several sections: Realtime Mode, Projection Settings, Influence Volume, Capture Settings, and Custom Settings.
4. Realtime Mode
Realtime Mode (Figure 05) controls how often the Planar Reflection Probe refreshes its view.
Every Frame, the default setting, enables real-time updates. Depending on the needs of your project and the specifications of target hardware, this may not be necessary.
On Enable renders the Planar Reflection Probe when the GameObject is first enabled (or when the Scene starts if it’s already enabled).
On Demand allows the user to control the refresh of the Planar Reflection Probe with scripting. For example, if we have a variable of type ReflectionProbe called reflectionProbe that stores a reference to our Planar Reflection Probe, we’d call reflectionProbe.RenderProbe() whenever we wanted to refresh its view. This option is especially useful in situations where you only need to update the Reflection Probe in certain conditions, or at a lower refresh rate than realtime.
5. Projection Settings
Depending on the relative location of the Reflection Probe to the GameObject that’s reflecting it, displacement — a visual mismatch between the position of the reflective surface(s) and the origin of the reflected image — can occur. This can be corrected by using a Reflection Probe Proxy Volume. You can either use the Influence Volume as the Reflection Probe Proxy Volume or create a dedicated Reflection Probe Proxy Volume.
If you use a dedicated Reflection Probe Proxy Volume, its shape (if not set to Infinite) must match that of the Influence Volume.
1. Check the box marked Use Influence Volume as Proxy Volume (Figure 06).
6. Creating a Reflection Probe Proxy Volume
1. Create an empty GameObject by selecting Create Empty from the GameObject drop-down.
2. Using the Inspector, attach a Reflection Probe Proxy Volume component (Figure 07).
3. Use the Transform to adjust position and rotation (the offset/adjustment from the mirror’s position and rotation) and the Box Size or Sphere Radius settings to control the size of the Reflection Proxy Volume component (Figure 08).
4. We’ll leave this alone for now, but will use it later. For now, go back to the Planar Reflection Probe and check the box marked Use Influence Volume As Proxy Volume in Projection Settings.
7. Capture Settings
In Capture Settings (Figure 10), you can set the Reflection Probe mirror’s position and rotation relative to its Transform. Depending on your project, you may find it easier to position the GameObject at the origin and adjust the position and rotation of the mirror using these controls. A third option that we’ll explore a bit later is to use the Reflection Probe Proxy Volume to adjust the position and rotation of the mirror.
The Planar Reflection Probe’s Field Of View is calculated using the mirror position and the bounds of the Influence Volume. Check the box labeled Field Of View to override this with a value you specify.
Aside from the mirror and field of view adjustments, the controls in Capture Settings function identically to the stock Camera controls.
1. Set the mirror position to some value along Z. We’ll make our magic mirror a bit later in this tutorial, and the value will likely need adjusting, depending on your desired effect. Any value is fine for now. We’ve set this Scene up in such a way that we only need to adjust the position in the Z, but feel free to experiment with any of these steps to get a deeper understanding of how they work.
2. Check the box to override Field Of View. Copy and paste the value from the Main Camera.
8. Render Settings
In Render Settings (Figure 11), you can increase the strength multiplier of the Probe’s reflection and/or its blending weight. It’s helpful to use a multiplier greater than 1 for the Planar Reflection Probe’s initial setup to make the reflection easier to see.
1. Set Multiplier to 25, leave Weight at the default of 1, and Fade Distance on 10000.
9. Making Magic
We’re finally ready to create our magic mirror.
1. Create a Quad by selecting 3D Object > Quad from the GameObject drop-down.
2. Assign a Material with Smoothness set to 1.
3. Scale the Quad by 50 in the X and Y axes and move it into position (Figure 12).
4. Using the Scene view camera, adjust the position of the Quad so that it obscures the Example Assets (Figure 13).
5. If you’d like to recreate our example exactly, select Main Camera in the Hierarchy and enter the following values for its Transform (Figure 14):
6. Align the Scene view camera to the Main Camera by selecting Align View with Selected from the GameObject drop-down.
7. Select the Quad/MagicMirror and try moving it along the X and Y axes. Holding ALT, click and drag in the Scene view to orbit the camera. Because the Planar Reflection Probe is on the opposite side of the Workshop as the Scene view camera, the Workshop’s reflection is rotated 180 degrees from the Scene view.
8. Select the Planar Reflection Probe, making a note of the mirror Position and Rotation values. Zero these out.
9. In Projection Settings, uncheck the box marked Use Influence Volume as Proxy Volume.
10. Drag the Reflection Probe Proxy Volume from earlier in the tutorial into the Proxy Volume slot in Projection Settings.
11. Select Reflection Probe Proxy Volume in the Hierarchy view.
12. Set the position and rotation of its Transform to match the values from Step 8. Whether or not you use a Proxy Volume (either the Influence Volume or a dedicated Proxy Volume) will depend on your settings.
13. Or, try adjusting the position of the Example Assets, then adjusting the Reflection Probe or Proxy Volume to match.
10. Conclusion
Planar Reflection Probes are a powerful addition to Unity’s toolset. The most effective way to understand the probes is to dive in. Keeping your subject at the origin to start can help remove some of the variables as you develop your understanding.