
Controlling Animation and Components in Timeline
Tutorial
Beginner
+10XP
15 mins
(111)
Unity Technologies
In the Timeline Editor window, you can create cutscenes and animations easily and effectively. In this tutorial, you'll manage your animation and component clips, and position them in Timeline to create a cutscene.
Languages available:
1. Controlling Animation and Components in Timeline
Verified: Unity 2019.4 & Timeline 1.2.6
In the Timeline Editor, you can manage your animation and component clips to help create cutscenes and animations easily and effectively and even record new basic animations. It’s a powerful utility that can help you build simple cutscenes or complex movie sets.
2. Open the Timeline Window
To open the Timeline window if it’s not already open:
1. Click the drop-down in the main Editor window.
2. Click Sequencing > Timeline (Figure 01).
3. Converting Recorded Data to a Clip Track
When you’ve recorded basic animation in the Timeline, it shows up as an animation track with your keyframes located within the track. This is often referred to as an Infinite clip, which cannot be positioned, trimmed, or split because it does not have a defined size. To manipulate the Infinite clip, you have to convert it into an animation Clip.
1. Add keyframes to your Infinite clip. See Creating Keyframed Animation in Timeline for more information on adding keyframes.
2. On the track you wish to convert, select the drop-down context menu on the track tab. You can also right-click the track to bring up the context menu (Figure 02).
3. Click Convert to Clip Track.
4. The Infinite clip will be converted into an animation clip, which can be manipulated
(Figure 03).
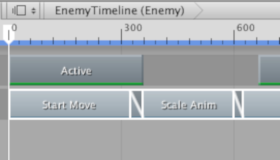
4. Manipulating the Timeline Clips
You can easily manipulate the tracks in your Timeline through the Timeline Editor. You can do many things, such as Adding, Selecting, Position, Tiling, Duplicating, and Trimming.
The quickest way to manipulate clips in the Timeline Editor is to do the following:
1. Right-click on an empty area within a track.
2. This will bring up a context menu with the following options: Copy, Paste, Paste Into, Duplicate, Delete, Lock, Mute, and more.
3. Select the appropriate option from the context menu (Figure 04).
5. Selecting Clips
There are several ways to select clips in the Timeline Editor. Selecting a clip will show its properties in the Inspector, allowing you to change the start of the clip, its duration, and other properties. Available properties change depending on the type of clip.
To select a clip:
1. Click a single clip. Selecting a clip will deselect all other tracks or clips you’ve selected previously.
2. The selected clip will be indicated by a white border (Figure 05).
To select contiguous clips:
1. Click the first clip of the sequence you wish to select.
2. Hold shift and click the end of the sequence of clips.
3. This will select all the clips in between (Figure 06).
To select noncontiguous clips:
1. Hold CTRL (on Windows) or Command (on MacOS) and click any clips in any order.
2. This will only select clips you’ve clicked.
6. Positioning Clips
Positioning clips in the Timeline Editor is a straightforward process. When positioning clips, the Timeline Editor will show two black guides, which indicate the range of the clips being positioned. It will also display the start and end times of the clips.
1. Click and drag the clip you wish to reposition.
2. You will see the clip highlighted and the two guides.
3. Move the clip horizontally to change its position in the same track or move it vertically to change which track the clip will be moved to (Figure 07).
If a clip overlaps with another clip, the second clip will override the first. This works for Activation, Control, and Playable tracks. For animation tracks, animation override tracks, and audio tracks, the first clip will be blended into the second clip.