Create a Unity Version Control workspace and repository
Tutorial
Beginner
+10XP
15 mins
472
Unity Technologies

Each time you add a new Unity project to Unity Version Control from the Unity Editor, you’ll begin by setting up your workspace and repository. In this tutorial, you’ll learn the steps of that process, and make your first changesets.
Important: Unity Version Control was previously called Plastic SCM. This learning content will be updated to fully reflect the name and user interface changes soon, but for now you will find references to the old name and user interface visuals. The instructions for working with Unity Version Control in this course remain accurate.
Languages available:
1. Overview
Every time you add a Unity project to Unity Version Control, you’ll begin by setting up a new workspace and repository. The workspace will be the Unity project folder on your local disk, and the repository will be the collection of changesets for that project in the Plastic SCM cloud.
Now that you’ve created your Unity Version Control account and cloud organization, you’ll begin at this point in the process every time you open Unity Version Control in the Unity Editor with a project that isn’t already configured for Unity Version Control.
2. Before you begin
It is necessary to complete the previous tutorial in this learning experience before continuing with this tutorial. You may also have completed the following tasks:
- Download and install the Unity Version Control Cloud Edition client application.
- Create a Unity Version Control account and cloud organization.
3. Create a new workspace and repository
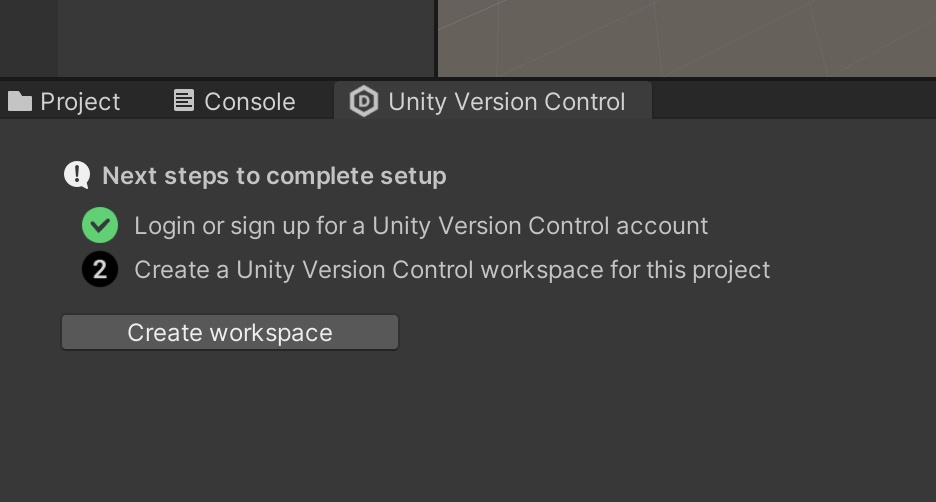
In this step of the Unity Version Control setup process, you will set up both your workspace (the local copy of your project) and your repository (the remote copy of your project). The following window appears to get you started.

Follow these instructions to set up your first workspace and repository:
1. In TestProject, select the Unity Version Control tab.
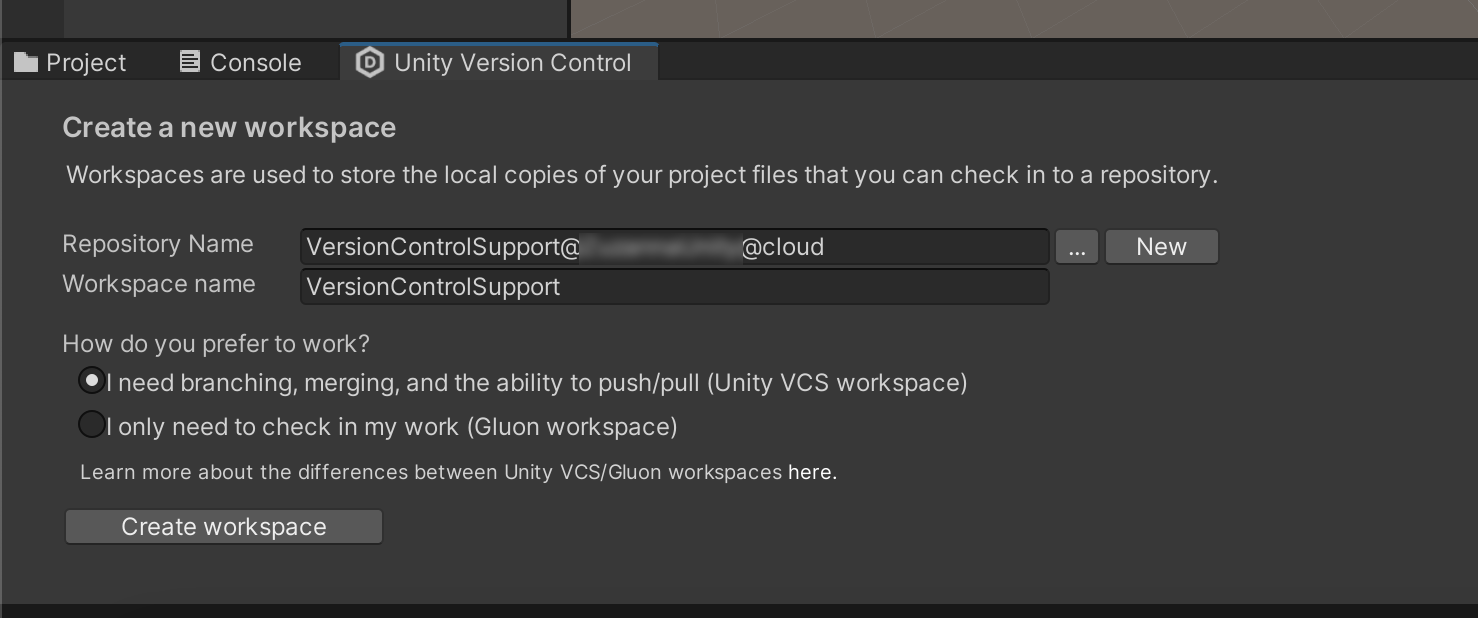
2. Select Create workspace. The following window appears.

Note: You need to have completed Set up Unity Version Control in the Unity Editor to proceed with the above step.
The first time you set up a workspace, Unity Version Control will create a new repository with the name [YourProjectName]@[YourUnityOrganization]@cloud in the Repository Name box.
Note: On macOS, when you create a new workspace, you will have to enter your repository and workspace names manually.
You can use the More (...) and New buttons to add this project to a different repository, or to create a new repository with a different name. For example, you might select a different repository if you are contributing to a project that was already set up by someone else.
By default, your Workspace Name is the name of your Unity project. You may change it here if you like, and it will still reference your current project regardless of any differences in the names.
The local workspace is your Unity project folder.
3. Under How do you prefer to work? select I need branching, merging, and the ability to push/pull (Unity VCS workspace). This is the full-featured workflow. The second option, the Gluon workspace, offers a streamlined workflow intended for artists.
4. Select Create workspace. The Unity Version Control window now has four tabs: Pending changes, Incoming changes, Changesets, and Branches. You'll use each of these tabs in the steps below.

Important: Your files won’t be uploaded to the repository until you check them in, which will be explained in the next step.
4. Check in pending changes
Right now, Unity Version Control has created your repository in the cloud, but the repository is still empty. In the Pending Changes tab, there is a list of every file in your project, which means that every file needs to be checked into the repository.
Meta files
In the Pending Changes tab, there are several files with the notation +meta. These files contain Unity metadata. If you look at these files in your workspace using a file explorer, you’ll find that many project files have an accompanying .meta file that Unity creates.
Rather than listing all these files separately, Unity Version Control adds the +meta notation. You should always check in .meta files with your Unity assets.
Check in to the repository
Follow these steps to check in your project files to the repository:
1. In the Unity Version Control window’s Pending Changes tab, select the Item checkbox to select all of the files listed.
2. Select the Your checkin comment box and enter a description of the changes you are about to make. In this case, enter “Original files”.
3. Select Check in changes. The list of items in the Pending Changes tab will disappear.
4. Select the Changesets tab. Your new changeset is now at the top of the list with "Original files" in the Comment column.
Unity Version Control automatically adds the first two changesets. The first, with the comment "Root dir", is the original empty repository, and the second, with the comment "Add packages and project settings to Unity Version Control, contains the packages and project settings in your project.
Note: Unity only uploads the necessary files in the cloud in the first two changesets. Every file that gets built by Unity itself on load, as indicated in your .collabignore file located in the root folder of your repository, will not be uploaded. This way, your cloud repository doesn't get unnecessarily bloated with files that the Unity Editor can create on its own when you start your machine.
5. Save changes to your project
Now that your workspace and repository are set up and your original project files are checked in, let’s make a change to the project and check in another changeset:
1. Right-click in the Hierarchy, then select 3D Object > Cube.
Important: For some assets, such as materials, there is a Checkout button in the Inspector window. You must check this asset out of Unity Version Control before you change it. The Checkout button allows you to lock the file and make sure that no one else uses it while you change it.
Select Checkout before you make the change. You don’t have to use the Checkin button — you can check in all changes in one changeset from the Pending Changes tab, as usual.
2. Save your changes in the Unity Editor. Keyboard shortcut: Ctrl+S (macOS: Cmd+S).
It is important to save because Unity Version Control detects changes from your workspace on disk, not from the Unity Editor. Assets have their own files, but changes to a scene are in a .unity file, which must be saved.
3. Open the Unity Version Control window and select the Pending Changes tab. The files affected by your changes are now listed.
4. Select the Assets\Scenes\SampleScene.unity checkbox.
5. Enter "Cube prefab" in the Your check-in comment... box and select Check in Changes.
6. Select the Changesets tab to see your new changeset listed.
Undo a pending change
In the Pending Changes tab, you can use the Undo button to undo any of your changes. Use the checkboxes to select the file(s) you want to revert back to their original state, and select Undo.
Important: Using Undo in Unity can be tricky in some cases, because many changes are changed in the same files. For example, when you change the locations of GameObjects in a scene, all those changes are saved to the .unity file. Using Undo on the Unity scene file would undo all of the changes in that specific file, which can create some unexpected loss of work.
Make more changesets for experimentation
Make a few more changesets so that you can experiment in the exercises below. They can be very simple: add a primitive, such as a cube or sphere, move, rotate, or scale a GameObject, or change a GameObject’s color. Check in each change as a changeset so that you have several changesets to experiment with.
6. Next steps
You’ve created your first repository and workspace! In the tutorials that follow, you’ll learn some basic source control operations in Unity Version Control that will help you collaborate on a Unity project with other creators.