Create your first 3D animations
Tutorial
Beginner
+10XP
40 mins
1000
Unity Technologies
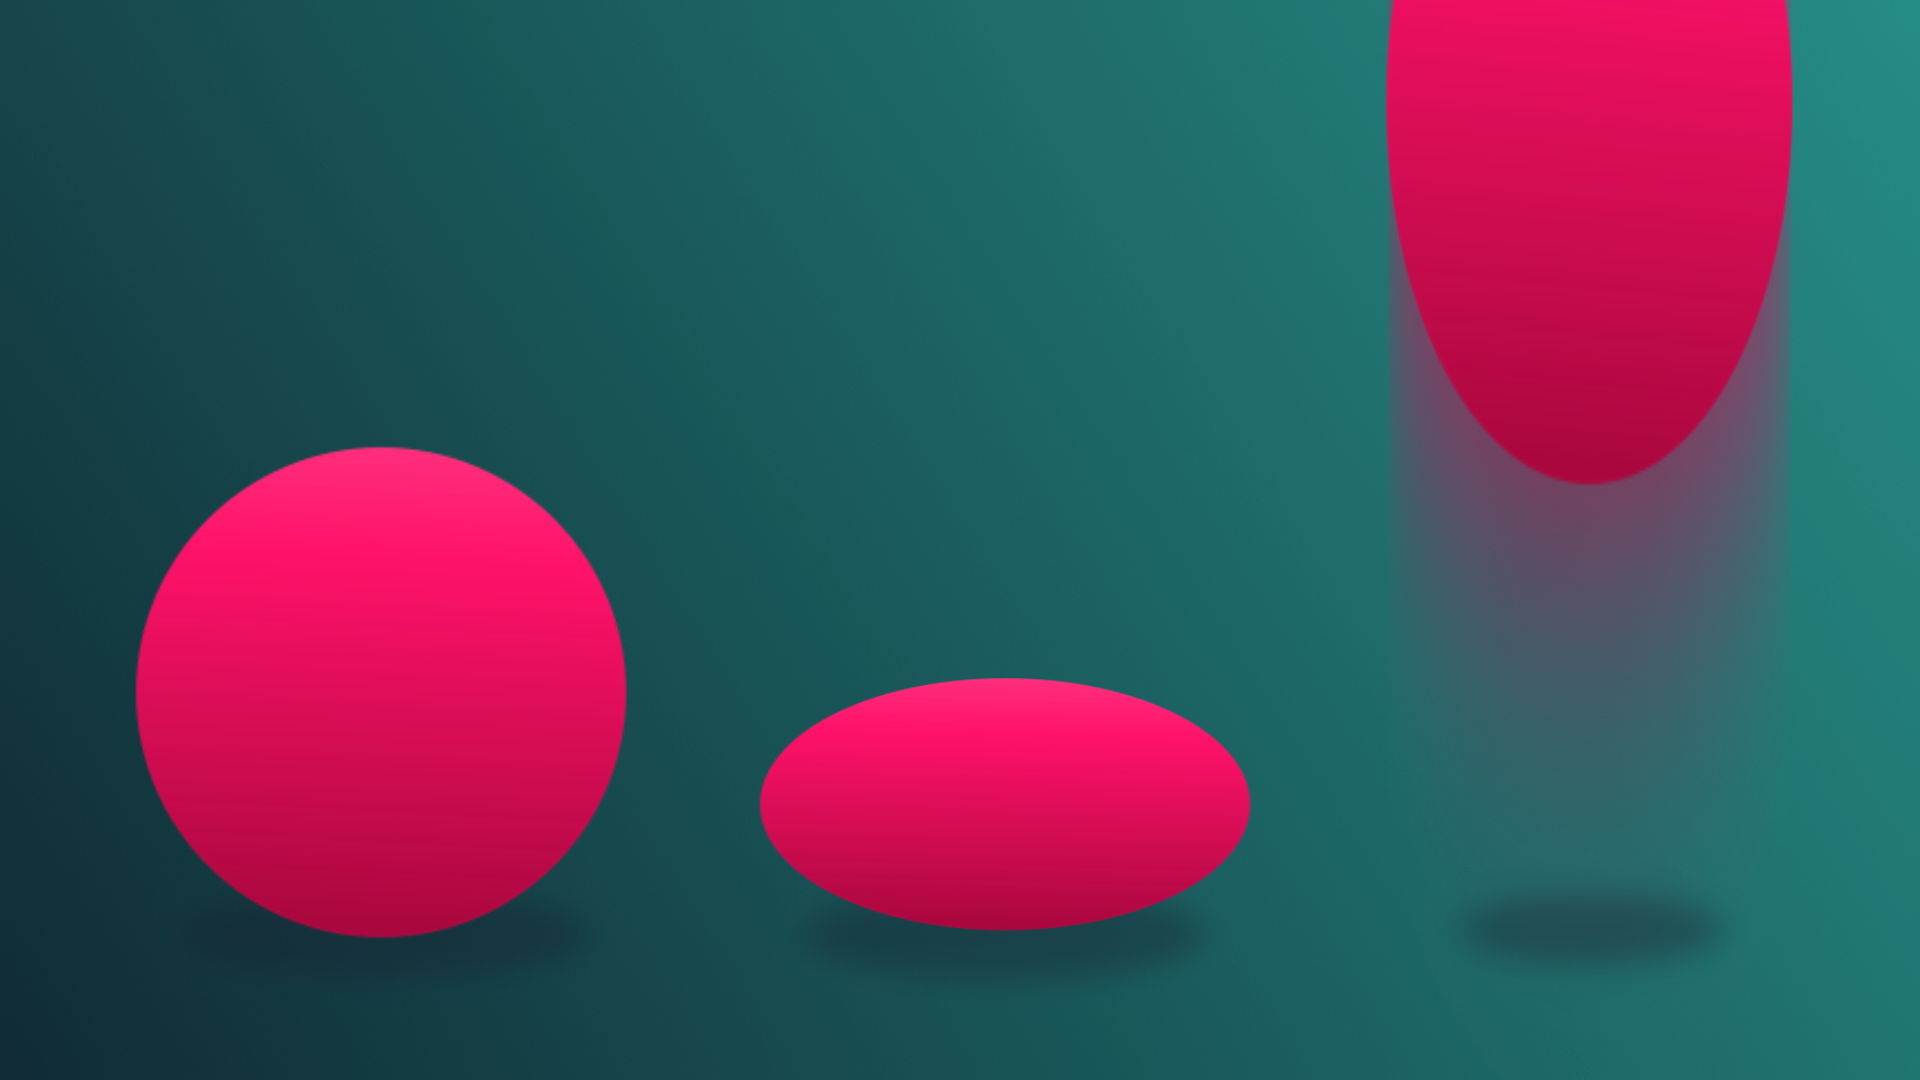
In this tutorial, you’ll learn the basic principles of animation and the tools available to you in Unity by animating a ball. This is a classic exercise for new animators, both digital and traditional alike.
By the end of this tutorial, you'll be able to:
- Set up a new Animation Clip.
- Record a GameObject animation using Record Mode.
- Add keyframes to an Animation Clip.
- Adjust multiple Keyframes at once.
Languages available:
1. Overview
As you learned in the previous tutorial, there are two types of animation that you’ll commonly be working with in Unity: imported, and in-editor generated. You’ll begin your animation journey with in-editor animations. Practically anything, from GameObjects and their individual components, can be animated in Unity. You can animate an object’s material to change color over time, toggle a light off and on, trigger a script, and more.
In this tutorial, you’ll learn the basic principles of animation and the tools available to you in Unity by animating a ball. This is a classic exercise for new animators, both digital and traditional alike.
2. Create an Animation Clip
In Unity, individual animations are stored in an asset called an Animation Clip. They are associated with the object selected at the time of the clip’s creation, and store all data that goes into creating a specific animation. Animation clips can be any length of time, and a single GameObject can have multiple Animation Clips associated with it.
1. In the Hierarchy, select the Ball GameObject.
In the Animation Editor, notice that a Create button has appeared in the main work area. This button will always appear for any selected object that doesn’t yet have any animation associated with it. If you select an object that has already been animated, the first animation created will be shown in the Animation Editor instead.
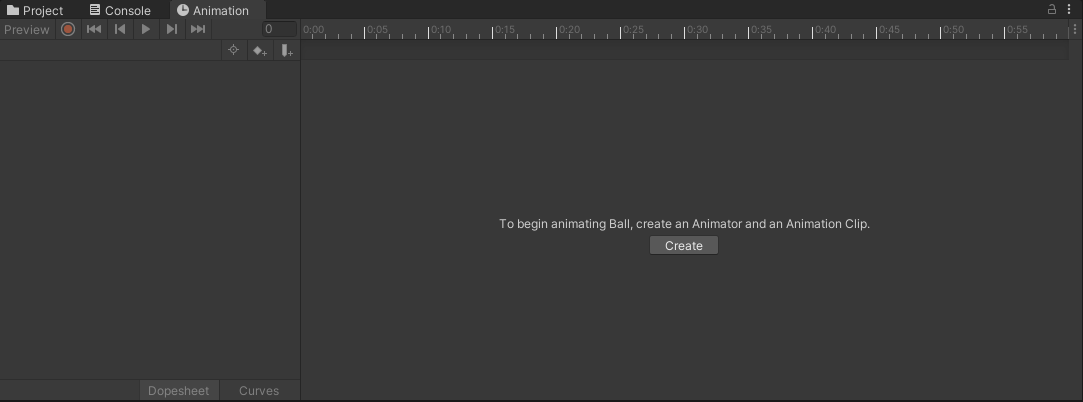
2. Click the Create button and Unity will prompt you to select a save location for your animation.
3. Name the animation Ball_Pulse, then Save it in the Animations folder
When you save the new Animation Clip, the appearance of the Animation window changes. The left side of the window now features an Add Property button where you can add and view the properties you wish to animate. Directly above this button is the name of your current Animation Clip in a dropdown menu. If you choose to have multiple animations on the same GameObject, you can select the one you wish to view from this menu.
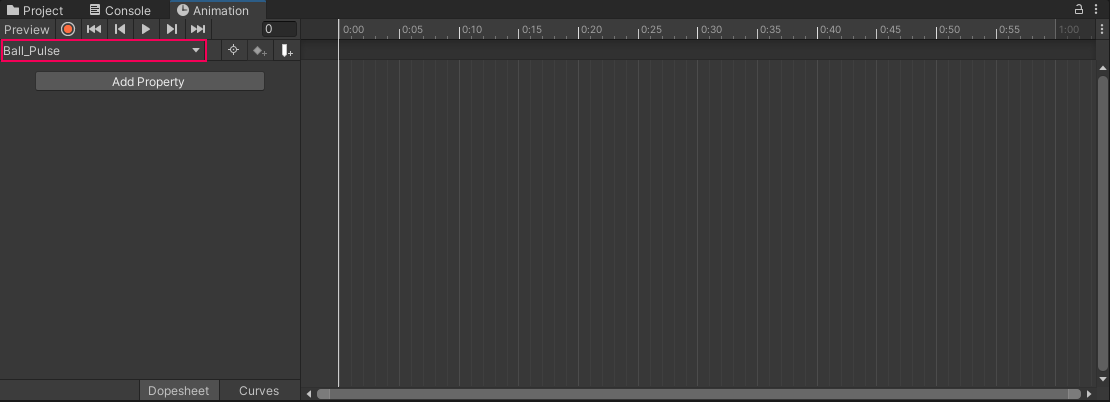
The body of the animation window will now display a timeline where you can create your animation.
3. Set the animation keyframes
Just as an animation is contained within an Animation Clip, the specific poses within an animation are defined by its keyframes. In traditional hand-drawn animation, keyframes are the poses that lead animators draw, and are important (or key) drawings that define the animation sequence. Once the lead animators finish these key poses, other animators draw the frames between them to complete the animation. These frames are referred to as in-between frames, also known as tweens.
In digital animation, tweening is generally handled by whatever tool the animator is working with, meaning they only need to worry about setting up keyframes. Digital keyframes record all the data related to the GameObject being animated at a defined time stamp. Let’s see this in action by creating a simple pulse animation with the ball.
1. Make sure the ball is still selected in the Hierarchy
2. Click the Add Property button on the left side of the Animation window, and then select the dropdown next to Transform to reveal the Scale Property. Select the + button to add it to the animation.
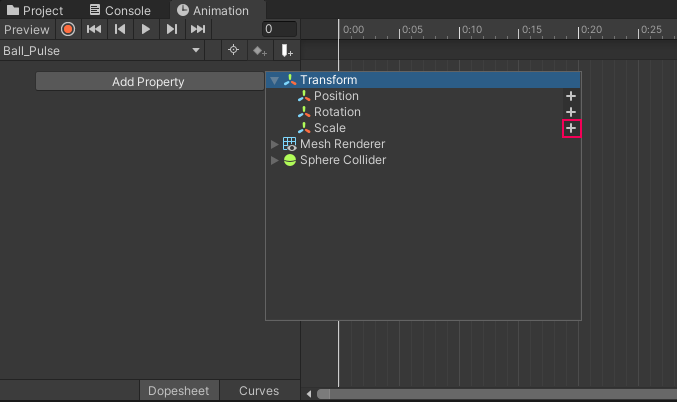
Four diamond icons will appear at the start and end of the timeline, two to a set. These icons represent keyframes.
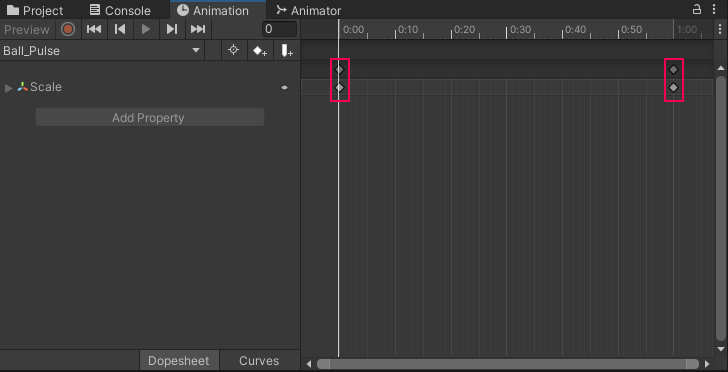
When a new property is added to an animation, the Animation editor records the relevant data (in this case, the ball’s current scale) about the selected object and generates initial keyframes for it. A keyframe is generated both at the start and end of the timeline so that the animation you generate can loop, or start and end in the same position so the animation can appear seamless. If you don’t wish for your animation to loop you can always delete the keyframes at the end of the timeline, but in this case, you will want your animation to loop.
You’ve set the initial keyframes, but because they’re both the same, you haven’t really animated anything yet. To do so, you’ll need to modify the ball mesh in the scene, and then set another keyframe to record the change. There are multiple ways to accomplish this, but the easiest is making use of the Record button in the Animation editor, which will automatically detect when you make any changes to your model and generate keyframes to record the changes.
3. Select the circular Record button at the top left of the Animation window to activate recording mode.
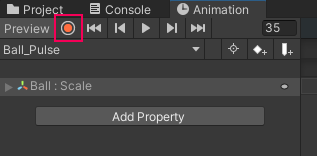
Once the Record button is pressed, both it and the timeline will be highlighted in red. So long as the Record button is active, Unity will automatically add keyframes for any property that is changed in the Inspector.
4. On the numbered section of the timeline, select the 25 mark.
The white line that was previously at the 0 mark jumps to the location where you clicked. This is the Playhead, and indicates which part of the animation is active, or where keyframes are currently set to be placed.
5. Switch to the Scale tool by pressing the R key on your keyboard, then increase the size of the Ball. A keyframe is automatically added to the timeline where the Playhead has been set.
6. Press the Play button in the Animation window located near the Record button to preview the animation.
Even though you only set three keyframes, the Ball will smoothly pulse from its starting scale to the size you changed it to, and then back. Unity took care of the tweening between the keyframes automatically!
You can easily edit keyframes after you create them; place the Playhead back on the frame you wish to edit, then select the keyframe. Any changes you make will be recorded over the previous settings, so long as Record mode is active.To delete a keyframe, select it and press the Delete key on your keyboard.
Let’s revisit the fact that two diamond icons were added to the timeline when you first created your keyframes. One icon appears in the darker gray area directly below the timeline marker, and another in the lighter gray work area. The top keyframe is used to select all keyframes at that specific time marker and move them along the timeline. This is particularly useful when you animate many properties at the same point on the timeline, as the top keyframe allows you to move them all at once.
7. Select the top keyframe at the 25 mark. Select and drag it to 30 to adjust the timing of the keyframe.
8. Select the Record button to deactivate recording mode.
4. Create a second clip
A single object can have an infinite number of Animation Clips. Let’s continue working with the ball to create a second animation, this time a looping bounce. Creating a bouncing ball animation is a classic exercise for both traditional and digital animators; they’re simple, but allow new animators to experiment with several animation principles. Let’s take a look at what you’re creating next:
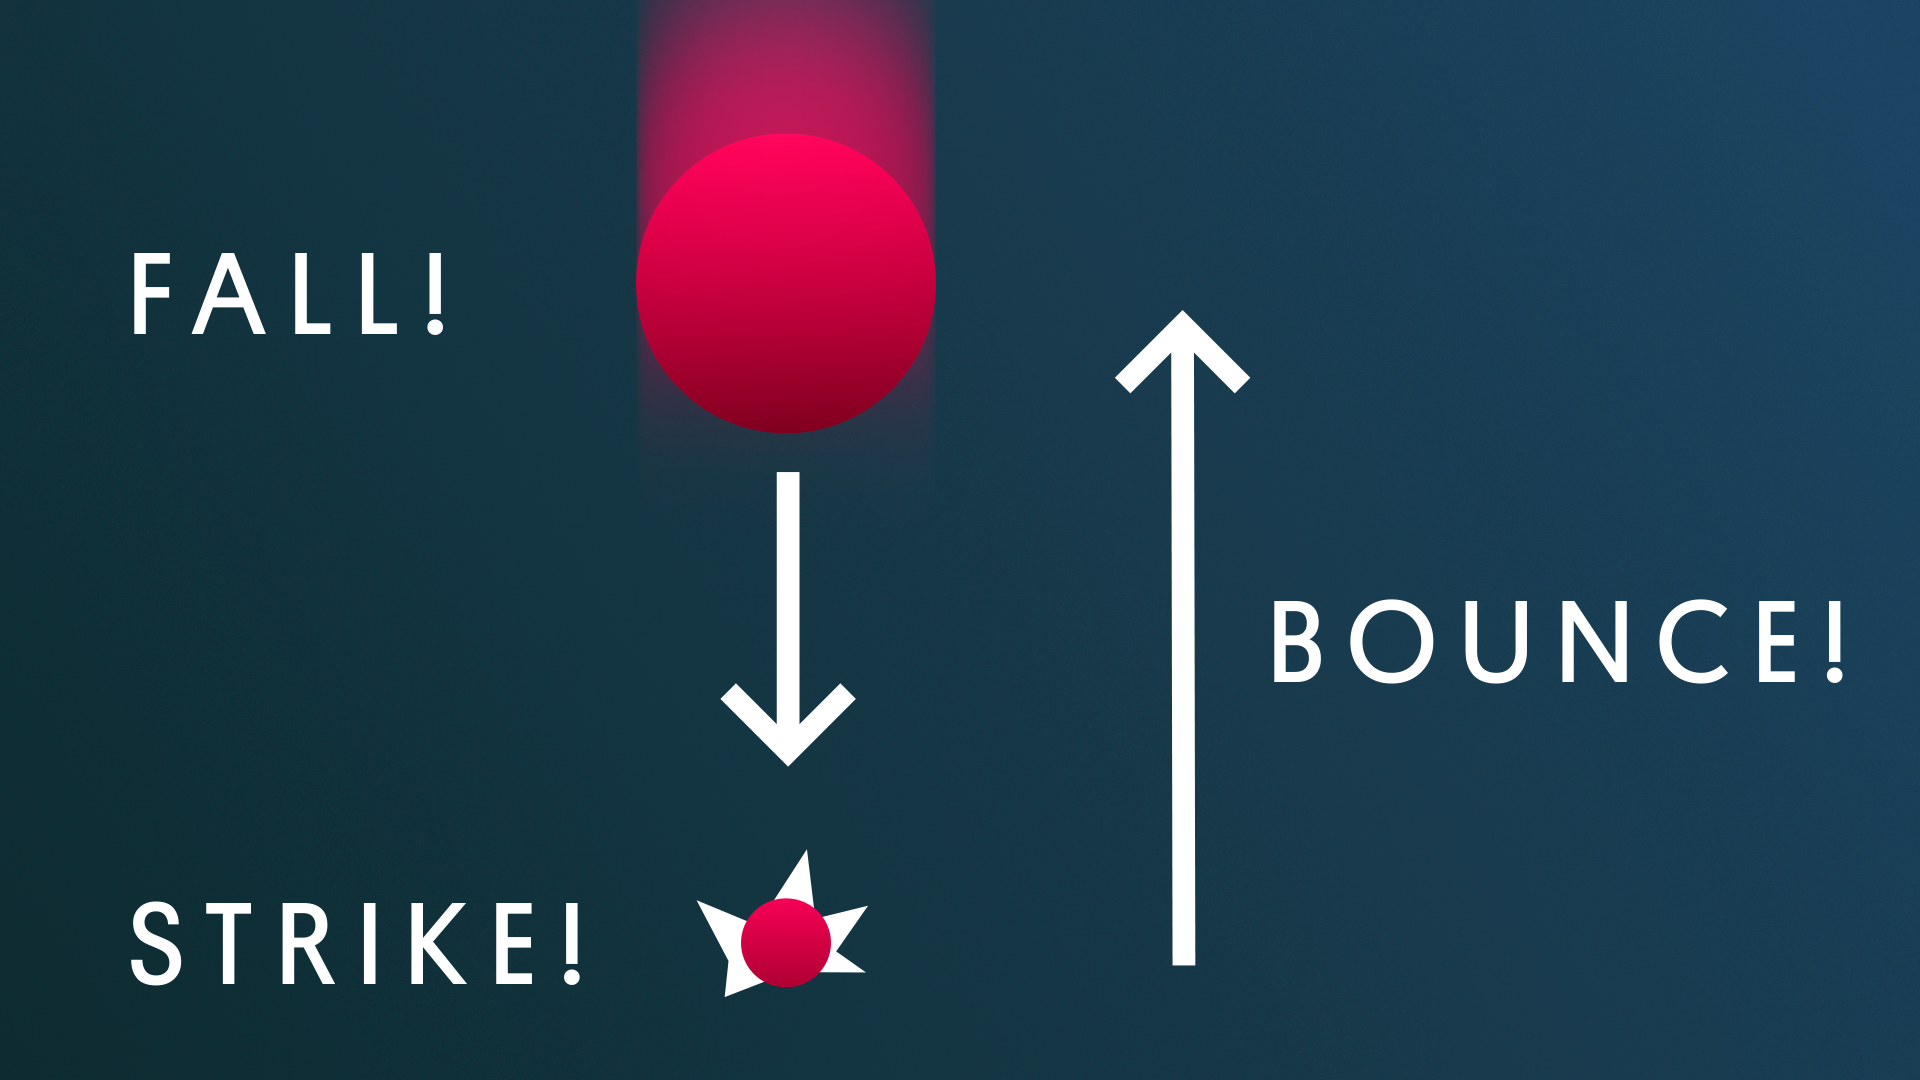
There are three major points to create keyframes for: the ball falling, the ball striking the ground, and the ball bouncing back up. Let’s get to it!
1. With the ball selected in the Hierarchy, use the top left menu under playback controls that lists Ball_Pulse as the current animation, and select Create New Clip.
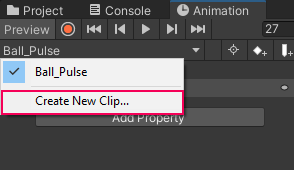
2. When prompted, save the new Animation Clip as Ball_Bounce in the Animation folder.
The animation window will clear of keyframes, but don’t worry–the pulse animation data is stored safely in its clip.
Since this animation is more reliant on timing than the previous clip, it may be helpful to have the timeline display seconds rather than frames.
3. Select the three vertical ellipsis in the upper right hand corner of the Animation window on the same level as the timeline and select Seconds.
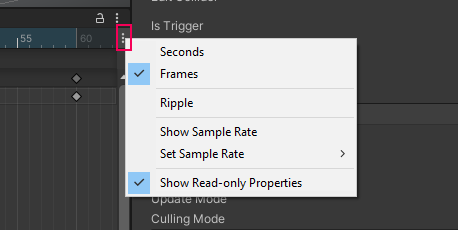
By default, Unity animations have a frame rate (FPS) of 60. This means that for every second of animation, 60 frames are rendered on the screen. This produces very smooth animation; however, the more common frame rate for animation is 24 FPS. This is also the frame rate for most movies. The frame rate that you choose to animate in ultimately comes down to personal preference, but make sure you use the same rate consistently across all animations in your project. This is especially important to keep in mind if you intend to use imported animations from a DCC or the Unity Asset Store, which are often at 24 FPS.
4. Click on the same three vertical ellipsis button from the previous step, and go to Set Sample Rate > 24.
Note: It’s important to understand the way numbers are displayed in the timeline for animations with a sample rate lower than 60 frames per second. The first number before the colon is the second of animation, while the number after the colon is the current frame. 1:22 for example, means the 22nd frame of animation within the first second.
5. Create the bounce animation
1. In the scene, select the Ball and drag it above the ground plane by around three units, or whatever height you prefer.
2. Click the Record button in the Animation editor so you can immediately begin editing your keyframes.
3. Select the Add Property button in the Animation editor and then click the down arrow to the left of the Transform option to reveal the different Transform Properties. Select the + button on the right side of Position.
Just as before, you can see the keyframes at the start and end of the animation timeline. However, right now the animation is only going to be one second long, which is too fast for the animation you’re creating. Let’s adjust it so it’s longer.
4. Place your mouse in the timeline and scroll down with your mouse wheel, or drag the bottom scroll bar until you’re able to see 1:10.
5. Create a keyframe in the 1:10 mark. The animation will now take a little longer to complete!
6. On the numbered section of the timeline, click in the middle point between the start and end frame. In the Scene view, move the ball so that it’s resting on the ground plane, being careful to only change the position in the Y axis.
7. Preview the animation by pressing Play in the Animation editor.
6. Next steps
The basic bounce is complete! If you look closely though, while your ball is animating smoothly, it doesn’t exactly look how you might expect a bouncing ball to look. It seems to be softly floating up and down rather than falling and bouncing. In the next tutorial, you’ll refine the animation to make it appear more realistic.