
Creating a Surface Shader
Tutorial
intermediate
+10XP
20m
(86)
Unity Technologies
Surface shaders, as the name implies, define the physical characteristics of Materials. They are responsible for both calculating the final color of each pixel within a Material and performing the light calculations that define the shading of each pixel on the surface. Most surface shaders in Unity are extensions of the default Standard Surface Shader, which makes the creation process more intuitive and allows artists to more freely define the look of their surfaces.
Languages available:
1. Creating a Surface Shader
This tutorial was verified with Unity 2019.4LTS
Surface shaders, as the name implies, define the physical characteristics of Materials. They are responsible for both calculating the final color of each pixel within a Material and performing the light calculations that define the shading of each pixel on the surface. Most surface shaders in Unity are extensions of the default Standard Surface Shader, which makes the creation process more intuitive and allows artists to more freely define the look of their surfaces.
In this tutorial, we will learn how to create a semi-transparent frosted glass material (Figure 01).
2. Brief Introduction to Physically Based Rendering
Unity’s Standard Surface Shader uses a Physically Based Rendering (or PBR) shading model. “Physically based” refers to the way that light is reflected and absorbed by surfaces. As it’s based on real life, this model provides a good approximation of how light behaves in the real world.
Surface Shader Properties
PBR Surface Shaders are composed of three essential properties:
- Albedo
- Metallic
- Smoothness
Albedo, sometimes referred to as a diffuse map, refers to the final color of a Material (Figure 02).
Metallic maps determine the extent to which a surface appears to be a metal — such as gold or platinum — as opposed to a non-metal, such as brick or concrete (Figure 03).
Smoothness maps, sometimes referred to as roughness maps, determine the reflectivity of a surface. Rougher parts of a surface absorb more light and have a greater diffuse appearance. Smoother parts of a surface reflect more light and have a mirror-like appearance (Figure 04).
Surface Shaders also have some optional properties. Some of the more popular ones are:
- Normal: Normal maps are used to approximate bumps and reliefs on a surface by altering the surface’s normals. They aregreat for adding additional detail to a model without altering its polygon count or mesh topology.
- Emission: Determines the color of the light that emits from a surface uniformly or from a mask.
- Occlusion: Ambient Occlusion (AO) maps determine the amount of light each part of a surface receives. They are typically used to create deeper shadows on small, enclosed surfaces.
- Alpha: Alpha maps determine which parts of a surface are transparent.
3. Creating a New Surface Shader
1. Right-click in the Project view and select Create > Shader > Standard Surface Shader (Figure 05).
2. Name your new Shader MyShader.
3. Double-click the Shader to open it in your IDE.
4. Extending the Shader with a Normal Map
In the Properties and SubShader sections, add the following:
  Properties
    {
        _Color ("Color", Color) = (1,1,1,1)
        _MainTex ("Albedo (RGB)", 2D) = "white" {}
        _Glossiness ("Smoothness", Range(0,1)) = 0.5
        _Metallic ("Metallic", Range(0,1)) = 0.0

        //Extending the Shader with a Normal Map property
        _Normal ("Normal", 2D) = "bump" {}
    }
    SubShader
    {
  ...
        sampler2D _MainTex;
        //The actual Normal Map
sampler2D _Normal;...
struct Input
{
float2 uv_MainTex;
//Adding the normal map's UVs
float2 uv_Normal;
};
...
void surf (Input IN, inout SurfaceOutputStandard o)
{
// Albedo comes from a texture tinted by color
fixed4 c = tex2D (_MainTex, IN.uv_MainTex) * _Color;
o.Albedo = c.rgb;
//Implementing the Normal Map calculation here
o.Normal = UnpackNormal (tex2D(_Normal, IN.uv_Normal));
...
}
ENDCG
}
5. Creating and Distorting Reflection
To create a reflection effect, add the following to the Properties and SubShader sections:
  Properties
    {
        ...
        _MainTex ("Albedo (RGB)", 2D) = "white" {}
        //Extending the Shader with a Normal Map property
        _Normal ("Normal", 2D) = "bump" {}
        //Extending the Shader with a Cube/Environment Map
        _EnvMap("Environment Map", CUBE) = "" {}


  ...
    }

    SubShader
    {
  ...
        sampler2D _MainTex;
        //The actual Normal Map
        sampler2D _Normal;
        //The cube map
        samplerCUBE _EnvMap;
  ...
        struct Input
        {
            float2 uv_MainTex;
            //Adding the normal map's UVs
            float2 uv_Normal;
      //Obtain the world reflection vector. INTERNAL DATA required
            float3 worldRefl;
            INTERNAL_DATA
        };
  ...
        void surf (Input IN, inout SurfaceOutputStandard o)
        {
            // Albedo comes from a texture tinted by color
          We dim the Albedo by half to make the reflections less intense
            fixed4 c = tex2D (_MainTex, IN.uv_MainTex) * 0.5 * _Color;
      float3 n = tex2D(_Normal, IN.uv_Normal);

            o.Albedo = c.rgb;
            //Calculating the cubemap reflection by writing to Emission
            //Distort reflection by the normal map
            o.Emission = texCUBE(_EnvMap, IN.worldRefl * n).rgb;

            //Implementing the Normal Map calculation here
            o.Normal = UnpackNormal (tex2D(_Normal, IN.uv_Normal));
           ...
        }
        ENDCG
    }
6. Creating and Distorting Reflection
To create the transparency effect for the glass, add the following to the Properties and SubShader sections:
Properties
  {
        ...
        _MainTex ("Albedo (RGB)", 2D) = "white" {}
        //Extending the Shader with a Normal Map property
        _Normal ("Normal", 2D) = "bump" {}
        //Extending the Shader with a Cube/Environment Map
        _EnvMap("Environment Map", CUBE) = "" {}
        _Opacity("Opacity", Range(0,1)) = 0.5

  ...
    }
    SubShader
    {
        Tags { "Queue" = "Transparent" "RenderType" = "Transparent" "IgnoreProjector" = "True" }
		Blend SrcAlpha OneMinusSrcAlpha
        LOD 200
        CGPROGRAM
        // Physically based Standard lighting model, and enable shadows on all light types
        #pragma surface surf Standard fullforwardshadows alpha

  ...
        struct Input
        {
            float2 uv_MainTex;
            //Adding the normal map's UVs
            float2 uv_Normal;
            //Obtain the world reflection vector. INTERNAL DATA required
            float3 worldRefl;
            INTERNAL_DATA
};
        half _Glossiness;
        half _Metallic;
  half _Opacity;
  fixed4 _Color;

  ...
        void surf (Input IN, inout SurfaceOutputStandard o)
        {
            ...
            //Implementing the Normal Map calculation here
            o.Normal = UnpackNormal (tex2D(_Normal, IN.uv_Normal));
		// Metallic and smoothness come from slider variables
	      o.Metallic = _Metallic;
            o.Smoothness = _Glossiness;
            o.Alpha = c.a * _Opacity;

           ...
        }
        ENDCG
    }
Save your completed Shader script (Figure 06) and return to Unity.
7. Creating the Window
1. Back in Unity, create a Scene that has one plane, a cube to represent the ground, and a few cubes behind the plane so we can see the glass effect working.
2. Create a new Material by right-clicking in the Project view and selecting Create > Material.
3. Name the new Material Window_Mat and set the Shader property to Custom/MyShader.
4. In the Material properties:
a. Set the Color to white unless you want the glass to be tinted.
b. Set the Smoothness to around 0.4 and Metallic to 0.
c. Choose a Normal map (Figure 07).
d. Choose the Environment Map. We’re using GareoultWhiteBalanced from the Unity HDRI Pack, available for free in the Unity Asset Store.
e. Set the Opacity to around 0.25. You can adjust it later to get the look you want.
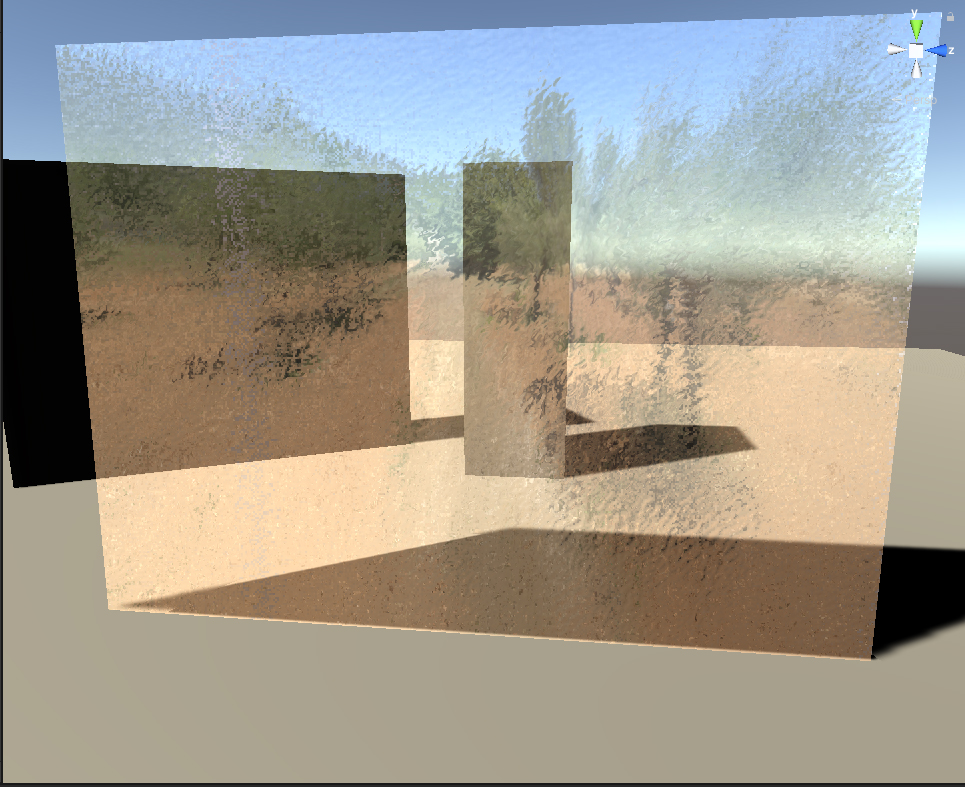
5. Apply your completed Material to the plane in your Scene (Figure 08).
8. Conclusion
Congratulations! You have successfully created your first Surface Shader and learned how to add properties, change the type of surface, and how to control the shader’s transparency. You are well on your way to creating more complex shaders that will showcase your ideas.