
Creating New Projects
Tutorial
Beginner
+10XP
5m
Unity Technologies
When Unity Creators launch the Unity Editor, they will be introduced to the Unity Home Screen. There are two tabs in the Home Screen - the Projects tab and the Learn tab. In this tutorial, you will learn to create a new Unity Project.
Languages available:
1. Creating New Projects
This tutorial has been verified using Unity 2019 LTS
Every new application you develop should have its own dedicated project; this will allow you to keep your Assets organized and easy to track. New projects should be created through the Projects tab of the Unity Hub, which is the central location for managing everything related to Unity. In this tutorial, you’ll learn how to create a new Unity project.
2. Setting up a project
1. Launch the Unity Hub.
2. In the Unity Hub window, ensure you are in the Projects tab.
3. If you have multiple versions of the Editor installed, click on the down arrow to the right of New to select which version to use. Otherwise, simply click New (Figure 01).
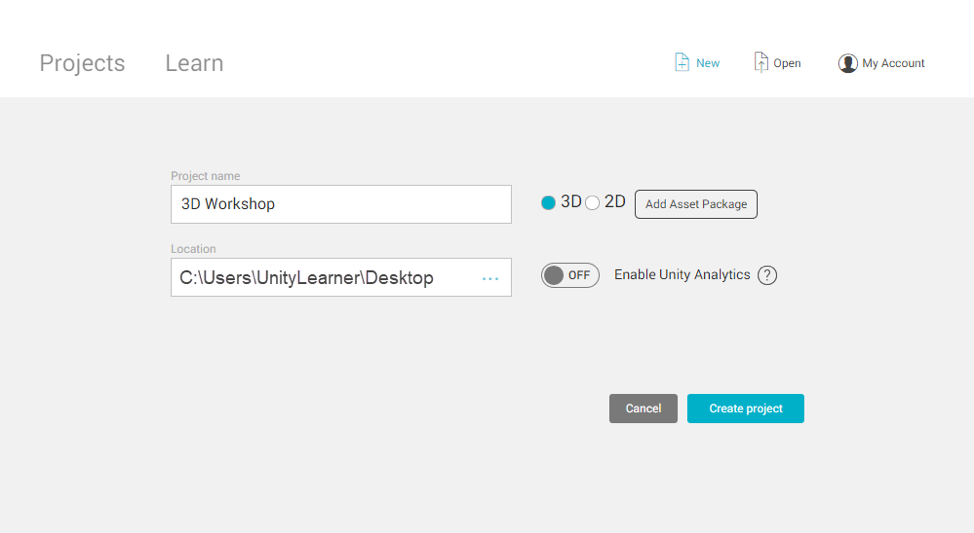
4. In the Create a new project window, select the template you wish to use (Figure 02).
2D: Creates a project for 2D development. All cameras will automatically be set to orthographic, and the Scene view will be set to 2D.
3D: The most commonly used template for Unity development. All cameras are set to perspective, and the Scene view is set to 3D.
3D With Extras: This template is the same as 3D, but with example content and presets included as reference.
High Definition RP: This template is configured for use with the High Definition Render Pipeline, which is designed for creating applications with high-end visuals. It also comes with Shadergraph and Post Processing already installed, and includes presets and example content as reference.
Universal Rendering Pipeline: The Universal Render Pipeline (URP) is designed for optimized real-time performance. Its goal is to allow projects to perform well on performance-constrained platforms.
5. Name your project and select where you’d like to save it on your computer.
6. Click Create.
The Hub will close, and your Unity project will be generated. When it’s complete, the Unity Editor will launch. The Editor window ribbon will list your project name, current Scene name, build target, and Unity version (Figure 03).
3. Conclusion
Creating projects is the first step to developing your own unique applications. The Unity Hub will keep track of all projects you create so you can find your way back to them without difficulty.