
Creating Volumetric Fog - Unity 2019
Tutorial
intermediate
+10XP
20m
(28)
Unity Technologies
Most implementations of fog, such as exponential or linear fog, are computed at an object’s surface by the Shader that the surface uses. At most, this is once per pixel. Volumetric fog, on the other hand, is computed at intervals in the empty space in front of the camera, independent of any surface. In this tutorial, you will learn to create and adjust Volumetric Fog.
Languages available:
1. Creating Volumetric Fog
If you are using Unity 2018.4 or below, click here. If you are using Unity 2019.3 or above, click here.
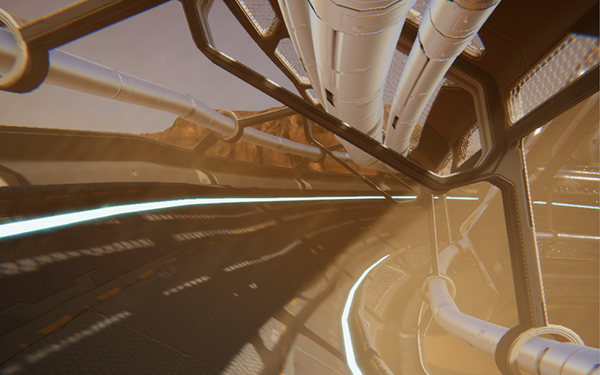
Most implementations of fog, such as exponential or linear fog, are computed at an object’s surface by the Shader that the surface uses. At most, this is once per pixel. Volumetric Fog, on the other hand, is computed at intervals in the empty space in front of the camera, independent of any surface. The main advantage of this method is that the fog can interact with light and shadow through space in a more physically correct way. This effect can be used artistically to pull a Scene together or draw the viewer’s eye to a particular spot. For example, in Figure 01, the fog draws the eye to the light shaft.
In the Exponential Fog example, note that:
- The sky is not tinted by fog. (There is no surface there that implements fog.)
- Light shafts are not present. (Exponential Fog, by its surface-dependent nature, cannot accept shading.)
2. Preparing for Volumetric Fog
To start a new project with HDRP enabled, do the following:
- Open the Unity Editor and click the New Project button.
- In the Template drop-down menu, select High-Definition RP (Preview).
- Click the Create Project button.
To upgrade an existing project, you must first download HDRP using the Package Manager in Unity.
- Go to the Window drop-down and select Package Manager to open the Packages window.
- Click the All button on the left side.
- Find High Definition RP in the list and select it.
- Click Install.
After the package has been installed from the Package Manager, you need to add the HDRP Asset to the Scriptable Render Pipeline Graphics settings field.
- Go to the Edit drop-down and select Project Settings > Graphics.
- Create a new HDRenderPipelineAsset by going to the Assets drop-down, and selecting Create > Rendering > High Definition Render Pipeline Asset.
- In the Graphics Inspector, drag and drop the HDRenderPipelineAsset into the Scriptable Render Pipeline field.
You’re now ready to add Volumetric Fog to your project.
3. Adding Volumetric Fog
To add Volumetric Fog to a Scene, you’ll need to add a global settings Volume. A global settings Volume is a GameObject that exists in the Scene and allows an override of certain Scene settings. If your Scene does not already have a global settings Volume, add a new one. From the top bar, navigate to GameObject > Rendering > Scene Settings (Figure 02).
This will create a new object and a new settings profile with some default settings you’ll be able to configure to use Volumetric Fog.
This new settings profile is, by default, configured to use Exponential Fog, not Volumetric Fog. To configure it to use Volumetric Fog:
- Remove the existing Exponential Fog component override.
- Right-click the Exponential Fog section header, or left-click the icon in the top right of the section.
- Click Remove.
- Click “Add component overrides…” and select Volumetric Fog.
- Click “Add component overrides...” again and select Volumetric Fog Quality..
- Enable all value overrides in both new sections.
- In the Visual environment section, change Fog Type from Exponential to Volumetric.
At this point, we should have a nice blue sky, but no fog (Figure 03).
Technically, Volumetric Fog is being rendered at this point, but with little to no density, meaning nothing is currently visible. Volumetric Fog Density is determined globally by the Base Fog Distance value of the Volumetric Fog module, and locally by the Fog Distance value of density volumes throughout the Scene. Fog Distance represents the furthest you can see through the fog. By default, the Base Fog Distance is set to 1,000,000 meters. As a result, the fog is effectively negligible. Note that this value does not affect fog render distance, just density.
To define atmospheric density for our Scene, you can either change Base Fog Distance in the Volumetric Fog module, or create a new Density Volume (Figure 04). For now, leave the Global Settings at their default.
- Create a new empty Density Volume by selecting Rendering > Density Volume under the GameObject drop-down.
- Move the volume and adjust the size property such that it is covering the entire area that you want affected by fog.
- You may want to cover additional area to allow room to use the Blend Distance property.
Notably, density volumes do not override one another. They are additive. Therefore, the global settings should reflect the least amount of fog that will exist in your Scene. Lower values — shorter distances — result in denser fog. A value of 50 is a decent starting point for thick fog (Figure 05).
Single Scattering Albedo determines the tint and absorption ratio. The color you choose depends on your Scene. A misty haze might be white or off-white. Dense smoke or smog would be darker. Sand would be a light shade of orange (Figure 05).
You may want to define a shape or pattern for your fog. A Density Volume can take a 32x32x32 Alpha8 Texture3D and provides tiling parameters. To create such a Texture, you can derive one from a Texture2D using Window > Render Pipeline > Create 3D Texture, or you can create one yourself from code. The Create 3D Texture utility uses consecutive slices on the X-Y plane along the Z axis. See Figure 06 for a channel map of the 32x32x32 volume for a 256x128 pixel image.
The Global Anisotropy setting in the Volumetric Fog module of the global settings volume biases how light scatters through the fog in your Scene. Negative values favor the light bouncing away from the source, and positive values favor the light bouncing back toward the source. If light shafts are what you’re after, an Anisotropy value between -0.25 and 0.125 produces the best result.
Global Light Probe Dimmer controls how much light is absorbed by fog density globally.
Max Fog Distance represents the furthest that fog is rendered, including Distant Fog, below. Generally, this should be equal to or greater than the Depth Extent setting of the Volumetric Fog Quality module.
Distant Fog allows you to render exponential fog based on your volumetric fog settings behind the maximum extent of the volumetric fog. This allows you to increase the quality of your fog up close, without losing much at a distance.
The Volumetric Fog Quality module controls how fog is lit. Its settings are as follows:
- Depth Extent
Determines the maximum render distance of the fog from the camera. As with any depth-buffer-based effect, deciding what this range should be is a trade-off between quality and distance and largely depends on the distances involved in your Scene. That said, Volumetric Fog does not need to be rendered very far to be effective. - Slice Distribution Uniformity
Controls how fog is sampled during rendering. Volumetric Fog is computed in a set number of slices. Lower values bias those samples closer to the camera. A value of 1 is uniform. As a general rule, the wider your depth extent is, the lower this value should be.
4. Conclusion
New to Unity with HDRP, Volumetric Fog is a powerful tool in an environment artist's kit. Volumetric Fog is a wonderful addition to any scene that could use a sense of space, whether it be a dusty town, a gloomy cemetery, or a grand throne room.