
Customizing Interactors and Interactables in XR Interaction Toolkit
Tutorial
intermediate
+0XP
15m
(22)
Unity Technologies
In this tutorial, you’ll learn how to customize Interactables with Interactor Events to trigger events, such as cutscenes or animations. You’ll also learn to apply haptic and audio feedback to an Interactor when hovering over or selecting Interactables. Finally, you’ll learn how to use the XR Interaction Toolkit Debugger to track and debug state-based interactions.
Languages available:
1. Customizing Interactors and Interactables in XR Interaction Toolkit
This tutorial has been verified using Unity 2019.4.12f1 LTS and XR Interaction Toolkit 0.9.3-preview
In this tutorial, you’ll learn how to customize Interactables with Interactor Events to trigger events, such as cutscenes or animations. You’ll also learn to apply haptic and audio feedback to an Interactor when hovering over or selecting Interactables. Finally, you’ll learn how to use the XR Interaction Toolkit Debugger to track and debug state-based interactions.
2. Interactable Events
There are eight event callbacks that can be registered for an Interactable object, fired by the XR Interaction Manager when certain conditions are met.
3. Customizing Interactors with Audio and Haptic Feedback
We assume at this point that you’ve worked through the previous tutorial, Working with Interactors and Interactables, or are otherwise familiar with creating XR Rigs and Interactables.
1. Load or create a Scene that uses an XR Rig and has at least one Interactable. Then, highlight either child Interactor in the XR Rig’s Hierarchy view.
2. In the Interactor component Inspector, expand the Sound Events and Haptic Events sections.
3. We’ll work with Interactor Events in the next section. For now, add some sound effects to your project (copy them into your project folder in Explorer/Finder, or drop them directly into the Project view).
4. Click the checkbox next to at least one Sound Event, assigning an AudioClip.
5. Click the checkbox next to at least one Haptic Event, setting an intensity of vibration and duration in seconds (Figure 01).
6. Build and launch your project on your device. Try interacting with your Interactable.
7. If desired, assign sounds and vibration for the other events. Try using different intensities and/or durations to more easily distinguish the events and to get a feel for what physical action triggers them.
4. Creating Event Callback Functions
Interactors can play an AudioClip when they hover over an Interactable without the need for code. Interactables don’t have that same ability, but we can create a script to play an assigned AudioClip when the corresponding event is fired.
Though we won’t be using them in this exercise, you can, if you need to, pass the XRBaseInteractor to the Interactable event as a parameter to the callback event function. For example:
public void PlayHoverEnterSound(XRBaseInteractor obj)
    {
        if (hoverEnterSound != null)
            AudioSource.PlayClipAtPoint(hoverEnterSound, transform.position);
    }
1. Create a new C# script, called InteractableEventDemo and open it in the Script Editor.
2. Add the following namespace:
using UnityEngine.XR.Interaction.Toolkit;3. Add the following data members:
public AudioClip hoverEnterSound;
public AudioClip hoverExitSound;
public AudioClip selectEnterSound;
public AudioClip selectExitSound;
4. Delete the Start and Update functions, as we won’t be using those. Instead, add:
public void PlayHoverEnterSound()
    {
        if (hoverEnterSound != null)
            AudioSource.PlayClipAtPoint(hoverEnterSound, transform.position);
    }

    public void PlayHoverExitSound()
    {
        if (hoverExitSound != null)
            AudioSource.PlayClipAtPoint(hoverExitSound, transform.position);
    }

    public void PlaySelectEnterSound()
    {
        if (selectEnterSound != null)
            AudioSource.PlayClipAtPoint(selectEnterSound, transform.position);
    }

    public void PlaySelectExitSound()
    {
        if (selectExitSound != null)
            AudioSource.PlayClipAtPoint(selectExitSound, transform.position);
    }
5. Save changes and return to the Unity Editor.
6. Load or create a Scene that uses a Grab Interactable and an XR Rig.
7. Select the Interactable and add the Interactable Event Demo component.
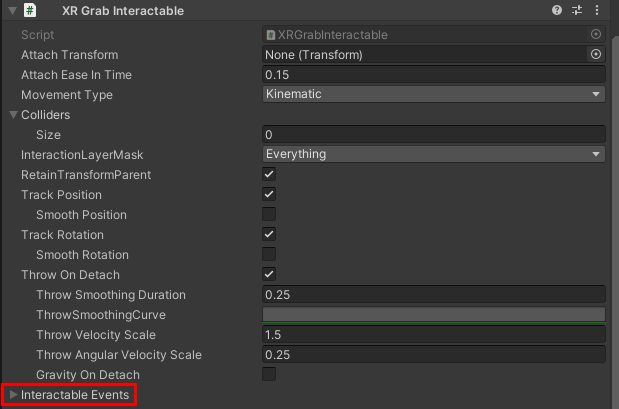
8. In the Inspector for the XR Grab Interactable component, expand Interactable Events (Figure 02).
9. In the second event, On Hover Enter, click the + sign.
10. Drag and drop the Interactable Event Demo component into the object slot, which should read “None (Object).”
11. Using the Function drop-down, select InteractableEventDemo > PlayHoverEnterSound () (Figure 03).
12. Repeat for the other three functions:
On Hover Exit
On Select Enter
On Select Exit
13. Assign sounds to these four fields in the Interactable Event Demo component.
14. Build and launch your project on your device.
15. Try hovering over and away from your Interactable, selecting and deselecting it.
16. Try adding a light to the Scene and making it turn on and off with activate and deactivate.
5. Working with the Interaction Debugger
The Interaction Debugger shows all Input Devices, Interactors, and Interactables in a Scene (Figure 04). It shows stats about Interactables, such as their Layer Mask or Colliders, and which Interactable an Interactor is hovering over or has selected. To access the Interaction Debugger, from the Window drop-down select Analysis > XR Interaction Debugger.
6. Conclusion
The events available to an Interactable make it possible to quickly add interactive elements to your VR experience.