
Demo: Texture Atlases
Tutorial
intermediate
+0XP
60 mins
(77)
Unity Technologies
Texture atlases are an efficient way of packing your textures and saving valuable resources for your 3D mobile application. In this demo, you will be able to identify the gains in performance when applying Texture atlases to your 3D scene.
Languages available:
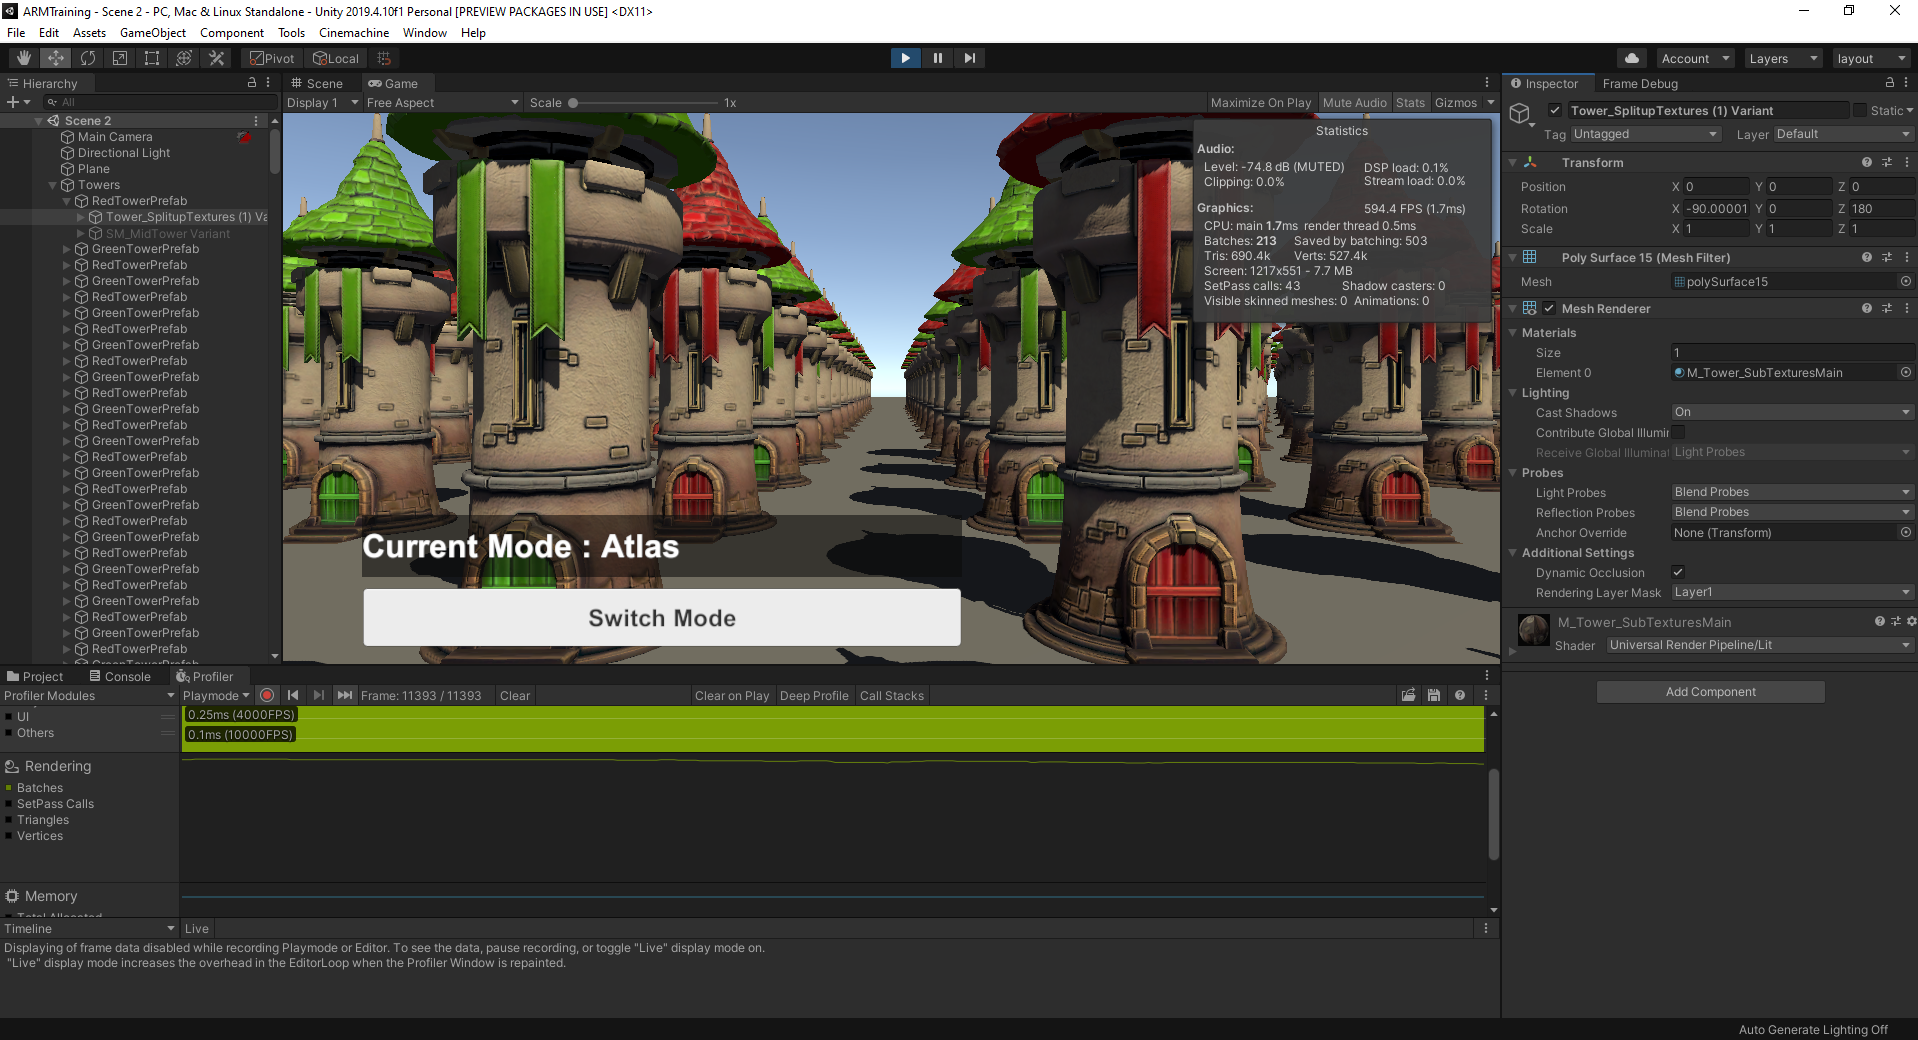
1. Batching with Texture Atlases
In a previous tutorial, you learned about implementing atlases when using multiple Textures in a mobile application. In this demo, you’ll have the opportunity to profile a sample Scene in order to compare the performance of atlassed and unatlassed Textures on static objects.
2. Before You Begin
If you haven’t done so, download the course project that contains the sample demos here. When prompted by the pop-up, click Textures Demo or open the sample Scene in the Project view (Assets > 2 Textures > Scene > Scene 2). Once downloaded and open, you can either enter Play Mode in the Editor or build the Scene to your mobile device to use the Profiler.
3. What to Watch For
Like the Geometry Demo Scene, we have the same array of towers with the player camera dollying between a row of towers. In this sample Scene, the towers that you can toggle between use either atlassed or unatlassed Textures. When implementing atlased Textures on static objects, you greatly reduce draw calls to the GPU.
Toggling between the Texture implementation, compare Batches and Saved by batching in the Stats window and the Rendering section’s Batches graph in the Profiler view. You will be able to see the difference in savings between atlassed and unatlassed implementations.
You can also watch how each frame is being drawn in the Frame Debugger view. When enabling the Frame Debugger, the Scene is paused and the number of draw calls is listed at the top along with the Render Camera label. Toggling between Texture implementations while paused will show the increase in draw calls with atlased Textures.
4. Conclusion
This project highlighted the flexibility of Textures, from the details that can be stored in one to the implementation considerations that make them performant. Whether you want to show details in your geometry or lights, it’s often more efficient to do so in the different types of data we can store in Textures. In the next project, we will learn about how Shaders and Materials support, render, and optimize Assets like Textures.