
Enemies
Tutorial
Beginner
+10XP
60 mins
(222)
Unity Technologies
The 3D Gamekit Lite contains 2 pre-made enemies: Chomper and Spitter. They are all controlled by the Enemy Controller component, and each one has a specific behaviour attached to them (ChomperBehavior and SpitterBehavior).
Languages available:
1. Meet Your Enemies
Chomper
Chomper is a melee enemy that runs towards Ellen when it detects her, and attacks when it’s close enough.
On the Chomper behaviour component found on it, you can change some settings to tweak its behaviour :
- In the Player Scanner section, you can change how this enemy detects the player (distance, angle etc.) (see next section called common settings for documentation)
- The Time to stop pursuit setting is how long (in seconds) Ellen has to stay out of the Chomper's line of sight before it stops pursuing her and returns to its original spot.
Spitter
Spitter is a ranged enemy that launches an exploding acid spit toward Ellen when it detects her. If Ellen gets too close to it, Spitter tries to run away.
Like with the Chomper, it got a specific component called Spitter Behaviour that allow to tweak its behaviour :
- The player scanner section like on Chomper allow to tweak how and when the Spitter see Ellen (see next section called common settings for documentation)
- Flee Distance: if Ellen get closer than this distance, the Spitter will flee and when running away, once it’s far away enough from Ellen, it stops fleeing and resumes attacking.
2. Common Settings
All enemies have a Player Scanner property on their behaviour that you can use to set up how they detect Ellen.
For an explanation of the settings, see the TargetScanner documentation.
They also all have a Damageable component that defines how much health they have and how they can be damaged. The Damageable component is on the root GameObject, next to their Behaviour components.
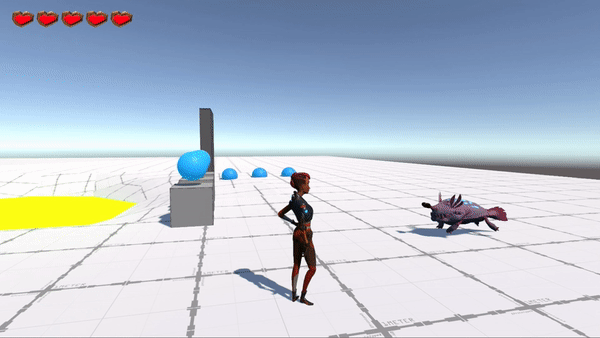
Scene view Gizmo
When you select an Enemy GameObject, the Scene view provides visualization of some of its settings.
- The blue circle represents the Player Scanner’s Detection Radius and Detection Angle. The enemy only detects Ellen if they walk within that circle.
- The yellow sphere is the Player Scanner’s Height Offset (where the "eyes" of the scanner are). The enemy only detects Ellen if nothing obstructs the line of sight between this and her.
- The red circle is the Damageable’s Hit Angle. Ellen only causes damage to the enemy if she hits it within this area.
3. Adding a Chomper
Let’s add a Chomper to our Scene:
- Go to Assets > 3DGamekitLite > Prefabs > Characters > Enemies > Chomper.
- Drag the Chomper Prefab into the Scene.
- Position the Chomper somewhere near Ellen so you can quickly test it.
Chomper’s Detection Radius (the area he can see, indicated by the blue circle in the Scene view) is currently very large. If Ellen walks in this area, Chomper attacks her. Let’s adjust this setting.
- Select Chomper in the Hierarchy window, and navigate to the Inspector window.
- In the Inspector window, locate the Chomper Behaviour component.
- Set the Detection Radius to 4.
- Press Play. Run towards the Chomper and enter its Detection Radius.
When you enter the Detection Radius, the Chomper detects Ellen and starts its attack behaviour. However, it is running on the spot and unable to move.
This is because the Chomper’s AI does not yet know which surfaces it can walk on. We use Unity’s NavMesh system to set this up. Unity handles the Chomper’s AI in the NavMesh Agent component. This component manages which surfaces the Chomper can walk on. It also manages whether it can avoid obstacles and other Chompers and Spitters while navigating the world.
We do not need to change any of these settings. The Chomper and the other enemies are already set up to behave and navigate in a specific way.
To set up the ground to be walkable by enemies, you need to add a NavMesh Surface.
- In the Hierarchy window, select the Plane (the GameObject that represents the ground).
- At the bottom of the Inspector window, select Add Component.
- Search for NavMeshSurface.
- Select NavMeshSurface to add it to the Plane.
- In the Nav Mesh Surface component, set the Agent Type to Chomper.
This tells the surface which Agent can walk on it.
Note: Only Chomper appears in this list, and Spitter doesn’t, because both enemy types use Chomper’s Agent settings.
- Set Include Layers to Nothing. This clears all Layers from selection.
- Now set Include Layers to Environment.
This is a quick way to deselect many layers and reselect the ones you wish.
- Select the Bake button.
This bakes a NavMesh in your Scene and make most surfaces walkable for your enemies. The Scene view highlights the NavMesh Surface in light blue, which indicates the areas the enemies can walk on.
If there are any gaps in the NavMesh Surface, enemies cannot walk in those areas. For example, enemies cannot walk into the acid pool.
The NavMesh Surface places gaps around GameObjects. This means that enemies cannot walk through the GameObjects that we have set up.
To test the Chomper, press Play. Now you can run up to the Chomper, and in turn, Chomper can run toward you and attack. If you run away from the Chomper, its NavMesh Agent uses the NavMesh Surface to navigate the world to chase you.
If you add more Chompers or other enemies in the Scene, they use the same NavMesh Surface; you don’t need to repeat this for new enemy additions.
When you add or move GameObjects in your Scene, you need to rebake the NavMesh Surface. To do this, select the Plane, navigate to the NavMesh Surface component and select Bake.
4. Adding A Spitter
- To add a Spitter Prefab, go to 3DGamekitLite > Prefabs > Characters > Enemies and drag Spitter into your Scene.
In the Inspector window, the Spitter is similar to the Chomper.
The Spitter is a ranged enemy that runs away from Ellen when she is too close. It uses the Fleeing Distance property to determine how close Ellen needs to be before it runs away. It then uses the Range Weapon to fire acid at Ellen.
Tip:
If the desired outcome is for Spitter to only run away from Ellen, set the Fleeing Distance greater than the Detection Radius.
It’s best to place the Spitters a fair distance away from Ellen, so that they have a better opportunity to attack and be more of a threat to her. If you want the Spitter to take the environment into consideration, then you need to look at the Spitter Behaviour component and change the View Blocker Layer Mask from DoNotDraw to Environment.
Play the Scene after adding them to see their behaviours. Experiment with different Detection Radius distances and Fleeing Distance values until you get the behaviour you want.