Explore the Prototype Room
Tutorial
Beginner
+10XP
15 mins
1261
Unity Technologies

In this tutorial, you will apply your understanding of the VR Beginner controls as you:
- Use teleportation to move around an example Prototype Room
- Interact with objects in the Prototype Room
When you’ve finished, you’ll be ready to configure your own teleportation bases and interactable objects.
Languages available:
1. Overview
In this tutorial, you’ll have the opportunity to apply your understanding of the VR controls for this learning project as you explore an example Prototype Room VR environment. This is a very simple environment, with two pre-configured interactable objects.
2. Before you begin
In this tutorial, you’ll use the VR Beginner Unity Project and your VR hardware. Before you begin:
1. Open the VR Beginner Unity Project.
2. Check that your hardware is ready. If you’re using Oculus Link with the Oculus Quest, enable and connect this now through the Oculus app.
3. Open the Prototype Room Scene
To open the Prototype Room Scene:
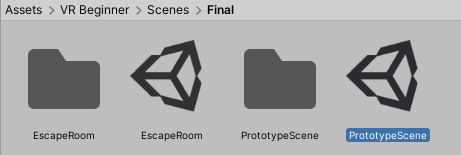
1. In the Project window, go to Assets > VR Beginner > Scenes > Final.
2. Double-click on PrototypeScene.

4. Prepare to test the Prototype Room Scene
You can test VR experiences in development directly from Unity Editor with all supported hardware except the Oculus Quest without Oculus Link. Before you review the process for exploring the Prototype Room, check that you’re ready to launch the VR experience.
To launch the Prototype Room VR experience:
1. In the Unity Editor toolbar, press Play to enter Play Mode.
2. Stand in the center of your designated play space.
3. Put on your VR hardware, if you launched the experience yourself.
Note: Once you’ve confirmed that Play mode works on your VR hardware, select Play on the Unity Editor toolbar again to exit. Changes you make while Unity Editor is in Play Mode can’t be saved.
5. Create an Android build for Oculus Quest
To test a VR experience using the Oculus Quest without Oculus Link, you need to create an Android build of the Scene:
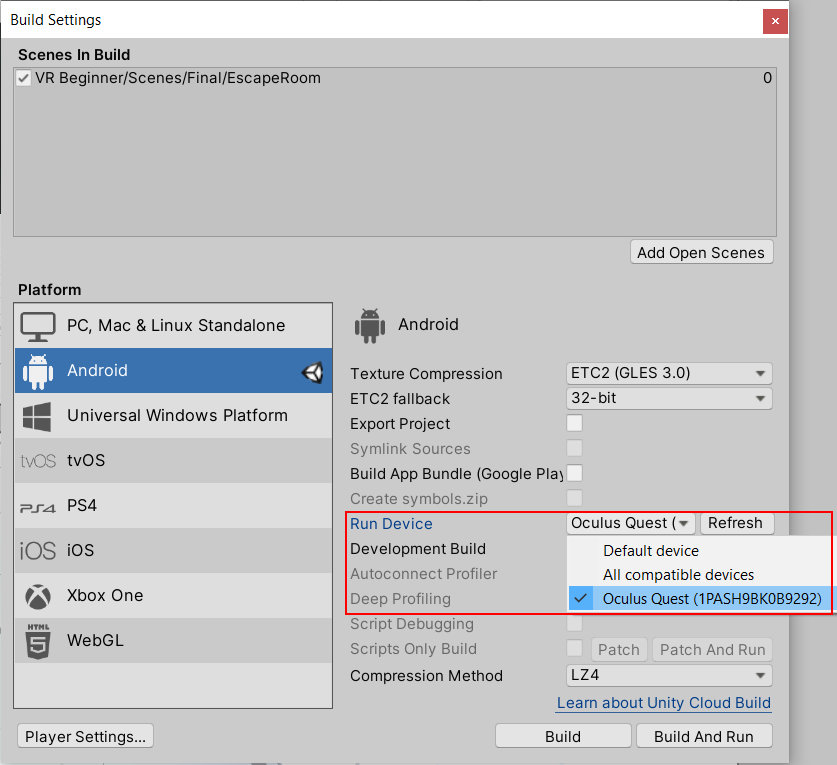
1. In the top menu, go to File > Build Settings...
2. In the Scenes in Build section of the Build Settings dialog window, disable the EscapeRoom Scene.

3. Select Add Open Scenes to add the Prototype Room to the build.

4. In the Run Device field, make sure that your Oculus Quest is selected. If it is not available, check that it is set up correctly.

5. Select Build and Run.
Note: When you build select Build and Run, your VR experience will automatically open and run on the Quest once it has been built. If the experience quits and you want to find it again, you can do so by navigating to Library > Unknown Sources inside of your Oculus Quest headset.
If you experience any problems with your Quest build, or the app isn’t functioning as expected:
- Navigate to the Unknown Sources Storage Settings and delete any previous builds
- Check that your Quest isn’t currently running an Oculus Link connection and has allowed the computer access to modify data
- If the colors in your build appear darker than expected, switch the Texture Compression to ETC (default)
6. Explore the Prototype Room
The Prototype Room is a simple space you can use to create interactive experiences using this kit. In this step, you will:
- Use the teleport functionality to move within the room
- Interact with a preconfigured object
Note: If you want to view Play Mode on your monitor rather than in the VR headset, you will need to cover up the headset sensor located in the middle top section inside of your Oculus headset (by using your hand, for example). If you are a VIVE user, ensure you are in the center of your space for accuracy, otherwise try recentering your view using the SteamVR settings.
To explore the Prototype Room:
1. Stand in the middle of your designated play space and put on your VR headset.
2. Turn to your left and find the Teleporter Base next to the fuse box and box table.
3. Move and hold the directional input forward to display the Teleporter Beam.
4. Move your controller until the Teleporter Beam touches the Teleporter Base.
5. Release the directional input to transport yourself to the table box.
6. Move your hand to the fuse on the table and press the grip button to pick it up.
7. Reach towards the fuse cabinet. The fuse slot will highlight when it is within range. Press the grip button to place the fuse.
8. Reach for the lever and hold the grip button to grab it. Pull your controller downwards to move the level as you would in the real world. You’ll see sparks coming from the fuse cabinet.
Here's a video of the whole process:
7. Summary
In this tutorial, you have teleported and interacted with an object in the Prototype Room environment.
In the next tutorial, you’ll create teleportation bases and interactable objects in your own version of the Prototype Room.