Exporting
Tutorial
Beginner
+0XP
0 mins
Unity Technologies

Covers the in's and out's of exporting. The tutorial focuses on two major DCC packages, Blender and Maya. This may extend to other software in the future such as 3D Max, Houdini, ZBrush, Adobe products, etc.
At the end, you will have a change to write a basic exporter in python and a little bit of MEL. Disclaimer, learning python or how to install python is beyond the scope of this tutorial as well as learning Maya or Blender. It is assumed that you have a basic understanding of both the language and the software.
In order to prep for the tutorial, you may refer to these resources:
- Learning Maya - A playlist of Maya lessons. The videos are from several years ago, but many workflows remain the same
- Blender Tutorial for Complete Beginners - Series of videos by Blender Guru
- Python for Beginners - Decent crash course into the basics of Python
- Python.org
Languages available:
1. Why do I need to write an exporter?
To begin, exporting from any DCC software almost always refers to the step of converting the software's native file format into a file format another tool can read. In our case, the other tool is the Unity Editor, and most commonly, the file format is .FBX.
For relatively simple assets, most DCC software will have a built-in way to export out an asset. It can be straightforward as finding the export option in a menu and then providing the software a location to save the converted file to. And for relatively simple assets where there's only one or two steps, the built-in option is perfectly fine. However, it's easy to imagine how the number of steps can build up:
Say you have a file with just a character mesh, including materials and textures. As a static mesh, you only have to hit an easily accessible 'export' button. But now add a skeleton and animation controls for your animators, add some simple geometry for your collision system, then add duplicate meshes to run a baked cloth sim. Then what about if you add props, mesh variants, a camera rig, dynamic shaders, attachment points, etc. If you want to simply export out your base character mesh, it's no longer straightforward. What if you had to export out a dozen characters from similarly packed files, every single time there's a change to the file?
If an artist had to do this manually, every time they wanted to preview their character in game, it would be incredible painful. Like most things in the TA philosophy, it's all allowing your artists to spend time on what's most important to them, creating art. Imagine a script that automatically selects the correct parts in the file and exports them with the correct settings, to the correct location in your system with just one button click. Doesn't that sound like a dream come true?
2. Where to start?
Hopefully you can see why, in many cases, you'd want to automate the export process. Luckily, major DCC packages have a scripting API available. API stands for Application Programming Interface, and it allows someone to use pre-written functions that calls the same code the software runs when told to do something manual. We can string together these APIs to mimic what a user can do, and even things that would be impossible for the user to do.
To help understand APIs better, let's write a Mesh exporter for two popular DCC tools, Maya and Blender.
3. Maya Scripting Recap
Maya is written C++ but supports two scripting languages, MEL and python. MEL stands for "Maya Embedded Language" and can be used to create GUIs and control workflows strictly in Maya. Support for the interpreted language, python 2, was added to a later version of the software to allow for more powerful scripting capabilities and the ability to more easily integrate with other DCC pipelines.
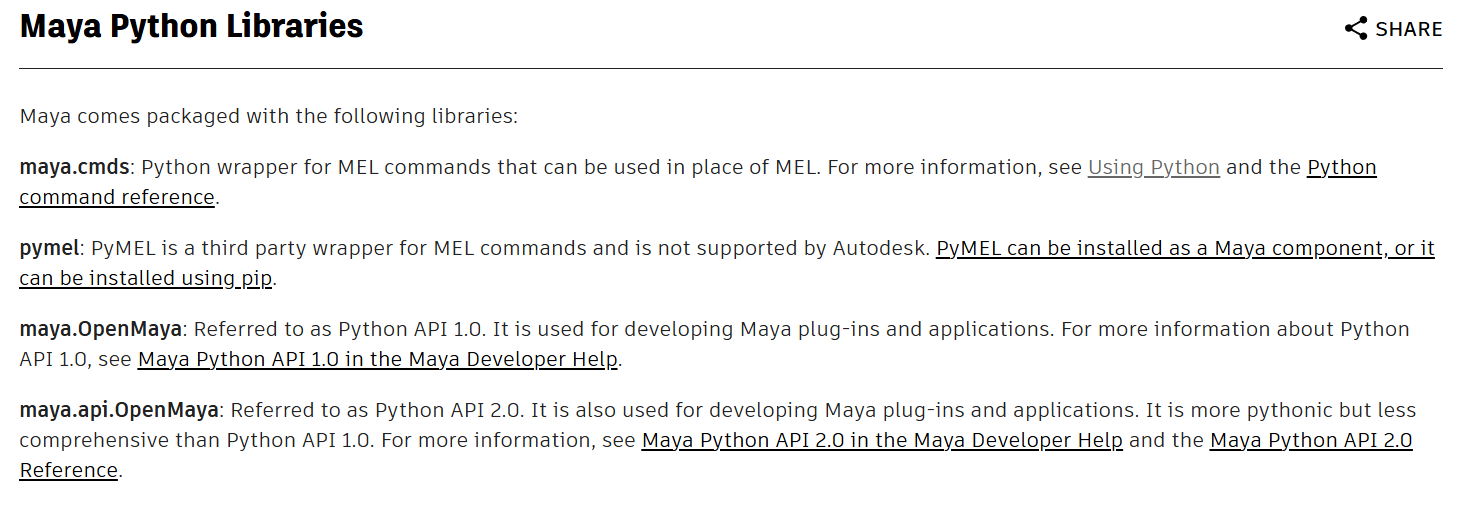
When it comes to python, currently in Maya 2024, Maya comes with it's own python 3 interpreter called mayapy. It also includes the following libraries:

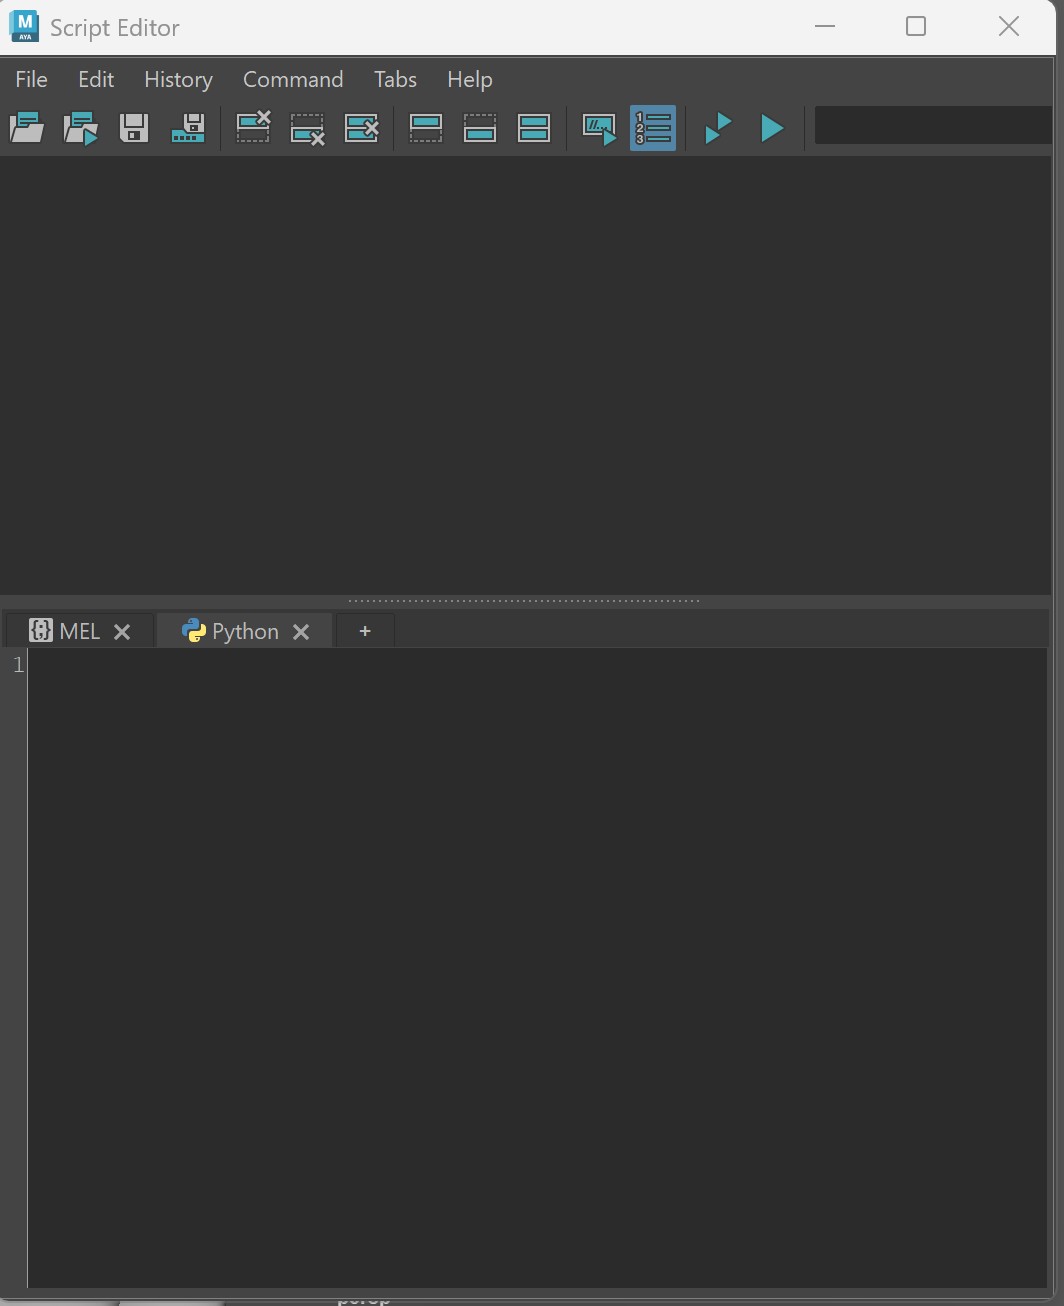
Maya also includes a Script Editor that you can use to write MEL and Python code snippets or load and save python files. The Editor runs mayapy behind the scenes.
You can read more about these libraries and in Maya's latest documentation.
4. Maya Mesh Exporter, Part 1 - What do we want to export?
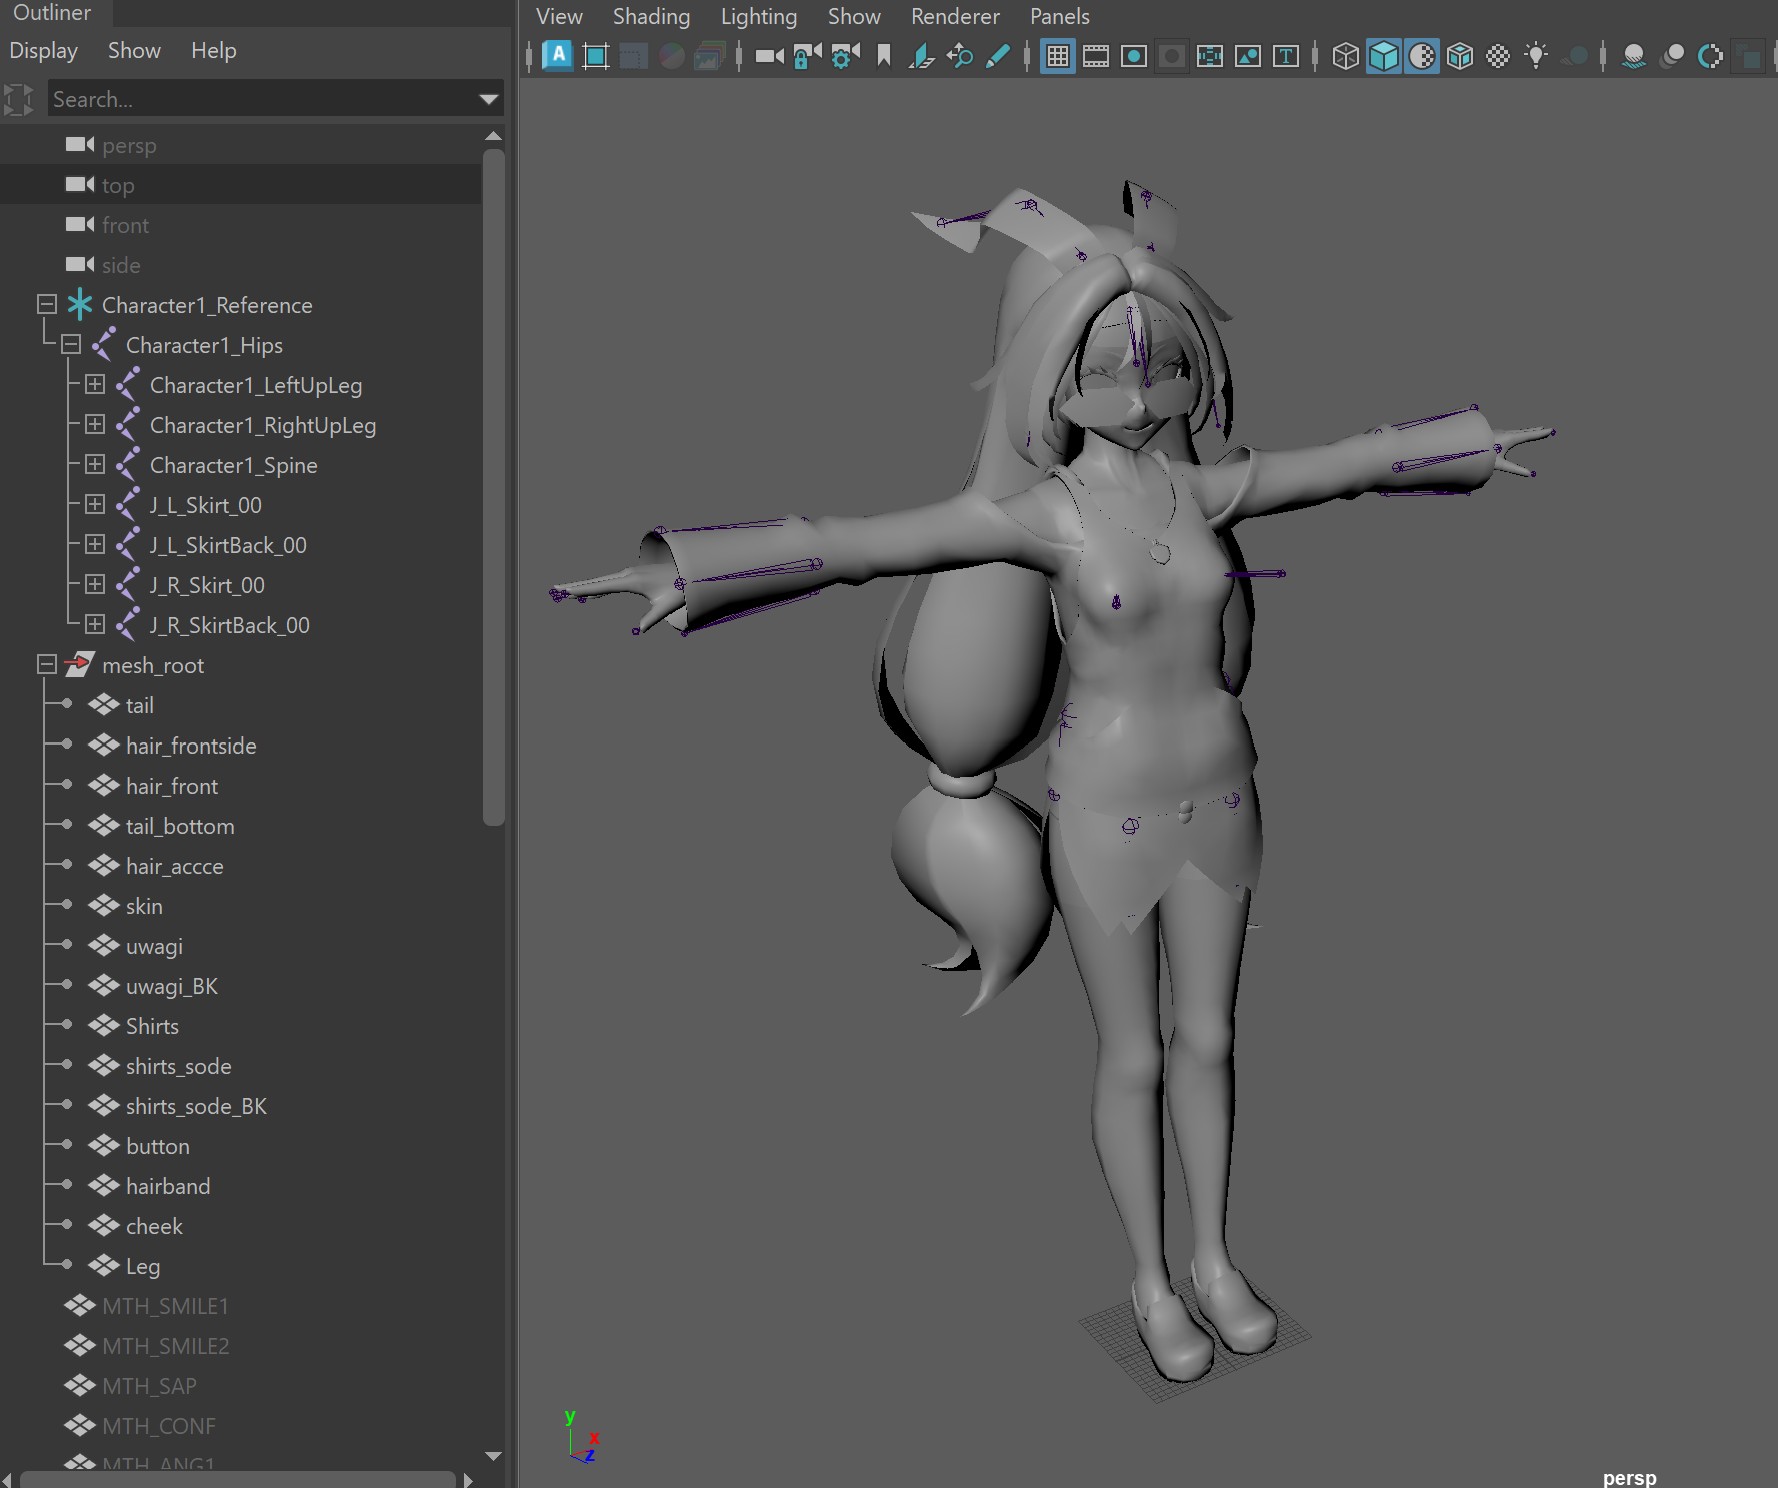
In this exercise, we're going to use the Script Editor to write a basic mesh and animation exporter using maya.cmds. For the exercise, we're going to use the Unity Chan model that comes with the free Asset Store package linked below. You'll need to import the assets into a Unity Project and then locate the 'unitychan.fbx' file.

We're not going to be dealing with namespaces in this tutorial, so you can choose not to include it. We're also not going to deal with referencing in a character, which means you can use the simple Import option from the file menu. Lastly, don't worry about missing shaders or materials. Once you have the character imported into the scene, open the Outliner.

You'll notice in the Outliner there are two parent nodes, Character1_Reference (skeleton hierarchy) and mesh_root (meshes). For a clean export of the skelmesh, let's say we want to export only these two root nodes and all their children.
If we were to export the skel mesh manually, the steps would be something like this:
- Find the root nodes: Character1_Reference and mesh_root
- Select root nodes and all their children
- Open the Export Selected Dialog and choose the appropriate export settings
- Select a file location to export to
- Complete the export
We've that now identified the basic functionalities of our script, let's get started.
5. Maya Mesh Exporter, Part 2 - Writing the exporter
Bring up the Maya Script Editor. The quickest way to open the Editor is click on the icon at the bottom right of the screen.

The Editor should pop up. There are two major components, the console window at the top, and your script editor at the bottom. Since we're writing our script using Python, select the python tab.

A few things to note when working in the Editor. CNTRL+Enter (Windows) is the shortcut for executing selected commands in the editor window. This means, if you have lines selected, it will execute only the selected code. If no lines are selected, it will execute everything in the window and then clear the editor.
To prevent your work from being cleared, it's a good idea to save your script first.
Now remember the steps to perform our chosen export:
- Find the root nodes: Character1_Reference and mesh_root
- Select root nodes and all their children
- Open the Export Selected Dialog and choose the appropriate export settings
- Select a file location to export to
- Execute the export
An easy way to get started is to address each requirement, one step at a time. As you get more experienced you'll be able to pre plan how to organize your code, call out challenges and dependencies, set things up for extensibility, etc.
Here's what a first pass might look like:
import maya.cmds as cmds

cmds.select('Character1_Reference', hierarchy=True)
cmds.select('mesh_root', hi=True, add=True)

EXPORT_FILE_NAME = "C:/unitychan2.fbx"
cmds.file(EXPORT_FILE_NAME, exportSelectedStrict=True, type="FBX export", force=True, prompt=False)
Breaking down the lines above, first we import the necessary python libraries (line 1). Now we can use all the commands available in the cmds module. For now, the only ones we need are select and file. The two lines calling cmds.select both take a named node (string) as a single main flag, but have slightly different signatures.
Here is a good time to talk about command flags. These basically act like python arguments and keyword arguments. The optional flags usually have both a long and short name. In the example above, you can use either hierarchy or hi. Flags can also be contextual; some are only valid when in a specific mode, such as Create or Query. For a complete list of Maya commands, check out the documentation here.
In our case, the first call selects a node called 'Character1_Reference' and the hierarchy flag set to True tells Maya to select all the children under the node. The second call does the same, with one additional flag, add. When set to True, Add tells Maya to append the new selection set to the old instead of replacing it.
The final step assigns a path to EXPORT_FILE_NAME (a constant), then passes that to the file command for export.
One more command that is useful in cases where you have to wrap MEL inside of python is mel.eval(cmd), where cmd is a string containing MEL. A case that's relevant here is accessing the FBX plugin within Maya. We can tap into the plugin in order to adjust export settings. You will need to import the MEL module to get access to mel.eval().
import maya.cmds as cmds
import maya.mel as mel

cmds.select('Character1_Reference', hierarchy=True)
cmds.select('mesh_root', add=True, hierarchy=True)

EXPORT_FILE_NAME = "C:/Users/bobic/OneDrive/Desktop/unitychan2.fbx"

mel.eval("FBXExportSmoothingGroups -v true")
mel.eval("FBXExportHardEdges -v false")
mel.eval("FBXExportTangents -v false")

cmds.file(EXPORT_FILE_NAME, exportSelectedStrict=True, type="FBX export", force=True, prompt=False)
Read here for more information on the FBX plugin and how you can access it via command line.
6. Maya Mesh Exporter, Part 3 - Exercise 1
Take the above code and add the following functionality before exporting
- Adjust the timeline to 200 frames
- Create an animation by changing joint transforms and setting a key at different frames. Then Bake out the animation and include it in your export
- Create a simple dialog box that allows the user to enter a file name and location for the export
- Add validation and error messaging or exception handling to the script. i.e. check for existence, check if the fbx already exists and allow the user to chose if they want to overwrite the existing file.
- Add your script to a new custom Maya menu
7. Blender Mesh Exporter, Part 1
Repeat the same exercise using Blender