Get started with the Package Manager
Tutorial
·
foundational
·
+10XP
·
10 mins
·
(13252)
Unity Technologies
Packages contain various enhanced Unity Editor features that help you create the experiences you want. In this tutorial, you’ll learn about the Package Manager in the Unity Editor, which you’ll use to add and manage packages within your Unity projects.
Languages available:
1. Overview
In this tutorial, we’ll guide you through the basics of packages and the Package Manager. There is one package that will be useful to you later in this pathway, and we’ll show you how to install it.
If you want to explore the topic of packages in more depth, you can review the “Packages” topic in the Unity Manual.
2. What are packages?
In the simplest terms, packages are small collections of Unity features or assets that help you do different things in your projects. This includes both:
- Core features of Unity, that are installed by default alongside the Editor
- Additional packages, that you can install in a project when you need them
Packaging different features together reduces the initial download size and time required to install a Unity version, and means that you can customize the Editor to meet the specific needs of your projects.
You can manage the packages in the Unity Editor using the Package Manager window. You can also view Asset Store packages you have downloaded or installed there.
Note: In this tutorial, we’ll guide you through the basics of packages and the Package Manager. If you want to explore this topic in more depth, then you can review the Unity Manual.
3. Open the Package Manager
You will use the Package Manager window to install, remove, and update packages that add functionality to the Unity Editor.
To open the Package Manager from the Unity Editor, go to Window > Package Manager.
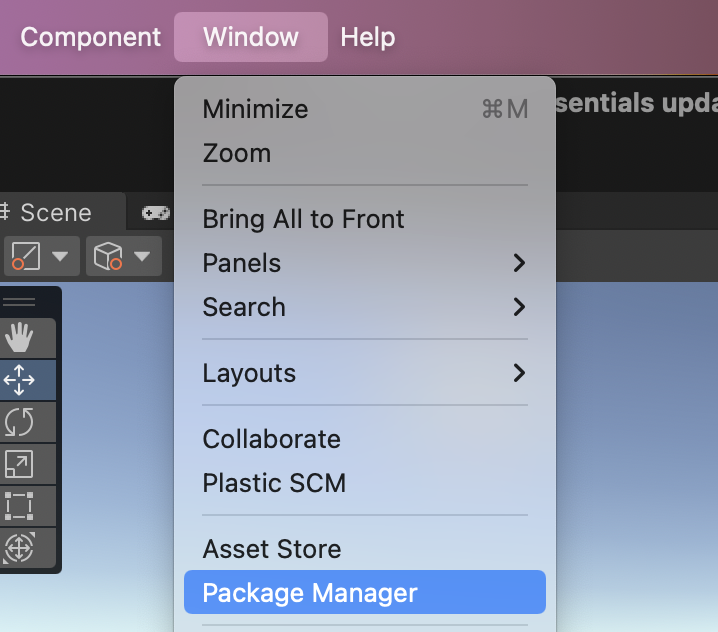
By default, the window will show the Unity Registry, listing all the available packages you can use to enhance Unity Editor. There are quite a lot of packages!
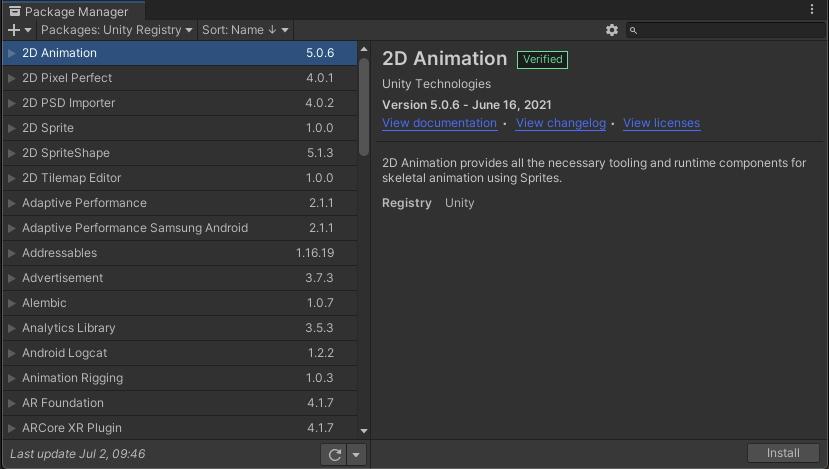
Should you ever need specific information about a particular package, you can find each package’s documentation in the Unity Manual.
Beyond the functionality provided by the core Editor and packages, as you gain experience, you might need more custom tools to achieve your goals. This is possible through both third-party plugin integrations and by creating your own in-Editor tools. Keep this in mind as you become more experienced — your possibilities are limitless!
4. View your in-project packages
Next, let’s review the packages in this specific project:
1. In the left-hand corner of the window, select the package scope drop-down menu and choose In Project.
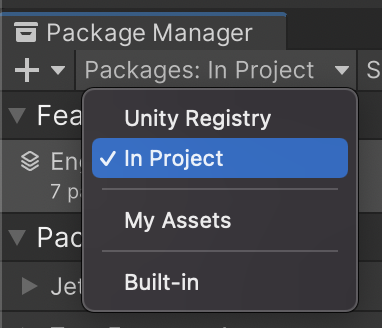
The view will filter to show you just the default packages for the 2D or 3D Template that you have selected.
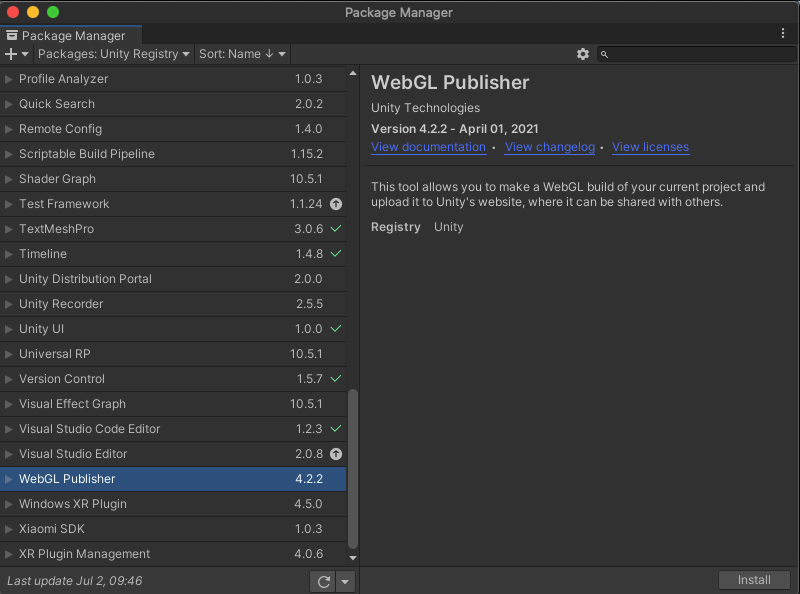
2. Let’s add a package to help you to share your work with others later in this course. Scroll the list of in-project packages and check if you have the WebGL Publisher package.
3. If you have the WebGL package and you see the checkmark icon, then you have the latest version, and you can skip the remaining steps.
4. If you see the arrow icon, then you can update this package to the latest version. Select Update to [version number] to update it.
5. If you do not have the WebGL Publisher package as indicated by a checkmark, return to the Unity Registry view and select it. Then select the Install button to add it to the Unity Editor.
5. Review your assets
Another useful feature of the Package Manager is the My Assets section, which catalogs assets you have imported from other sources — including the Unity Asset Store, which you will visit later in this course.
⟶ In the left-hand corner of the window, select the package scope drop-down menu and choose My Assets.
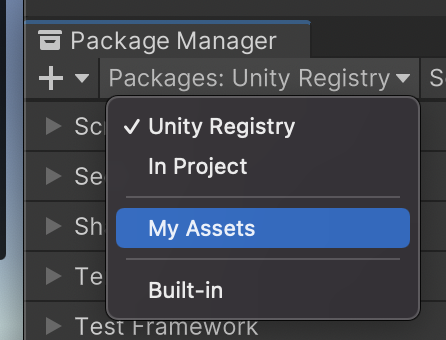
You will see a list of assets used in your project, plus any assets you might have imported into Unity already. Later, you will use this window to bring new assets into Unity to use in your own projects.
6. Next steps
You have had your first look at the Unity Hub, Editor, and Package Manager — three essential toolsets in Unity. You have completed the tutorials in this mission, and you’re ready for your first quiz!