
Get started with Unity Ads
Tutorial
intermediate
+10XP
30m
(256)
Unity Technologies
Monetization of your Unity project through Unity Ads is a great way to generate revenue without charging your customers directly. A successful free ad-supported game will bring in many times the asking price of an ad-free game that must be purchased outright.
In this tutorial, you’ll enable Unity Ads and implement an ad in your own project.
Languages available:
1. Overview
Monetization of your Unity project through ads is a great way to generate revenue without charging your customers directly. A successful free ad-supported game will bring in many times the asking price of an ad-free game that must be purchased outright.
In this tutorial, you’ll enable Unity Ads and implement an ad in your own project.
2. Before you begin
When you first enable Unity Services for a project, you’ll be asked to assign the project to an organization. By default, your Unity account has one organization: your user name. Organization names must be unique. You can add (but not currently delete) more names, or rename an account at will, as long as the proposed new name is available. You might wish to have one organization for your solo projects, and one for your team.
3. Connect a project to Unity Ads
Before you can display ads in your Unity project, you need to enable Unity Services for it:
1. Open a Unity project that you want to display ads in.
2. Go to File > Build Settings and select either Android or iOS as your chosen build platform.
3. In the top menu, select General > Services.
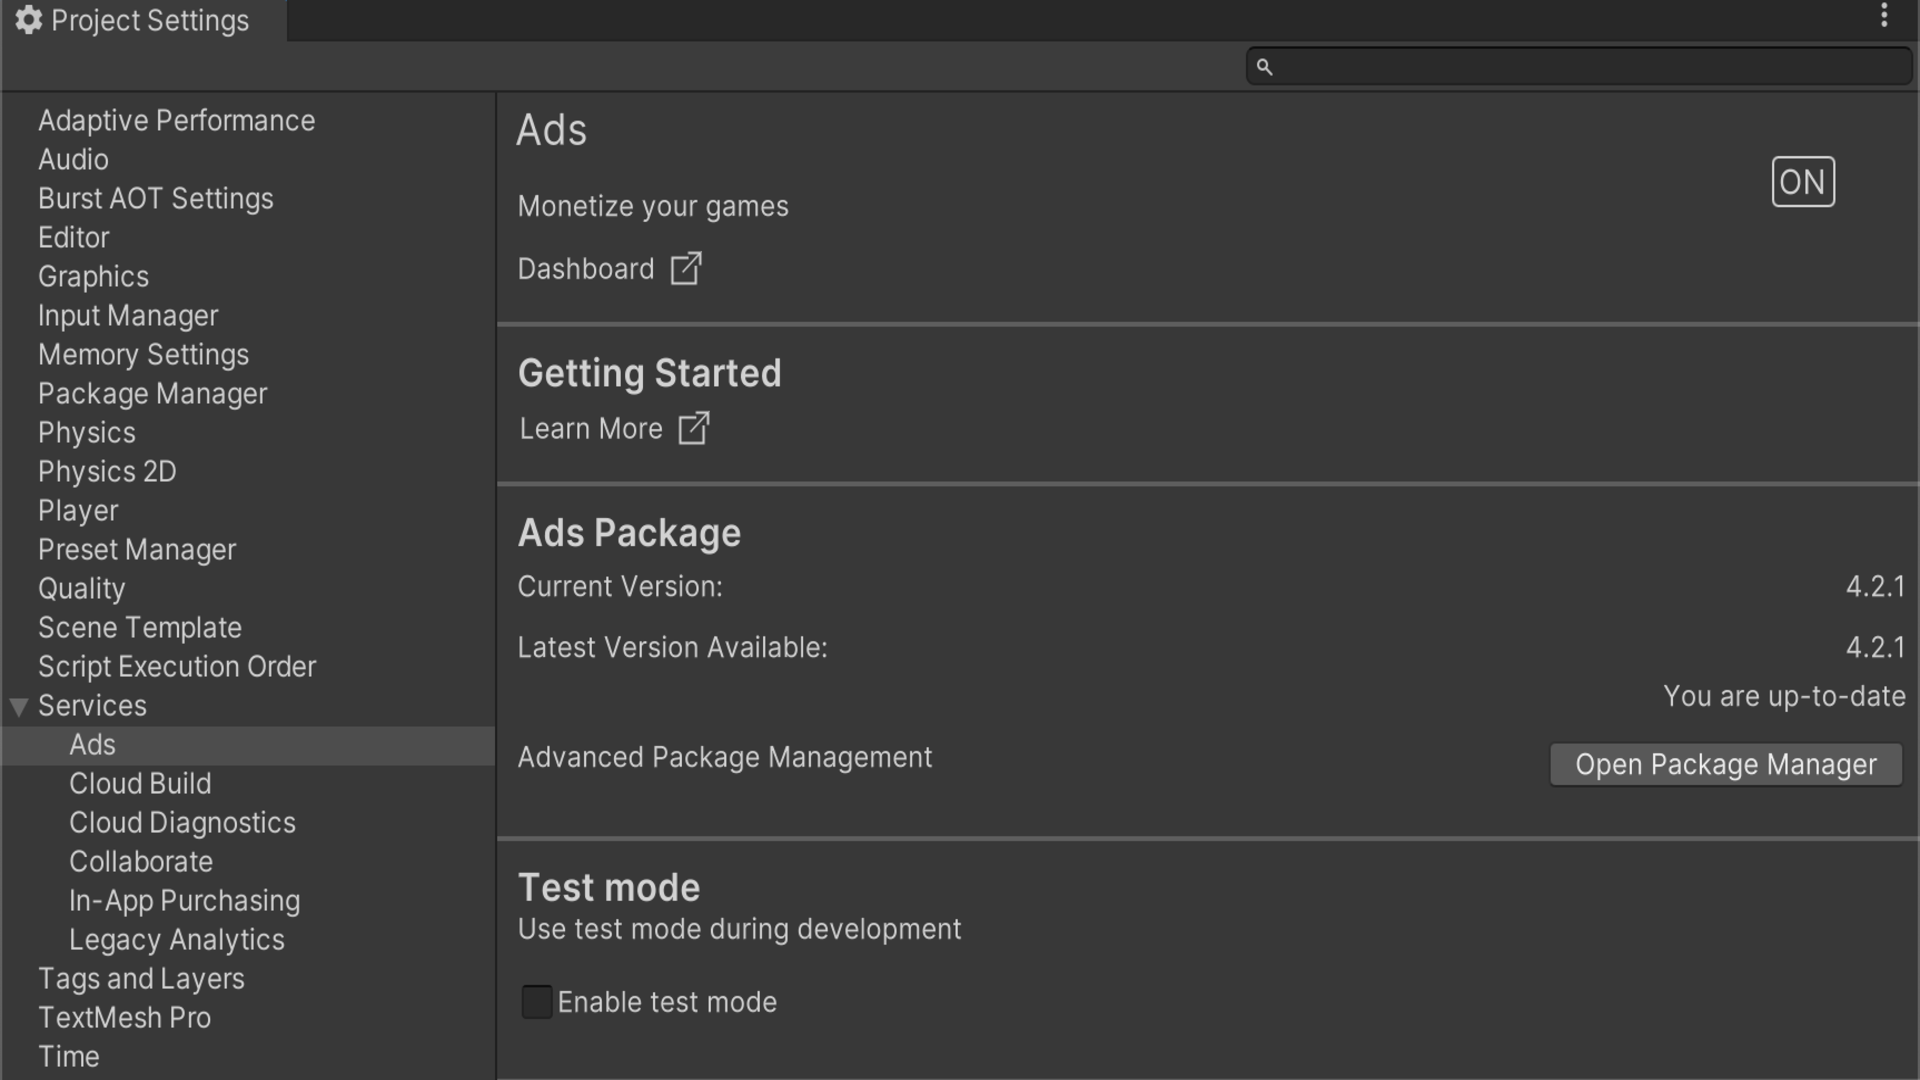
4. Select Ads. If you haven’t yet enabled any Unity Services for this project, this will open the Project Settings dialog window.
5. If this Unity project has already been set up in your Dashboard, select Use an existing Unity Project ID, and then select your project’s name and organization. Otherwise, select the organization for this project and then select Create project ID.
Note: If you have Unity create your Project ID for you, it will set the name based on either the project name for desktop projects, or the Product Name in Player Settings for mobile projects.
6. Declare whether or not your app will primarily be targeted to children under the age of 13.
7. Once you have enabled Ads, it is important to use the latest version. If your current version isn’t the latest version available, select Install Latest version to update it.
8. In the Project Settings window tab panel, select Ads and then enable Test Mode. If you don’t enable Test Mode and watch real ads on devices to test while developing, your account can be flagged for fraud.
4. What is an Ad Unit?
Ads are shown in the designated Ad Unit for your project. Rather than a literal scene or GameObject, an Ad Unit is just a mode defining how your players can interact with ads. Options include muting the audio and if or when they can skip the ad.
For example, you wouldn’t want players to have the ability to skip a lucrative rewarded video. All projects in the Dashboard begin with three Ad Units for each platform, for example Interstital_Android, Rewarded_Android, and Banner_Android for the Android platform.
5. Complete your Unity Ads activation
Before you can prepare to display an ad in your app, you need to complete the Unity Ads activation process:
1. In your web browser of choice, go to the Unity Gaming Services dashboard. .
2. From the dashboard main menu, select Monetize.
3. Select the name of your project from the dropdown list available.
4. If you haven’t completed activating monetization for your Unity organization, select Complete Activation.
5. Select the Mediation Partner to serve ads in your app. In this tutorial you are integrating the Unity Ads directly without any mediation. Select I’m not using Mediation, only Unity Ads.
Note: If this dialog window is not displayed, it means you have already completed the Unity Ads activation. Go to Monetization > Project Overview > Settings > Mediation partner and check that the Mediation partner field states Unity (not mediated).
6. Prepare to trigger an ad
Showing an ad, from initialization to display, takes just a few lines of code. In this tutorial, you’re only going to trigger an ad. The Unity Ads display has a built-in button to close the ad.
Before you can trigger an ad, you need two pieces of information: your project’s Game ID for the platform(s) on which it will display ads, and the name of the Ad Unit ID. You can find both of these in the Unity Dashboard:
1. In the Unity Gaming Dashboard main menu, select Monetization > Project Overview > Ad Units.
2. Make a note of your project’s Game IDs. Check that these Game IDs are the same as the Game IDs for the project in the Unity Editor (main menu: Edit > Project Settings > Services > Ads).
3. In the same Unity Gaming Services dashboard tab, you can view or add Ad Units. By default there are three Ad Unit IDs for each platform, such as Interstitial_Android, Rewarded_Android, and Banner_Android for the Android platform.
4. Select an Ad Unit ID to view its settings. Select the arrow to the left of the placement name to return to the placement list.
5. When you’re ready, return to the Unity Editor.
7. Write the script to display an ad
Now you’re ready to write the script to display an ad:
1. In the Unity Editor, create or load the scene in which you want to play the ad.
2. In the Hierarchy, select Add (+) and then Create Empty.
3. Name the new GameObjected “AdDisplayObject”.
4. Create a new script called “AdDisplay” and open it in your IDE of choice.
5. To use Unity Ads, you need to reference the Advertisements namespace. On line 4, add:
using UnityEngine.Advertisements;6. Beginning on line 8, type:
public string myGameIdAndroid = "XXXXXXX";
public string myGameIdIOS = "XXXXXXX";
public string adUnitIdAndroid = "Interstitial_Android";
public string adUnitIdIOS = "Interstitial_iOS";
public string myAdUnitId;
public bool adStarted;
private bool testMode = true;
Important: On lines 8 and 9, replace XXXXXXX with your Game IDs.
7. Since the Game ID and AdUnitId are different between iOS and Android, you can use #if, #else, and #endif directives to execute the code corresponding to the OS on which your app is running. In Start(), beginning on line 17, add:
#if UNITY_IOS
	Advertisement.Initialize(myGameIdIOS, testMode);
	myAdUnitId = adUnitIdIOS;
#else
	Advertisement.Initialize(myGameIdAndroid, testMode);
	myAdUnitId = adUnitIdAndroid;
#endif
Note: If this were a real app, #else could be extended to:
#else if UNITY_ANDROID. Doing this while running in the Unity Editor would disable the app from initializing Unity Ads, and the code is fine as is.
8. In Update(), beginning on line 27, add:
if (Advertisement.isInitialized &&  !adStarted)
{
	Advertisement.Load(myAdUnitId);
	Advertisement.Show(myAdUnitId);
	adStarted = true;
}
9. AdDisplay is now complete. Save your changes and return to the Unity Editor.
Review the full AdDisplay script
using System.Collections;
using System.Collections.Generic;
using UnityEngine;
using UnityEngine.Advertisements;

public class AdDisplay : MonoBehaviour
{
    public string myGameIdAndroid = "YOUR_GAME_ID_HERE";
    public string myGameIdIOS = "YOUR_GAME_ID_HERE";

    public string adUnitIdAndroid = "Interstitial_Android";
    public string adUnitIdIOS = "Interstitial_iOS";

    public string myAdUnitId;
    public bool adStarted;

    private bool testMode = true;


    // Start is called before the first frame update
    void Start()
    {
        #if UNITY_IOS
	        Advertisement.Initialize(myGameIdIOS, testMode);
	        myAdUnitId = adUnitIdIOS;
        #else
                Advertisement.Initialize(myGameIdAndroid, testMode);
                myAdUnitId = adUnitIdAndroid;
        #endif

    }

    // Update is called once per frame
    void Update()
    {
        if (Advertisement.isInitialized && !adStarted)
        {
            Advertisement.Load(myAdUnitId);
            Advertisement.Show(myAdUnitId);
            adStarted = true;
        }

}8. Complete implementation and test the ad
Now you’re ready to complete implementation and test an ad:
1. Add the Ad Display component to your AdDisplayObject GameObject.
2. Enter Play mode. The test ad should display immediately.
3. Exit Play mode.
9. Next steps
Unity Ads is a quick, easy way to add a dependable revenue stream to your app. With careful placement, ads can seamlessly integrate into a player’s experience without feeling like it breaks the flow of fun.