Hand tracking and gestures
Tutorial
intermediate
+10XP
30 mins
Unity Technologies
Hand tracking is a feature that allows users to interact with applications without the need for controllers or other input devices. The Magic Leap 2 uses a combination of cameras and sensors to detect and track hand movements in real time, which allows for accurate interactions with digital objects. A selection of common gestures, such as pointing, grabbing, and pinching can be recognized by the headset and can be used in applications.
In this tutorial, you will learn how to implement hand tracking and gesture recognition in a Magic Leap 2 application, including an example where hand tracking is used to manipulate meshes in a 3D model viewer.
Languages available:
1. Overview
What is hand tracking?
Hand tracking is an emerging aspect of XR that is often showcased in popular media. Hand tracking enables users to engage with digital content in a more intuitive and familiar manner, replicating forms of real-world interactions.
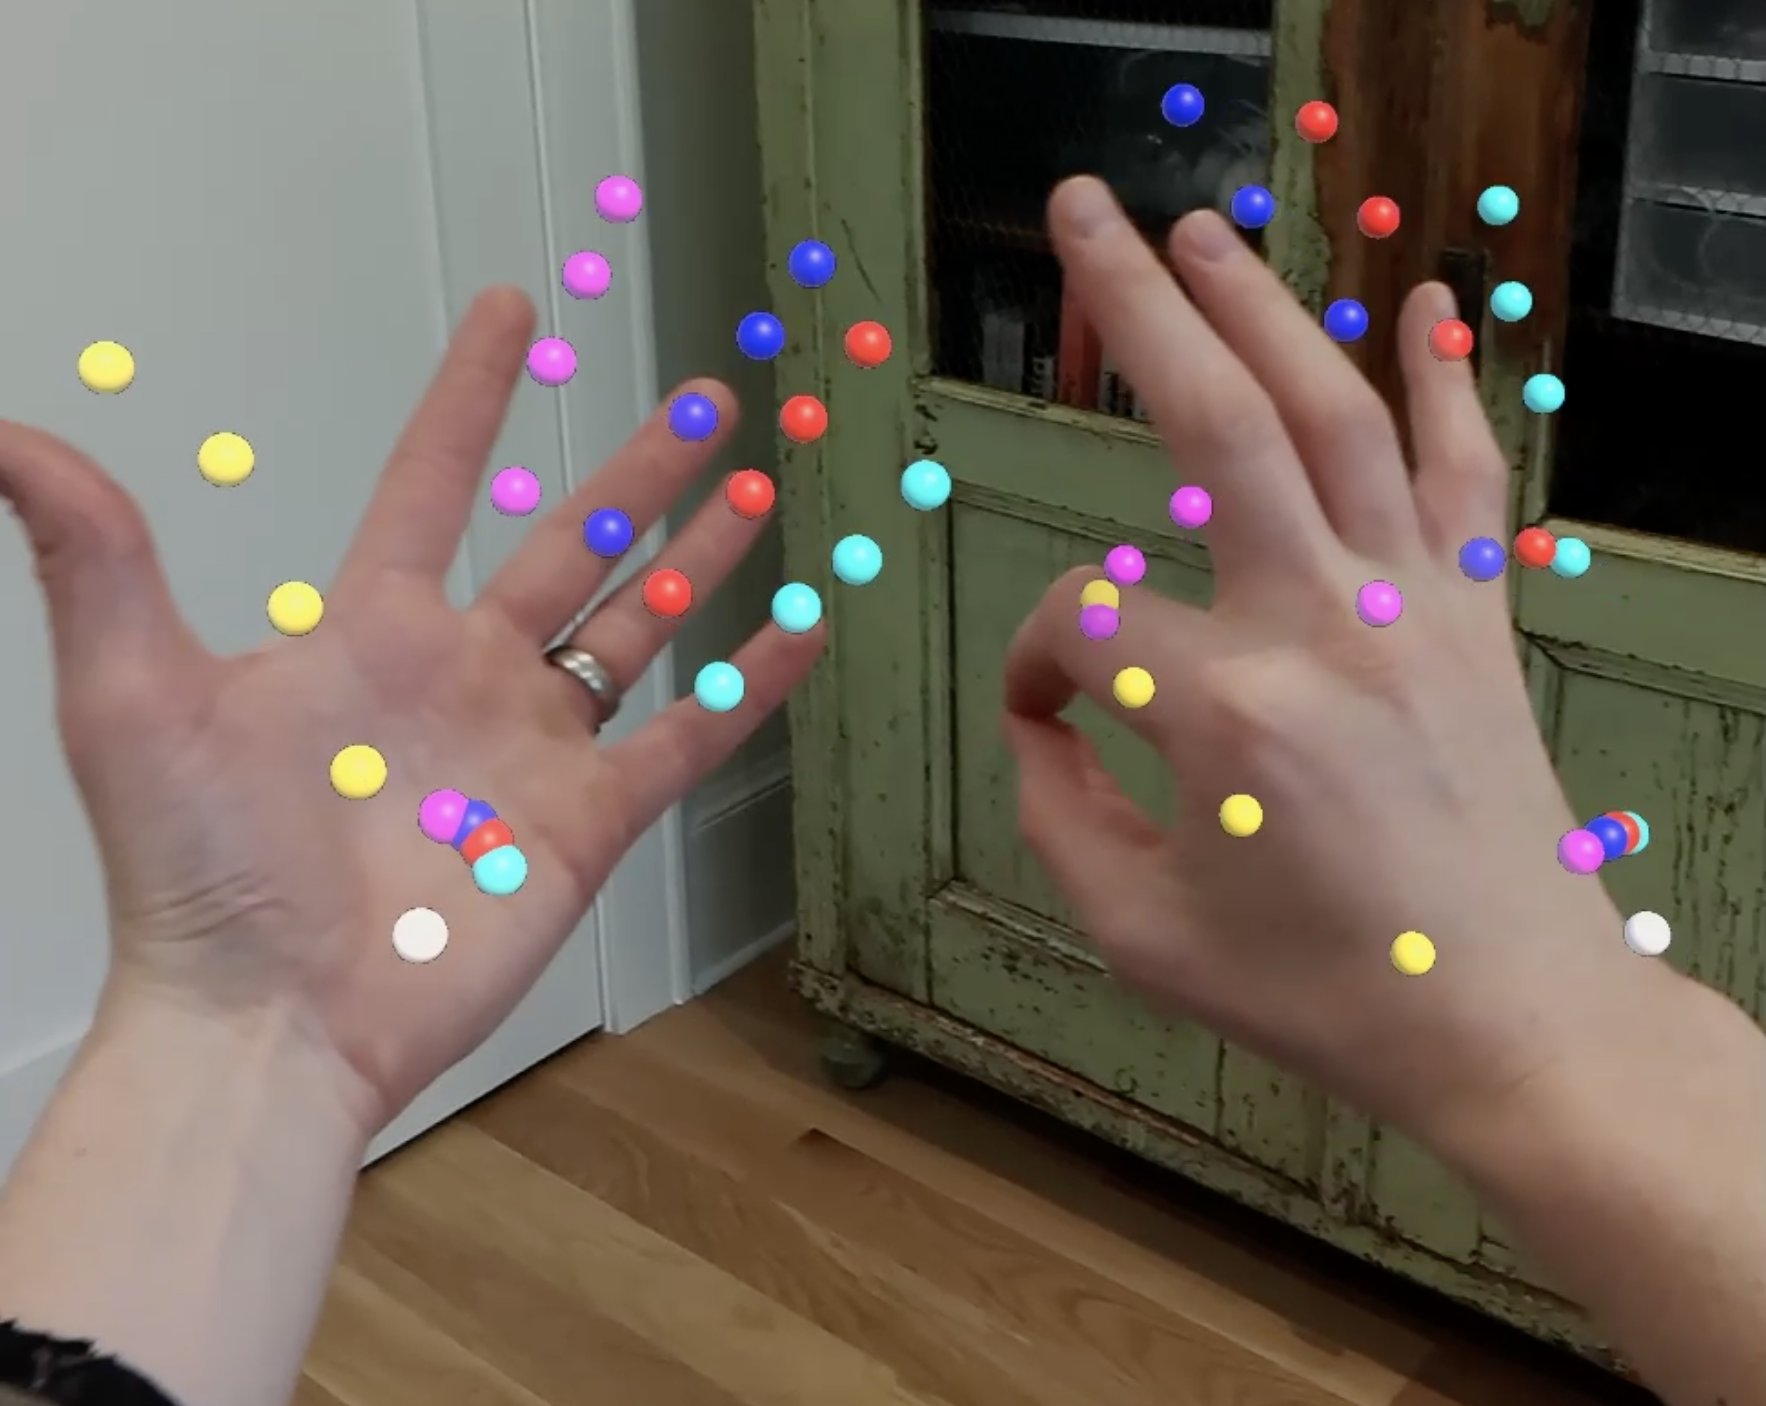
When hand tracking is enabled on the Magic Leap 2, the headset uses its cameras and other sensors to track the user’s hand position and movement. This tracking is extremely detailed and is capable of recognizing and tracking individual fingers and their angles.

What is gesture recognition?
With precise tracking of the user’s hands, the Magic Leap 2 can recognize key gestures, which can then be used to trigger events within an application. You can check out some of the examples of types of gestures and poses that the Magic Leap 2 detects for yourself using the Gesture Classification example scene, which is also shown in the video below.
Why include hand tracking and gesture recognition?
For users who are not used to using controllers or find other input methods such as keyboards challenging, hand tracking provides a more natural and user-friendly option. Additionally, not relying on controllers can be particularly advantageous for individuals using the Magic Leap 2 in work environments, as it allows them to keep their hands free for other tasks when they are not directly interacting with the application.

What you’ll learn in this tutorial
In this tutorial, you’ll learn how to configure a project to use hand tracking and gesture recognition to interact with digital content in your application.
You’ll also review an example where hand tracking and gesture recognition are used alongside other features like marker tracking, segmented dimming, and spatial audio within a 3D model viewer prototype.
2. Before you begin
Before you begin working through this tutorial, you should make sure your development environment is set up for Magic Leap 2 development and download the example prototype project.
Set up your development environment
If this is your first time developing in Unity for the Magic Leap 2, make sure you have your development environment configured properly using one of the following guided options:
- Follow the Unity: Getting started guide from the Magic Leap 2 developer documentation.
- Follow the Magic Leap 2 in-Editor tutorial project in the Unity Editor.
Download and open the example prototype
This tutorial will guide you through the implementation of this feature in your own application using an example prototype. If you want to explore the code of the prototype yourself, download the accompanying prototype project and open it in Unity.
3. Basic hand tracking setup
Add an XR Rig to the Unity scene
Just like with any Magic Leap 2 project, the first step is to add the XR Rig prefab to the scene from the Magic Leap SDK package (Packages > Magic Leap SDK > Runtime > Tools > Prefabs) and then delete the Main Camera GameObject.

Enable the Hand Tracking permission
In order to scan markers in your application, you must have HAND_TRACKING enabled in your project’s manifest settings. To do this, navigate to Edit > Project Settings > Magic Leap > Manifest Settings. You might also want to include a check in your code to make sure that this permission is granted at the start of the application.
Download and import the Hand Visualizer and Hand Controller scripts
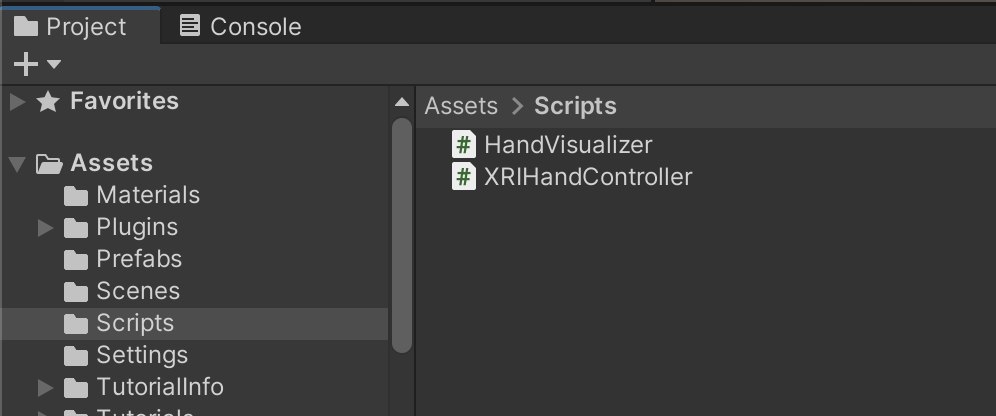
The scripts that control and visualize users’ hands are complex and too long to embed here, so we recommend that you open the example prototype, locate HandVisualizer.cs and XRIHandController.cs, and import them into your current project. You’ll need both of these scripts in the next step.

The HandVisualizer script is taken from Magic Leap’s hand tracking sample scene. This script helps visualize the hand by attaching colored spheres to each of the hand’s keypoints.
The HandController script inherits from Unity’s XR Interaction Toolkit (XRI) ActionBasedController class. This script overrides the tracking information to use the tracked hands instead of the default controller.
Set up the hand tracking GameObjects in the Hierarchy
Since our plan is to use the user’s left and right hands as controllers in the scene that can interact with objects, we will use a lot of the same components provided by XRI’s default left and right hand controllers.
To set up the required GameObject structure in your Hierarchy, follow these instructions:
1. Create a new, empty GameObject, name it “Hand Tracking”, and make it a child object of the Session Origin.
2. Duplicate the default LeftHand Controller and RightHand Controller GameObjects, then paste them as child GameObjects of the new Hand Tracking GameObject.
3. Rename the new GameObjects appropriately to “LeftHand” and “RightHand” and set them as active.
Configure the hand tracking script components
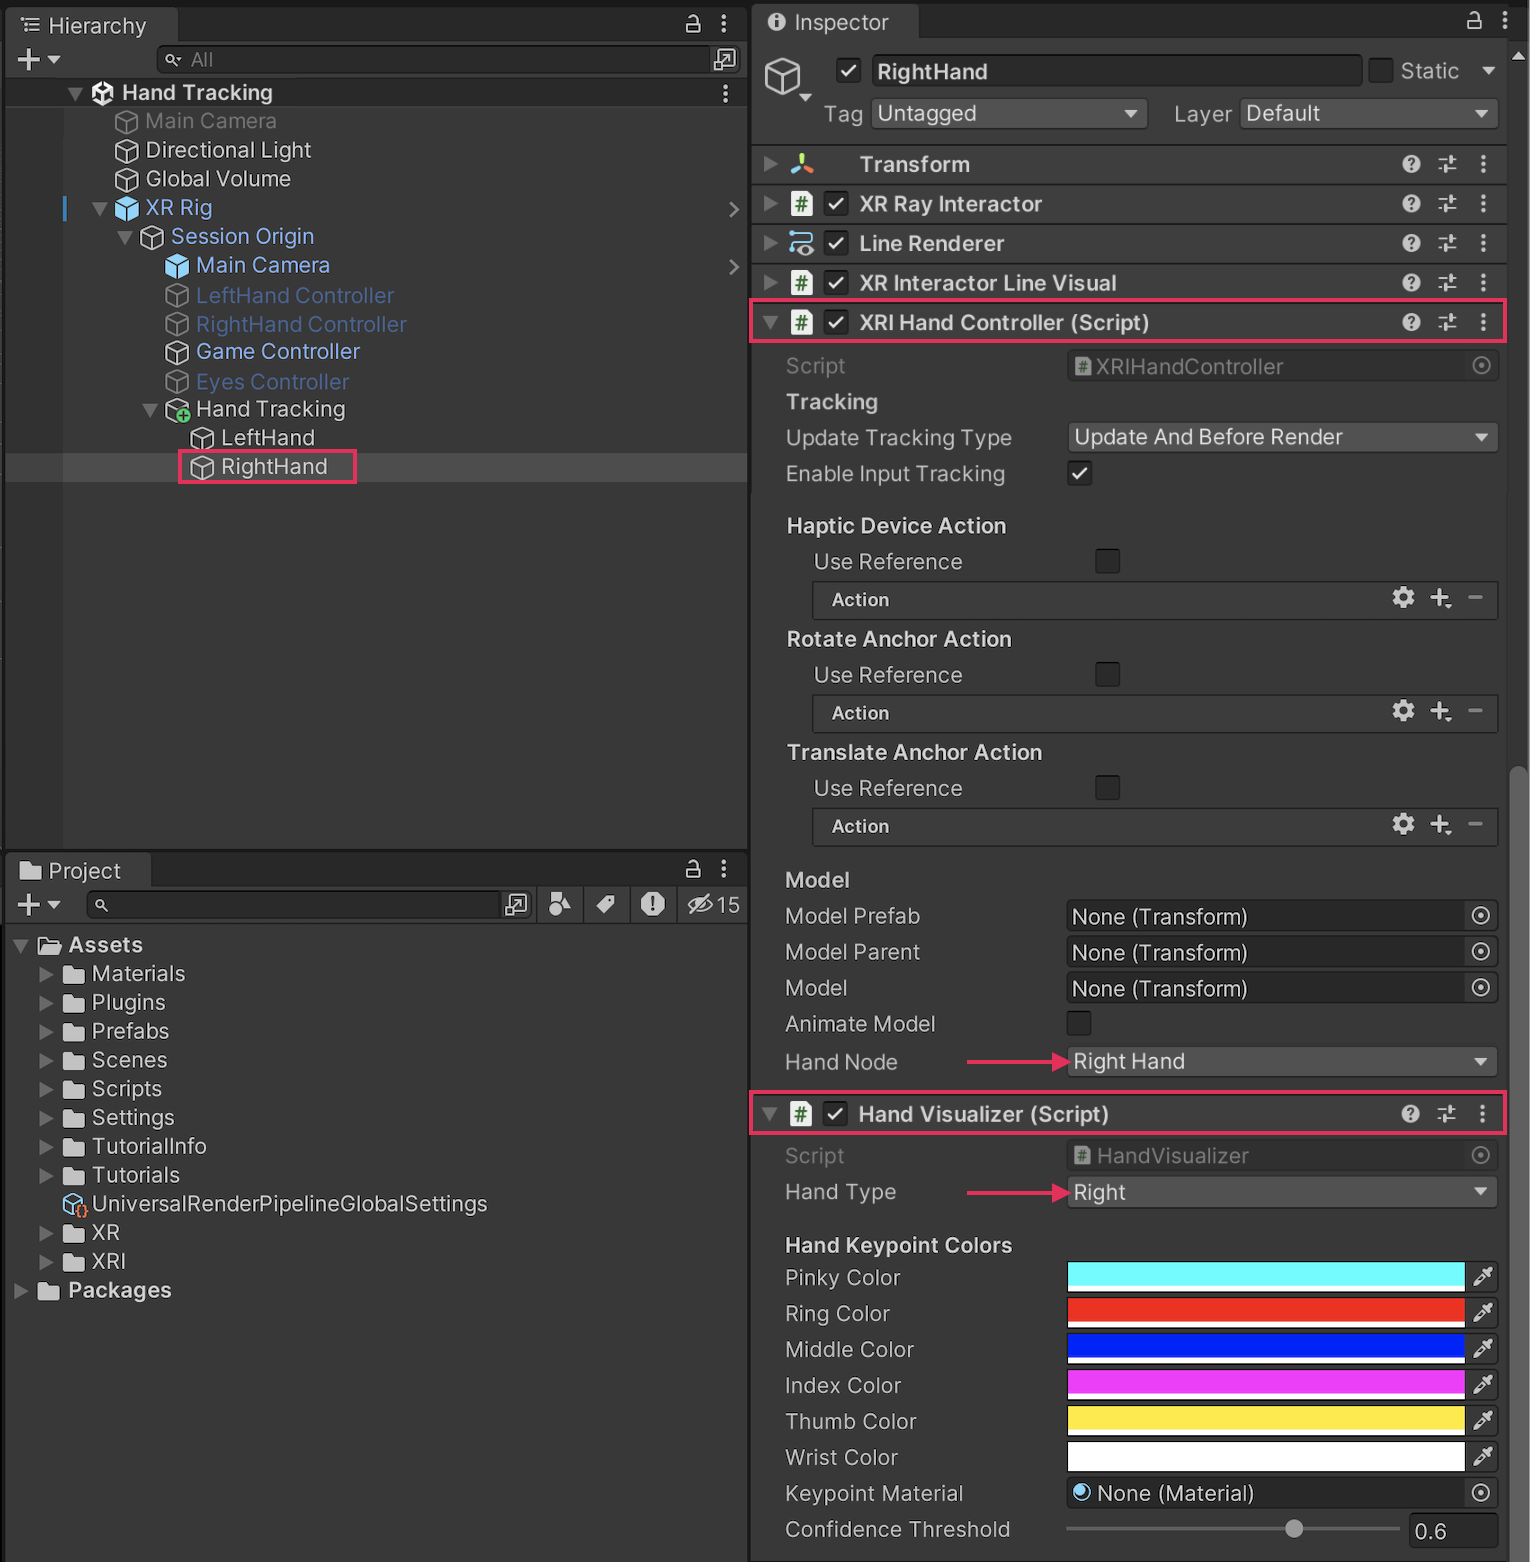
To be able to track and visualize your hands, you need to replace the default XR Controller script with the custom HandController subclass, and add the Hand Visualizer script.
To add the required scripts structure in your Hierarchy, follow these instructions:
1. Remove the XR Controller components from the LeftHand and RightHand GameObjects.
2. Add the HandController and HandVisualizer script components to the LeftHand and RightHand GameObjects.
3. For the LeftHand and RightHand GameObjects, make sure that the Hand Node property and the Hand Type property are assigned appropriately to left and right, respectively.

Take a moment to read through each of the custom scripts to see how they work.
Add grabbable objects to test hand tracking
Add a simple XR Grab Interactable object into your scene and test your hand tracking. There should now be rays coming from each of your hands. When you perform a pinching gesture with your thumb and index finger, you should be able to grab the object as if you pulled the trigger on the Magic Leap 2 controller. In the example below, there is a grabbable cube with a socket interactor on top of it. For demonstration purposes, the left hand’s Ray Interactor component has the Force Grab property enabled, which causes the object to snap to the hand’s location, but this property is disabled on the right hand.
Experiment with other features
Try experimenting with some other of Magic Leap’s hand gestures, combined with other XRI features. In the example below, for example, the XRIHandController script references PostureType.Grasp instead of PostureType.Pinch, and Ray Interactors have been replaced by Direct Interactors.
4. Hand tracking in context
Now that you know how to set up hand tracking in your own projects, let’s check out an example of how this feature can be combined with other interactive functionality.
In this example, the user is using a 3D model viewer. Once the accompanying marker has been scanned, a 3D model appears. The user is then able to pick up and interact with the model with their hands.
5. Next steps and additional resources
In this tutorial, you learned about working with hand tracking and gesture recognition on the Magic Leap 2. You can learn more about them with the following resources:
- Magic Leap’s hand tracking example scene from the samples project
- Magic Leap’s Hand Tracking guide
- Magic Leap’s documentation on the MLHandTracking class
- Magic Leap’s gesture classification example scene from the samples project
- Magic Leap’s Gesture Classification guide
- Magic Leap’s documentation on the MLGestureClassification class
You may also want to learn more about out the other features highlighted in the example prototype:
Otherwise, feel free to go back to the overview page, where you can explore other tutorials and resources.