
Intro to Unity Rigs
Tutorial
intermediate
+0XP
25m
(84)
Unity Technologies
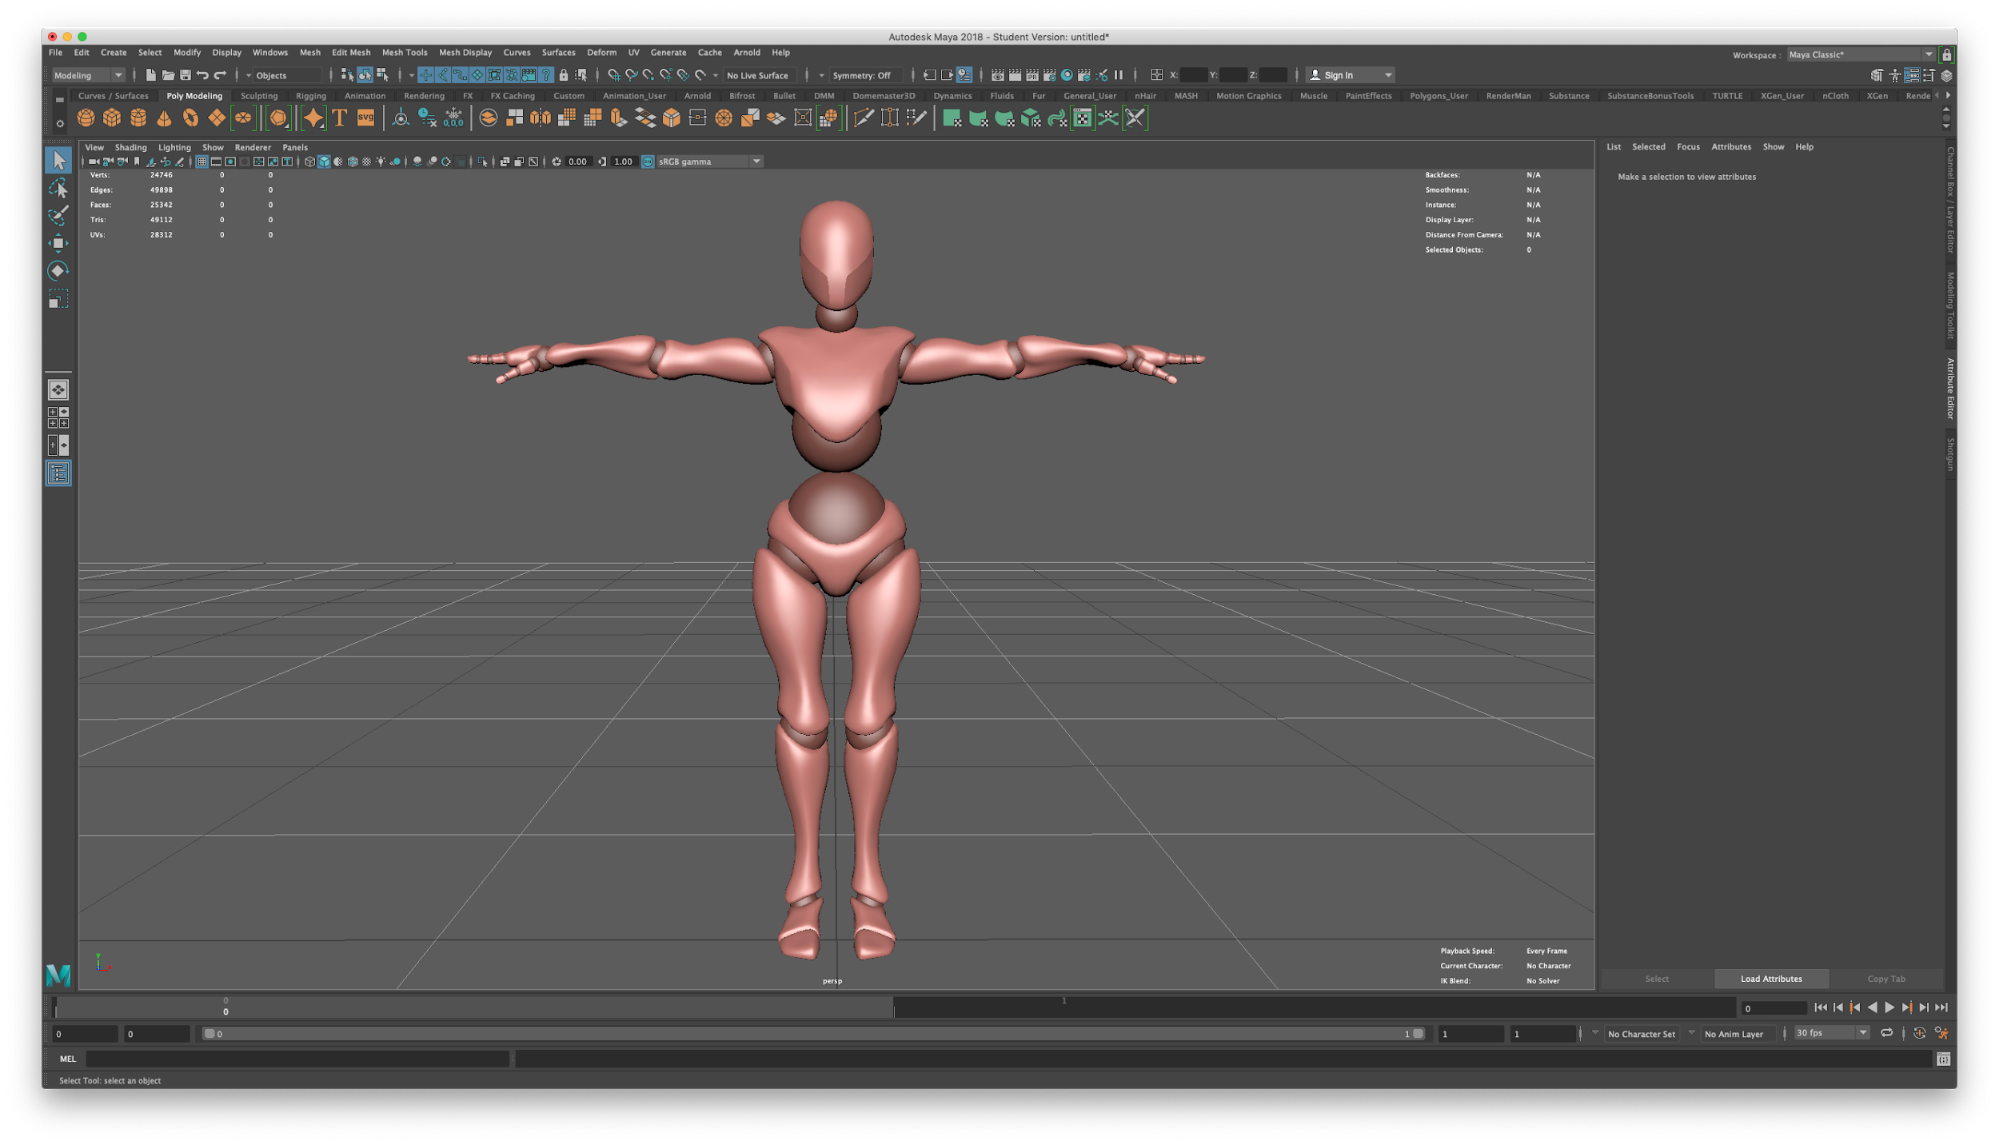
3D modeling software applications, such as Maya, provide a number of ways to create a rigged character for animation in Unity. A rig consists of a series of joints that mimic actual bone structure and provide natural pivot points between bones. The character’s mesh is connected to joints through a process called weight painting so the joints and mesh will move together. In order to import and animate a character in Unity, the bone hierarchy and skinned mesh need to be set up properly
Languages available:
1. Intro to Unity Rigs
Verified: Unity 2019.4, FBX Exporter preview.2 - 3.2.1, & Maya 2020
3D modeling software applications, such as Maya, provide a number of ways to create a rigged character for animation in Unity. A rig consists of a series of joints that mimic actual bone structure and provide natural pivot points between bones. The character’s mesh is connected to joints through a process called weight painting so the joints and mesh will move together. In order to import and animate a character in Unity, the bone hierarchy and skinned mesh need to be set up properly. (Figure 01)
2. Unity and Maya Integration Setup
To prepare a Unity Project for the rig, open the Unity Editor and either create a new project from the Start screen or open a project from the Start screen.
3. Install the Unity FBX Exporter using Unity’s Package Manager
1. In the Menu Bar, go to the Window drop-down and select Package Manager to open the Packages Window. (Figure 02)
2. In the Package Manager, click the Advanced button and check the Show preview packages option.
3. Find the FBX Exporter and select it. (Figure 03)
4. Click the Install button on the right side of the Packages window.
5. Once the FBX Exporter package has been loaded into the current project in the Unity Editor, close the Package Manager window.
6. In the Menu Bar, go to Edit > Project Settings. (Figure 04)
7. In the Inspector panel, select Fbx Export then choose the appropriate version of Maya. In this case, it’s Maya 2018. If it’s not listed in the menu, click the button to right of the menu to locate the Maya application.
8. Click the Install Unity Integration button (make sure that Maya is not already open). (Figure 05)
9. While the integration files can be installed anywhere, installing them in Maya’s User Preferences Directory keeps them together with other Maya scripts. This is usually in C:/Users/<Username>/Documents/maya/2020/prefs/ if using Windows or /Users/<Username>/Library/Preferences/Autodesk/maya/2020/prefs/ on the Mac. Select a folder and click the Select Folder button.
10. A message will pop up letting you know that the Unity menu will be installed in Maya and will open afterward. Click the Ok button to close the message. (Figure 06)
Maya will open after the Unity integration has been installed.
4. Set up a Maya Project
To confirm the integration is installed in Maya, you should see a new Unity option in the File Menu that includes a submenu. (Figure 07)
2. Using the Maya project directory, either create a new project by selecting File > Project Window, or set a project as the active project by selecting File > Open Scene, choosing the Set Project button, then selecting the directory folder for your existing Maya project. Do not select the Unity project folder as the Maya project. Keep these project folders separate.
5. Prepare a model and rig character in Maya
Unity’s rig system requires an imported rigged and skinned mesh. Setting up a character rig in Maya to import into Unity with the proper scale and orientation requires a few initial steps.
1. In Maya, choose Windows > Setting/Preferences > Preferences.
2. In the Preferences window, select the Settings category.
3. In the Working Units section on the right side of the window, select Meter from the Linear drop-down menu. (Figure 08)
4. Click Save to save the settings and close the Preferences window.
This will set up the environment in Maya to model and rig for export to Unity.
6. Create a character model
When modeling, you need to strike a balance between detail and polygon count. It’s easier to create a high-poly model with detail, then reduce the polygon count and use the high-poly mesh to generate normal or height maps to create the illusion of detail. To model the character geometry properly for export, prepare your model in a T pose. The character’s feet need to be placed on the origin or center of the grid in Maya. Then, for proper skin binding and texturing, unfold the layout UVs. (Figure 09)
7. Add a character rig to the model
There are two main steps to rigging a character model. First is to place joints or bones, followed by binding the skin to the skeleton. Position the joints where the mesh should bend or fold. When creating the skeleton or bone structure, a minimum of 15 bones are needed for either a humanoid or generic rig in Unity. The names of the bones in the rig should mimic the names of bones in a human or creature. Since arms and legs are mirrored on each side of the body, be consistent in the names appropriate for the side of the body. Use something like armUpper_L for the left upper arm and legLower_R for the right lower leg, for example. Each bone or joint must connect directly to others along the chain and eventually be parented to the hip or root joint with no free-floating joints in the skeleton. Make sure there are no empty or extra transforms anywhere in the hierarchy. (Figure 10)
If you’re creating a character that will be animated in Maya, and you’ve created character controls, make sure they’re kept separate, as they will not be used in Unity when importing. The root joint must be in the center of the Scene. The root should be zero on the X and Z, but will have a vertical, or Y, value. If the root joint isn’t correctly located, move the character so it’s positioned where the root joint is located.
Skin or bind the skeleton to the mesh. The mesh needs to be attached to the character’s skeleton. The skin is bound to joints or bones by a degree of influence; once the mesh is bound to joints, the skin of the model will move with the joints. Don’t use more than four influences when binding. Using more than four influences may cause binding issues in Unity. In Maya, there are several methods to bind the skin to the joints; painting weights is one common method. Essentially you will assign a vertex on the mesh to a bone or, to a degree, multiple bones so the mesh will move or be influenced by a bone or several bones. (Figure 11)
8. Export FBX from Maya
1. To prepare the Unity project for the exported file, from the Main window choose File > Send to Unity > Set Unity Project.
Note: If the Send to Unity option is not available in the File menu, you may need to check the Plug-in Manager in Maya (Windows > Setting/Preferences > Plug-in Manager) to make sure the gameFBXExporter and GamePipeline plugins are enabled. If they’re enabled and the Send to Unity option is not available, toggle the checkbox next to the Loaded option for the GamePipeline plugin. (Figure 12)
2. In the Choose a Unity project to send FBX assets window, select the root folder of the Unity Project, then click the Select button. (Figure 13)
3. To export an FBX file of the Scene to Unity, from the Main window File > Send to Unity > All.
Note: While you can choose the Selection option, which will export only the selected object to Unity, it’s more advisable to create a complete rig in a single Maya file and send the entire contents to Unity.
4. In the Export All window, enter a name for the rig in the File Name text field.
5. In the Options window, expand the Advanced Options section and click Units. Turn off the Automatic checkbox and change the File units converted to drop-down to Centimeters.
6. Expand the FBX File Format section and change the Type drop-down to ASCII. (Figure 14)
7. The location for the file by default is the Assets folder for the Unity project, assigned by the previous Set Unity Project option.
8. Click the Export All button to save the FBX file.
Maya will export the FBX file to the Unity project folder that was selected when using the Send to Unity function. If the Unity project is already open, the FBX file will be imported automatically and show up in the Project panel.
9. Unity imported FBX file Settings
When switching to, or opening, the Unity project, the FBX file will show up in the Unity Project panel. You’ll need to set some initial import properties on the FBX character rig.
1. In the Project window, select the character rig FBX file.
2. In the Inspector panel, select the Model tab, if it’s not already selected.
3. If the imported rig file doesn’t contain cameras or lights (character rig files shouldn’t) make sure the Import Cameras and Import Lights checkboxes are turned off. (Figure 15)
4. Click the Apply button to accept the changes to the model.
This sets the initial properties of the imported FBX file so the character’s rig can be assigned for use in Unity.
10. Create an Avatar
Unity will need to know how the bones of the rig are assigned. An Avatar is assigned for biped human characters; however, Avatars aren’t used with non-human characters, such as a quadruped. For those characters, the generic animation type setting uses a root bone that’s automatically selected, or can be set manually.
For humanoid rigs, change the Rig type and create an Avatar.
1. With the character rig FBX file selected in the Project window, select the Rig tab in the Inspector.
2. Change the Animation Type drop-down menu to Humanoid for a biped human character.
3. Click the Apply button to configure the rig based on the Humanoid Animation Type.
4. To assign the bones of the rig to the Avatar, click the Configure button. (Figure 16)
Note: If you get a warning saying the character isn’t in a T-pose, click the Pose button near the bottom of the Inspector panel and choose Enforce T-Pose. When the bones of the character are all green, the bones are mapped correctly and set up. If any are not green, change the bone assignment to the correct slots or change the bone hierarchy. You can also fix the character in Maya and export again to match the Avatar. (Figure 17)
5. To assign bones, or change their assignment, either drag a bone from the Hierarchy panel to the appropriate field in the Inspector panel, or click the radio button to the right of the field and select the bone from the Select Window. (Figure 18)
6. Click Apply to accept any changes or bone assignments in the Avatar.
7. Click the Muscles & Settings tab to tweak the Avatar’s muscle configuration, and check the rig for any issues.
8. Click Done to accept any changes.
This will complete the set-up of an Avatar to use in Unity.
11. Manually choose a generic character’s root node
For non-human rigs, change the Rig type to Generic to set a root joint for the character.
1. With the character rig FBX file selected in the Project window, select the Rig tab in the Inspector.
2. Change the Animation Type drop-down menu to Generic for a non-human character.
3. From the Root Node drop-down menu, choose the bone that’s first in hierarchy, usually the hips. (Figure 19)
4. Click the Apply button to accept the changes based on the Generic Animation Type.
12. Conclusion
This workflow provides you with essential information to create a rigged character in Maya and transfer it to Unity. You can create a character, set up the bone structure, and export it to use in Unity. With some basic settings in Unity after the rig is imported, it can be animated.