
Introduction to Editor Scripting
Tutorial
intermediate
+10XP
20 mins
402
Unity Technologies
Editor Scripting is a very powerful feature. It allows developers to create tools and extend the Unity Editor to perform custom tasks that could aid in the development of your project. In this tutorial, you will learn about the different ways you can extend the Unity Editor.
Languages available:
1. Introduction to Editor Scripting
This tutorial has been verified using Unity 2019.4.10f1 LTS
Editor Scripting is a very powerful feature. It allows developers to create tools and extend the Unity Editor to perform custom tasks that could aid in the development of your project. This includes a custom “cheat” menu, animation tools, and more. Unity gives you the power to extend its functionality and use, making it a very adaptable engine that can be tailored to your exact needs.
You can define how properties are displayed in the Inspector with custom Property Drawers. You are able to create any number of custom windows in your project, these behave just like the Inspector, Scene or any other built-in Unity windows. This is a great way to add a user interface to a sub-system for your game.
2. Creating the Editor Window
There are a few simple steps to follow when you want to extend the editor:
- Create a script that derives from EditorWindow.
- Use code to trigger the window to display itself.
- Implement the GUI code for your tool.
We will create a simple Editor Window that will have a few elements to get you started.
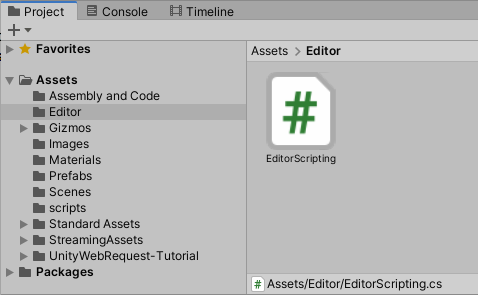
1. Create a new folder within your Project named “Editor”
2. Inside the Editor folder create a new script, name it “EditorScripting” (Figure 01).
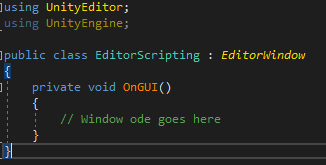
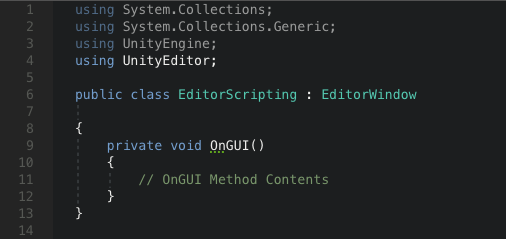
3. Open the script. In order to get the script to inherit from the EditorWindow module, add the code ‘using Unity Editor;’ on Line 4, and then replace ‘MonoBehaviour’ with ‘EditorWindow’ on Line 6. This will allow you to inherit many of the controls and functionality that Unity Editor Windows have, such as being able to dock them and preserve their position (Figure 02).
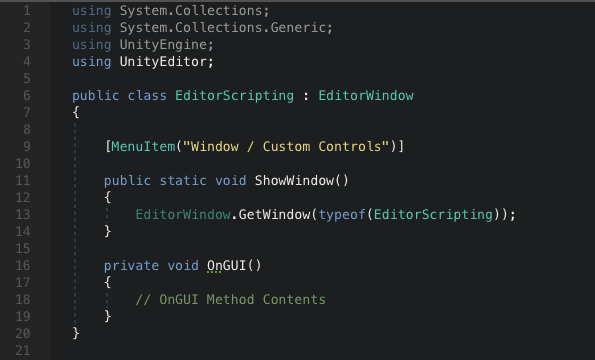
The next step you want to do is to show the window on the screen. This is done by a function that is activated by the MenuItem property (Figure 03).
4. Add ‘[MenuItem("Window/Custom Controls")]’ - this line adds the window to the Window menu, thus, “Window / Custom Controls”.
5. Replace “Custom Controls” with whatever name you wish to give the window.
6. Add “EditorWindow.GetWindow(typeof(EditorScripting));” - this line will create the window. When you click it from the menu it will show the menu in the Unity Engine, with it inheriting all the base functionalities of all editor windows.
The code will create a dockable editor window. It will behave like any other Unity window and preserve it’s position between uses. The window can be docked just like any other window and can also be used with custom layouts.
3. Scripting Window Contents
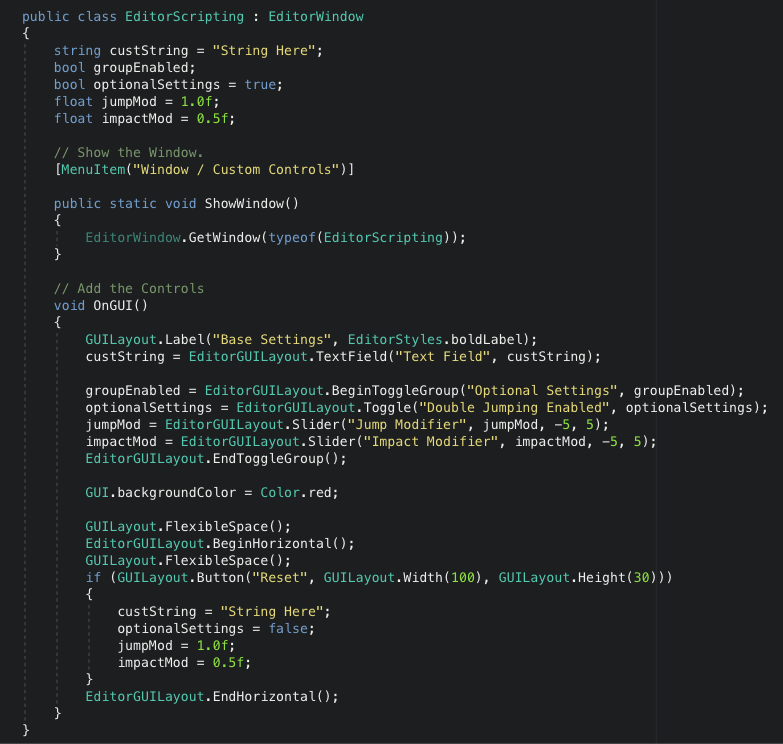
The actual contents of the window are rendered by implementing the OnGUI function. Utilizing the editor-only classes EditorGUI and EditorGUILayout will enable you to mix and match controls.
4. Opening the Custom Window
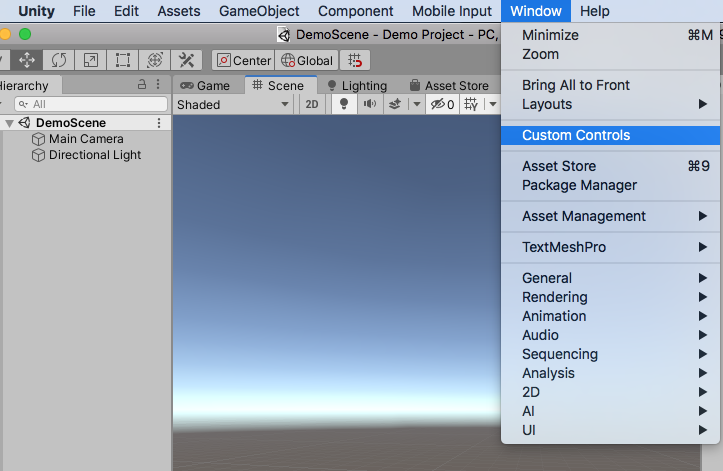
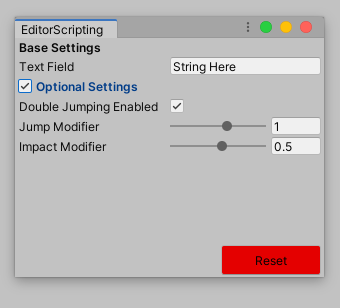
The code will show a custom window control. From the Windows dropdown menu, select Custom Controls (Figure 05). You will be able to tailor the window to your specific needs by adding, removing, and positioning the controls in whatever manner you need. (Figure 06).
By utilizing the pre-existing libraries of the EditorGUI and EditorGUILayout you will have the capability of designing custom Editor Windows to display whatever information you need or create functionality to automate tasks.
5. Next Steps
Moving forward, you now have the tools and knowledge to really expand this simple Editor Window you created following this guide. You can turn it into a “cheat” menu, or add in the production pipeline for your game designers. Whatever it is, it’s a very useful skill to have with being able to extend the Unity Engine to your team’s specific needs. Try creating your own scripts to customize and extend the Editor.