Introduction to High Definition Render Pipeline Lighting
Tutorial
intermediate
+10XP
10 mins
9
Unity Technologies
The High-Definition Rendering Pipeline (HDRP) is designed to produce high-quality visuals with ease. If you want high-end visual quality and are aiming for your project to be released on high-end PC’s and Consoles then you will benefit from using HDRP. In this tutorial, you will learn about the HDRP and its uses for lighting.
Languages available:
1. Introduction to High Definition Render Pipeline (HDRP) Lighting
Unity’s High Definition Render Pipeline (HDRP) Lighting allows you to enhance your project’s visual appeal with ease. HDRP uses a hybrid of Deferred and Forward Rendering Paths along with Tile and Cluster Renderers that allow the lighting to scale better than if you just used Unity’s built-in Rendering.
2. Lighting improvements
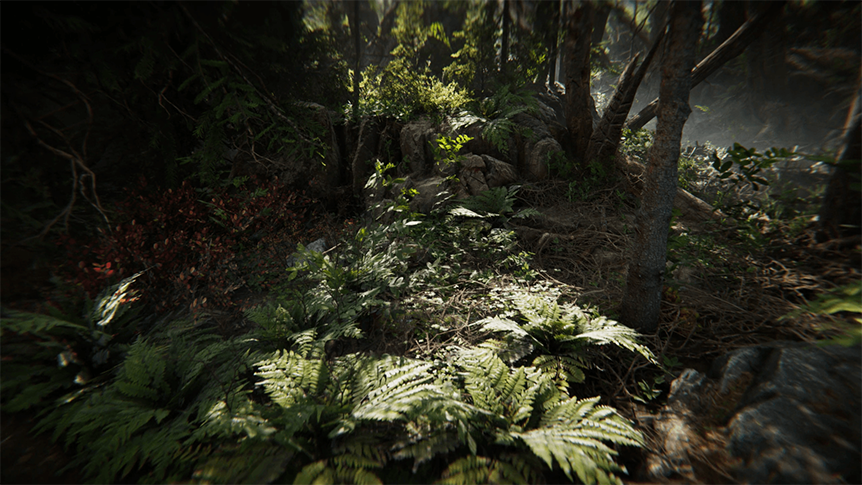
HDRP comes with a new lighting architecture that uses a hybrid of Deferred and Forward Rendering Paths along with Tile and Cluster Renderers. This combination means that lighting scales better than if you just used the built-in Unity Rendering. This new architecture is focused on performance while also bringing a new level of quality to your scene.
HDRP comes with new light properties and a new Light editor that allows you to do things like fade light, affect only diffuse or specular lighting, and use color temperature to set the lighting color. With HDRP, you can control the inner angles and shapes of Spot Lights. HDRP also supports colored cookies and allows the use of real-time area lights.
Note: HDRP does not use the built-in Unity Gamma Mode and instead uses the more precise Linear Mode.
With HDRP, it’s now possible to use oriented bounding boxes or sphere shapes, proxy shapes, and influence shapes to change how the light probes read, collect, and bake out the lighting information, which allows for more precise lighting.
3. Creating a new project with HDRP
To start a new project with HDRP, follow these instructions:
1. Open the Unity Hub and select the New Project button.
2. In the Template dropdown menu, select 3D (HDRP).
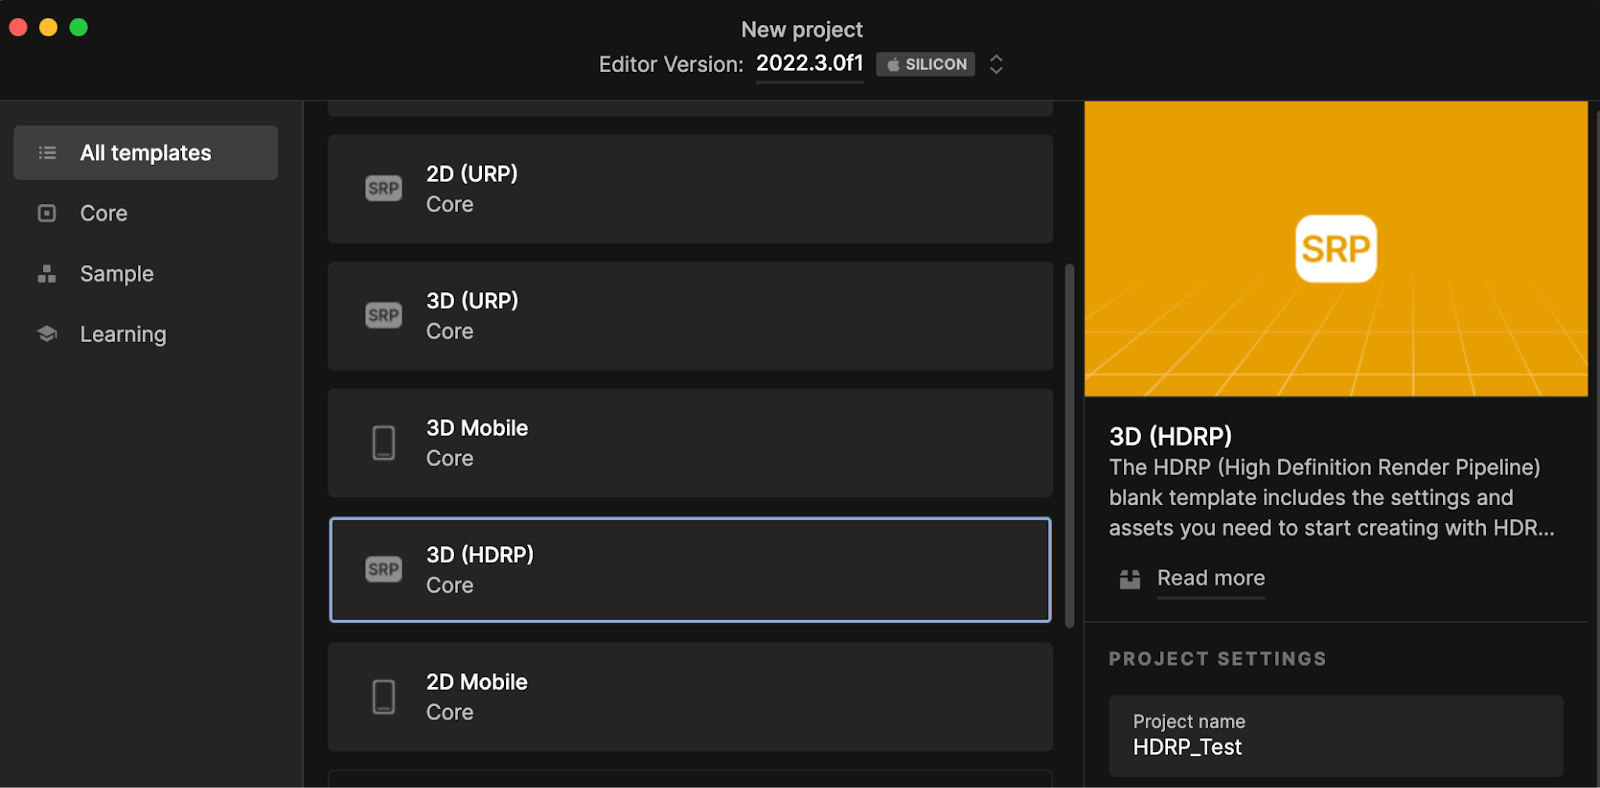
Note: You can also choose to open the 3D Sample Scene (HDRP), which contains pre-built content that you can explore and experiment with.
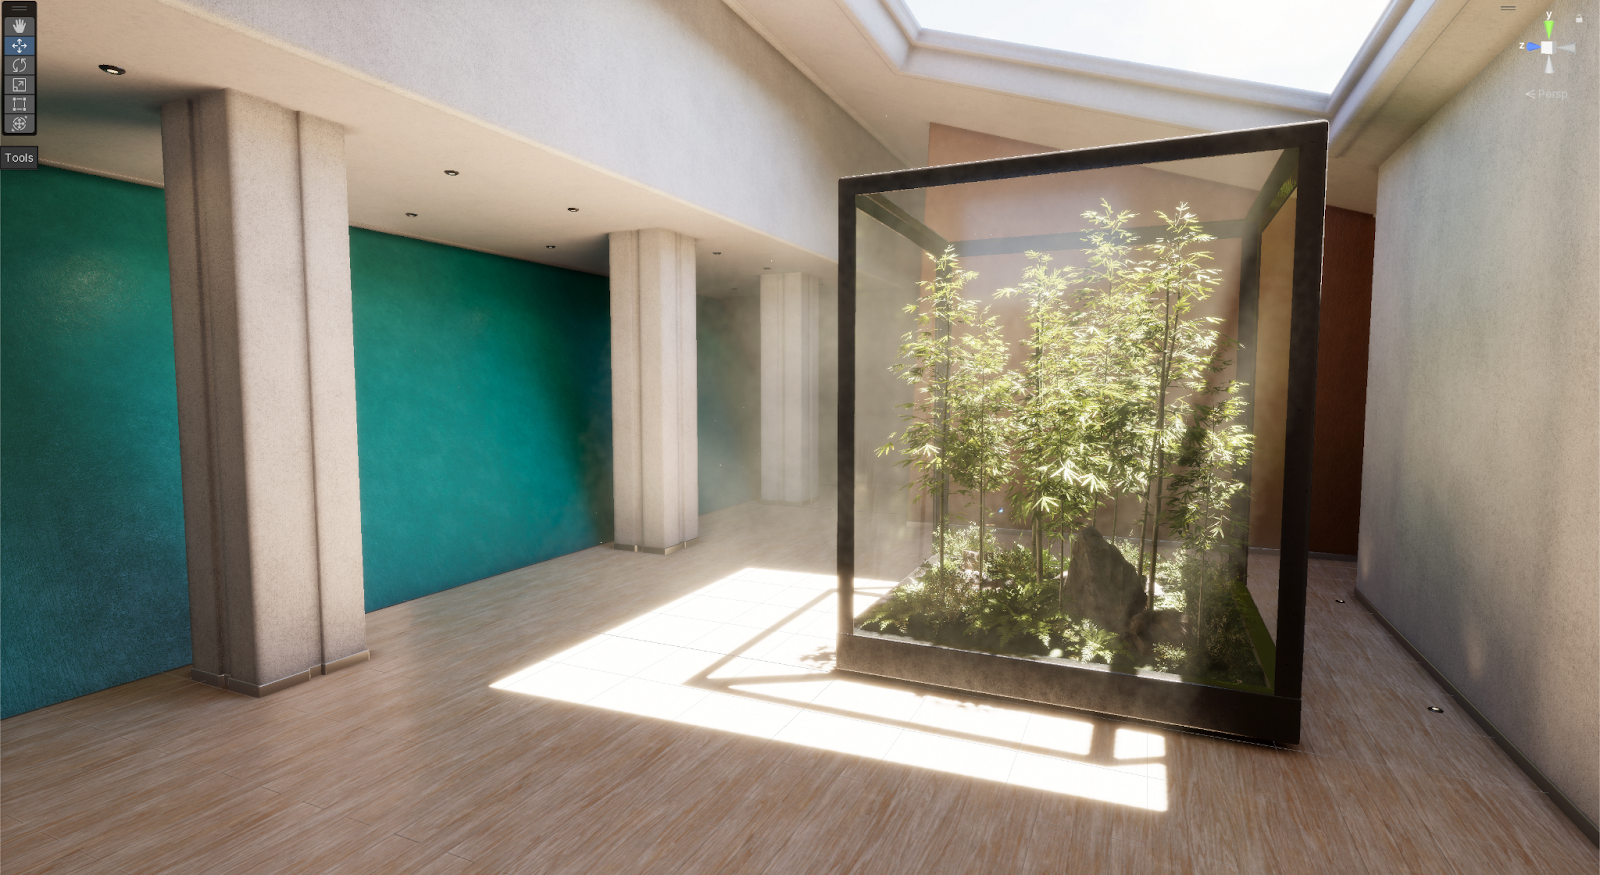
3. Select the Create Project button.
Once that’s done, your new Unity Project with HDRP will be ready to go.
4. Upgrading an existing project to use HDRP
To upgrade an existing project to use HDRP, you must first install HDRP using Unity’s Package Manager:
1. Go to the Window dropdown menu and select Package Manager to open the Package Manager window.
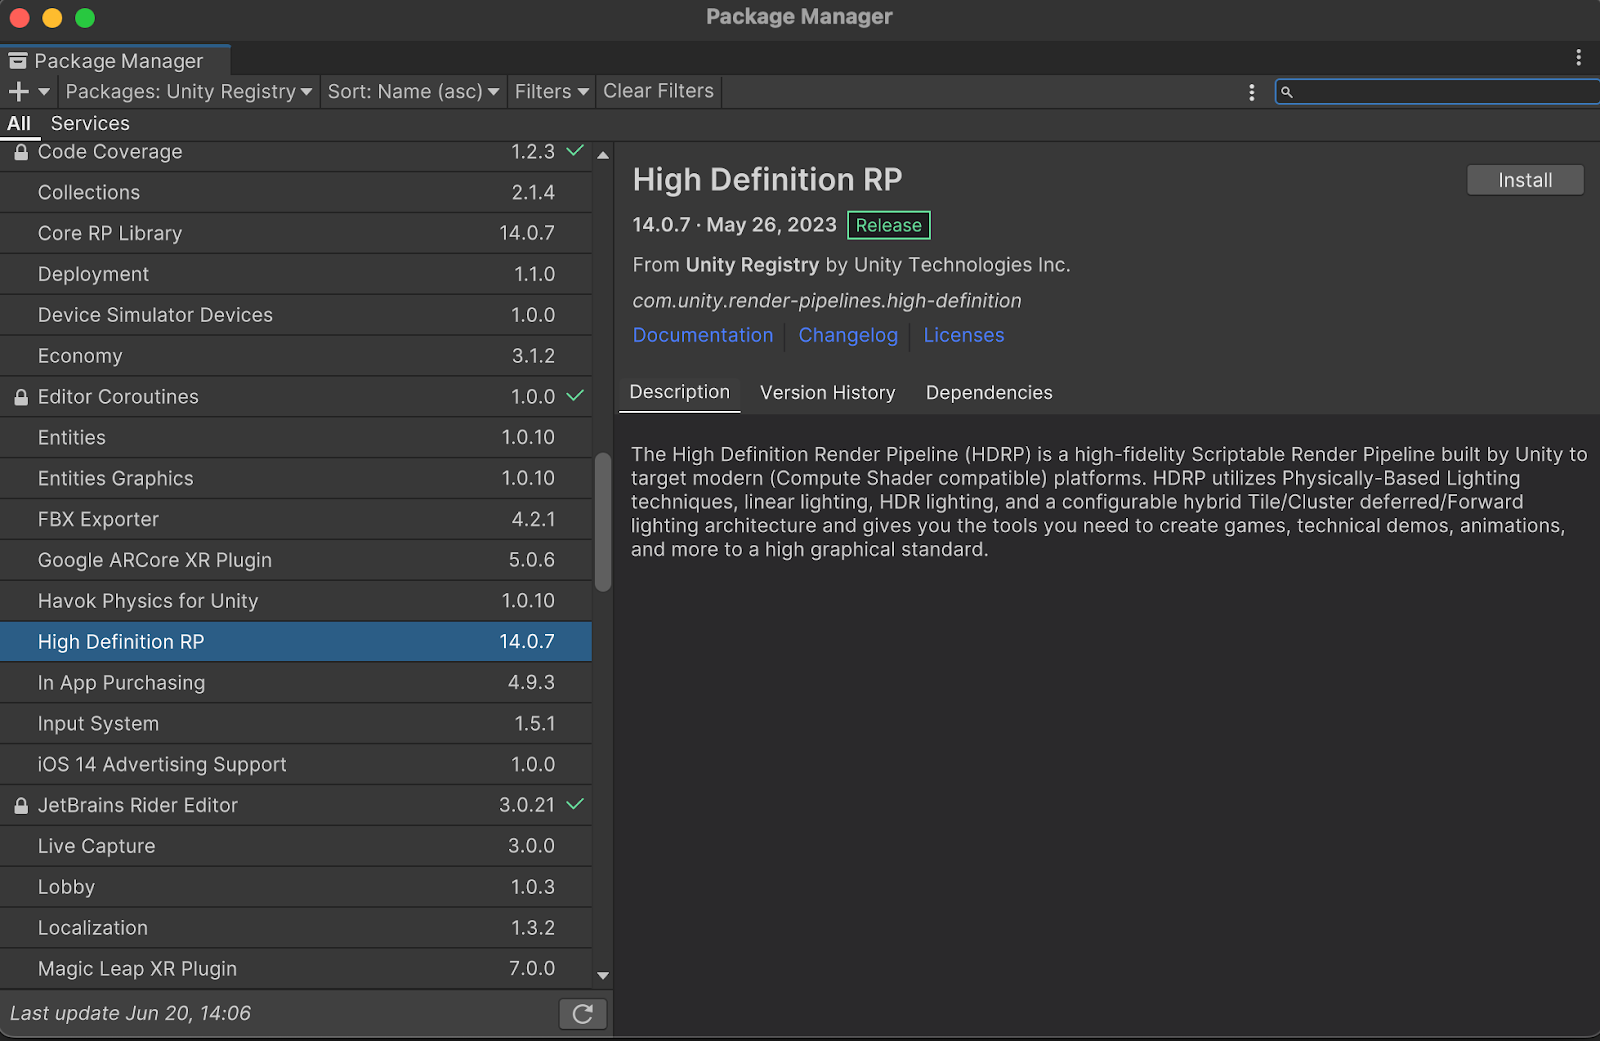
2. From the Packages dropdown menu, select Unity Registry to search all available packages.
3. Find High Definition RP in the list and select it.
4. Select Install.
After the package has been installed, you can run the HDRP Wizard to configure all the other required settings.
5. Select Window > Rendering > HDRP Wizard, then use the wizard to resolve any outstanding issues.
You can now use HDPR with your existing project.
5. HDRP Light Settings
With HDRP, the Light component — which controls the shape, color, and intensity of the light and whether the light will cast shadows in your scene — comes with some more advanced settings.
To open the Light component window, follow these instructions:
1. Go to the GameObject dropdown menu and select Light > Point Light to add a new light to your scene.
2. Ensure the new Point Light you created is selected.
3. Go to the Inspector window and use the foldout (triangle) to expand all of the sections.
4. To view all available advanced settings, select the More (⋮) menu for the Light component, then select Show All Additional Properties.
5. In the Core Render Pipeline Preferences window that appears, open the Visibility dropdown menu and select All Visible.
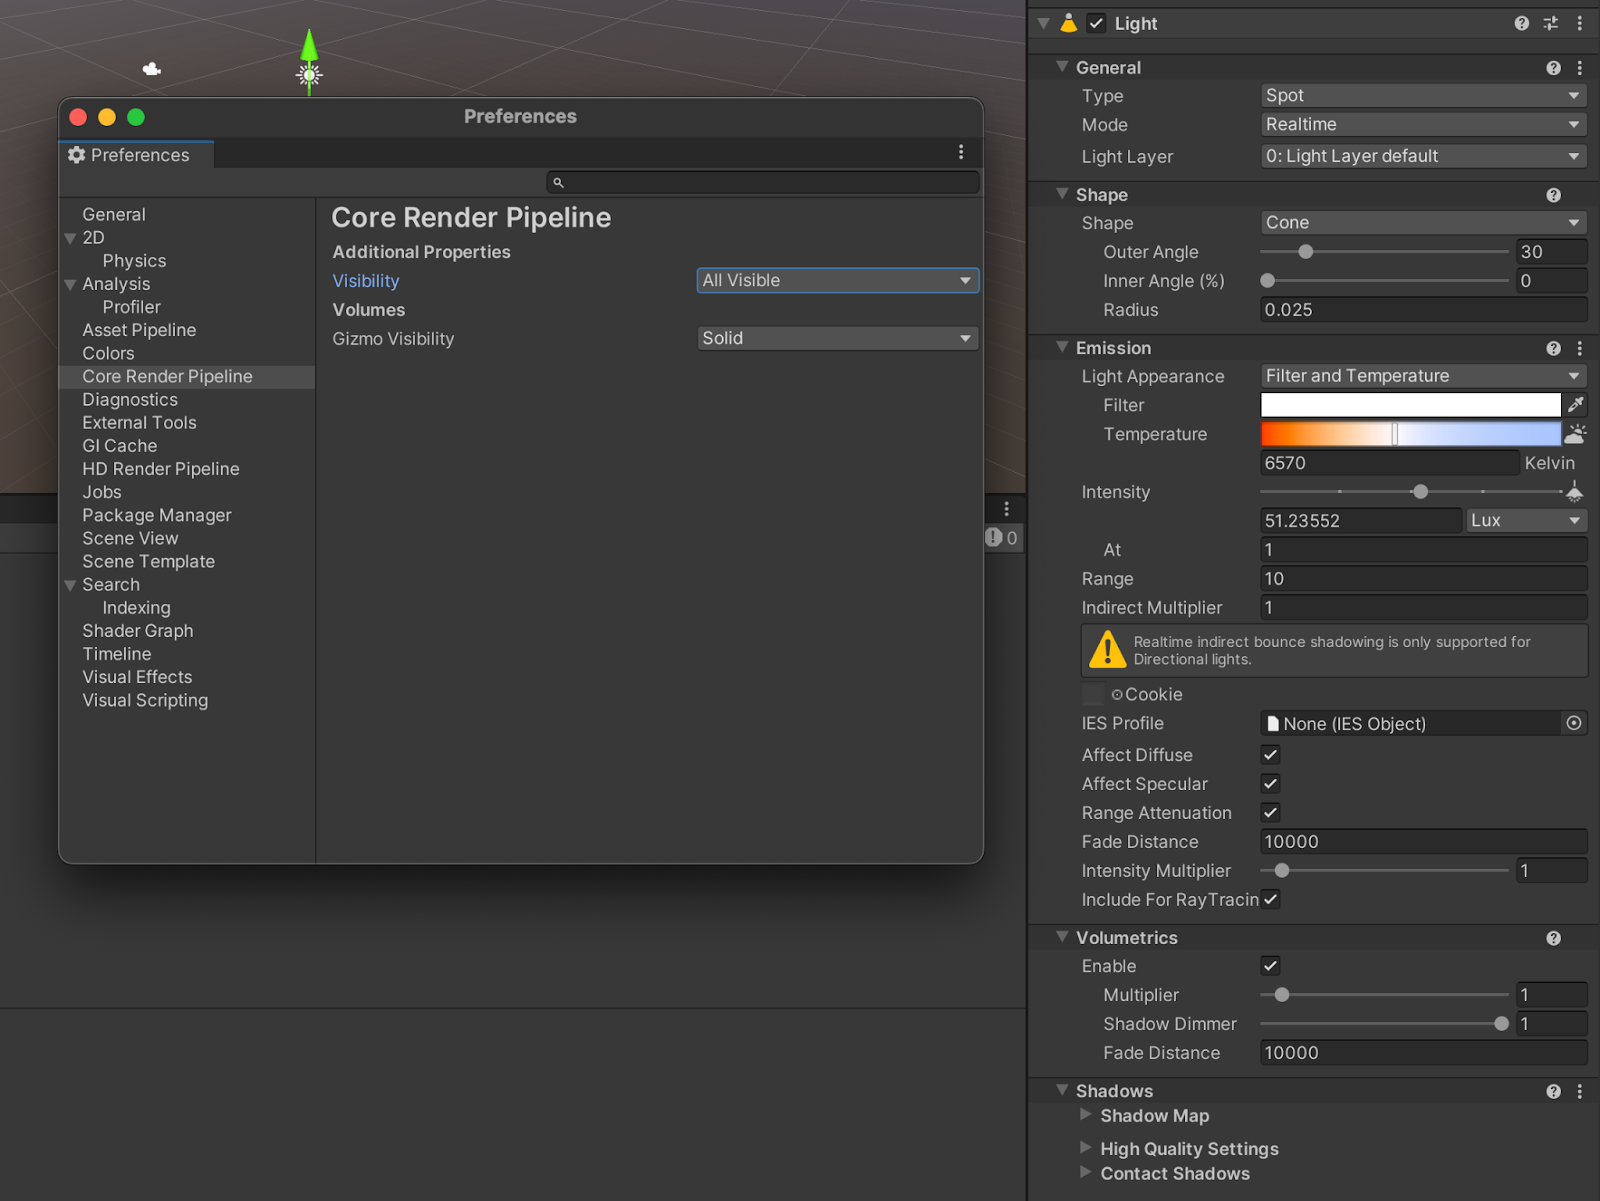
The Light component has quite a few settings. Below is a detailed description of each setting.
6. General
You can configure your light’s main properties in the General section.

Type
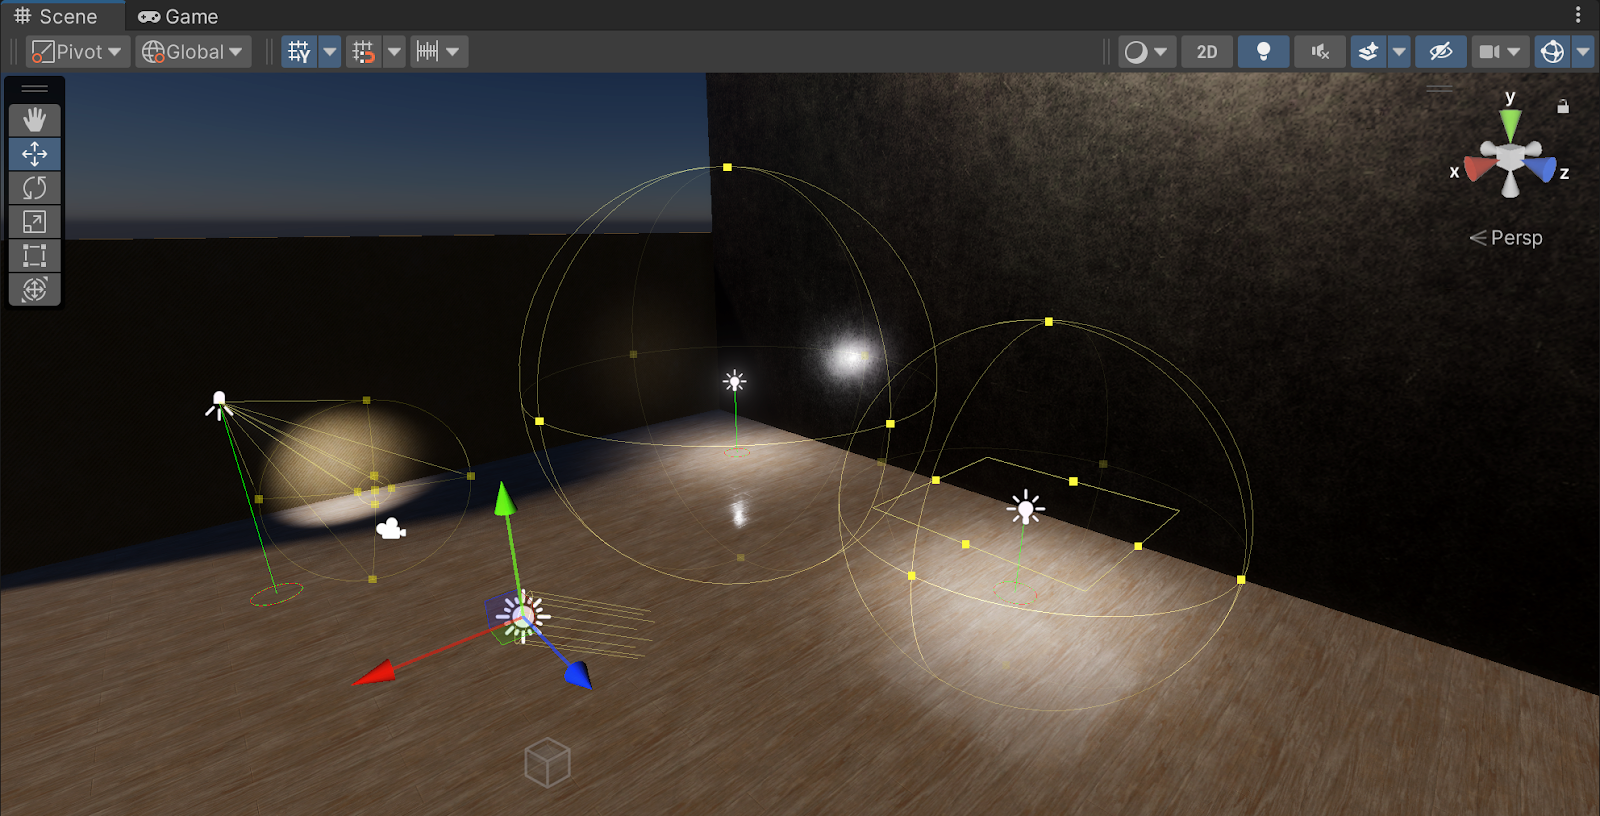
Use the Type dropdown to select the shape of your Light. You can choose from the following types: Spot Lights, Directional Lights, Point Lights,, and Area Lights. When selecting a light, it will add or remove settings for each specific light type. Here is more information on each of the options:
- Spot: This light emits from a specific location within a cone shape. Its intensity decreases over distance, and the cone's edges also fade.
- Directional: This light replicates sunlight effects in a scene. Although it appears distant and illuminates all objects uniformly, its actual position doesn't influence the lighting, and the intensity remains unchanged over distances.
- Point: This light emits uniformly from a central point in all directions. The direction of the emitted light is from its center, and the intensity diminishes as distance increases, simulating real-world light behavior.
- Area: This type projects light evenly from a rectangular surface in all directions.
Mode
The mode determines if and how a light is baked. Possible modes are Realtime, Mixed, and Baked.
For more information on these settings, consult the HDRP Lighting manual.
7. Shape
The Shape settings determine the light's impact area, varying by Light Type.
Spot Light
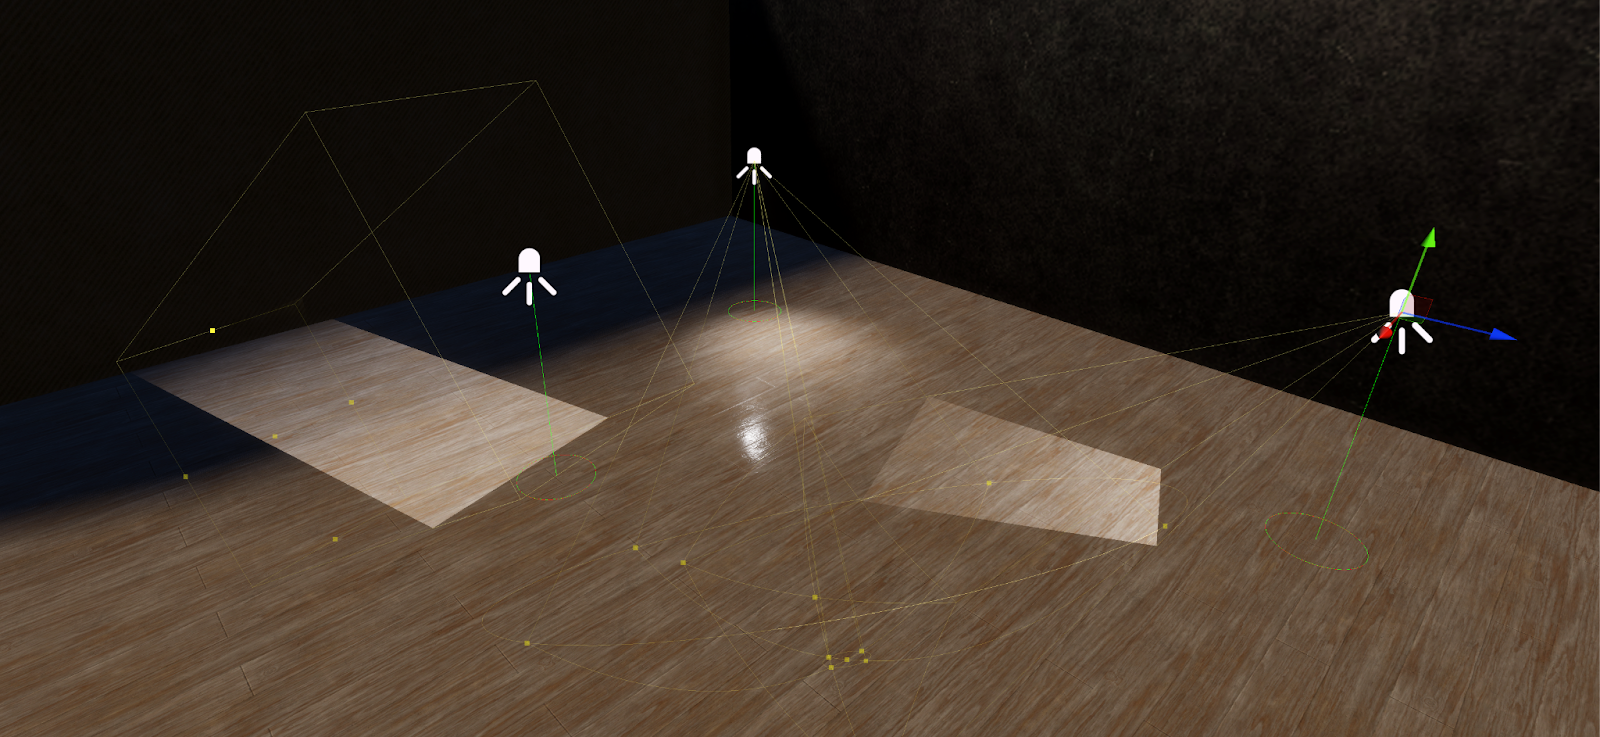
HDRP Spot Lights have Cone, Pyramid, or Box shapes. Cones direct light in a funnel, adjustable with Outer Angle and Range, Pyramids target a square base equivalent to the Cone's diameter, and Boxes illuminate a rectangle uniformly. Each shape also has additional settings.

Directional Light
This light type simulates distant light sources. Its Angular Diameter changes specular highlights and shadow softness.
Point Light
The Radius of a Point Light influences highlights, falloff, and shadow smoothness.
Area Light
HDRP Area Lights offer Rectangle, Tube, or Disc shapes. Rectangles project light perpendicularly, Tubes emit omnidirectionally, mainly for Realtime Mode, and Discs, used in Baked Mode, shine perpendicularly. Dimensions for each of these lights are set using Size X, Size Y, Length, and Radius for respective shapes.

8. Emission
Emission settings control a light's color, power, and range. These settings vary by light type, but many share the following common properties:
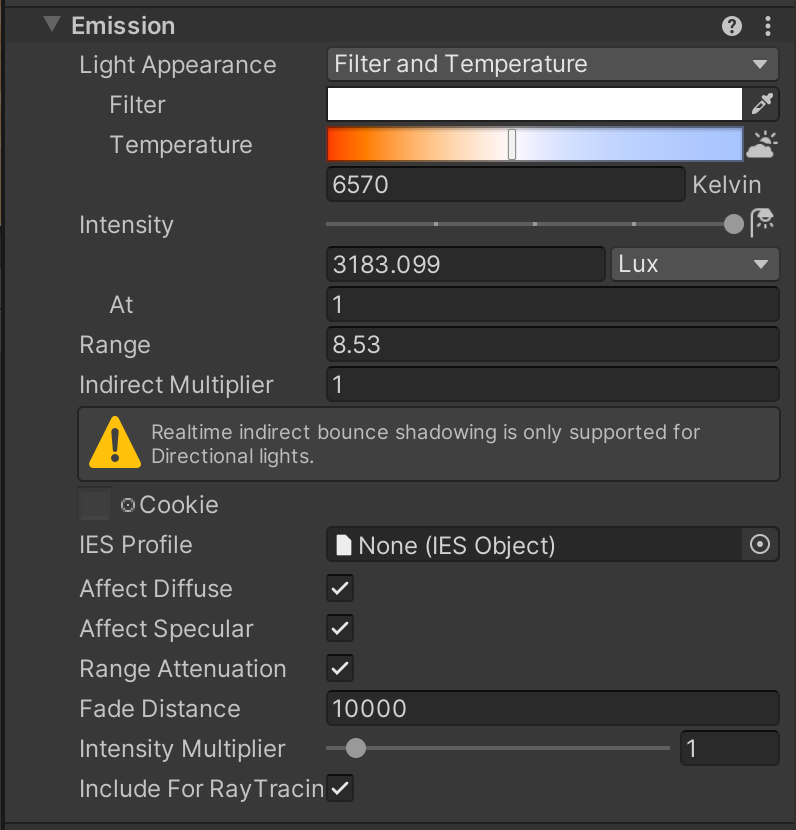
- Color Temperature: Select to adjust light color using a kelvin scale, which replaces the standard color selector with a Filter and Temperature setting.
- Filter and Temperature: Determines light's final color based on a kelvin scale, which can be selected from a slider or set to match real-world light sources.
- Color: Choose the light's hue with a color picker.
- Intensity: Sets light strength in various units. As light travels, it generally weakens, but Directional Lights maintain constant intensity. The control also matches real-world light sources.
- Range: Establishes the emitted light's reach (not applicable to Directional Lights).
- Indirect Multiplier: Regulates indirect light intensity, becoming inactive if Global Illumination settings are off.
- Cookie: An RGB texture projected by the light, available for most light types except Pyramid and Box, which default to white.
- IES Profile: Details the light's profile, averaging with cookies if both are set, though only cookies affect light baking.
- Affect Diffuse and Affect Specular: Checkboxes to enable diffuse and specular lighting effects, found in additional properties for certain light modes.
- Range Attenuation: Allows uniform light projection across its range, found in additional properties for some light modes.
- Fade Distance: Specifies the light's fade start point relative to the camera, found in additional properties for specific light modes.
- Intensity Multiplier: Modifies light intensity on-the-fly without altering base values, found in additional properties for certain modes.
- Display Emissive Mesh: Generates a mesh using the light's specifications, mainly for Rectangle and Tube lights, and prioritizes cookie displays over IES profiles.
- Include For Ray Tracing: Activates the light for ray-traced camera settings, found in additional properties for specific modes.
9. Volumetrics
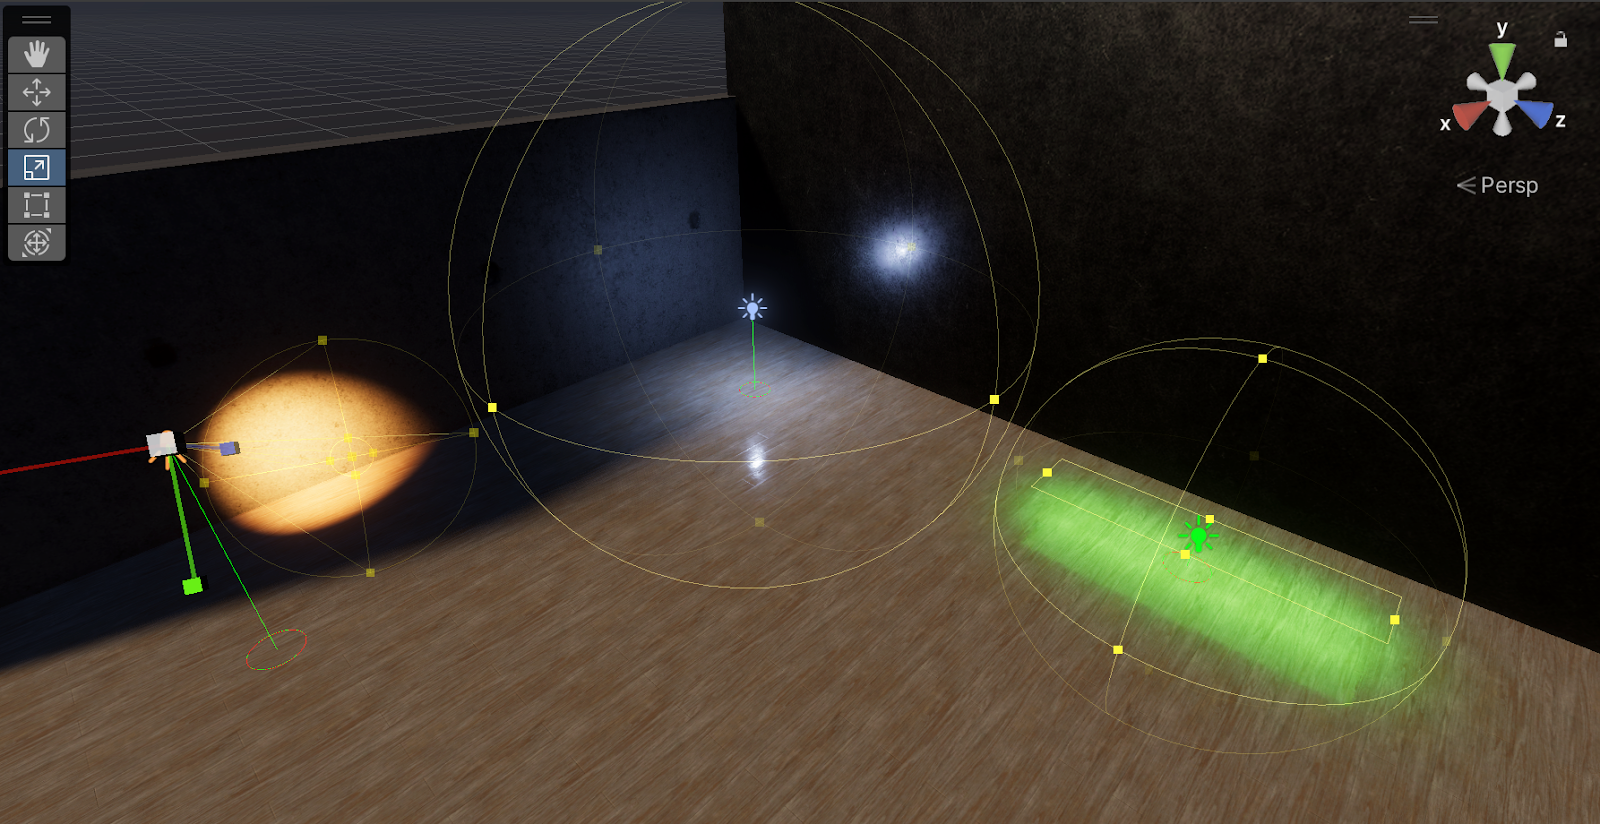
Volumetric settings shape how light interacts with Atmospheric Scattering. While universal to all light types except the Area Light, Volumetric settings are accessible only in Realtime or Mixed light Mode.

The Volumetric settings are as follows:
- Enable: Enables the simulation of light scattering within volumetric fog, which also grants access to the Dimmer and Shadow Dimmer adjustments.
- Dimmer: Modulates the light's volumetric intensity.
- Shadow Dimmer: Adjusts the intensity of the light's volumetric fog effect. Reducing to 0 can enhance volumetric scattering speed.
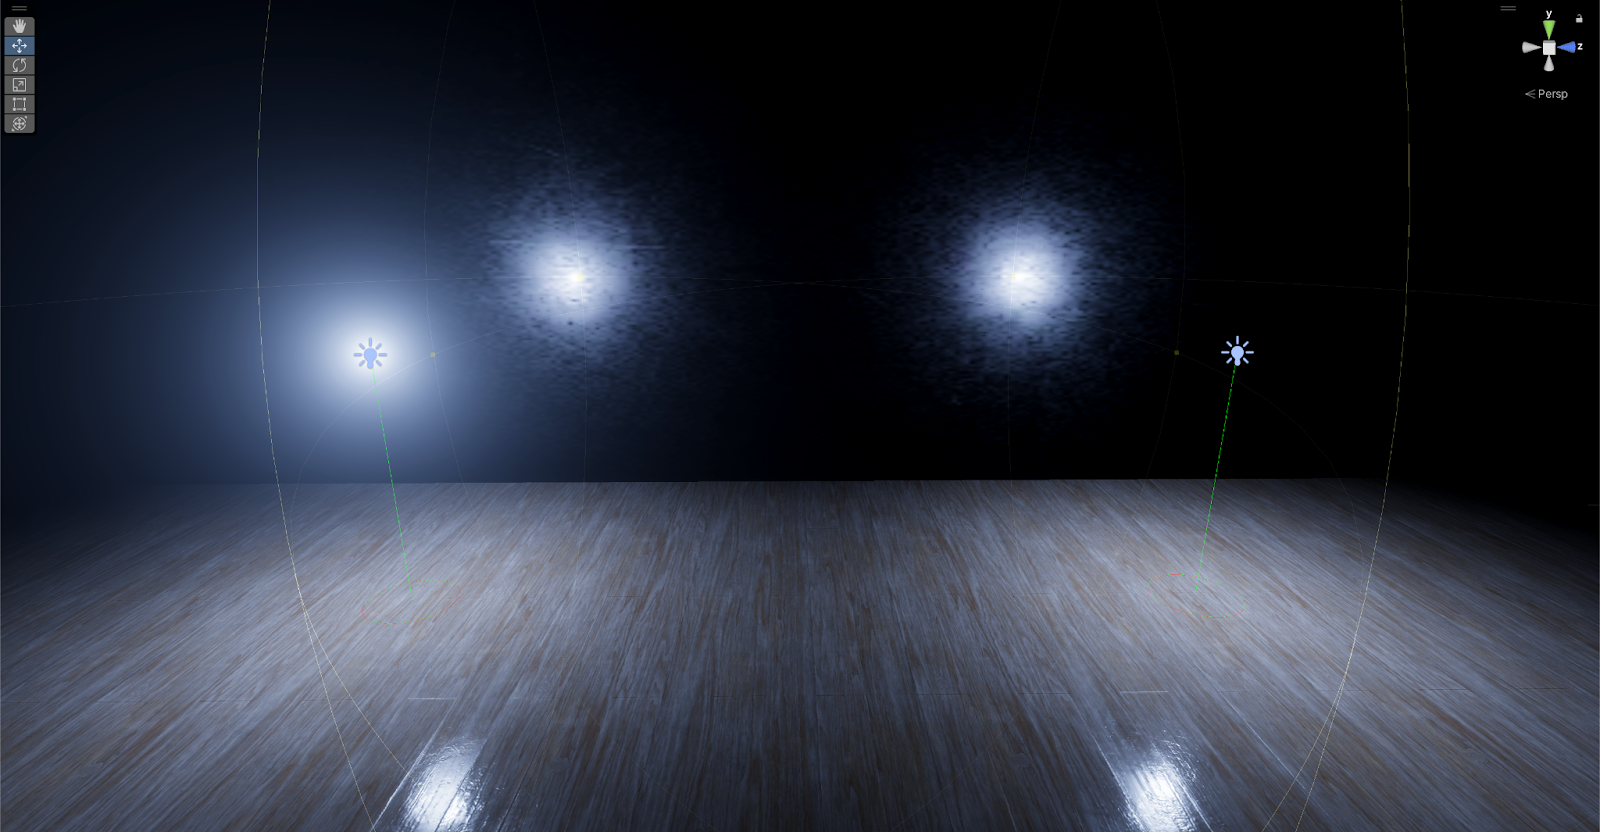
Below is an example of a light with volumetrics enabled (left) and disabled (right) below.
10. Shadows
Unity offers additional shadow properties based on the Mode in the General section and the Filtering Quality in the HDRP Asset.
Specific unique properties are also available based on the lighting mode: Realtime, Mixed, or Baked.
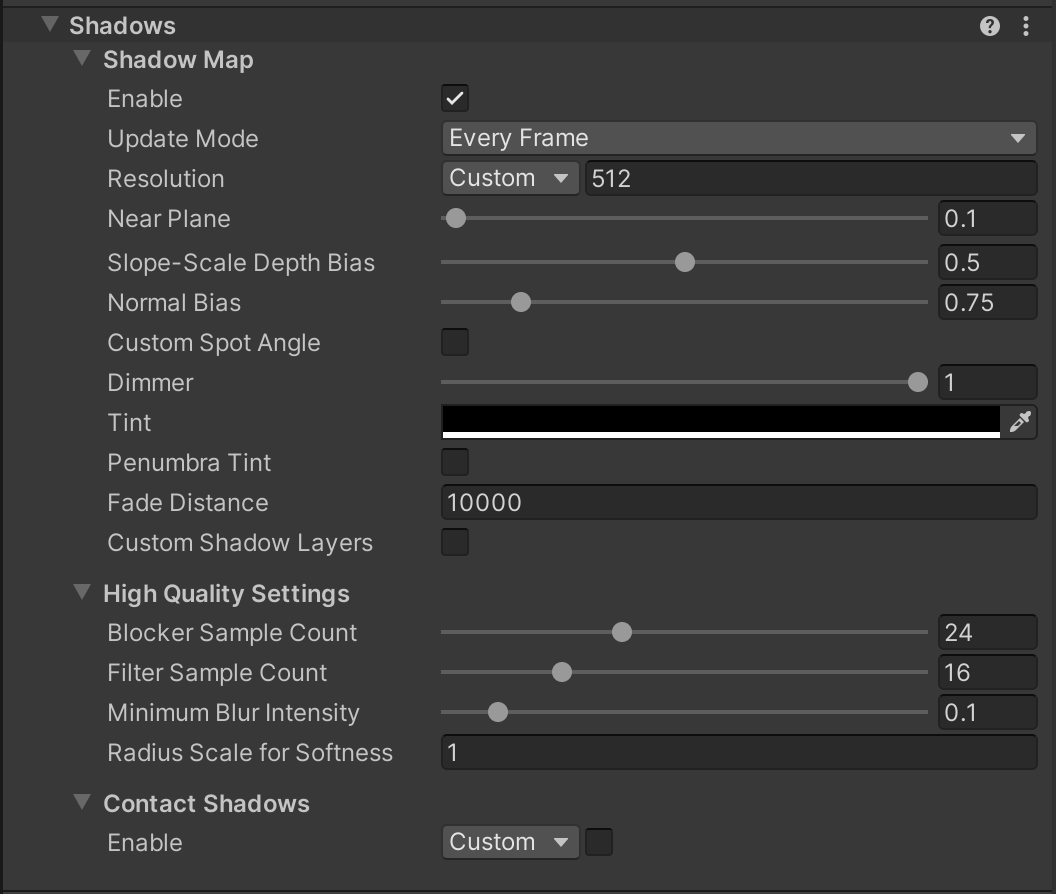
- Enable: Enable light shadow casting.
- Update Mode: Dictate HDRP's Shadow Map update frequency.
- Resolution: Define the shadow map's quality. Higher resolutions offer better shadow fidelity at a performance cost.
- Near Plane: Set the proximity from the light where shadows start appearing.
- Shadowmask Mode (only for Mixed): Determine the Shadowmask behavior.
- Slope-Scale Depth Bias and Normal Bias: Adjust bias settings to prevent shadow artifacts.
- Custom Spot Angle and Shadow Angle: Enable and adjust the shadow rendering angle for spotlights.
- Dimmer and Tint: Control shadow opacity and color with penumbra tinting options.
- Fade Distance: Define shadow visibility relative to the camera distance (for Spot and Point Lights).
- Custom Shadow Layer: Choose light layers for shadow casting.
Below is an example of a low quality shadow (left) and a high quality shadow (right).
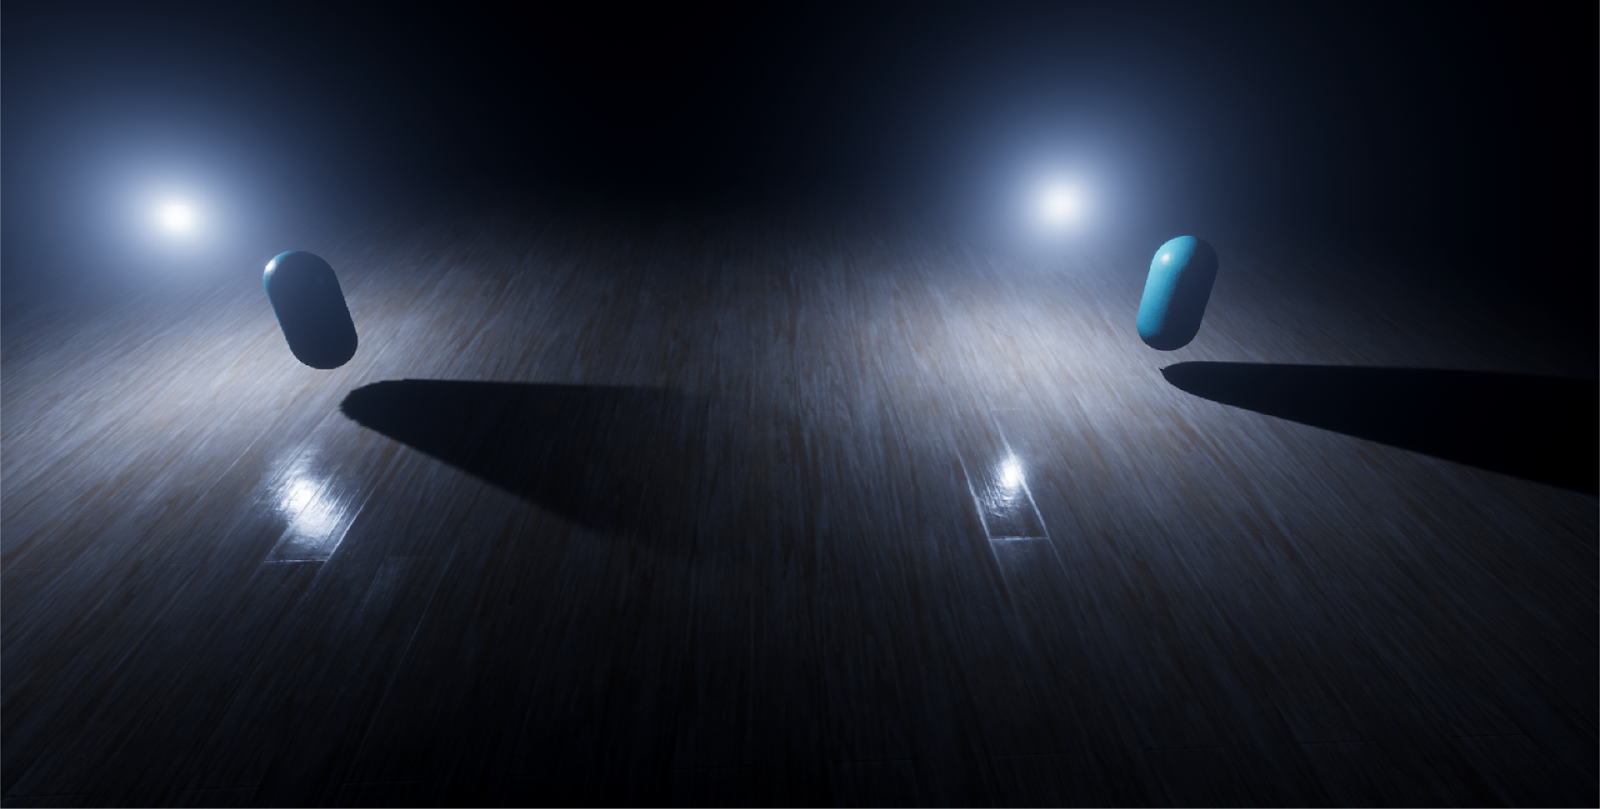
There are additional high quality settings for more customization. For more information on these settings, consult the HDRP Lighting manual.
11. Conclusion
HDRP offers many new features and options that bring that AAA lighting to your projects. It’s important to understand how the Light component is more robust than before to really bring that believable atmosphere to your scenes. HDRP also gives you much more control over light behavior within each scene.