Introduction to the public keyword and inheritance
Tutorial
·
Beginner
·
+10XP
·
20 mins
·
(119)
Unity Technologies

In this tutorial, you’ll:
- Explore the public keyword, and the role this plays in code
- Make a variable public and access it in Unity Editor
- Explore the concept of inheritance and derived classes
When you’ve finished, you’ll be ready to create a custom effect for the health potions used in your SpawnerSample script.
Languages available:
1. Understand the difference between public and private
In the previous tutorial, you explored the role of the class keyword in organizing your code. You’ve also previously encountered another keyword: public. In your SampleSpawner script, the ObjectToSpawn variable written within the Spawner Sample class starts with the public keyword.
By default, everything within a class is private. This means that it can only be accessed by the class itself. However, if you add the public keyword in front of a class, function or variable, this allows other classes to access it too.
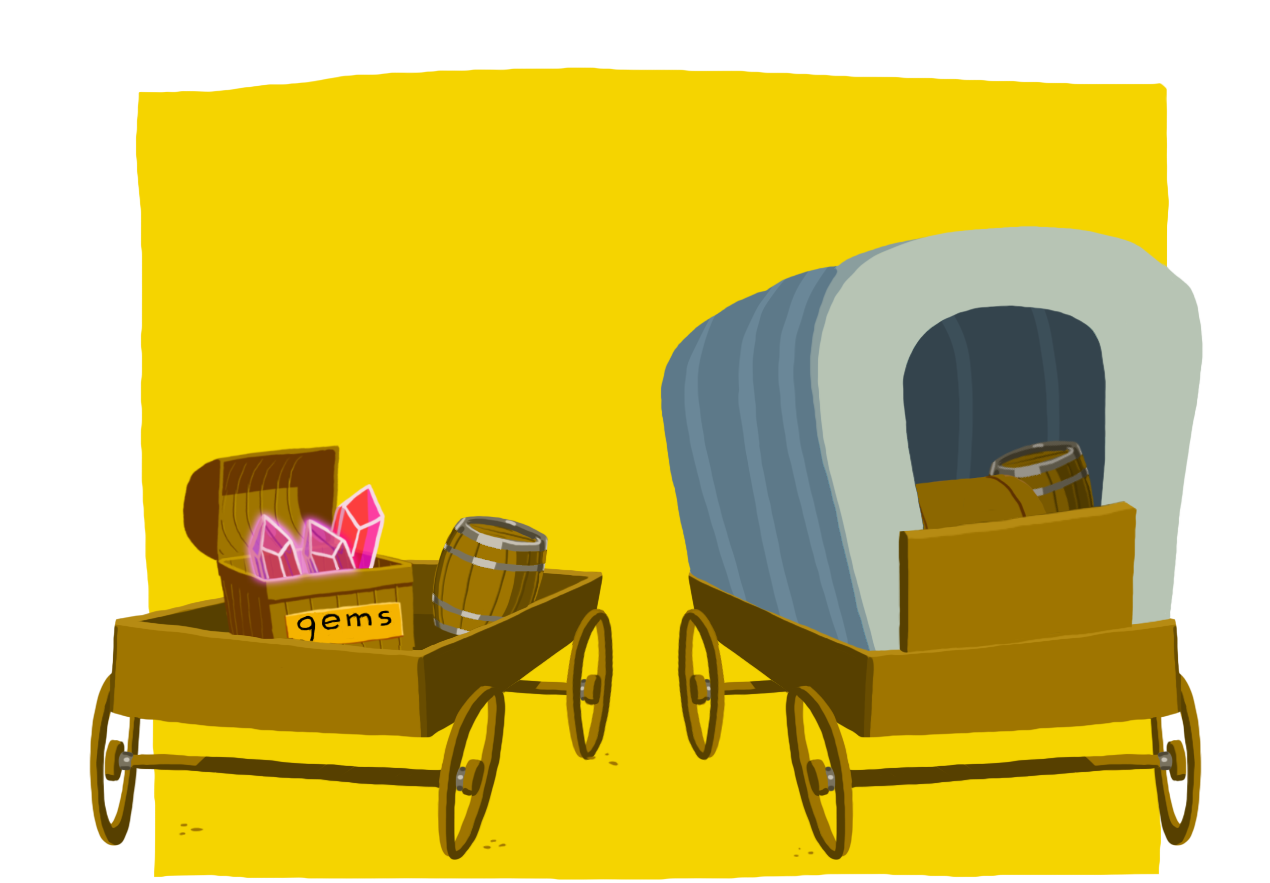
You could consider public things to be in an open wagon where the contents can be easily accessed, and private things to be in a closed one.

2. Review a private variable example
Let’s look at an example which illustrates the difference between public and private variables.
Consider the following script:
class Vector3
{
    float x;
    float y;
    float z;

    Vector3 otherVector;
}
You would not be able to access the float variable x in a different script using a dot operator.
This is because x is private by default — it doesn’t have the public keyword. Only functions inside the class Vector3 can access it.
3. Make your LootAngle variable public
Let's make your LootAngle constructor and NextAngle function public to fix the Unity Editor error:
1. In the SpawnerSample script, find the function LootAngle inside the class LootAngle:
LootAngle(int increment)
   {
       step = increment;
       angle = 0;
   }
2. Add the keyword public to the function declaration:
public LootAngle(int increment)3. Below the function LootAngle, find the function NextAngle:
    int NextAngle()
    {
        int currentAngle = angle;
        angle = Helpers.WrapAngle(angle + step);

        return currentAngle;
    }
4. Add the keyword public to the function declaration:
public int NextAngle()5. Press Ctrl + S (Windows) or Cmd + S (macOS) to save your changes.
6. Return to Unity Editor, and check that the error has cleared in the Console window.
Great — you’ve fixed the error by making the constructor and function accessible!
4. Access a public variable in Unity Editor
When you make a class variable public, this has an interesting secondary effect of enabling you to access it from the Inspector.
In the SpawnerSample script, the variable ObjectToSpawn is public. Let’s find it in the Unity Editor:
1. Return to Unity Editor.
2. In the Hierarchy, select the PotionSpawner GameObject.
3. In the Inspector, find the Spawner Sample (Script) component:

The public ObjectToSpawn variable has a field in the Inspector!
When you tell the computer that a variable needs to be accessible from other places using the public keyword, Unity exposes it so that you (or someone else) can change its value in the Inspector.
5. Create a new spawning object
You can use the ObjectToSpawn public variable to assign a Prefab GameObject as the object to spawn.
Let’s create a different GameObject which spawns money at game start:
1. In the Hierarchy, right-click and select 3D Object > Sphere from the contextual menu. Rename your new GameObject MoneySpawner.
2. In the Scene view, use the Move Tool (shortcut: W) to move the MoneySpawner GameObject next to the PotionSpawner GameObject.
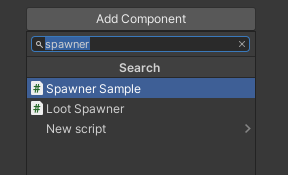
3. Make sure that MoneySpawner is still selected in the Hierarchy. In the Inspector, select the Add Component button. Search for Spawner Sample, and add the script to your MoneySpawner GameObject.

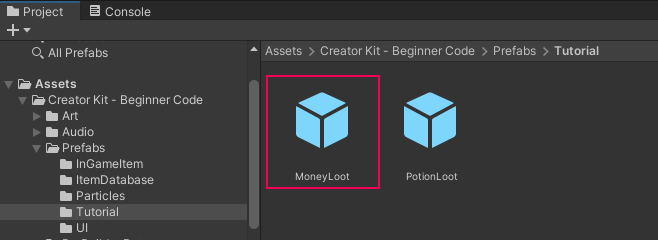
4. In the Project window, go to Assets/Creator Kit - Beginner Code/Prefabs/Tutorial and find the MoneyLoot Prefab.

5. Make sure that the MoneySpawner GameObject is still selected in the Hierarchy. Drag the MoneyLoot Prefab from the Project window to the Object To Spawn field in the Inspector.
6. Press Ctrl + S (Windows) or Cmd + S (macOS) to save your changes.
TIP: If you need a little more support completing these steps, you can return to the first tutorial and review the Unity Editor refresher.
6. Using exposed variables to adjust gameplay
Exposed variables can be very useful, because they enable people to adjust gameplay without editing scripts. Values which can be easily adjusted in this way include:
- The speed of an object
- The amount of health points an object gives when equipped
- The points of contact on an enemy character - such as various colliders
Exposed values are very useful because they can be changed by a non-coder. They can also be adjusted during live play in Unity Editor to test and refine the player experience.
7. Review your progress
You’ve learned a lot in these tutorials, but there’s one more thing to explore. Let’s review the SpawnerSample class declaration:
public class SpawnerSample : MonoBehaviourYou now know what most of this information means:
- public is a keyword which means the class can be accessed by other scripts
- class is a type, which enables you to group related functions and variables
- SpawnerSample is the class name
However, there’s still a little more information to work out:
: MonoBehaviour
8. Look up “MonoBehaviour”
First, take the standard approach when you encounter an unfamiliar type or keyword — search in the Unity Scripting Reference.
The first result provides the following definition:
“MonoBehaviour is the base class from which every Unity script derives.”
That tells you that MonoBehaviour is a class, something you’ve already encountered, and all scripts derive from it. Since SpawnerSample is a script, you could deduce that the colon sign means “the class before the colon derives from the class after the colon” — but what does it actually mean for something to be “derived” in C#?
9. Introduction to derivation and inheritance
Class allows you to group together the variables and functions needed to complete a specific task — for example, an Enemy class could group together everything needed to control enemies in your game.
However, sometimes you will need variations or specializations of that class. For example, you might want a flying enemy and walking enemy, which have the same data and most functions, but a different movement function.
To write this code efficiently, you could write:
- An Enemy class to perform all common operations
- Two other classes (FlyingEnemy and WalkingEnemy) that derive from it
The derived classes FlyingEnemy and WalkingEnemy will automatically inherit (be able to access) all the functions and variables of the Enemy class.
One way to think of derived classes is as different members of the same family.

10. Review an inheritance example
Let’s use the example from the previous step to explore what inheritance looks like in practice:
public class Enemy
{
    public void Attack()
    {
        …
    }
}

public class FlyingEnemy : Enemy
{

}
The colon identifies FlyingEnemy as derived from Enemy.
You could then write code which accesses the function Attack inside the Enemy class without redeclaring the function, for example:
void HandleEnemy()
{
  FlyingEnemy myEnemy;
  myEnemy.Attack();
}11. What does the MonoBehaviour class contain?
Your scripts in Unity derive from the base class MonoBehaviour. This means that the script can access a range of variables and functions created within the base class that every Unity user can use, including:
- The variable transform, which contains the Transform component
- The function GetComponent, which enables you to access a component on a GameObject
These default variables and functions mean that you have to spend less time writing scripts to do commonly needed things, and can focus more on writing code that will help you make your specific game.
12. Tutorial summary
In this tutorial, you have:
- Reviewed the role of the public keyword, and used it to fix the protection level error in your SpawnerSample script.
- Explored the concepts of inheritance and derived classes.
In the next tutorial, you’ll apply what you’ve learnt and write a custom effect for the health potions in the game.