Introduction to Timeline
Tutorial
Beginner
+10XP
20 mins
472
Unity Technologies

The Unity Timeline Editor is a built-in tool where you create and edit cinematic content, gameplay sequences, audio sequences, and complex particle effects. In this tutorial, you'll see the various features of Timeline.
Languages available:
1. Introduction to Timeline
This tutorial has been verified using Unity 2019 LTS
The Unity Timeline Editor is a built-in tool that allows you to create and edit cinematic content, gameplay sequences, audio sequences, and complex particle effects. You can move clips around the Timeline, change when they start, and decide how they should blend and behave with other clips on the track.
Each Scene you create with Timeline Editor consists of a Timeline Asset and a Timeline instance. A Timeline Asset is any media (tracks, clips, recorded animations) that can be used in your project. It could be an outside file or an image. It could also be assets created in Unity, such as an Animator Controller Asset or an Audio Mixer Asset.
A Timeline Instance is created by associating a Timeline Asset to a GameObject through a Playable Director component. Note that the GameObject must have an Animator component and the Timeline Instance is Scene-based.
To create a new Timeline Asset:
1. Select the GameObject that you want to use as the focus of your cinematic or create an empty GameObject to hold this Timeline Asset.
2. Go to Window > Sequencing > Timeline. From there click the Create button in the Timeline window and Save (Figure 01). This Editor window is where you control assets and sequences.

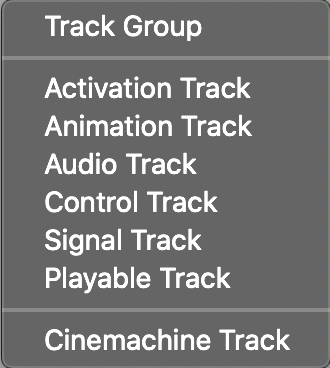
3. Figure 02 shows six different types of tracks, seven if you have Cinemachine installed. Each Asset you control in this Timeline sequence is represented by its own track.

- Track Group lets you make a collection of tracks.
- Activation Track controls when to activate a track on the Timeline.
- Animation Track allows you to import existing animation clips or create an animation from scratch directly within Timeline.
- Audio Track allows you to import existing audio clips and make edits. Note that you cannot preview audio outside of Play mode.
- Control Track lets you take control of time-related elements of a GameObject, such as a PlayableDirector or a ParticleSystem.
- Playable Track allows you to trigger other timeline sequences.
- Signal Track establishes a communication channel between the Timeline and outside systems.
- Cinemachine Track Allows you to control Cinemachine cameras within the Timeline.
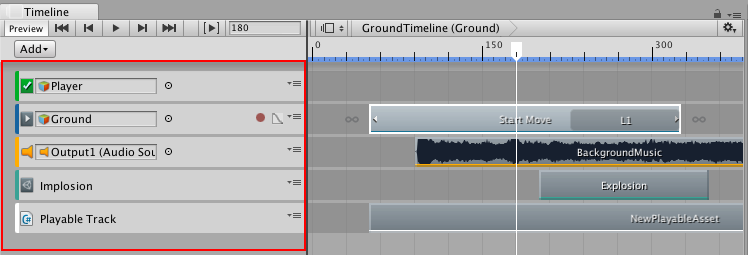
In Figure 03 and Figure 04, you can see what these six tracks look like in the Timeline:


4. You can preview your Timeline by clicking the Preview button on the top left of the Timeline Editor. In Preview, you can also make adjustments and play back your track in real time.
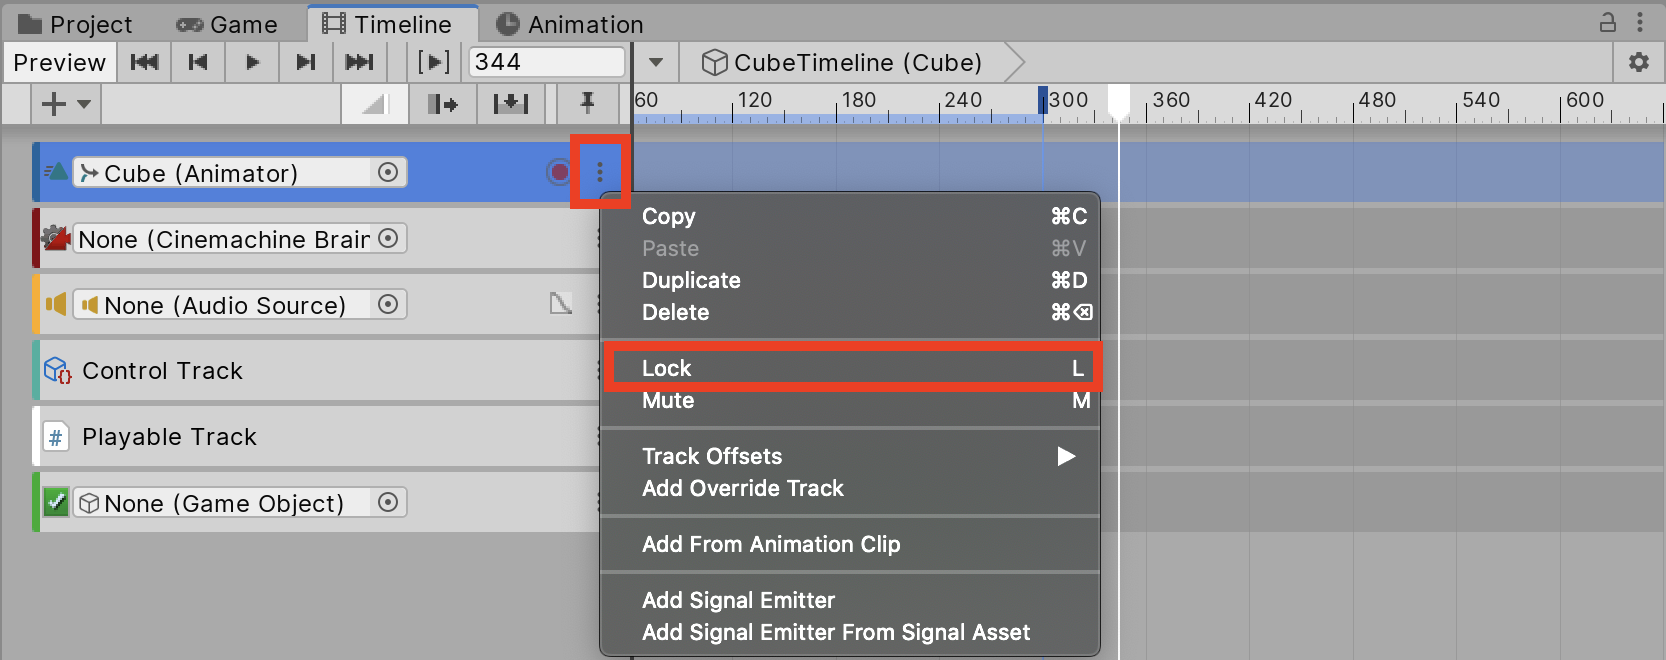
5. Once you’ve finished editing, you can lock the track by clicking the drop-down menu and selecting Lock (Figure 04).

Unity Timeline serves a wide range of needs. It gives creators the power to edit in-context and is very user-friendly. You can freely arrange your GameObjects, animations, particles, and sound and quickly generate your own content.