Introduction to Unity Studio
Tutorial
foundational
+10XP
20 mins
11
Unity Technologies

This tutorial will guide you through creating your first project in Unity Studio. You will learn the interface, navigate the 3D scene, upload your own assets, and add simple interactivity.
Languages available:
1. Overview
Unity Studio is a simple, no-code 3D editor that works directly in your web browser. You don’t need to install anything or write code to create interactive 3D experiences. Unity Studio is designed to make 3D content creation accessible to everyone, regardless of technical background, including designers, artists, training and marketing managers, industrial engineers, or sales teams.

By the end of this tutorial, you'll be able to do the following:
- Understand what Unity Studio is and what it's designed for.
- Create your first project draft in Unity Studio.
- Identify and understand the core panels of the Unity Studio interface.
- Navigate effectively within the Scene view using camera controls and GameObject interaction tools.
- Upload your own 3D models for use in a scene.
- Animate individual GameObjects or more complex animated sequences.
- Add interactive functionality using built-in block-based coding.
2. Create a draft
Your first step in Unity Studio is to create a new project draft, which is a starting point for your work. Watch the video walkthrough or follow the step-by-step instructions below to complete this task.
Note: The videos in this tutorial were recorded on a version of Unity Studio with different branding, but all functionality is the same. These videos will be updated soon.
Instructions
1. Sign in to Unity Studio
- Open Unity Studio at https://cloud.unity.com/studio.
- Sign in with your Unity ID and password.
- Note: If you don’t have a Unity ID yet, you’ll need to create one first. If you haven’t signed up for Unity Studio beta access yet, you’ll need to sign up here first.
2. Select your organization (optional)
- By default, you’ll see your personal organization. To switch to a company workspace, select your profile in the upper-right corner.
- Select your company organization from the dropdown if you wish to switch from your personal account.
3. Create a new draft
- Once in your desired organization, select the New Draft button.
- Select Start from an empty scene for a blank project, or Use a pre-made template to explore existing features.
- If this is your first time using Unity Studio, we recommend starting with a pre-made template.
4. Name your draft and select a project
- Enter a name for your new draft.
- Select an existing project from the list, or enter a name and select Create to start a new project.
Your new draft is now open, and you are ready to begin building with Unity Studio.
3. Learn the interface
Now that you’ve set up your account and started your first draft, it's time to explore the Unity Studio interface. Watch the video walkthrough or follow the text guidance below.
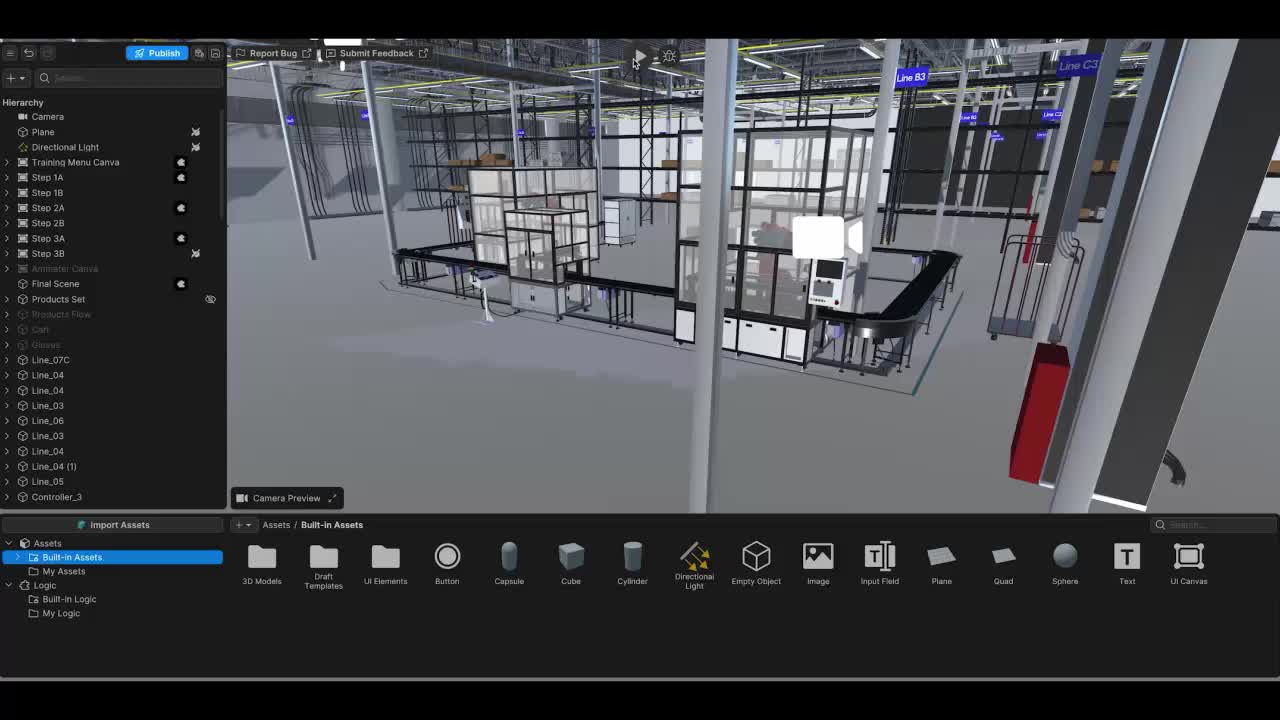
Hierarchy window: This panel, located on the left, lists and helps you organize all GameObjects in your scene.
Project window: Located at the bottom, this panel is your asset library, containing 3D models, images, and visual scripts for your project.
Scene view: As your main workspace in the center, this is where you build, arrange, and interact with your 3D scene.
Inspector window: On the right side, this panel allows you to view and adjust the properties, such as size, color, and behavior, of any selected object.
Camera Preview: This window provides a real-time view of what your scene's Main Camera sees, helping you frame your final application.
You now have a basic understanding of the Unity Studio workspace and the function of each main panel.
4. Navigate Scene view
In this step, you’ll learn the basics of Scene view navigation, including how to move around, interact with GameObjects, and use the most common tools. Watch the video walkthrough or follow the step-by-step instructions below to complete this task.
Instructions
1. Manage the Scene Navigation dialog
- When the Scene Navigation dialog appears on opening a draft, you can disable Show on startup if you prefer it not to appear every time.
- To re-open the Scene Navigation dialog later, select the Main Settings button (menu icon) in the upper-left of the Hierarchy window, and then select Open controls guide.
2. Practice camera controls
- Move the camera around the Scene view using the W, A, S, D keys for forward, left, back, and right movement, respectively, or Q and E to move the camera down and up.
- Hold the right mouse button and drag to rotate the camera's view.
- Hold the scroll wheel (or middle mouse button) and drag to pan the camera across the scene.
Note: This action might not be possible if you’re using a touch pad.
- Use the scroll wheel to zoom the camera in and out of the scene.
- Left-click to select an individual GameObject, or hold and drag the left mouse button to select multiple GameObjects at once.
- With a GameObject selected, press the F key to focus the Scene view camera directly on it.
3. Interact with objects using the toolbar
- Select a GameObject in the Scene view. A toolbar will appear at the bottom.
- Use the toolbar buttons or the corresponding keyboard shortcuts (1 to 4, Z, X) to switch between transformation tools:
- Press 1 (or select the Free Transform tool) to freely move objects on multiple axes simultaneously along a surface.
- Press 2 (or select the Move tool) to move GameObjects precisely along specific axes using the gizmo.
- Press 3 (or select the Rotate tool) to rotate GameObjects to change their orientation.
- Press 4 (or select the Scale tool) to resize GameObjects; use the gray box in the center of the gizmo to scale evenly in all directions.
- Press Z (or select the Toggle handle position button) to switch between moving a GameObjects from its center or its pivot point.
- Press X (or select the Toggle handle rotation button) to switch between global (world space) and local (GameObject-based) rotation controls.
- Select the Duplicate button to create a copy of the selected GameObject.
- Select the Delete button to remove the selected GameObject from your scene.
4. Utilize Scene view quick actions
- Select the Play button at the top of the Scene view to run your scene and test your work, then select Stop to return to editing mode.
- Select the Bug notification icon next to the Play button to view details about any warnings or errors in your project, and select Show to locate their source.
- Use the Report Bug button or the Submit Feedback button in the upper-left of the Scene view to report issues or share your suggestions with the Unity Studio team.
You can now confidently navigate the Scene view, control your camera, and interact with GameObjects using Unity Studio's essential tools.
5. Add your own assets
This section will cover the process of importing and placing your custom 3D assets into your Unity Studio project. Watch the video walkthrough or follow the step-by-step instructions below to complete this task.
Instructions
1. Open the Asset Manager
- In the Project window, select the Import Assets button.
- The Asset Manager window will open.
2. Navigate the Asset Manager
- On the leftmost side, you'll see all projects within your organization. Select the project where you want to add assets.
- To switch organizations, use the dropdown in the upper-right of the Asset Manager window.
Note: Unity Studio supports FBX, OBJ and GLB files natively, but also supports many other files including CAD formats like STEP thanks to the built-in asset transformer. You can learn more in the Supported asset file formats documentation.
3. Add new assets
- From the Asset Manager window, select the Add button.
- Select your files from your computer, then select Upload to begin importing your assets.
4. Import assets to your project
- Once uploaded, enable the checkbox next to each asset you want to import. Your selections will appear in a panel on the right.
- Select Import and allow a moment for Unity Studio to process your assets.
All the assets you import are now stored in the My Assets folder within your Project window, making them easy to find and organize for building your scene.
6. Create animations
Unity Studio offers two powerful ways to add motion and visual effects to your GameObjects: the Animation component for single GameObjects and the Animation Director for coordinating multiple objects on a shared timeline. Watch the video walkthrough or follow the step-by-step instructions below to complete this task.
Instructions
1. Animate a single GameObject with the Animation component
- Select the GameObject you wish to animate in your scene.
- In the Inspector window, select Add Component, then search for and add the Animation component. This opens the Animation window.
- Utilize the keyframe system: move the timeline cursor, then make a change to your GameObject in the Scene view to automatically create a keyframe.
- Adjust animation timing by dragging, merging, or deleting keyframes on the timeline.
- Select the Play button in the top bar to preview your animation.
2. Coordinate multiple GameObjects with the Animation Director
- In the Hierarchy window, locate and select the Animation Director to open its Timeline window.
- Move the timeline cursor, then select a GameObject in the Hierarchy window and apply a change in the Scene view to create a keyframe for that GameObject.
- Repeat for other GameObjects to animate multiple GameObjects on the same timeline.
- Drag an asset's blue animation track on the timeline to move all its keyframes, or create multiple timelines for advanced control.
3. Customize animation properties
- Adjust Autoplay to start animations automatically.
- Rename animations using the Name property for organization and script reference.
- Choose Easing types for natural motion.
- Set Playback options to Once, Loop, or Ping Pong.
With Unity Studio's animation tools, you can create everything from simple object movements to complex cinematic scenes.
7. Explore Unity Studio Logic
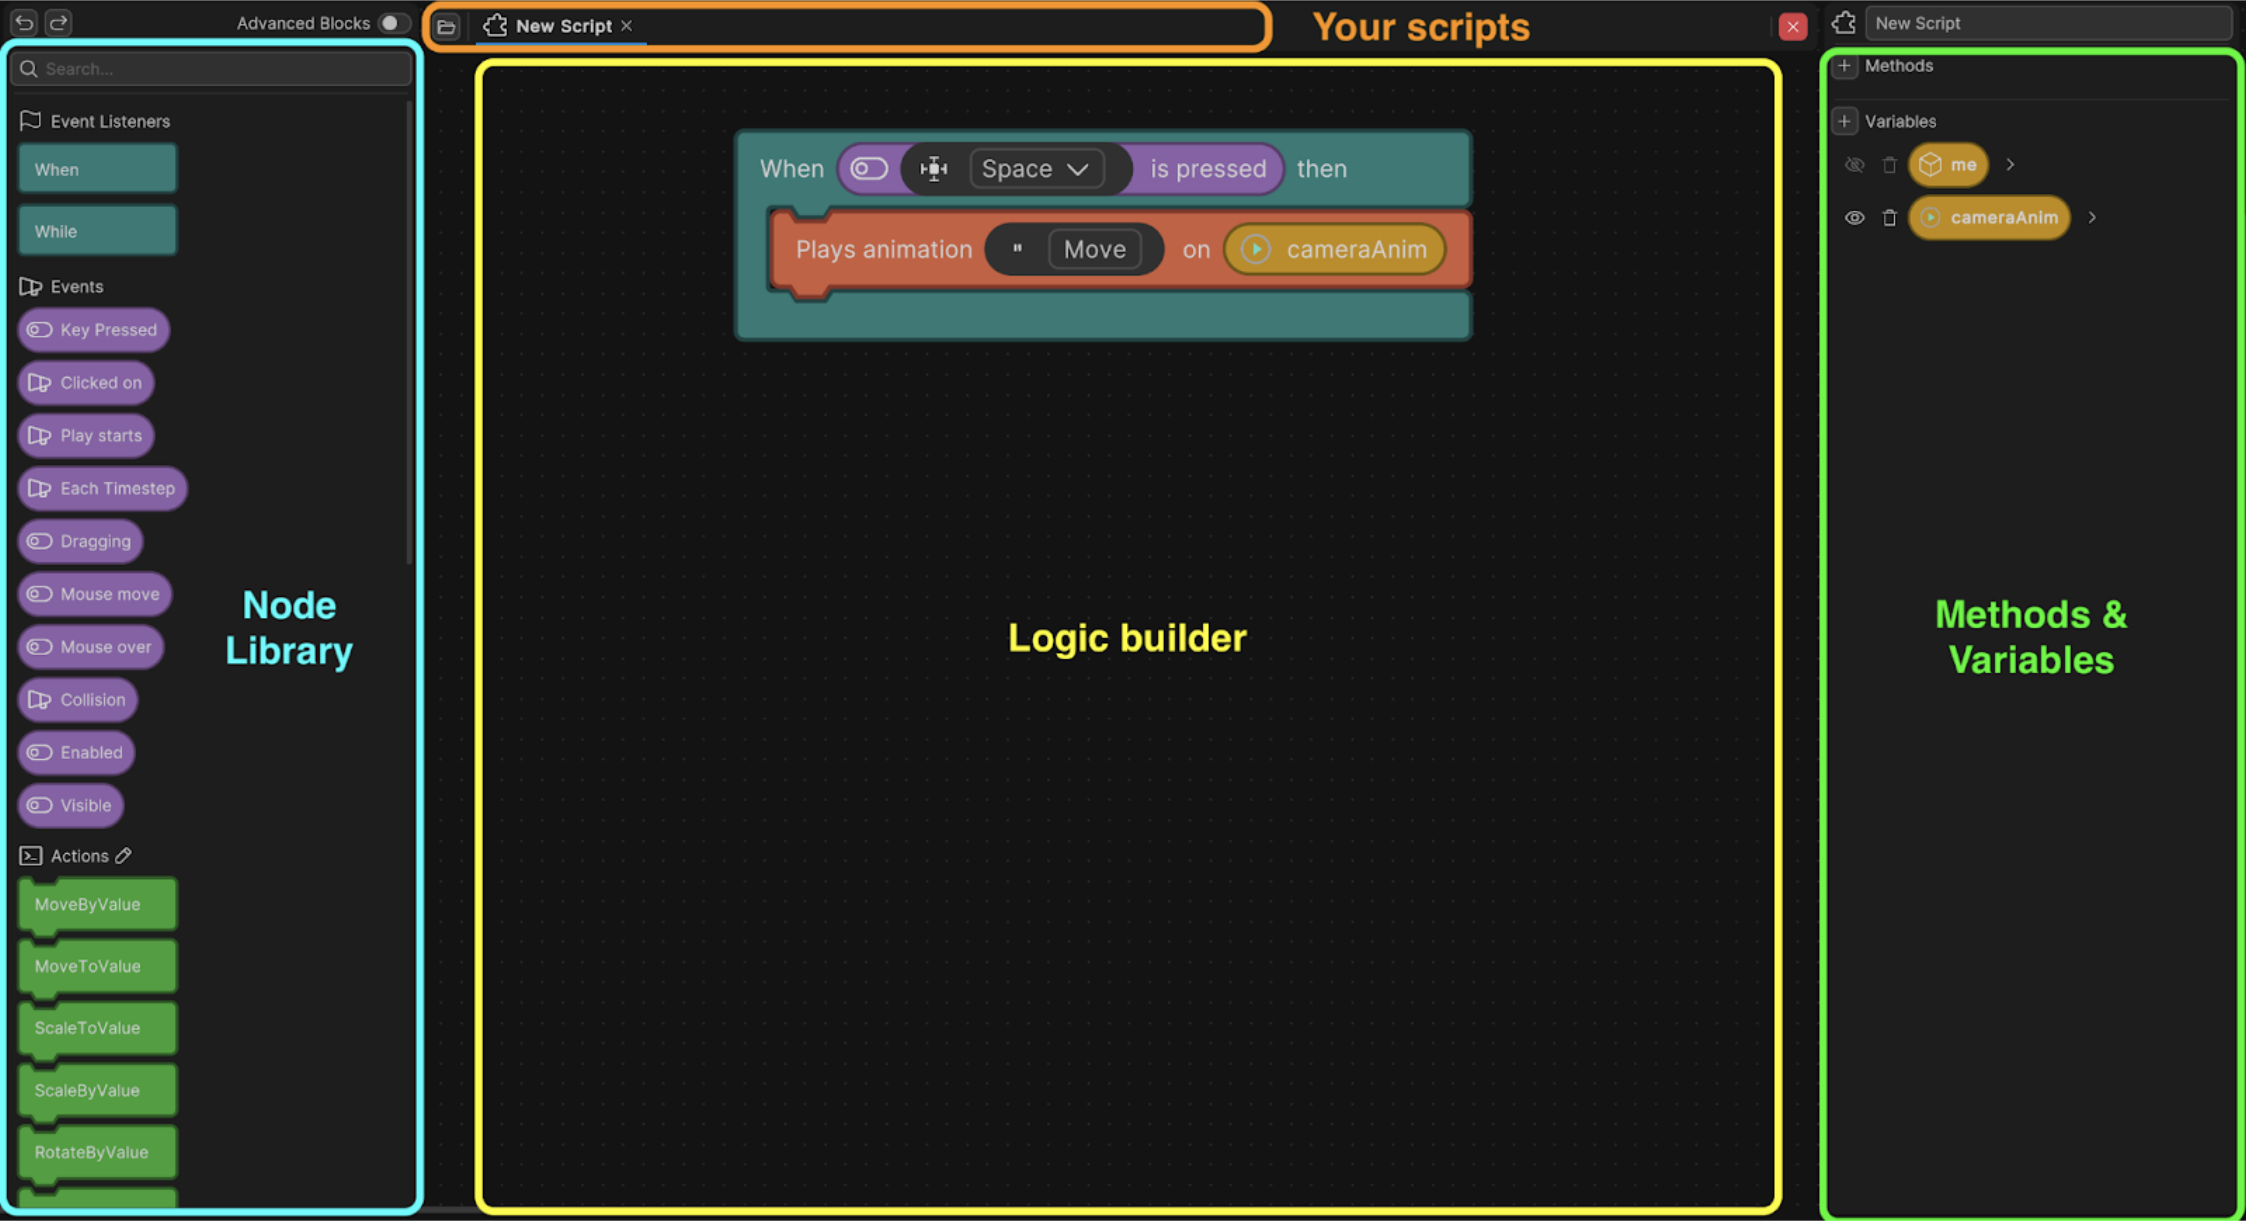
Unity Studio features its own visual scripting system, called Logic, which allows you to create interactive 3D experiences without writing any code. You can set up reactions to user actions and control how your GameObjects behave, all by connecting simple building blocks.
Extensive documentation is available to help you understand the concepts of visual scripting and provides step-by-step instructions for adding specific functionality.

Instructions
1. Understand Unity Studio's visual scripting system
- If you are interested, open the Logic documentation to learn more about the Logic editor, how it's set up, and what it can do.
2. Experiment with Logic examples
- If you want, follow specific step-by-step instructions from the documentation to implement one or more of the following interactive behaviors:
3. Explore existing Logic scripts in templates
- Browse other draft templates available in Unity Studio and examine their Logic scripts to observe how different interactive elements and behaviors are implemented.
By exploring Unity Studio's Logic system, you can begin to add dynamic interactivity to your projects, making them more engaging and functional.
8. What's next?
Congratulations! You've successfully completed your first steps with Unity Studio, learning how to create projects, navigate the interface, add assets, create animations, and explore visual scripting.
Here’s what you can do next:
Continue building and sharing
- Keep experimenting with the tools and features you've learned. The best way to master Unity Studio is through hands-on creation.
- Once you've built something you're proud of, share it with a friend or colleague. In a few clicks, you can publish your app and get a URL to share with anyone.
Provide valuable feedback
- Unity Studio is currently in beta, so your feedback directly shapes the future of the product.
- If you encounter any issues, use the Report Bug button in the upper-left of the Scene view.
- To share general thoughts, suggestions, or to request features, use the Submit Feedback button, also located in the upper-left of the Scene view.
You now have a solid foundation for bringing your 3D ideas to life without needing to write any code. Keep creating and exploring!