
Lesson 3 | Refine and Publish Your Project
Exercise
foundational
+20XP
45m
Unity Technologies
In this lesson, you will continue to add controllable elements to your personal 3D Gallery Project, then publish and share your project.
Languages available:
1. Adding a UI and proximity triggers
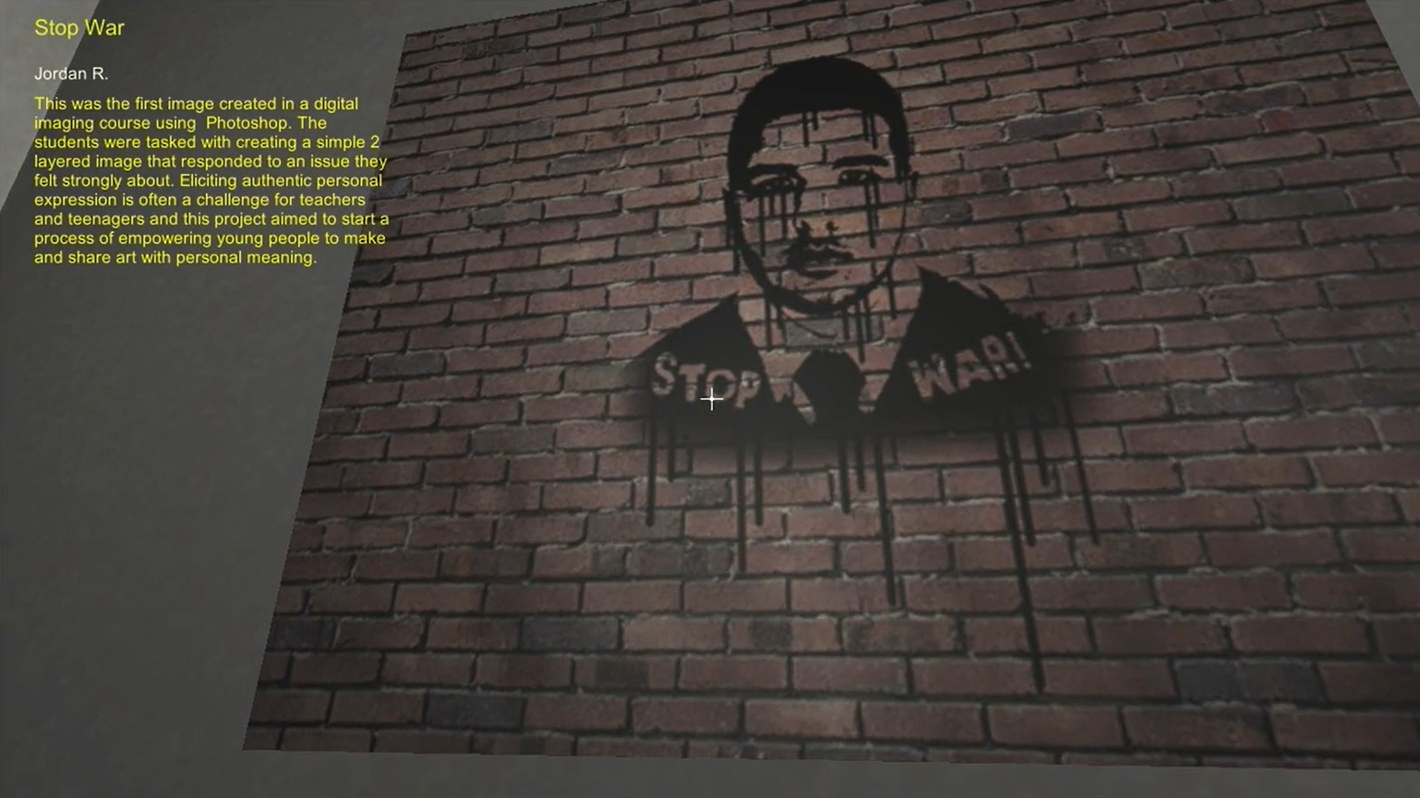
At this point, your 3D Gallery project includes a player controller with collision detection capabilities and a detailed 3D environment which includes decals, lighting, and sound. In this tutorial, you will create a user interface to display any elements you wish to include. In the video below, you will see Unity Educator, Mark Shufflebottom, demonstrate how to create a user interface to display details about the images in his 3D Gallery project. When the user gets close to a particular item in the gallery, text will appear on the screen to give the user context about each piece featured. Consider how you might adapt this process to add context and meaning to your own personal project.
- From the top menu, click GameObject > UI > Text. Switch to Game View to see how the text is displayed in the lower-left corner of the screen.
- Check that Canvas>Text is selected in the Hierarchy panel.
- Then, in the Inspector panel under Rect Transform, click on the Anchor icon, then hold Alt and click ‘left/top’
- Change the Width to 500 but leave Height at 30. Click on the Anchor icon again, then hold Alt and click ‘left/top’
- In the Text component, Increase the Font Size to 18 and change the Color to yellow, and change the actual Text to ‘Title’
- In the Rect Transform component, change the Pos X to 280 and the Pos Y to -30
- At the top of the Inspector, name the text element “ArtTitle’.
- Click where it says ‘Untagged’, then choose ‘Add Tag.’ Click the plus (+) to add a tag and name it ‘ArtTitle’. Repeat this for ‘Auth’ and ‘Description’ so you have three tags. It is essential that these three tags are spelled exactly ‘ArtTitle’, ‘Auth’ and ‘Description,’ including correct capitalization, because the code will look for that spelling later.
- Select ArtTitle in the Hierarchy panel and, in the Inspector, change the tag from ‘Untagged’ to ‘ArtTitle’.
- Repeat steps 1-6 and step 8 to make 2 more text boxes. Name them ‘Author’ and ‘Desc’ then tag them ‘Auth’ and ‘Description’ respectively. You will also have to change their Height and Pos Y to be appropriate for the length and position of those text elements.
2. Adding images and a script
- Select Assets in the Project Panel, hit the + icon and choose ‘Folder’ in the pop-up menu. Name this folder ‘Textures’.
- Go back and select Assets in the Project Panel, hit the + icon and choose ‘New Folder’ in the pop-up menu. Name the folder ‘Scripts’.
- From the downloaded assets, drag over the two textures into your new Textures folder.
- Then drag the Proximity.cs script from your downloaded assets into your new Scripts folder.
- Return to the scene view by selecting the Scene tab, then from the top menu, click GameObject > 3D Object > Plane. Drag the ‘da3’ texture from the Textures folder onto the Plane.
- In the Inspector panel, find the Rotation properties in the Transform component and change the fields so that the plane is 90º on the x-axis and -90º on the y-axis.
- Change the position of the panel over a wall in the scene with the move tool.
- Scale it to 0.5 on the x-axis and 0.5 on the z.
- Find the Direction Light in the Hierarchy panel and uncheck the Light in the Inspector to disable it.
- To make the scene brighter, select all Lights in the Light group by clicking the first and shift-clicking the last.
- In the Inspector panel, increase the intensity to 2.
3. Creating interaction with a proximity script
- Drag the Proximity.cs script from the Scripts folder onto the Plane in the Hierarchy.
- Write some text for the Title, Author, and Description of the painting into the relevant fields in the Inspector for the Proximity Script. Alternatively, you may have this text already in a separate text document, and you can copy and paste it in directly.
- Hit Play to test walking up to the gallery work and seeing the text display in the UI.
4. Debugging Challenge
When working in Unity, you will inevitably have to debug issues as they arise. You may have noticed a minor bug in your 3D gallery project. The Title, Author, and Description remain on the screen even after you've moved away from a plane. This is a problem with the Proximity.cs script that we will now debug.
- Navigate to your scripts folder and double click on the Proximity script to open it in Visual Studio, the primary IDE (integrated development environment) associated with Unity.
- Select all of the code and delete it.
- Copy and paste the following updated code:
using System.Collections;
using System.Collections.Generic;
using UnityEngine;
using UnityEngine.UI;

public class Proximity : MonoBehaviour
{
    public string newTitle;
    public string newAuthor;
    public string newDesc;
    private Transform other;
    private Text myTitle;
    private Text myAuthor;
    private Text myDesc;
    private float dist;
    private GameObject player;
    private GameObject message1;
    private GameObject message2;
    private GameObject message3;
    private bool check;

    // Start is called before the first frame update
    void Start()
    {
        player = GameObject.FindWithTag("Player");
        other = player.GetComponent<Transform>();
        message1 = GameObject.FindWithTag("ArtTitle");
        message2 = GameObject.FindWithTag("Auth");
        message3 = GameObject.FindWithTag("Description");
        myTitle = message1.GetComponent<Text>();
        myTitle.text = "";
        myAuthor = message2.GetComponent<Text>();
        myAuthor.text = "";
        myDesc = message3.GetComponent<Text>();
        myDesc.text = "";
        check = false;
    }

    // Update is called once per frame
    void Update()
    {
        if (other)
        {
            dist = Vector3.Distance(transform.position, other.position);
            print("Distance to player: " + dist);
            if (dist < 4)
            {
                myTitle.text = newTitle;
                myAuthor.text = newAuthor;
                myDesc.text = newDesc;
                check = true;
            }
            if (dist > 4 && check == true)
            {
                Start();
            }
        }
    }
}
This updated Proximity.cs script solves the problem of the UI not disappearing when the player moves away from the object the script is attached to. Debugging scripts can be a challenging but rewarding process that involves learning how to code in C#, the language used in Unity projects. To learn how to code in C#, check out some of the other tutorials on Unity Learn like Create with Code.
5. Submitting Your Project
Congratulations on completing your personal project!
You now have the option of sharing your final personal project with your fellow project participants here on Unity Learn. The easiest way to do this is to create a screen recording of your project in-action, then share that video with us by following the steps below:
- Test your personal project using the “Play” button at the top of the screen in Unity. Check that it works!
- Capture a video of your screen as you test your project:
- On Mac, you can use the built-in app “Quicktime” for this. Follow these instructions
- On Windows, you have a number of free options for screen recording. Check here for some suggestions
- Whichever option you use, make sure to export your video in mp4 format for best results
- Once you have captured a video of your project in action, share your video in the “Your submission” field below, and add a title and description
Once you’ve shared your personal project, explore some of the submissions from other learners and use the comment features to give constructive feedback.
Please login to submit
Complete this Tutorial
Submission Gallery

studentcase1
A quick video on how 3d game in unity looks like
The Knack
Early music video trial.

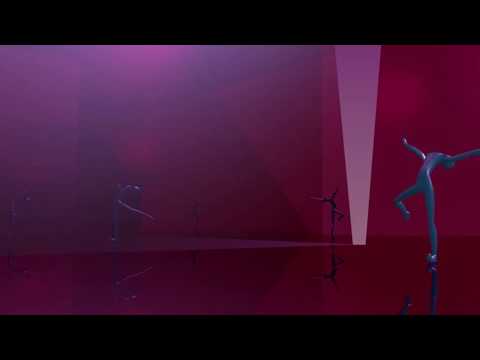
3D gallery mockup with generative art example of flock flying in central hall.
Prototype of 3D gallery with my pin up paintings and drawings and an example of generative art which consists of a 3D flock of boids flying in swarm in the central hall of the gallery. The boids are not a particle system but I have implemented a collection of independent gameObjects and programmed them with parallel behaviors of align with neighbors, separate from neighbors, distance from too close, chase and escape etc.

CodaBot Metaverse Learning System Gallery
What is the difference between a private teacher and a teacher teaching a classroom full of learners? The private teacher can give instant, real-time feedback and encouragement. As VP of Education for CodaBot.com an education startup, we have built a Metaverse Learning Management System (MLMS) in the Unity Gaming Engine. I've applied my over 30 years of research, practice and publications in learner engagement into Unity's real-time engagement and feedback. I applied all this experience and knowledge to this MLMS to advance learning beyond the current face2face and virtual classrooms. If they are virtual students get real-time streamed videos. Students get individual and group exercises with real-time feedback. Students go on quests to apply learning and do their homework on their own or in groups.

First gallery :)
:)

UNITY GALLERY
Final de la