Lesson 5.1 - Framing Shots with the Main Camera
Tutorial
Beginner
+10XP
40 mins
233
Unity Technologies
This lesson is a deep dive into using Unity’s Main Camera and will provide you with a solid foundation of knowledge about framing shots and moving the camera so we can move on to learning about Cinemachine in the next lesson.
Languages available:
1. Lesson Overview
2. Framing by Direct Manipulation
At Cinemachine's heart is the Main Camera. Before we delve in to creating virtual cameras with Cinemachine, we must familiarize ourselves with how to operate the camera and reproduce the framing of shots drawn in storyboards. For this lesson, we will focus specifically on framing and movement.
Before we dig in:
1. Download the Unit5_StarterFiles here. Unzip the folder and move it to an organized location on your computer, add the Project in the Unity Hub and open it. In this Unit, we’ve actually created a new animation for you to film and we’ve changed our scene from day to night to make lighting more fun in Unit 6.
2. Open the Unit5 scene located in the Assets > Scenes folder.
The Main Camera is responsible for everything you see inside the Game view, and for what each of our virtual cameras will see. Naturally, while we see our camera through the Game view, we operate it in the Scene view. For those coming from a live-action background, imagine the Scene view as containing our camera and set, while the Game view is a live monitor showing the camera's viewfinder or livestream.
There are four primary ways of framing a shot using the Main Camera:
- Using the Transform gizmo in the Scene view.
- Manually inputting values in the camera's Transform component in the Inspector
(Direct Manipulation).
- Adjusting the Scene view in Flythrough mode.
- Focusing on an object and setting the camera to look at what you see
(Indirect Manipulation).
To explore these methods, let's frame the dog using both Direct and Indirect Manipulation.
As a quick refresher:
3. Select the Main Camera in the Hierarchy or by clicking on it in Scene view.

4. Press W on the keyboard or the above icon in the upper-left corner to use the Move Tool. Drag on any of the axes to move the camera in each respective axis.

5. Press E on the keyboard or the above icon in the upper-right corner to use the Rotate Tool. You can click and drag on any of the circles (corresponding to the X, Y, and Z axes, respective) to rotate the camera (Figure 01).
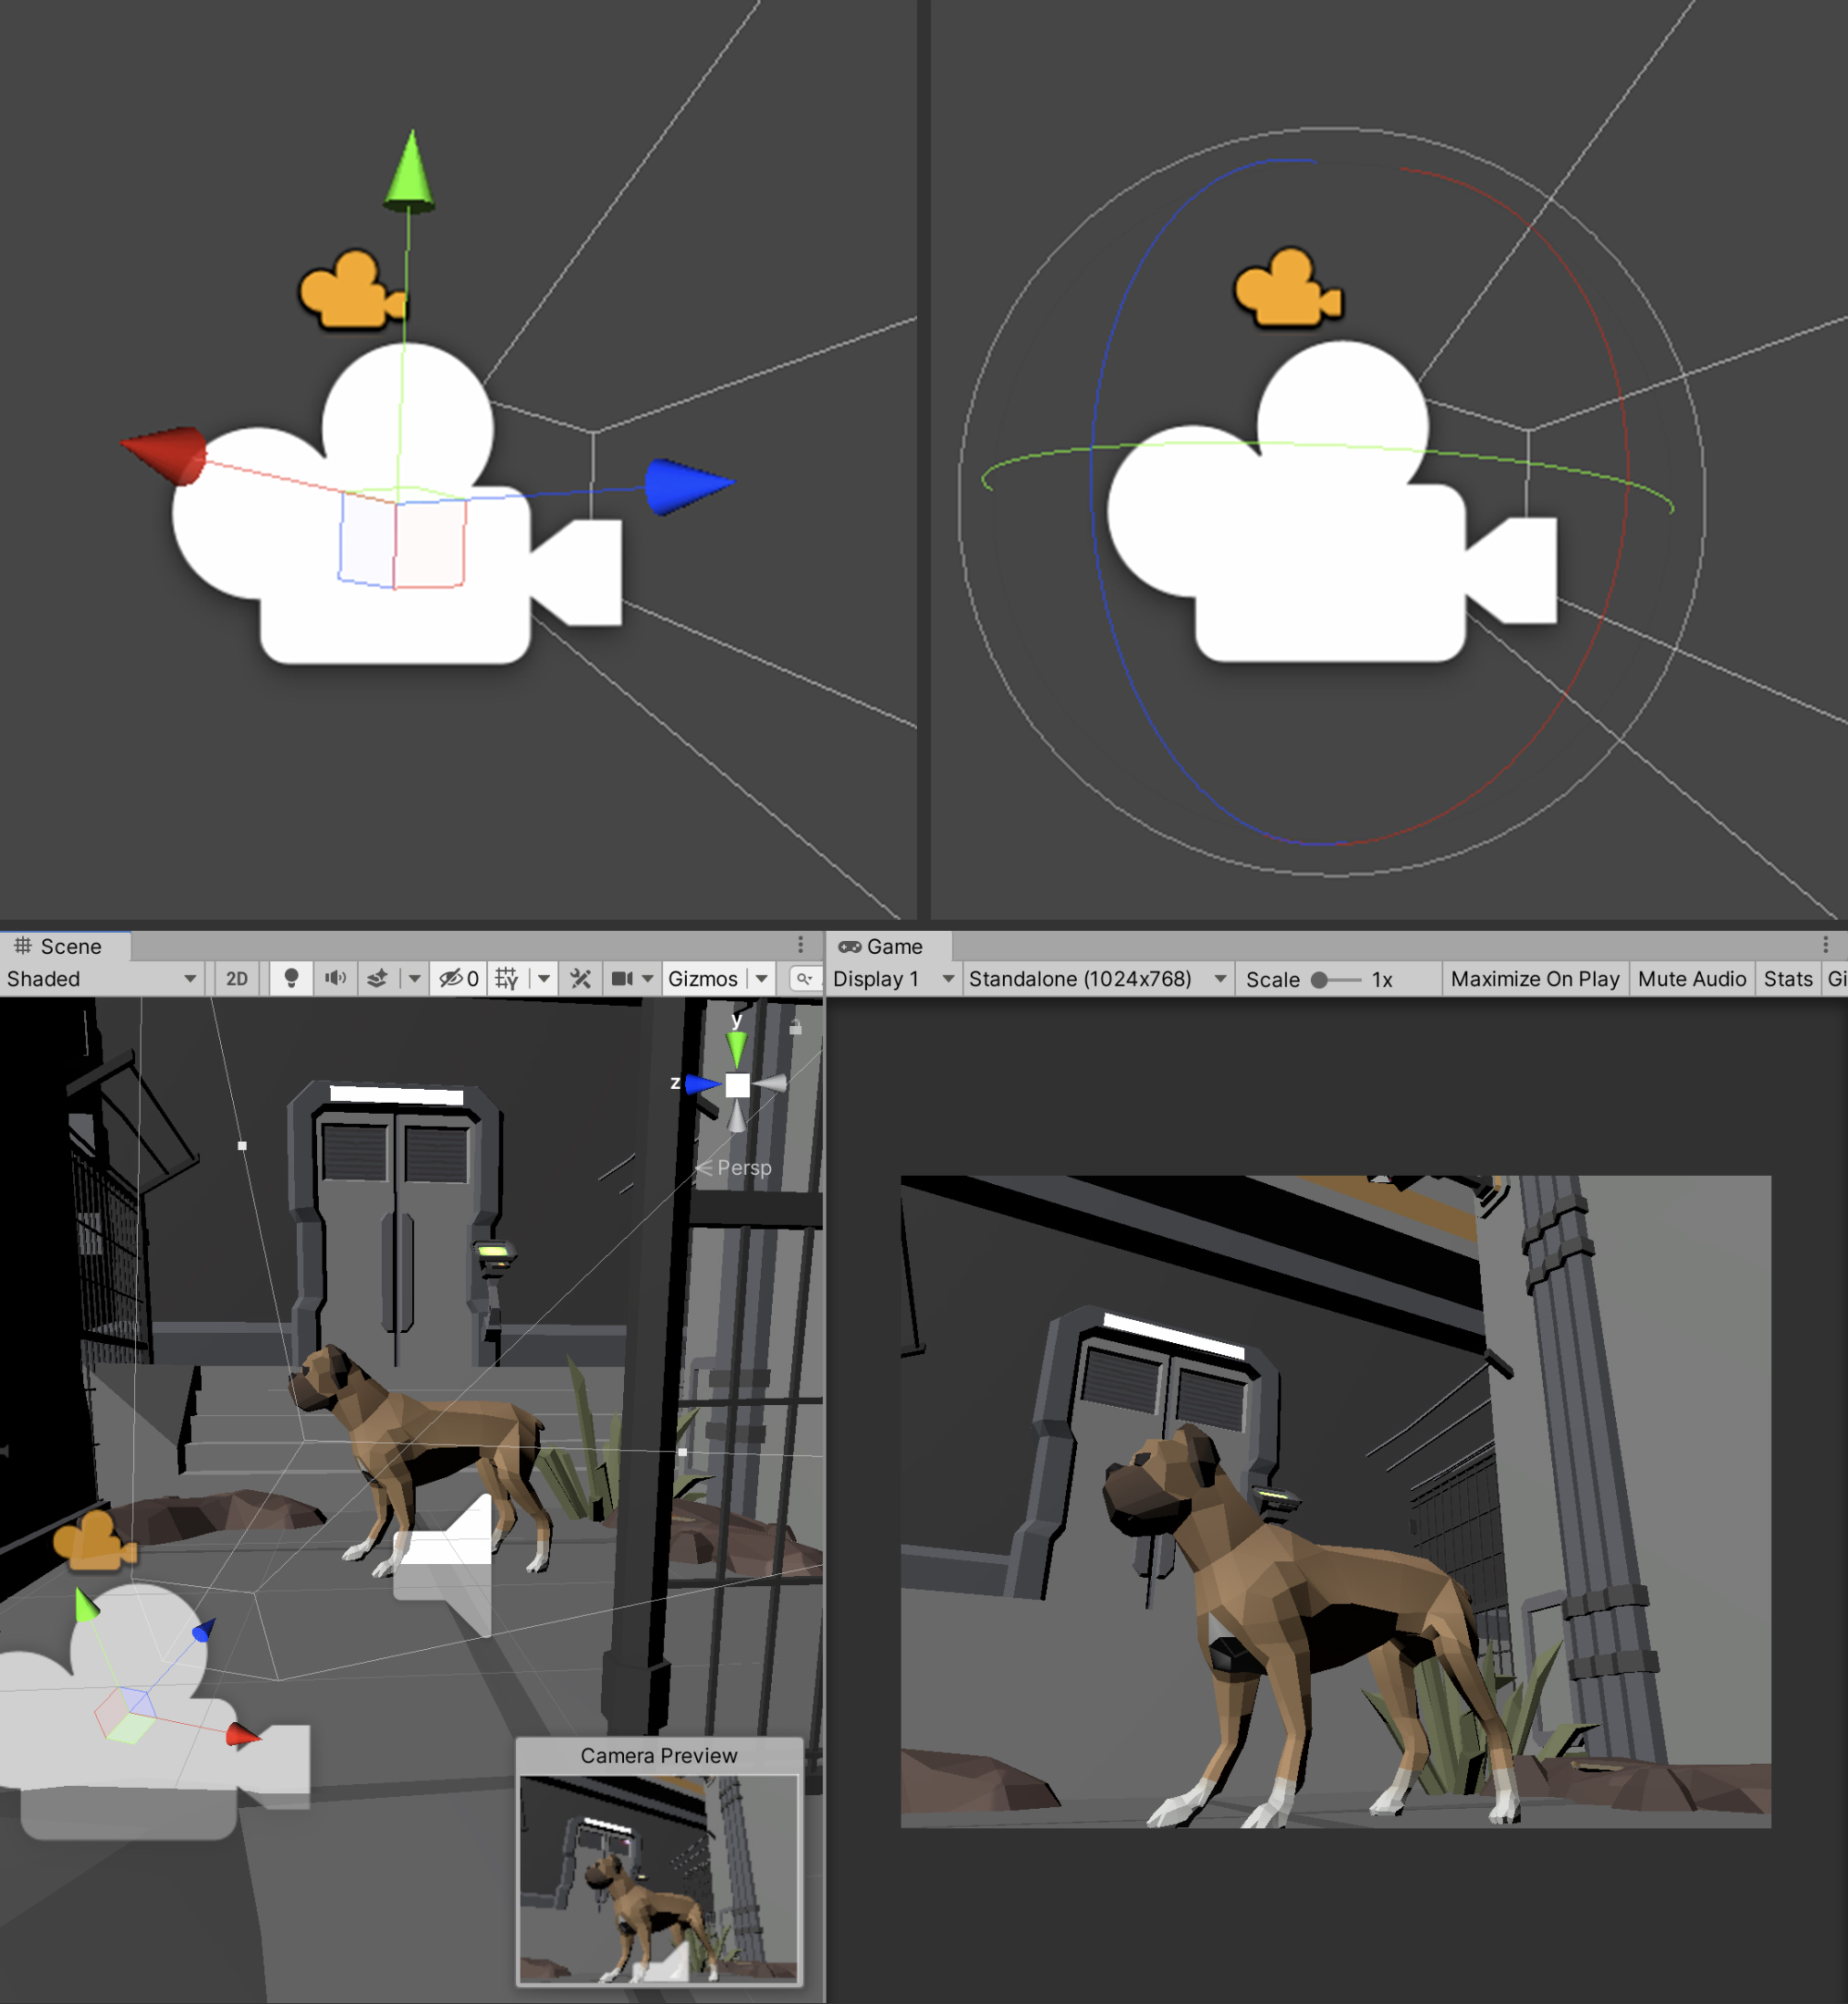
These same changes can be made manually in the Inspector by directly moving the camera using the Transform gizmo or directly modifying the Transform (specifically the position and rotation) values on the camera in the Inspector.
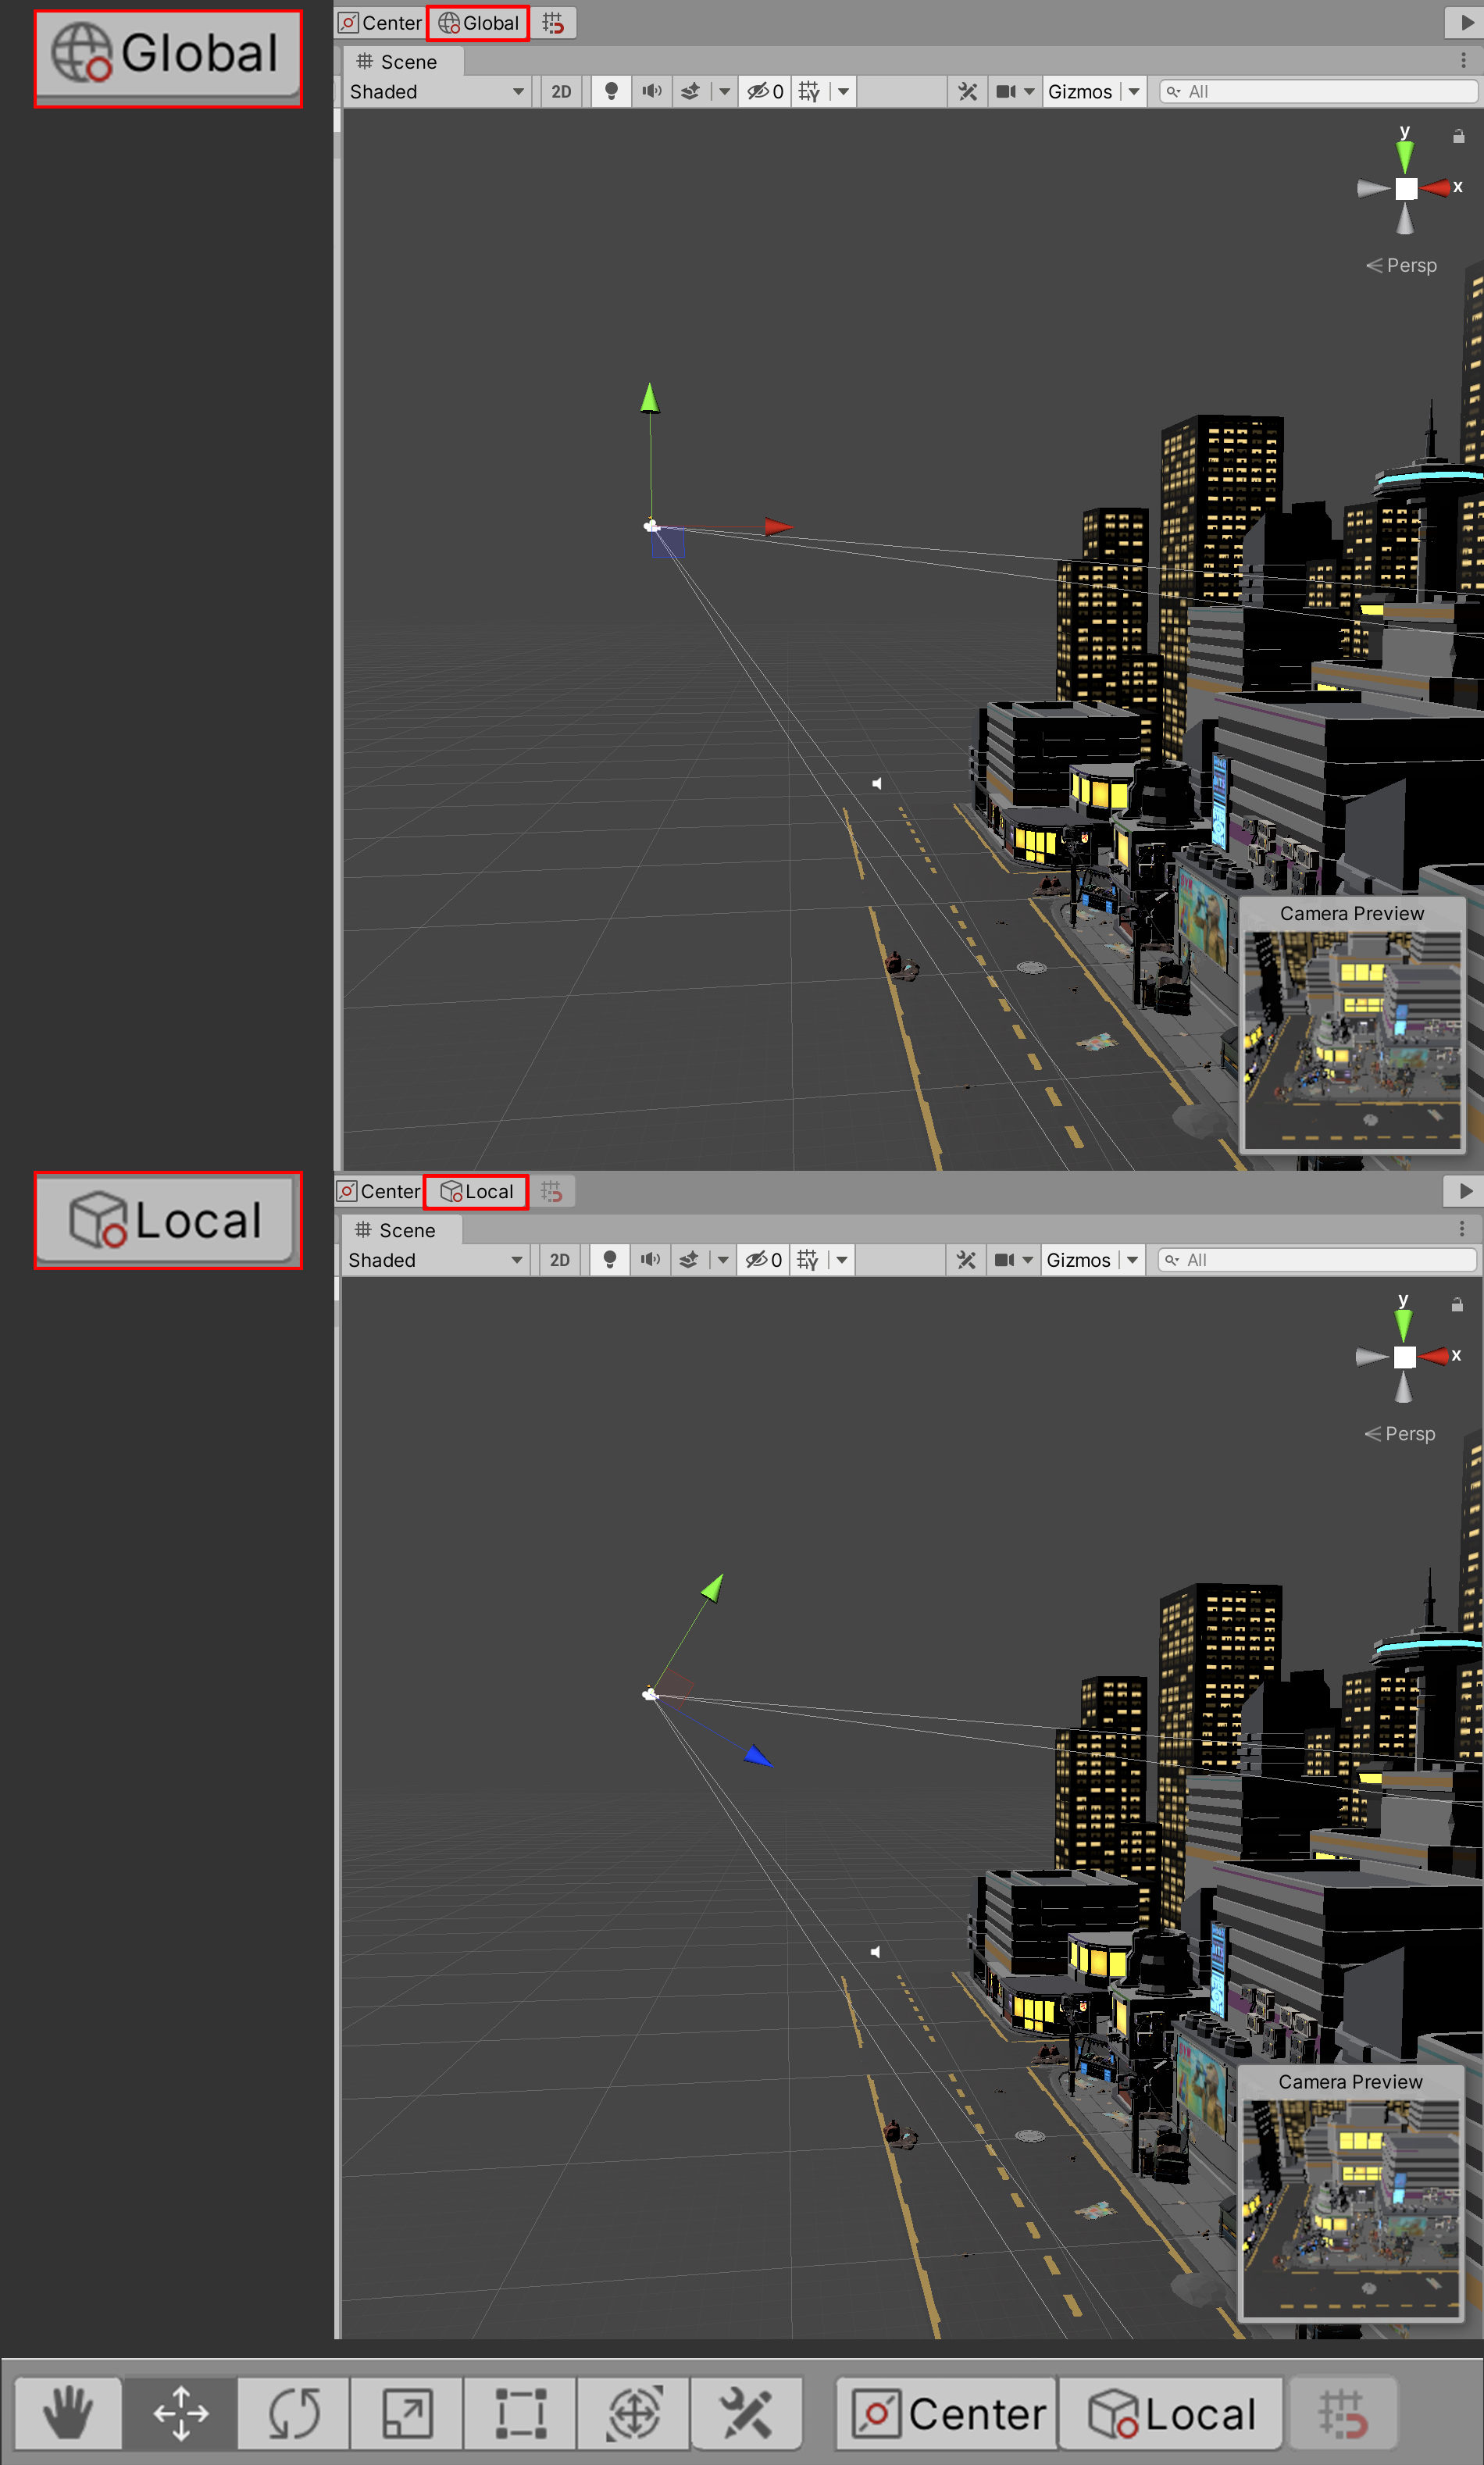
Before we proceed, it's important that we know how to switch between Local and Global manipulators to move the camera as directed in the following lessons. Let's begin by switching to Local Manipulators.
6. In the Toolbar in the upper-left corner of the Editor window, change the Toggle Handles (the red, green and blue gizmos visible in Scene View) from Global to Local (Figure 02).
3. Framing by Indirect Manipulation
A quicker and perhaps more intuitive way to frame objects is indirectly manipulating the position of the camera based on what we see in the Scene view. Let us demonstrate with the cat.
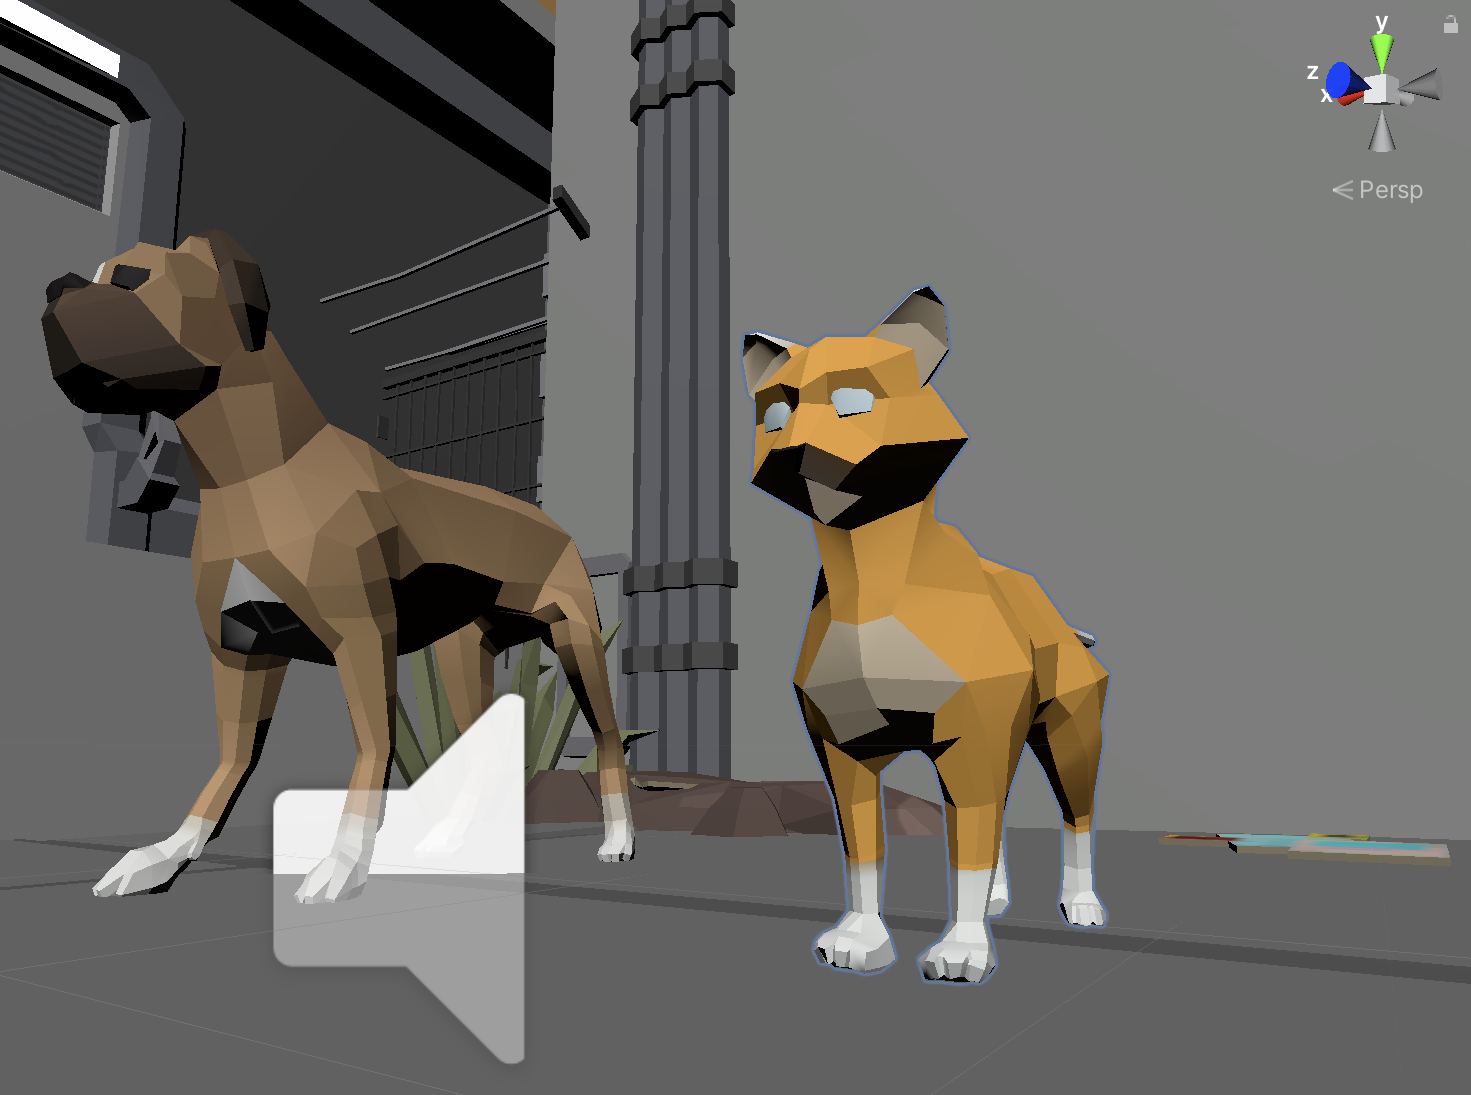
1. In the Hierarchy, expand the “Animated” GameObject, and select the Cat_Rig object. In the Scene view, press F on the keyboard. Alternatively, you can double-click on the object in the Hierarchy window.
You will notice that the cat is now centered in the Scene view. We can tumble (move around the Scene in 3D space) or orbit around the Scene view by using a combination of the Alt key and left mouse button as we see fit to alter our framing (Figure 03).
2. Now, select the Main Camera in the Hierarchy. In the Scene view, press Ctrl/Cmd + Shift + F to have the Main Camera match the framing of the Scene view. This is the Align With View option that can be found under the GameObject top menu drop-down. For this unit, we'll refer to it as the “framing” hotkey (Figure 04).
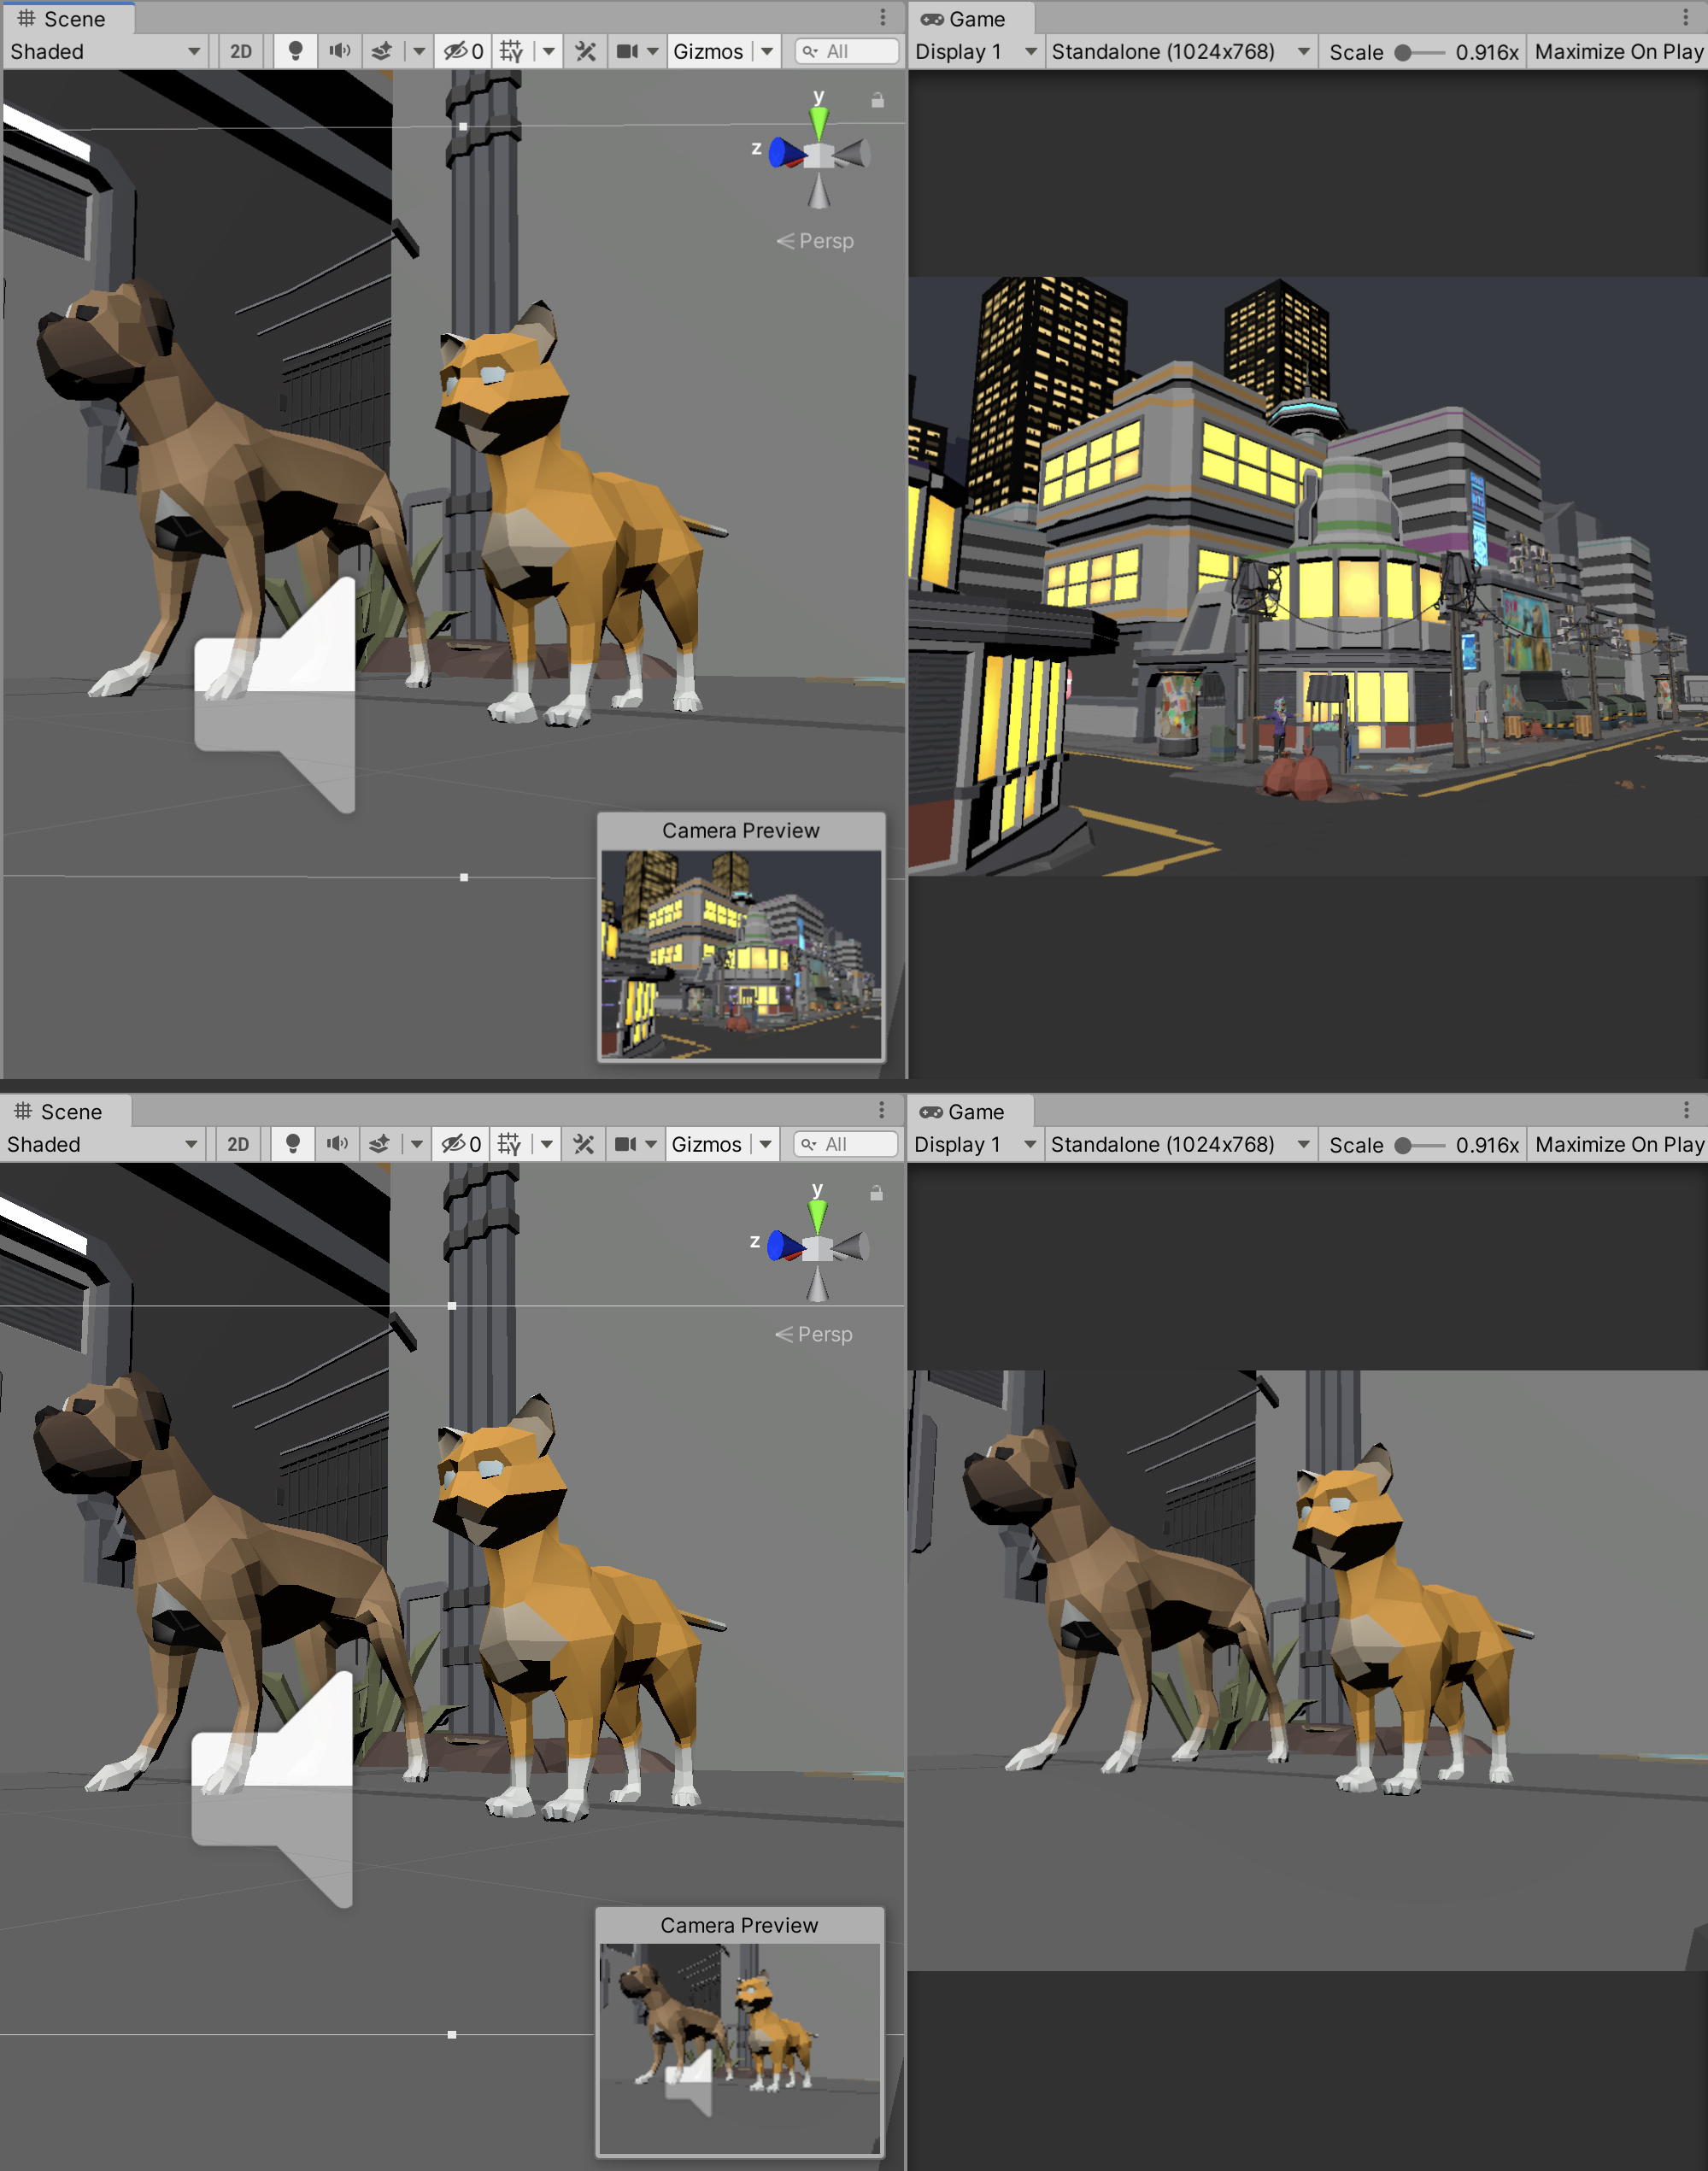
Viewing the Main Camera’s Aspect Ratio
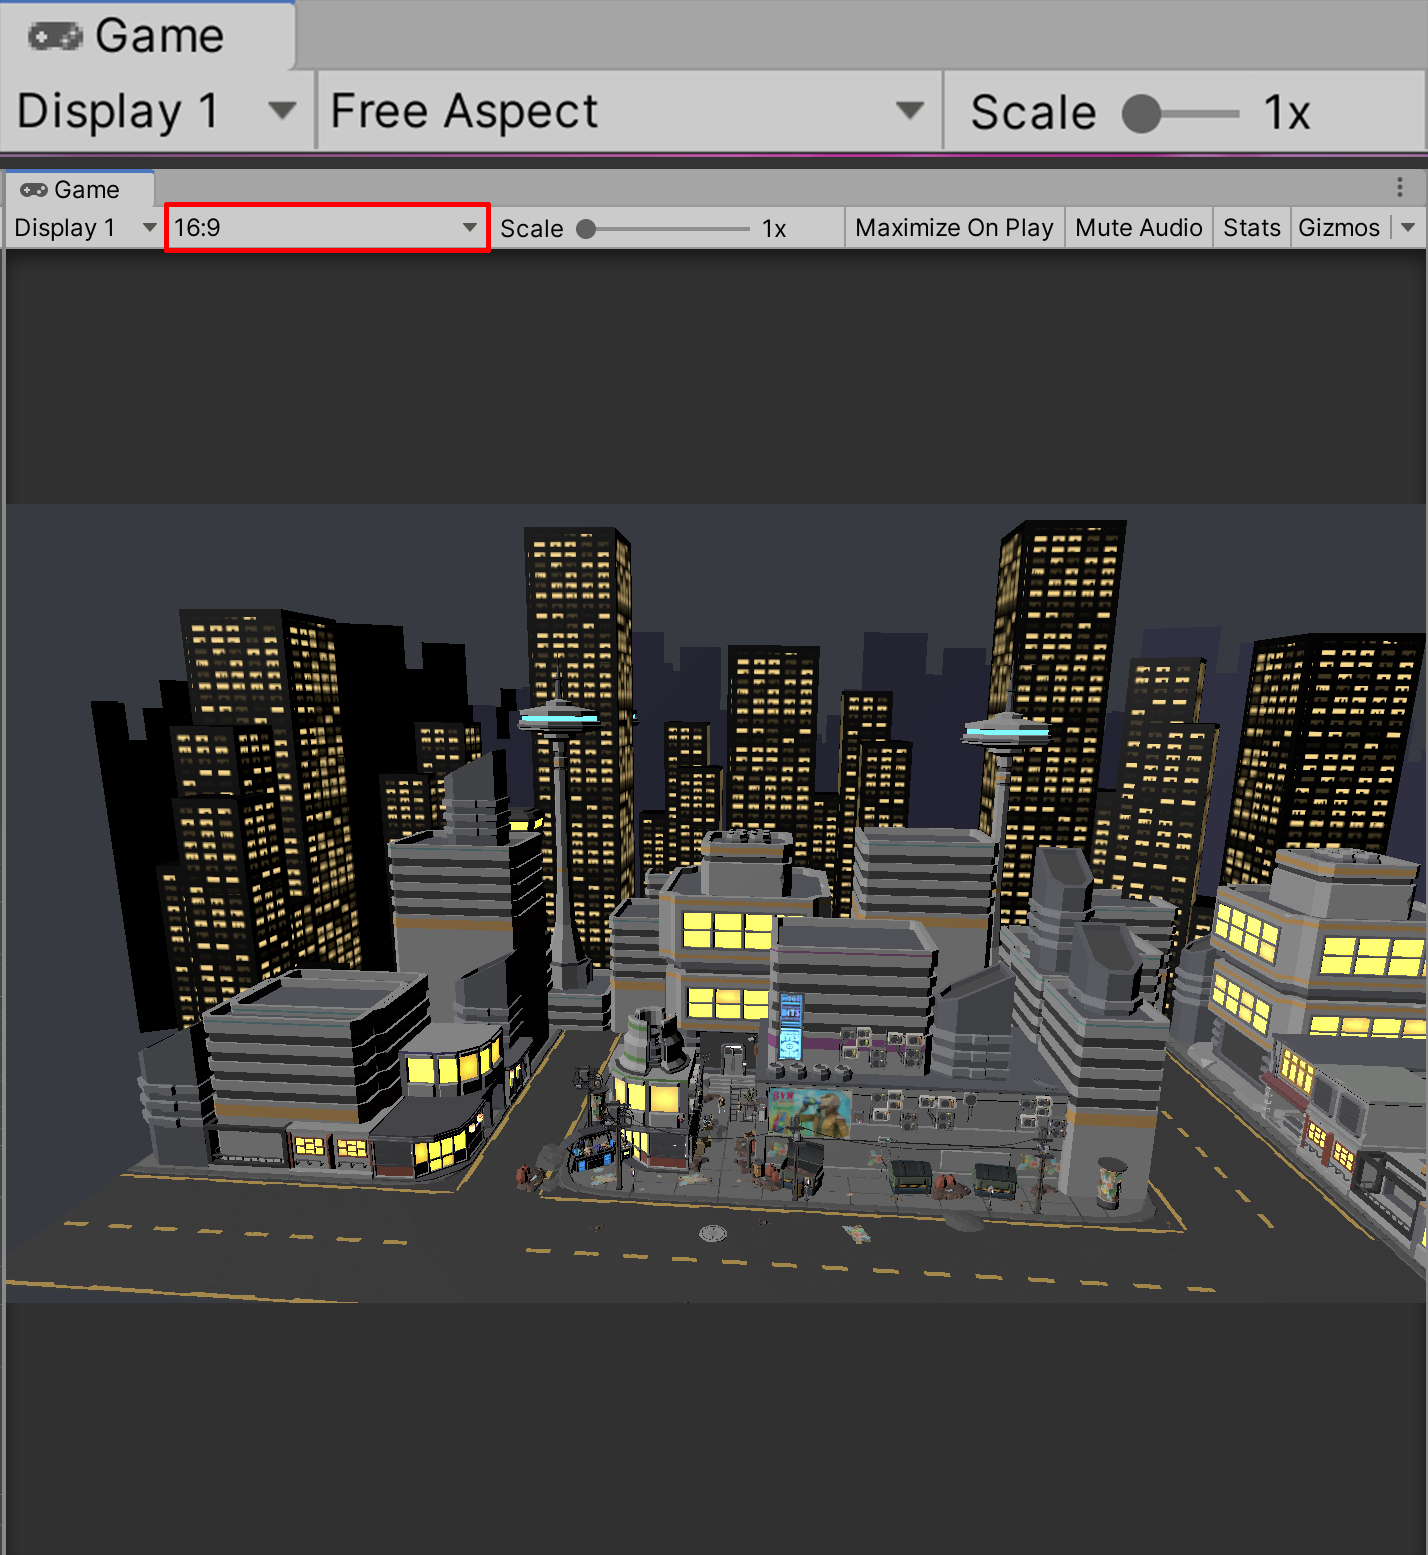
Aspect ratios have to do with image or video pixel dimensions, in proportion to their specified width and height. Many different monitors, screens, or devices have a signature aspect ratio format. When considering your project’s intended video format, it’s especially important to preview the Main Camera’s Game window with the intended aspect ratio setting.
3. In the Game window, select the drop-down menu labelled to the right of the Display button, and set the Aspect Ratio to 16:9. The default setting of the Game window’s view to Free Aspect will set the Main Camera’s view to match the size of your Game window.
We are changing the view to 16:9 to view the sequence in a cinematic aspect ratio common on widescreen monitors and TVs. This will help us with our composition and framing (Figure 05).
We can also enter Flythrough Mode in the Scene view to find our Main Camera's framing.
4. In the Scene view, click and hold the right mouse button and move it around to adjust the viewport's pitch, or angle. Still holding the right mouse button, press the W, A, S, and D keys to maneuver around the Scene forward, left, backwards, and right, accordingly. The Q and E keys can be used to adjust the view up and down. When you find the framing you like, press the framing hotkey again (Ctrl/Cmd + Shift + F) (Figure 06).

By adjusting our view in the Scene view, we can quickly gather a more precise framing for our Main Camera.
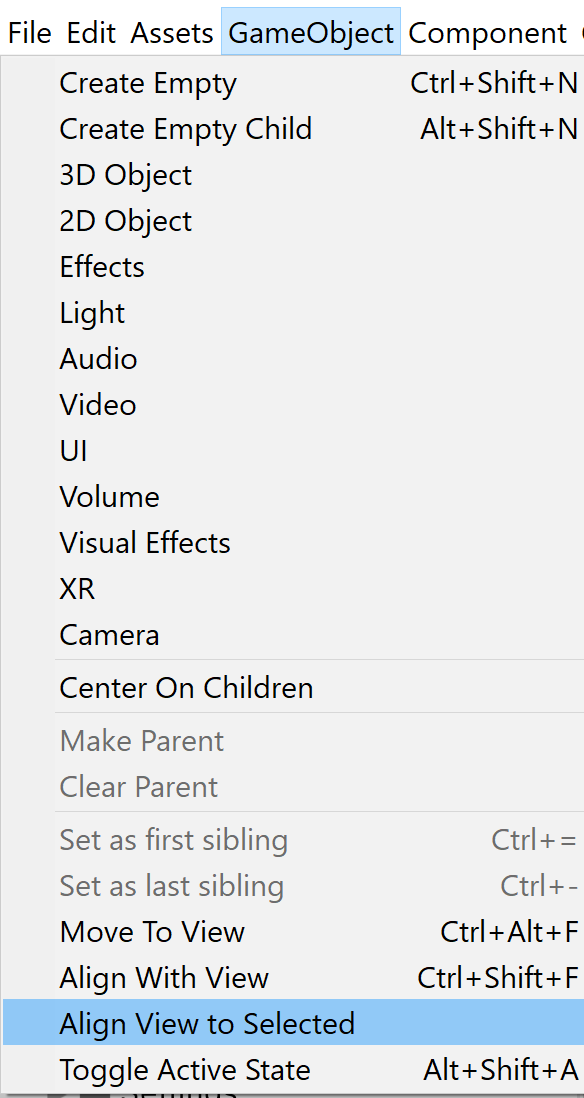
We can also do the inverse (match the Scene view to the Game view) if we want by selecting the camera, then navigating to GameObject > Align View to Selected. This is useful for when you must navigate between Scene and Game view, such as composing a shot with multiple camera moves (Figure 07).
4. Framing for Storyboards
Now that we know how to frame objects in our Scene, it’s especially useful to know what it is that we want to frame and how we want to frame it. This goes back to the concepts behind previsualization in Unit 2. By having an idea of what we want to shoot, we can more efficiently frame and animate our cameras.
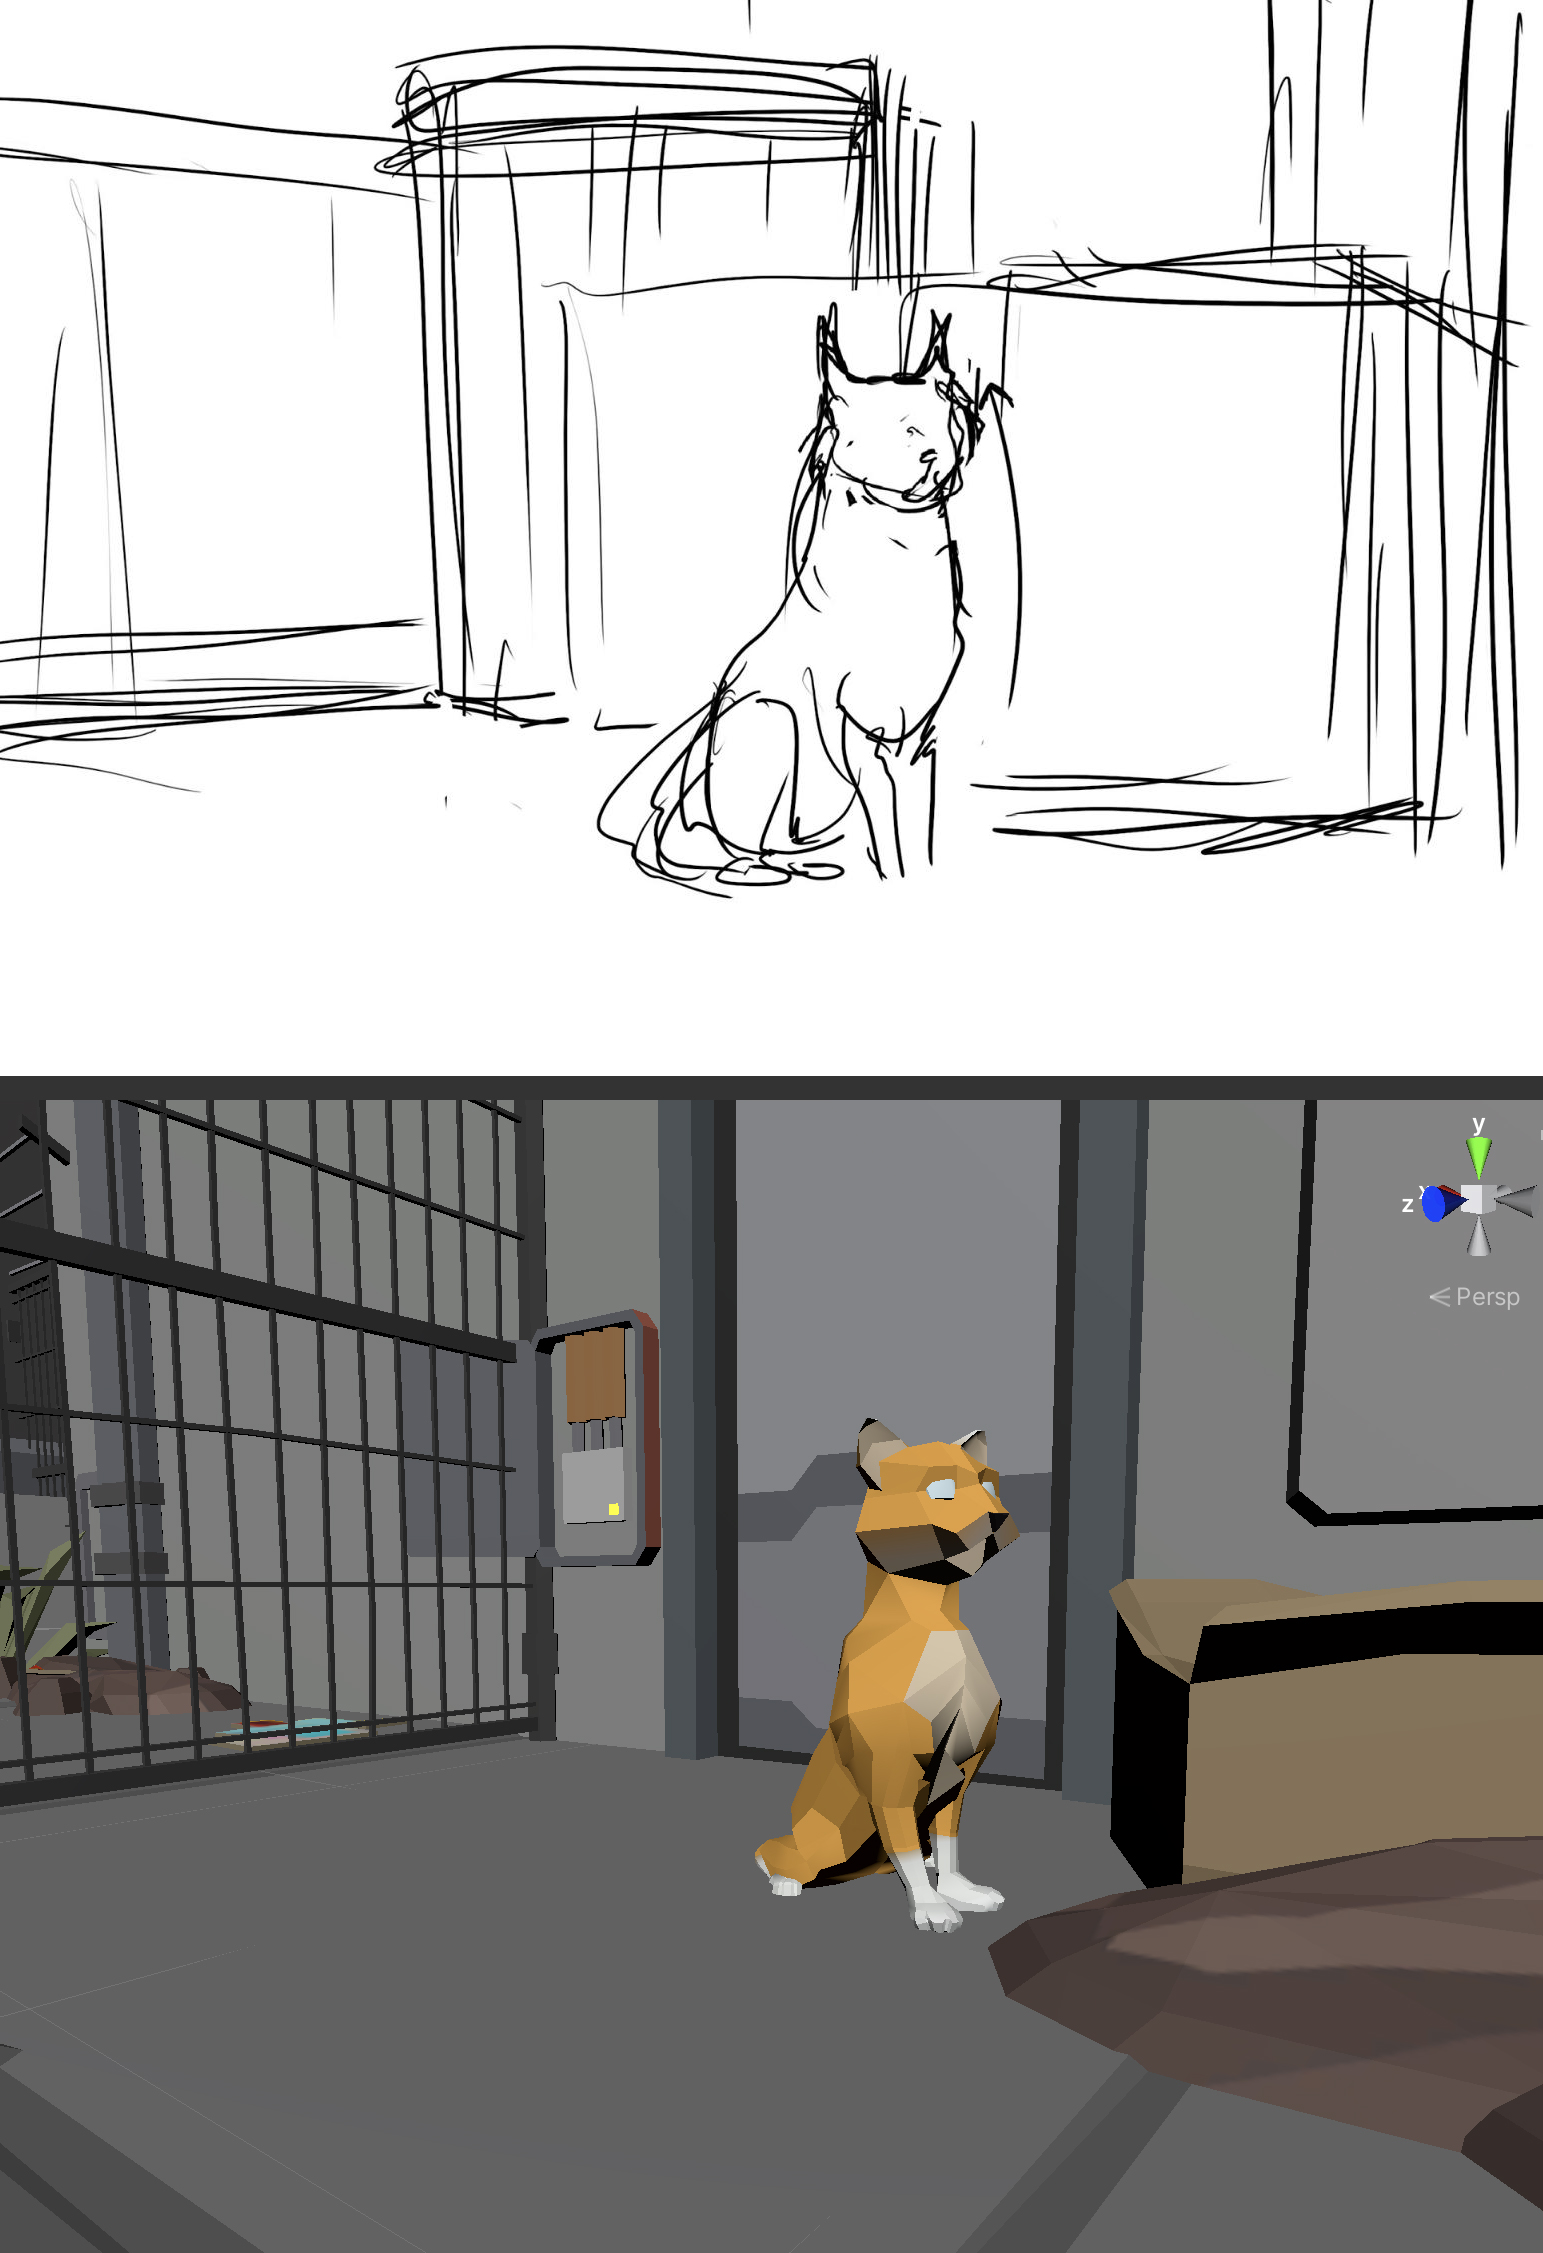
These storyboards will guide us in the following lessons (Figure 08).
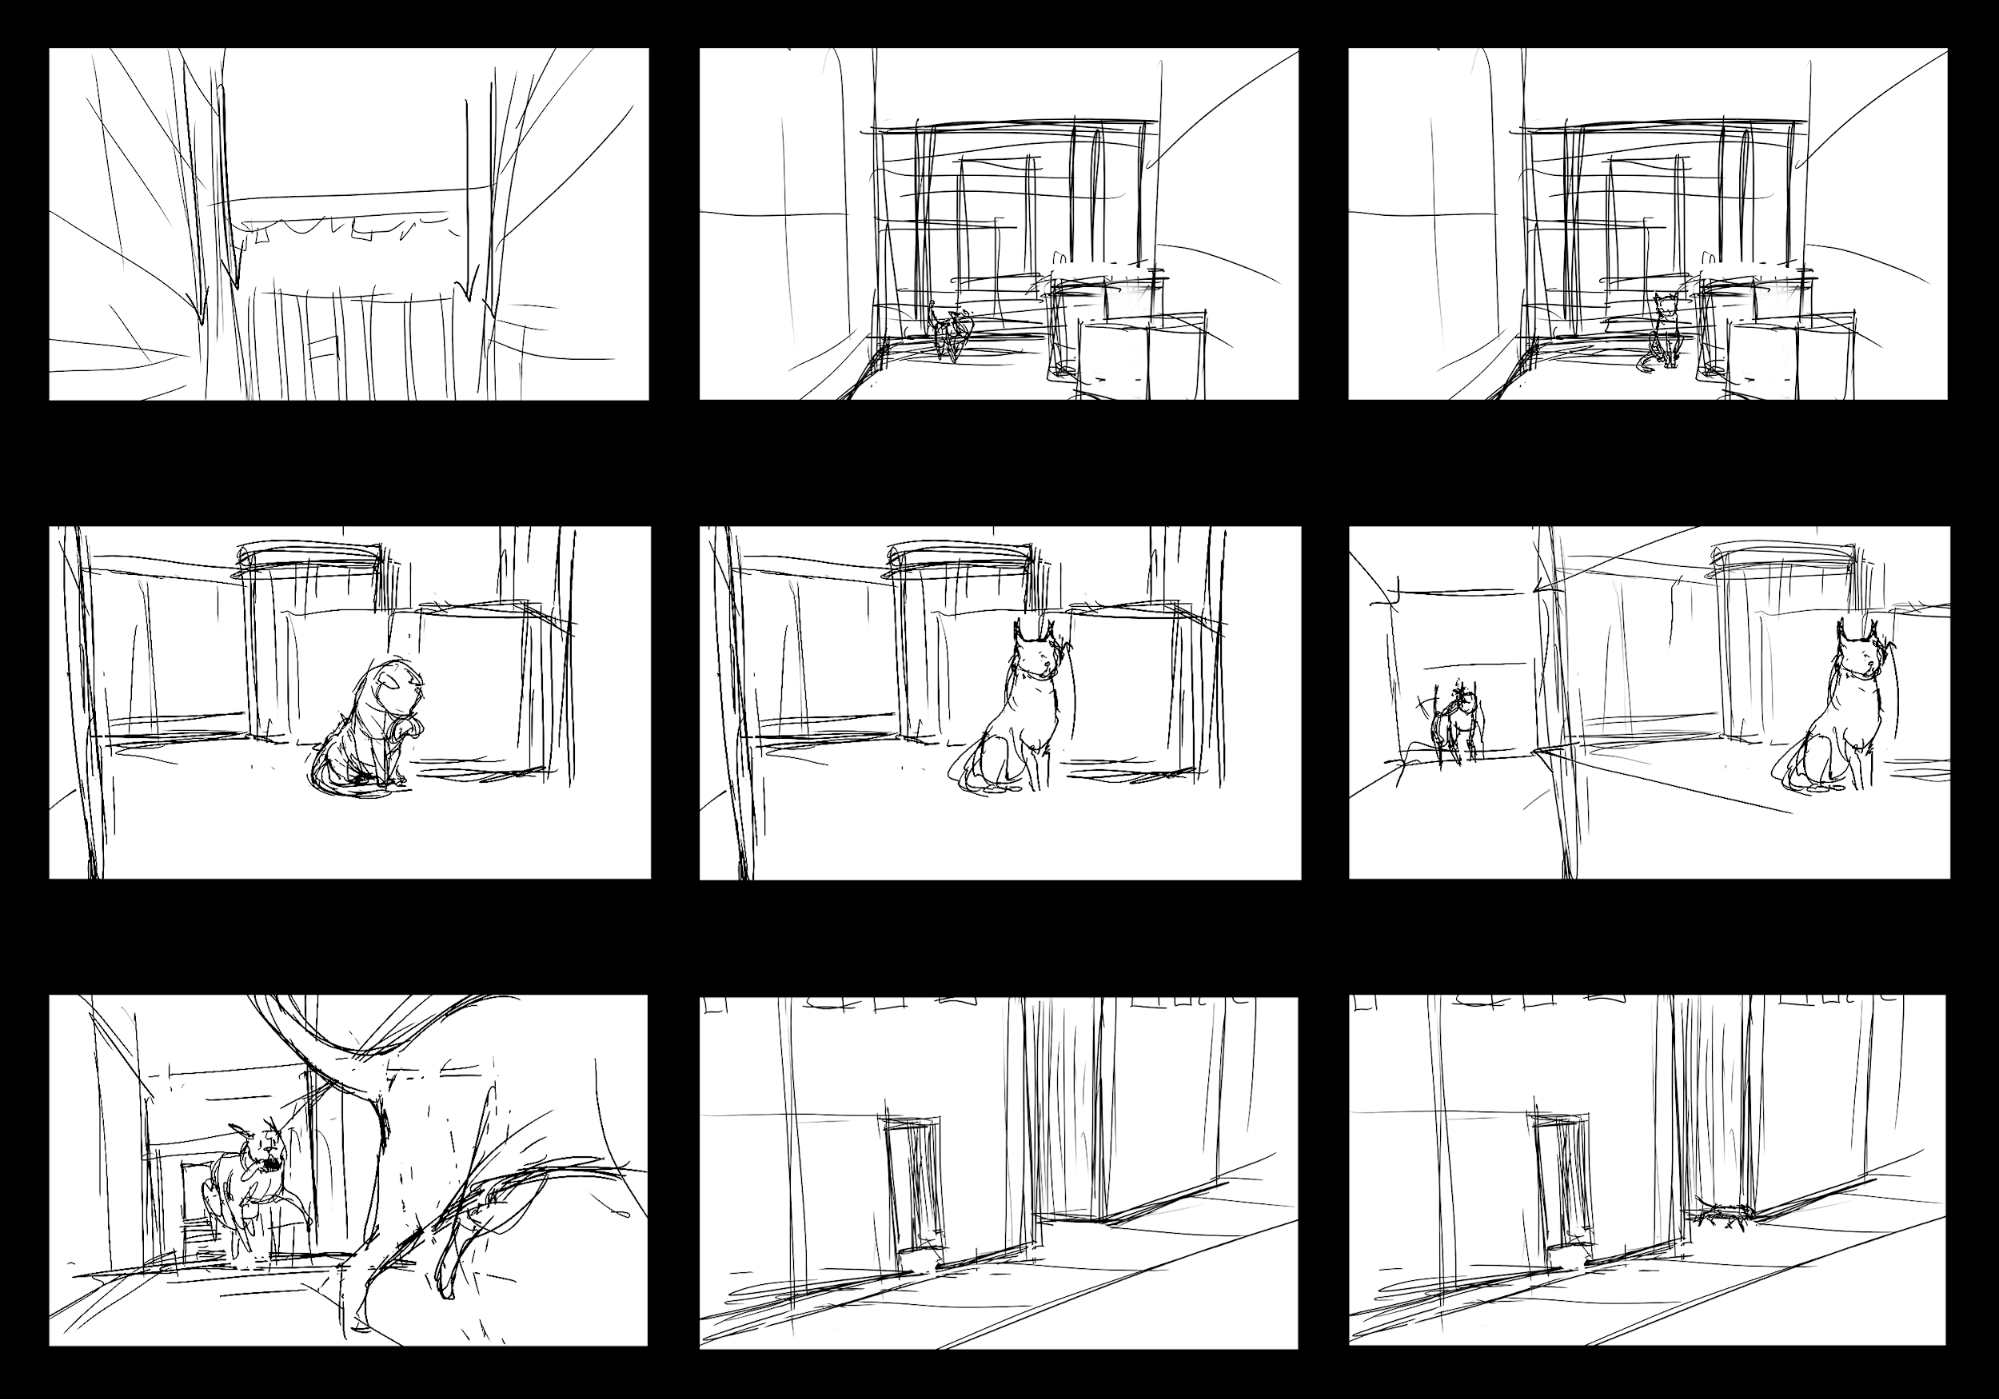
For practice, let's try recreating the frame in the center of the storyboard panels depicting the cat sitting proudly in the center of the frame.
1. With the Master Timeline selected in the Hierarchy window, select the Lock icon in the upper-right corner of the Timeline window to set the Master Timeline to stay in view.
2. Position the Frame Playhead cursor to Frame 242 in the Timeline window.
3. Enter Flythrough mode by clicking and holding the right mouse button and maneuvering with W, A, S, D, Q, and E to refine your framing.
4. When you're satisfied, select the Main Camera, then enter the framing hotkey (Ctrl/Cmd + Shift + F) to match the Main Camera's view to the Scene view (Figure 09).
5. Recap
In this lesson, you learned all about framing shots with Unity’s Main Camera. This will set you up for success when working with Cinemachine’s virtual cameras in the next lesson.