Lesson 5.2 - Getting Started with Cinemachine
Tutorial
Beginner
+10XP
45 mins
245
Unity Technologies
In this lesson, you’ll learn how to install Cinemachine, create your first virtual camera, frame your shot, and animate the camera.
Languages available:
1. Lesson Overview
2. Installing Cinemachine
Cinemachine is a cinematics authoring tool that mimics how shots are filmed in a live-action shoot or animated film. Typically, a single camera is used to film a Scene shot-by-shot. These shots are represented by Cinemachine as Virtual Cameras, which we'll explore in the following lessons. When Cinemachine is used in conjunction with Timeline, we can create entire sequences through the timing and placement of these Virtual Cameras.
Now that we've been introduced to the wonders of Cinemachine, let's install the Package.
1. Navigate to Window > Package Manager. Search for “Cinemachine” in the search bar in the upper-right corner. Select Cinemachine on the left to access the Package page and then click the Install button to install the Package (Figure 01).
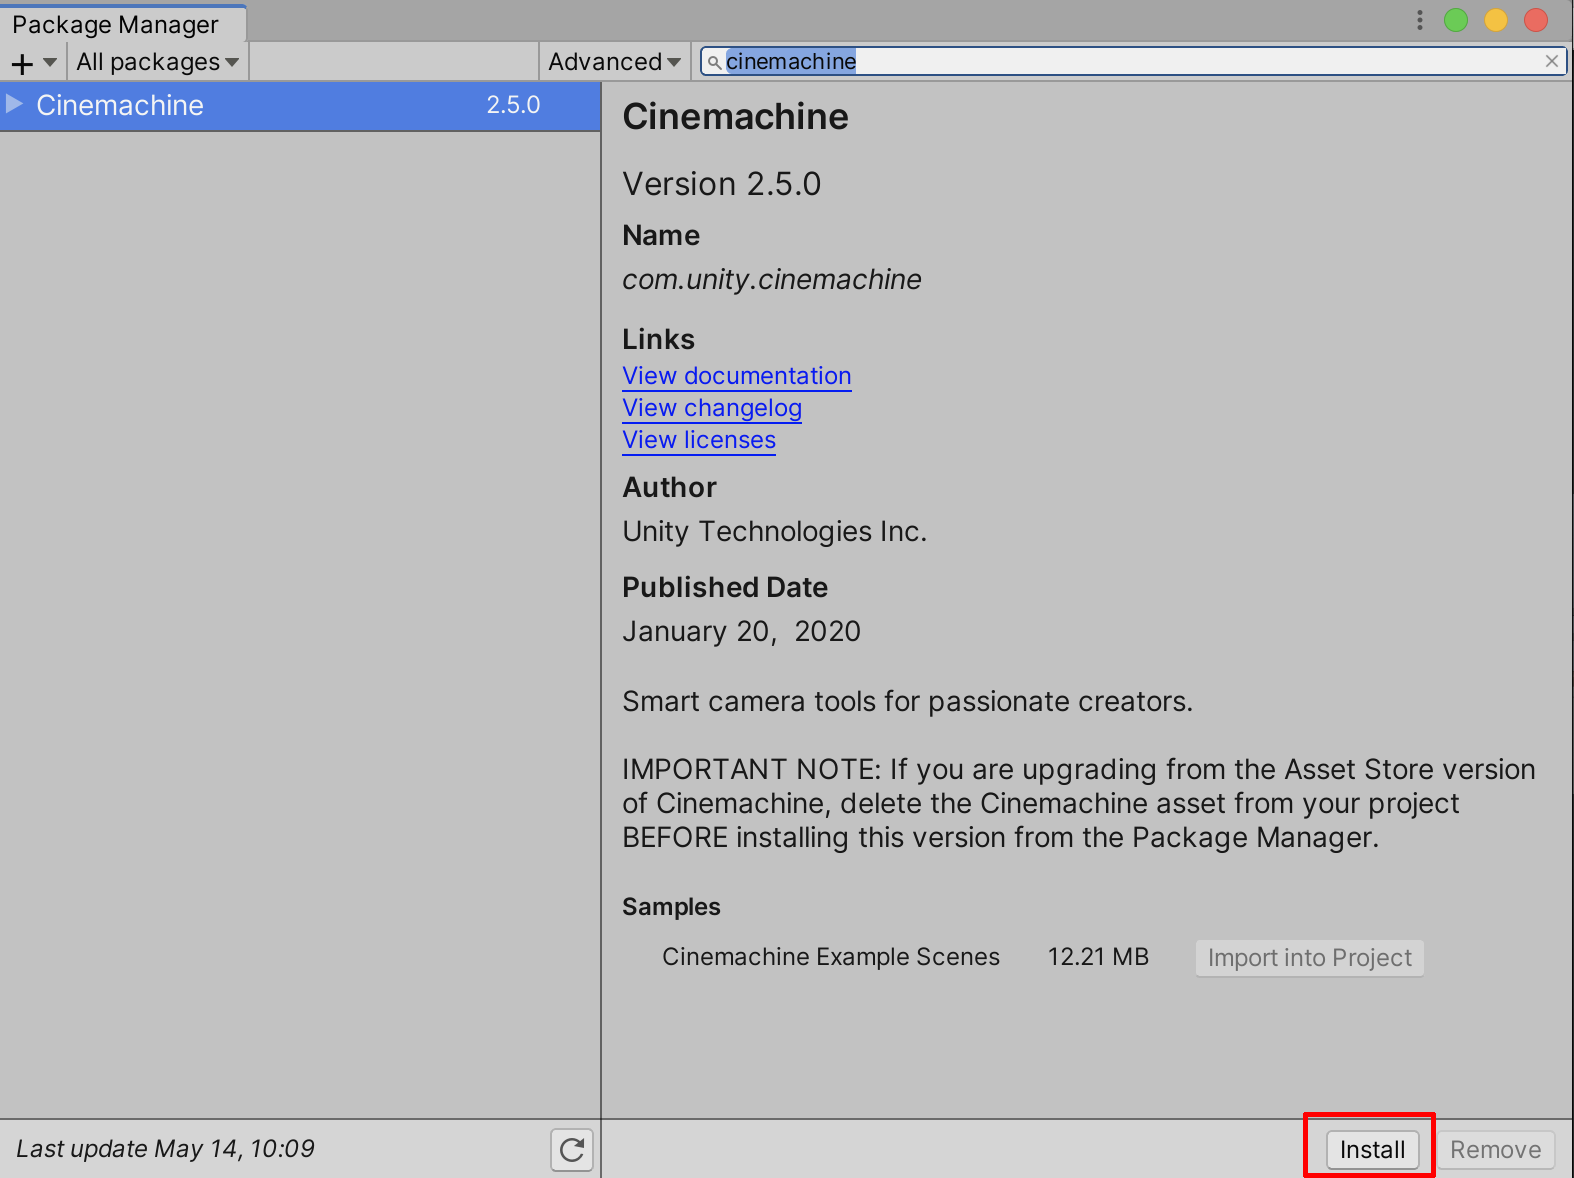
Cinemachine is now installed and ready to use in your project.
3. Adding the Cinemachine Brain
We’re now ready to set up our first shot. While we will be exploring new GameObject types, many of the principles behind Animation Tracks and Timeline from Unit 4 will be revisited here to create a shot.
By default, we must tell Unity that we want to use Cinemachine. This is easy to do, but only works under the assumption that there is ONE Main Camera in your Scene. The Cinemachine Brain acts as the "director" for your Scene. It’s aware of and controlled by several Virtual Cameras that we can place in the Scene.
1. Select the Main Camera in the Hierarchy and navigate to the Inspector.
2. Scroll to the bottom and select Add Component.
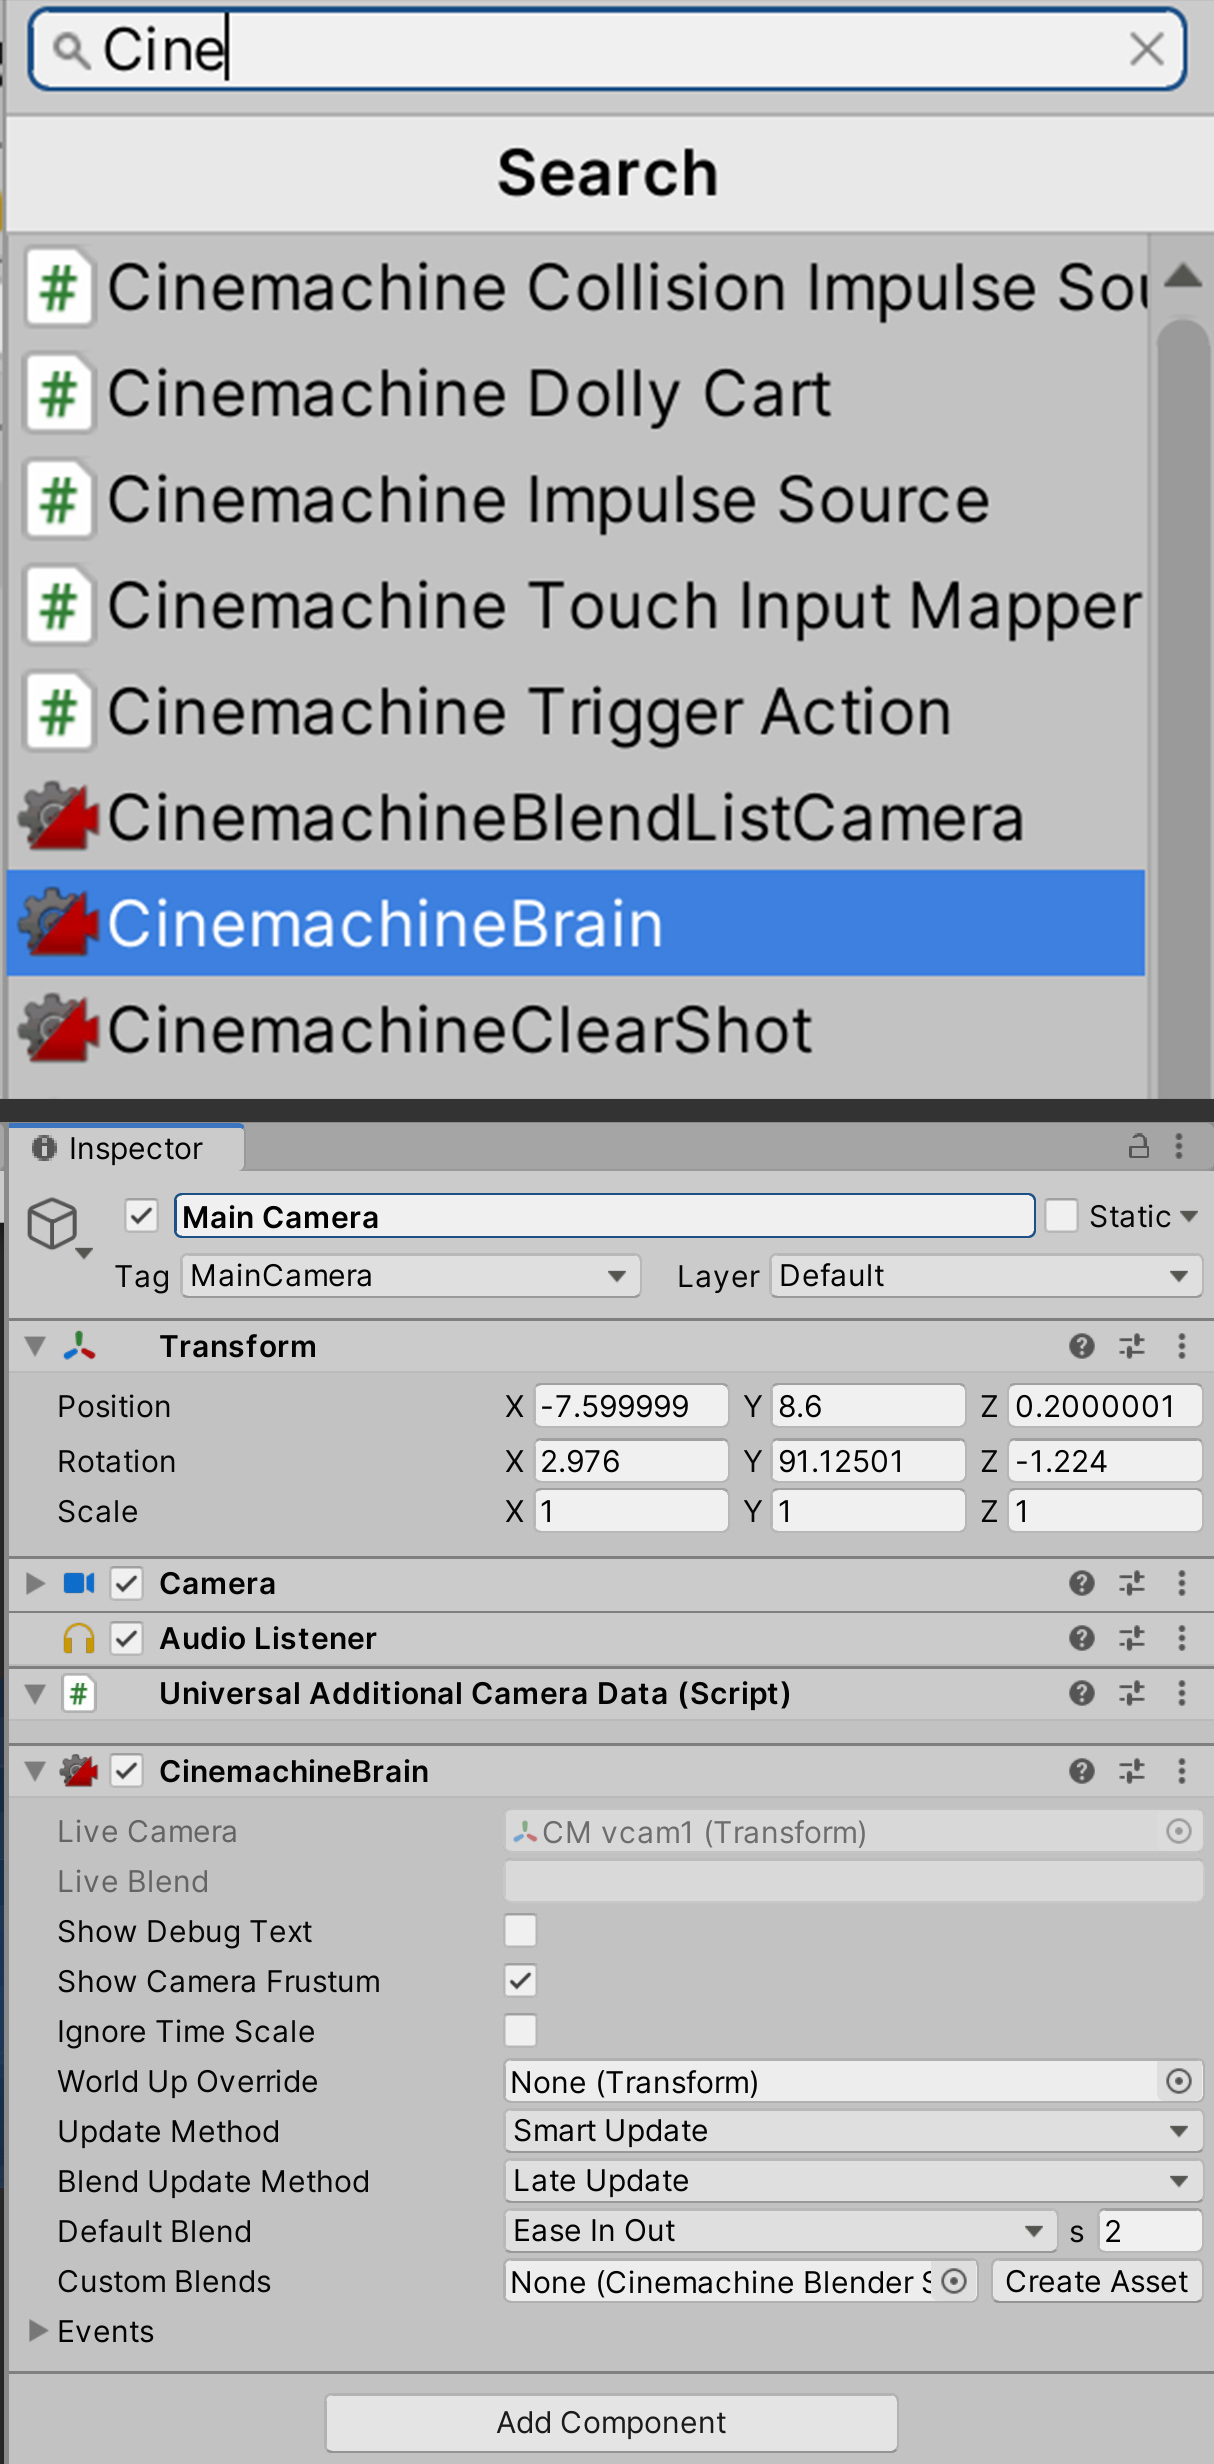
3. Search for and select Cinemachine Brain.
The Cinemachine Brain component should now be part of your Main Camera (Figure 02).
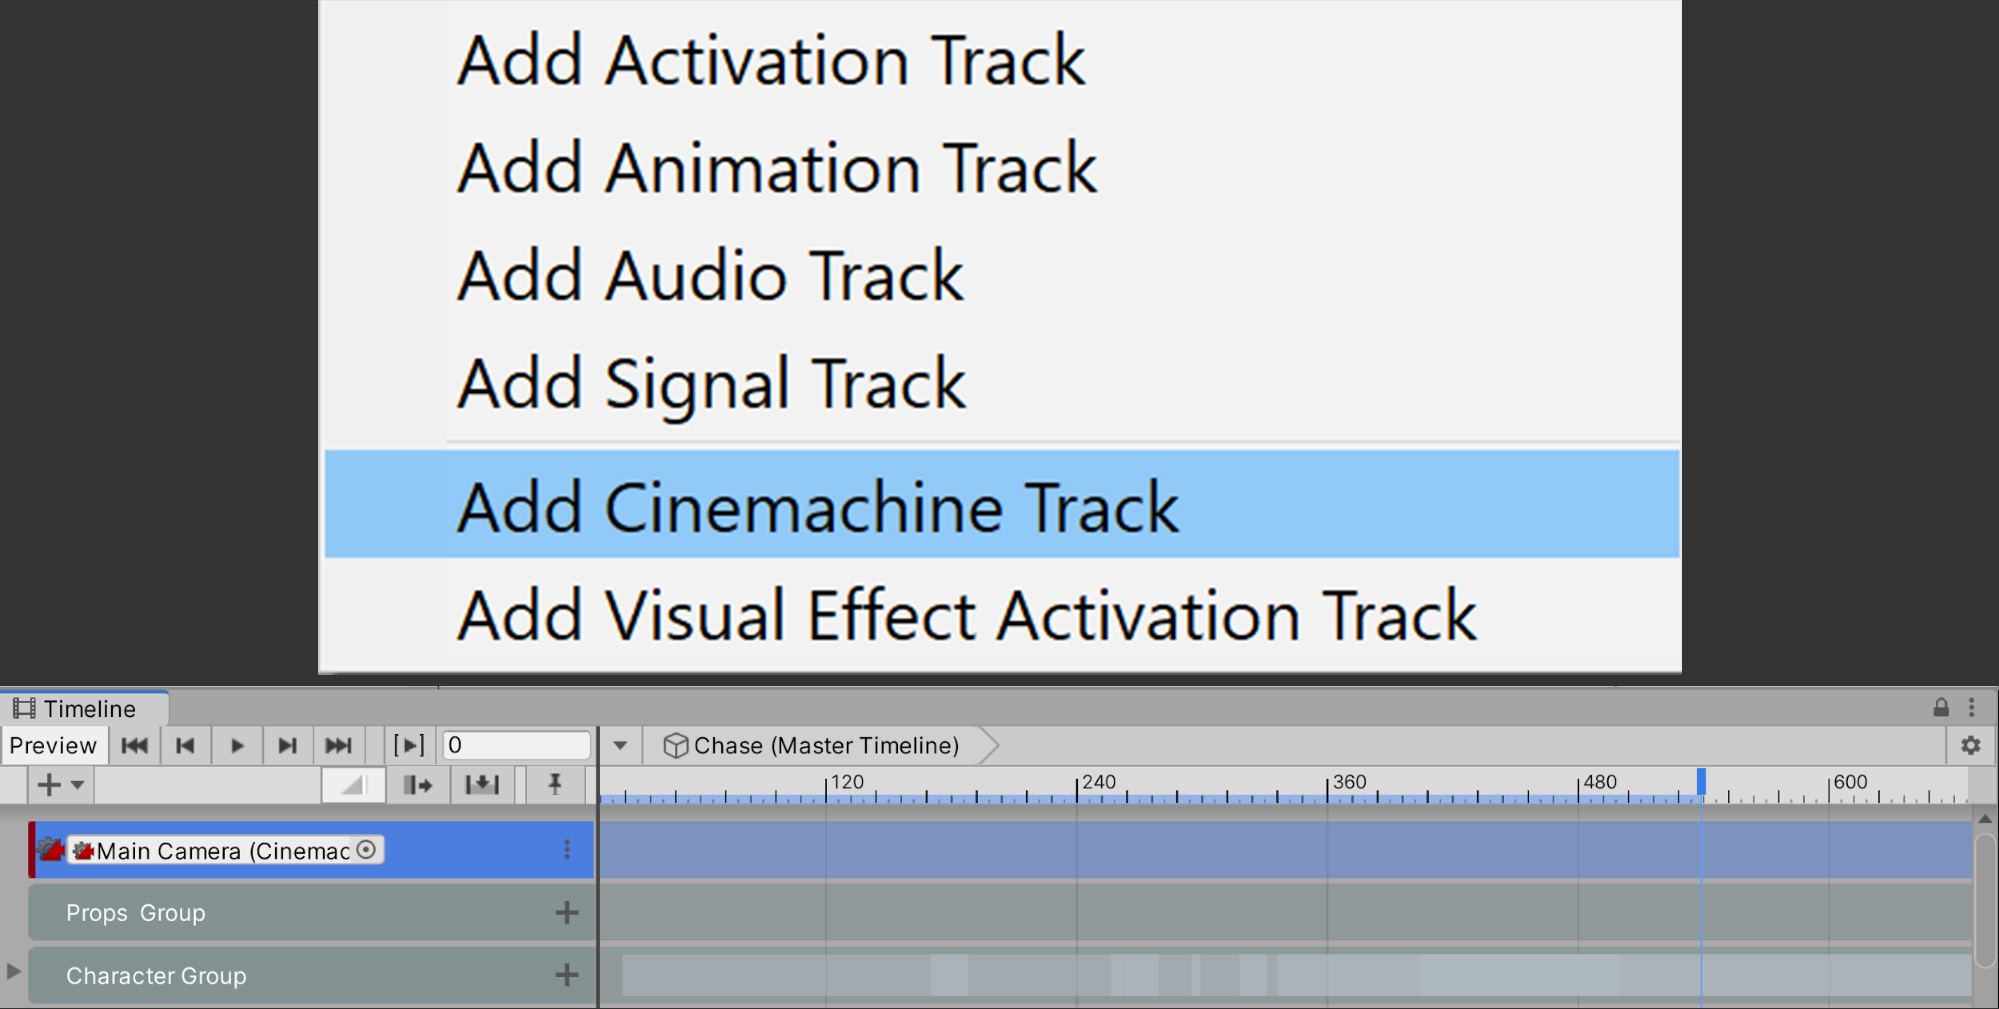
4. Next, click and drag the Main Camera from the Hierarchy into the Timeline. You will be prompted to select which kind of track you wish to create. Select Cinemachine Track. This track will be used to sequence our Virtual Cameras/shots (Figure 03).
4. Adding a Cinemachine Virtual Camera
Virtual Cameras are used to compose individual shots. They can be positioned and framed just like the Main Camera, but they are not cameras necessarily; they are more akin to waypoints, or bookmarks, for the Main Camera to snap to when activated. Each one merely tells the Main Camera where to go and what to look at. While there is one Main Camera in our Scene, we can have many Virtual Cameras.
Before we proceed, let's modify a setting in our Main Camera that will make setting up our Virtual Cameras easier for those familiar with physical lenses or cameras in a DCC, such as Maya.
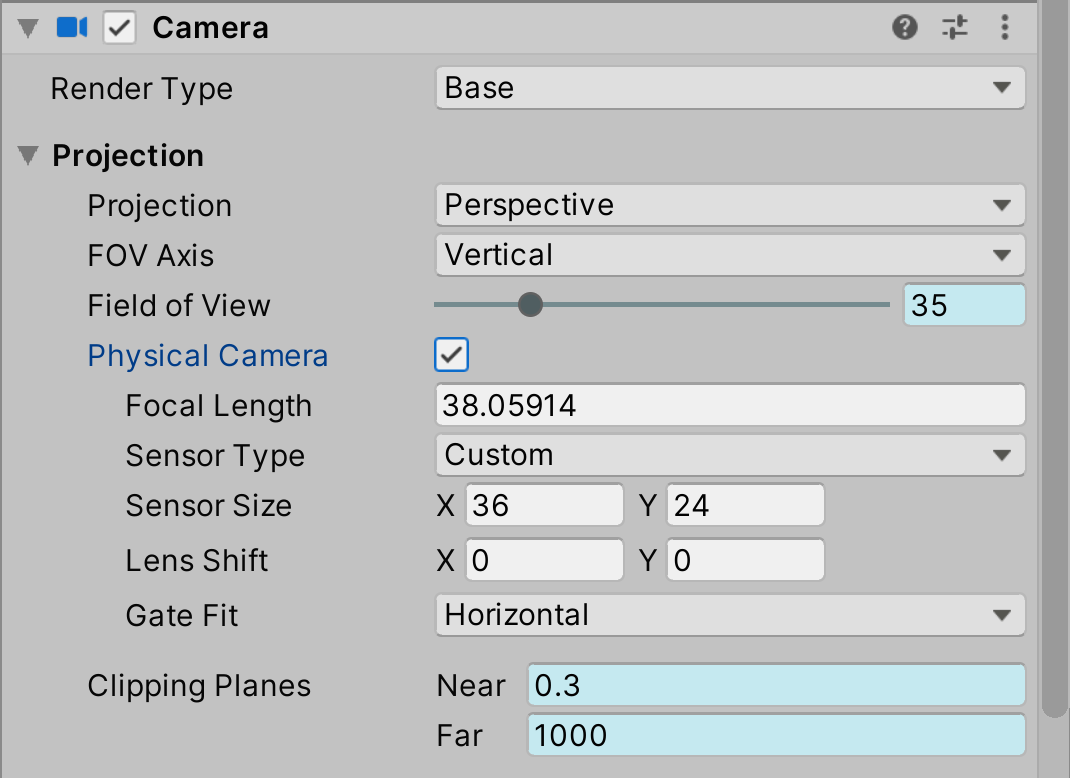
1. Select the Main Camera in the Hierarchy, then navigate to the Inspector. In the Camera component, under the Projection Tab, toggle Physical Camera. This will enable us to use real-world focal lengths to adjust our lens (Figure 04).
Now let's create our first Virtual Camera:
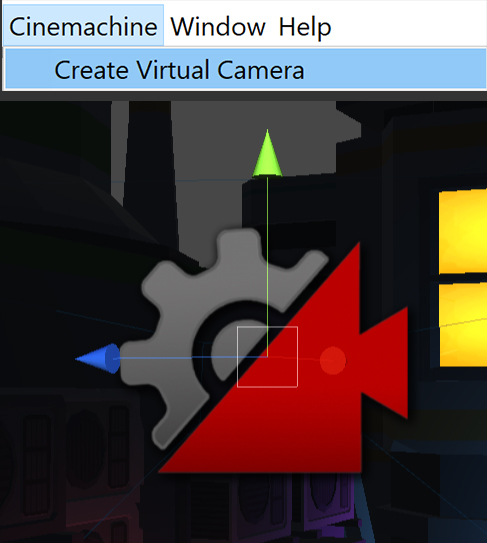
2. In the Toolbar, navigate to Cinemachine > Create Virtual Camera. A new Virtual Camera will be added to your Scene (Figure 05).
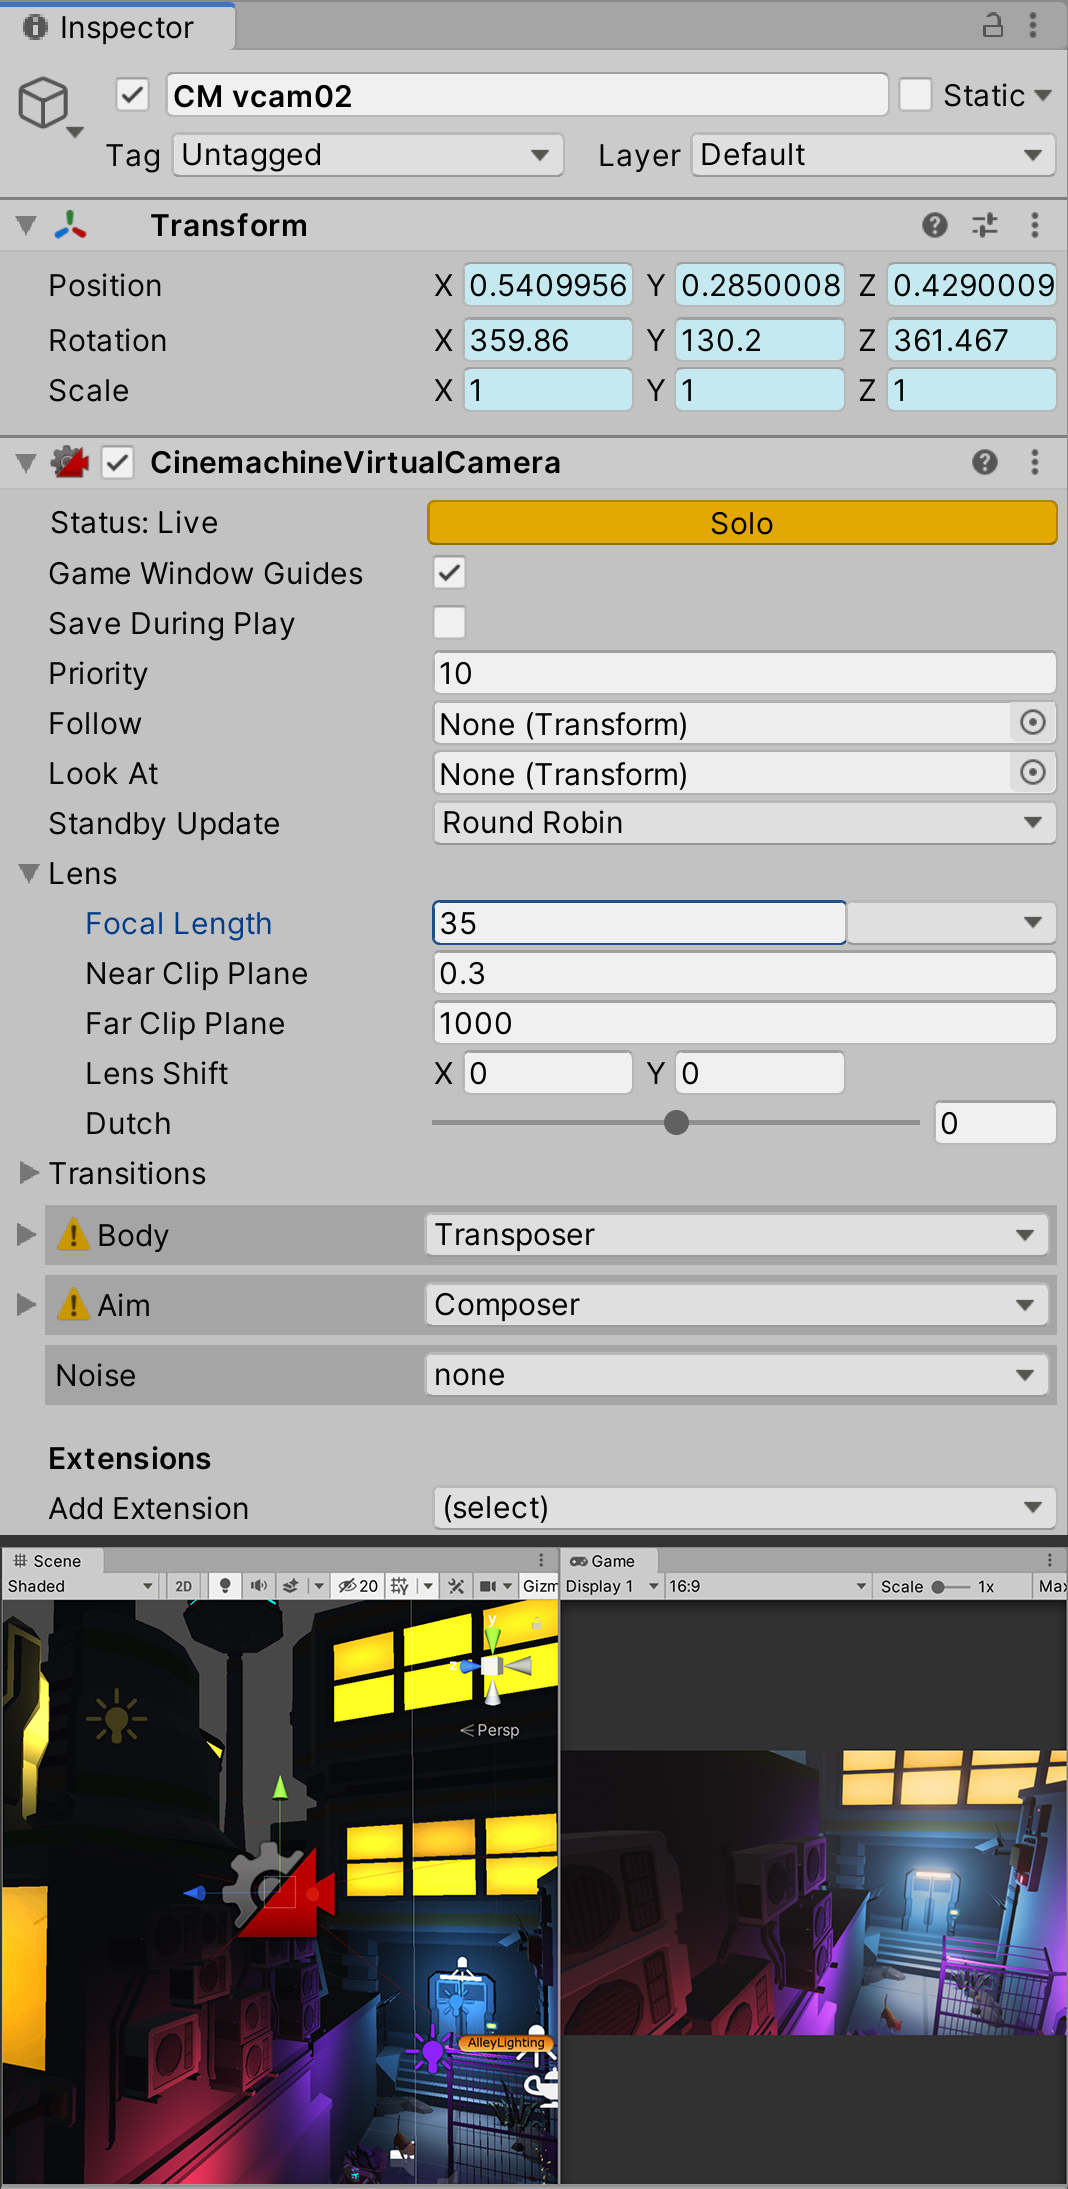
If we look at the Inspector, we will see an assortment of new and familiar parameters. Clicking the Lens drop-down, for instance, reveals settings for adjusting the Focal Length, Near and Far Clipping Planes, and Dutch. These are the only parameters we’ll focus on for now, as they offer the most control when framing your shots (Figure 06).

If you haven't seen this settings before, here’s a brief recap:
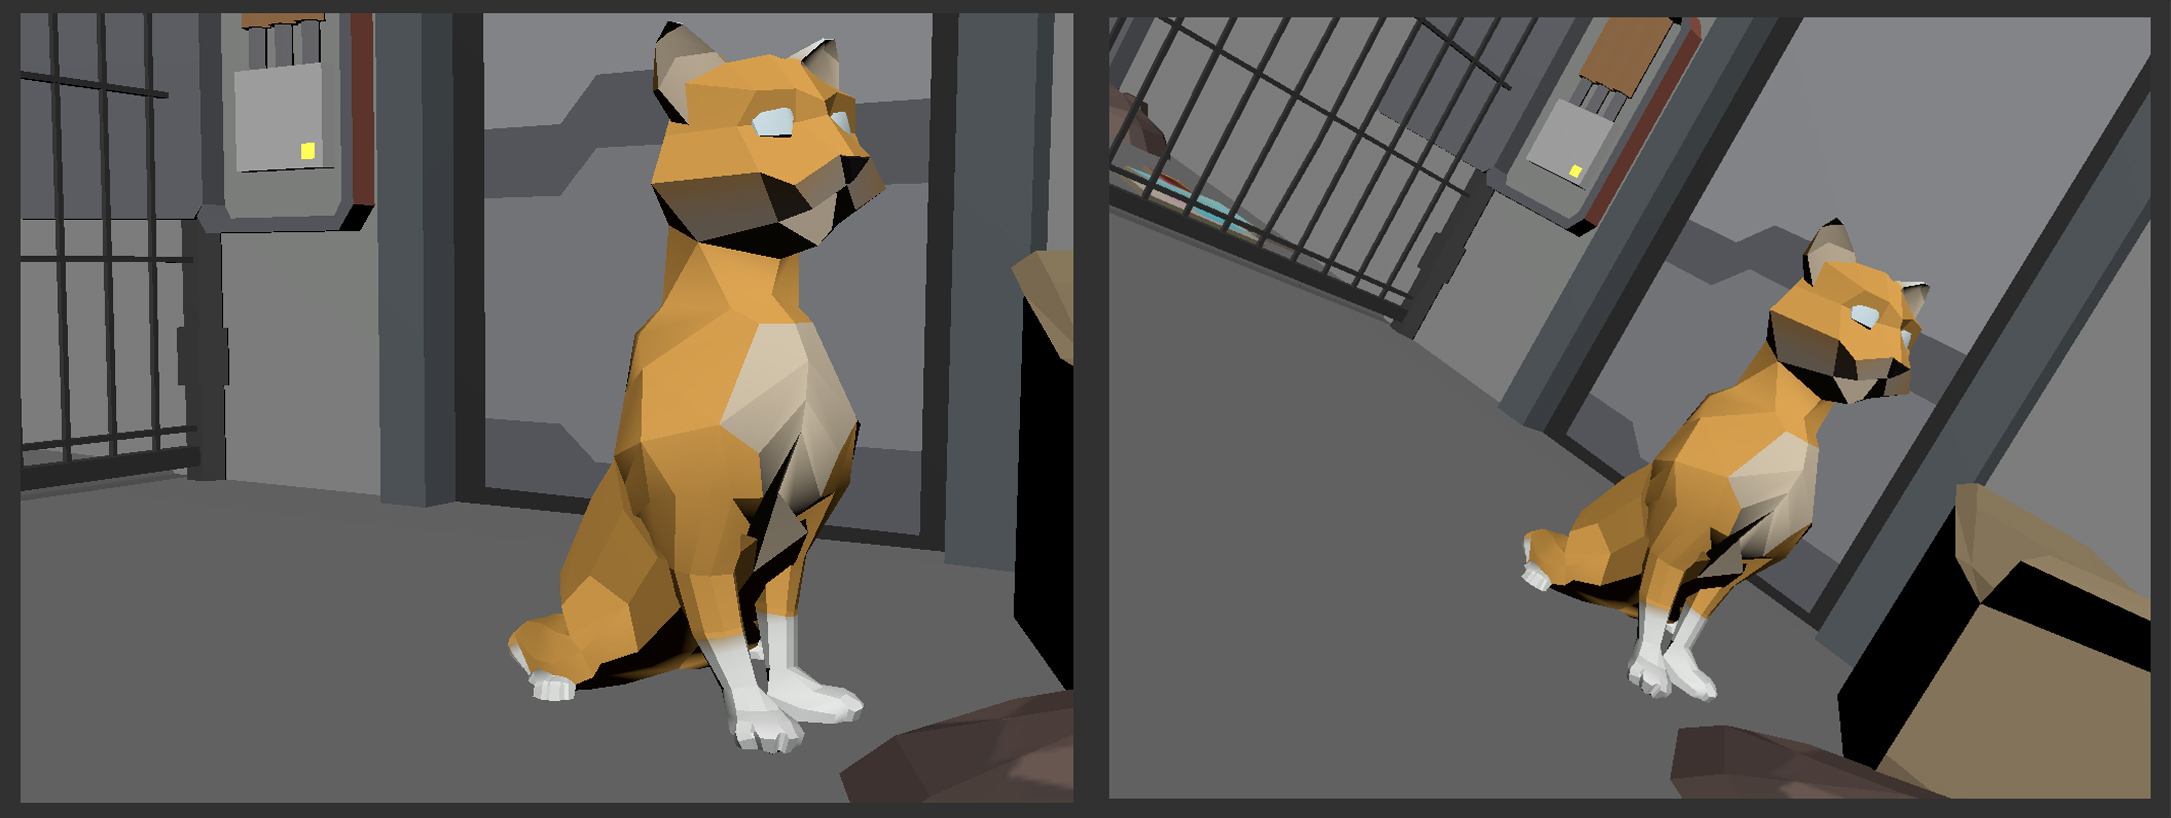
- Focal Length: This value corresponds to the focal length of the lens. If you’re unfamiliar with the concept of focal length, smaller values frame your subject using a wider angle so they appear farther from the camera, while larger values frame your subject using a narrow angle so they appear much closer to the camera. A value of 35mm is a good focal length for “neutral” framing (Figure 07).

- Near and Far Clipping Planes: Near represents the closest an object can be to the camera for it to be displayed. Its default value essentially means that any object in front of the camera will be rendered. Far represents how far away an object can be from the camera before it’s not displayed. By default, we do not want to change these values, yet there are instances (such as in confined spaces) where we might want to adjust the Near value so we can clip or "see through" objects that are too close to the camera.
- Dutch: This slider tilts the camera along the X-axis to create dramatic angles. It's best for creative purposes to only Dutch the camera for shots that deserve this amount of dramatic attention (Figure 08).
3. In the Inspector, click the Solo button. This allows us to see through the Virtual Camera in the Game view (Figure 09).
4. Set the playhead on the Timeline to Frame 0, then drag the Virtual Camera onto the Cinemachine Track in the Timeline. By default, a five second (or 120 frame long) clip will be placed on the Cinemachine Track, but this can be extended or shortened (Figure 10).

This forms the basis for creating a Virtual Camera and placing one on the Timeline. Next, we will frame the camera to obtain our shot.
5. Framing the Shot with the Virtual Camera
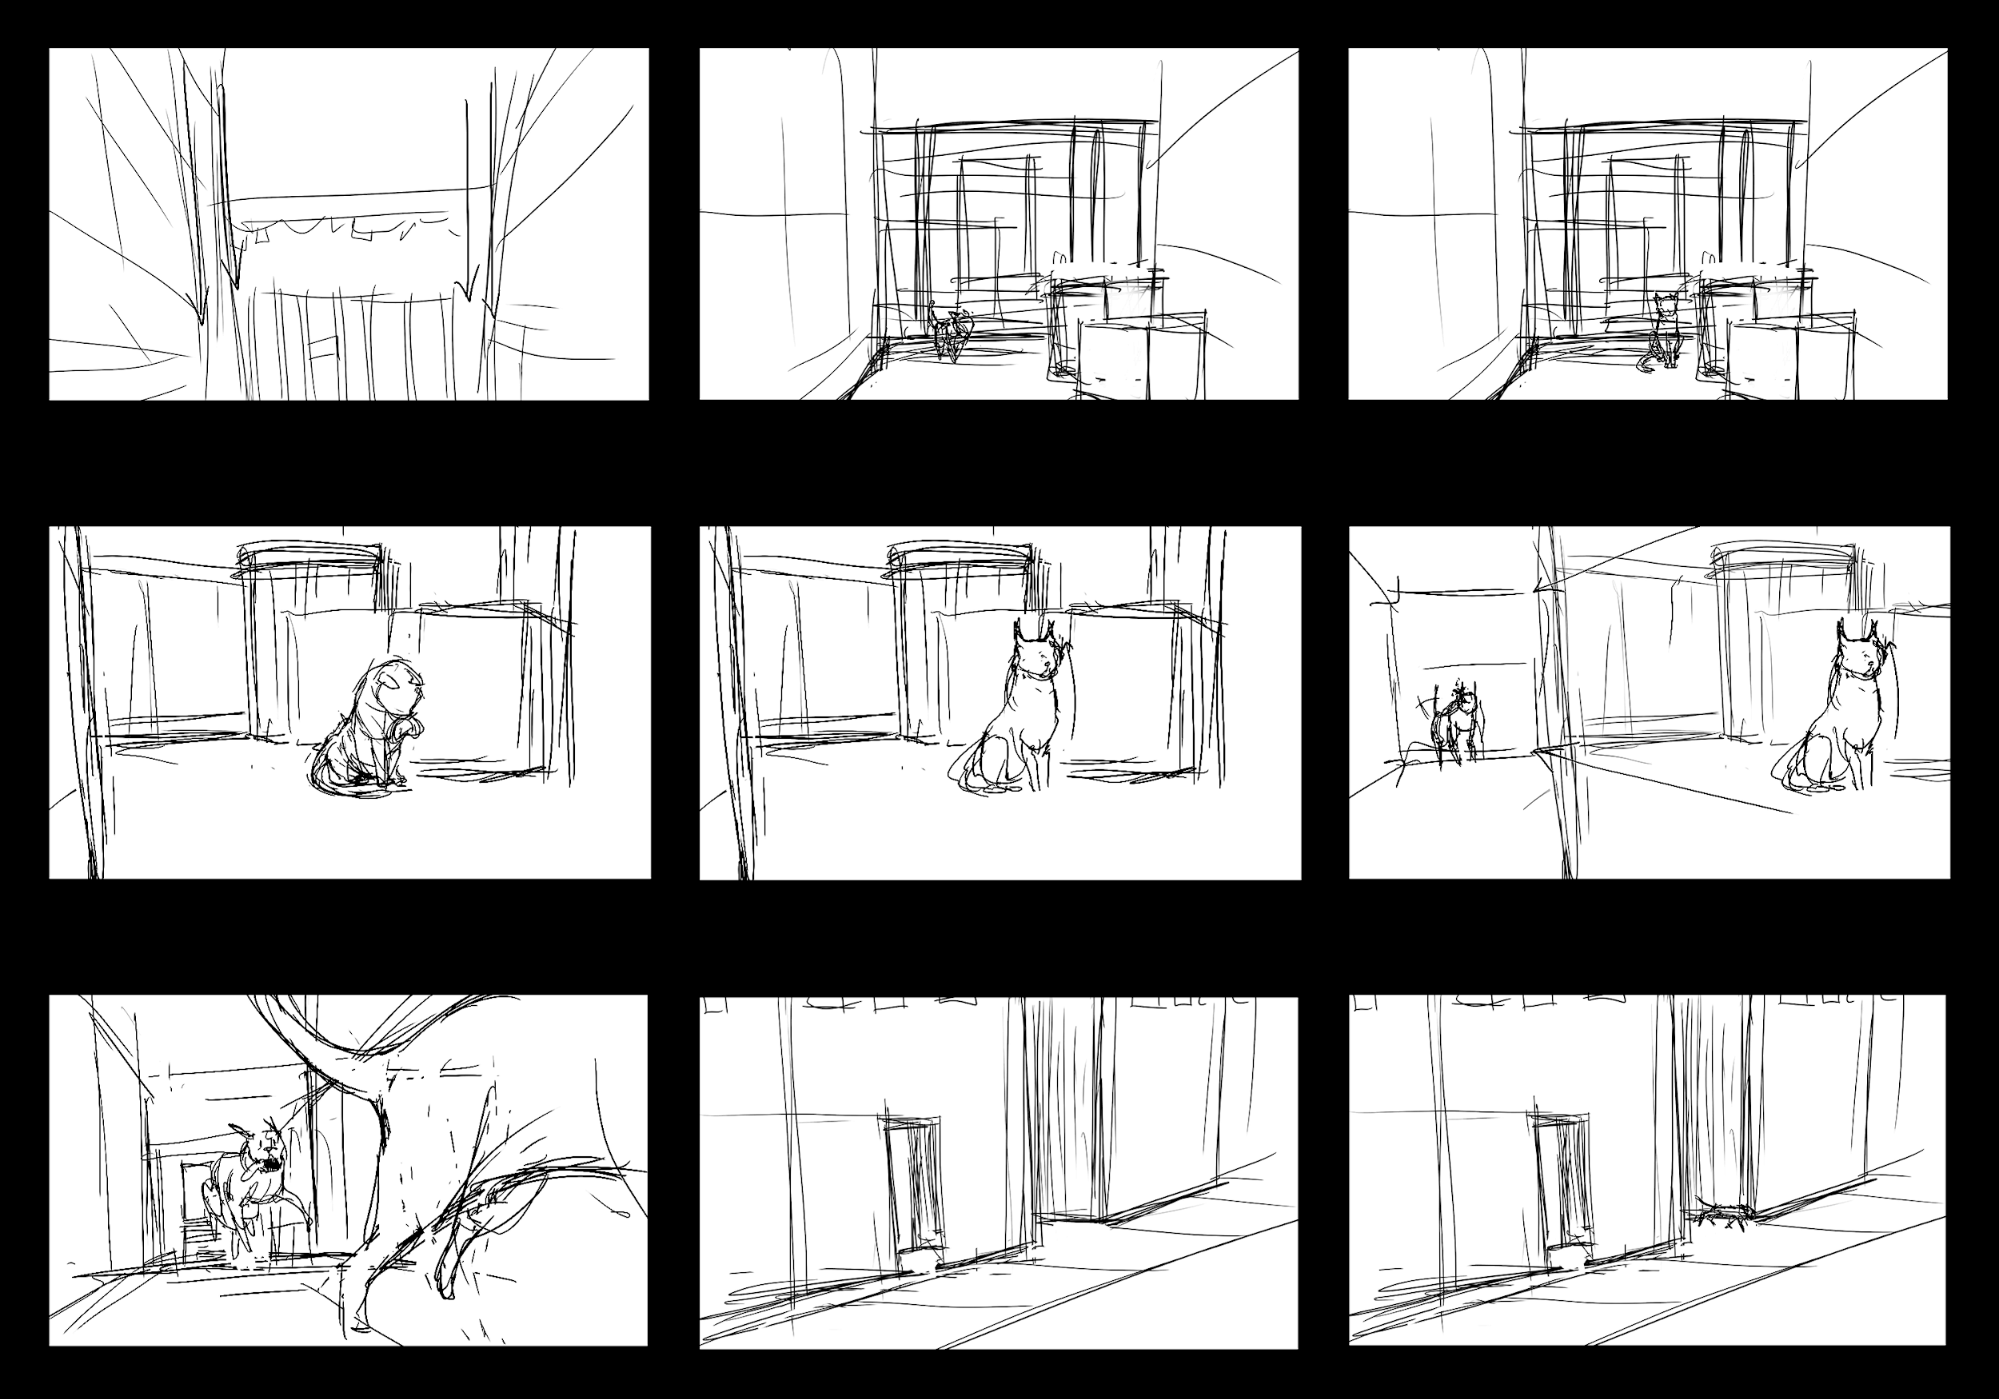
We are ready to frame our first shot. This shot, as it appears in the storyboards, is an establishing shot that sets the tone for the Scene while showing off its key players: the city skyline, the cat, and the dog.
1. Using the navigation techniques we learned in Lesson 5.1, adjust your Scene view so it matches this image (Figure 11).
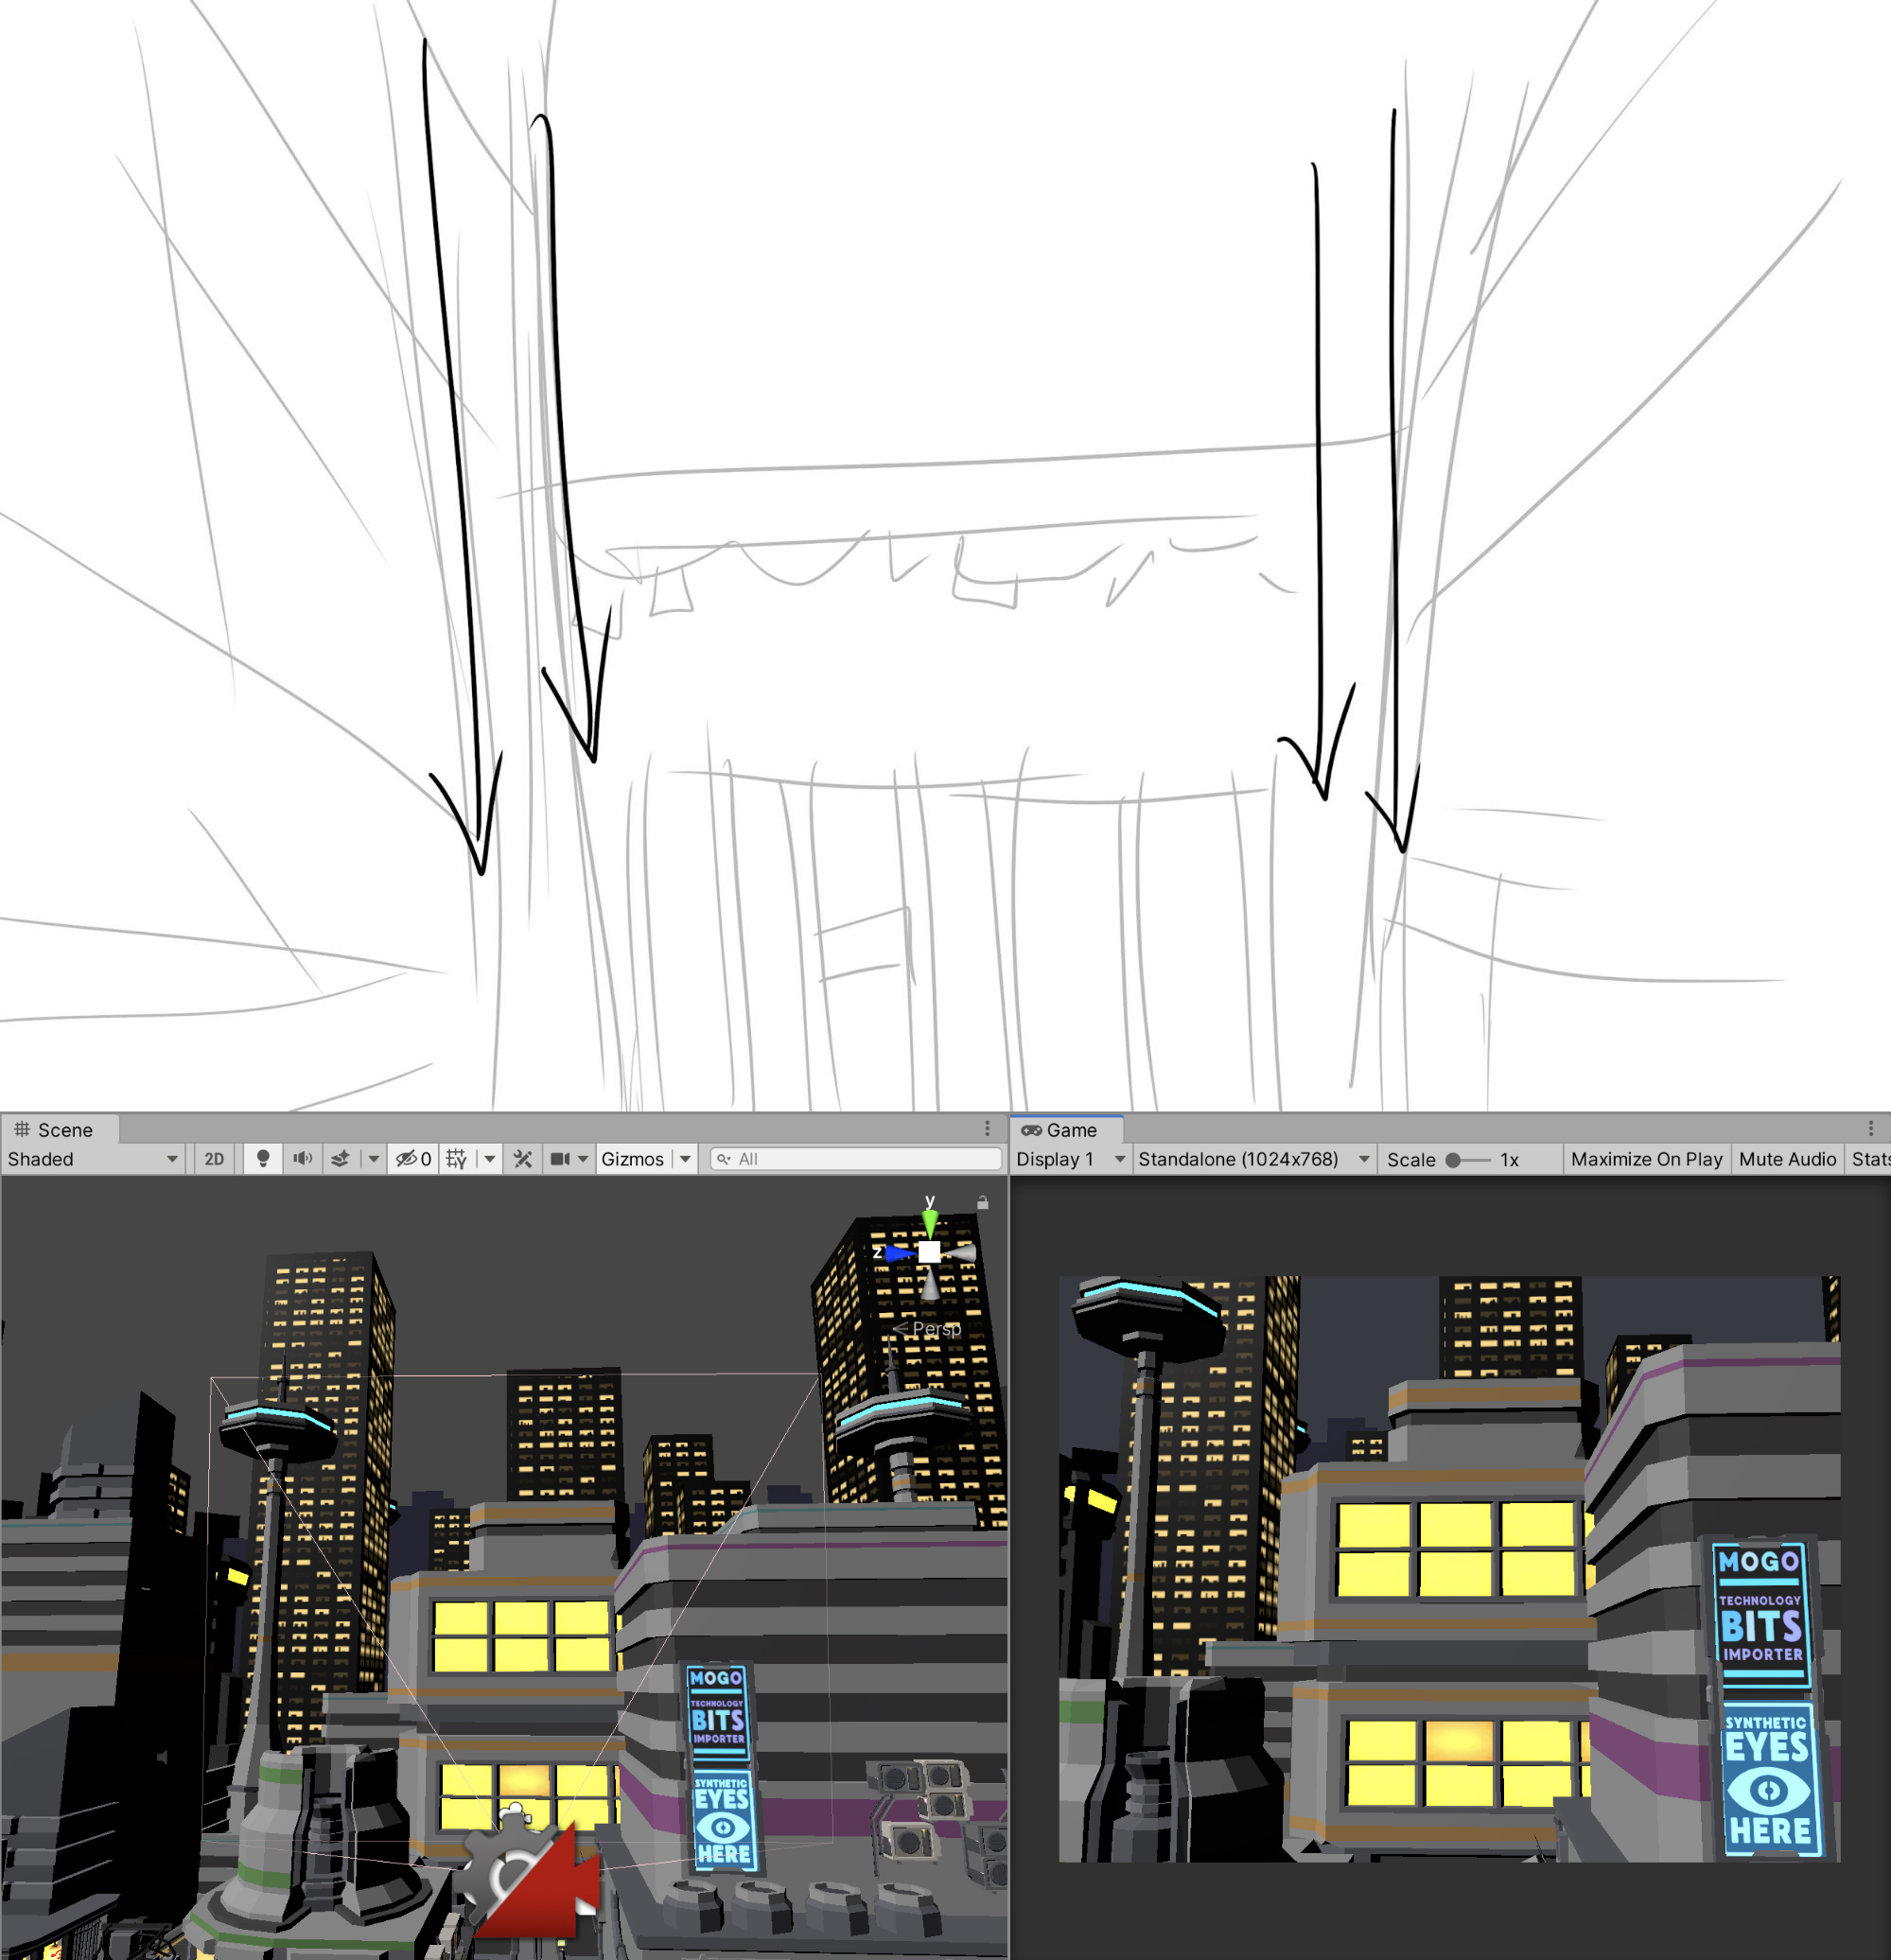
2. With the Virtual Camera selected, press the "framing" hotkey (Ctrl/Cmd + Shift + F) to frame the Virtual Camera to that view.
3. From this framing, orbit the Scene view to see if the cat is visible in the lower-left corner. We want to ensure that when we boom the camera down, the cat will be in the frame.
Next, we will animate our first shot.
6. Adding an Animation Track for the Virtual Camera
Our first shot will be a simple boom — a type of movement where the camera starts at an elevated angle and descends downwards. We want this camera to start at the position we defined in the previous lesson and descend until the cat is visible in the lower third of the frame.
1. Select the Virtual Camera CM vcam1 in the Hierarchy window.
2. Drag and drop the Virtual Camera onto the left panel of the Timeline, just below the Main Camera (CinemachineBrain) Track. When prompted, select Add Animation Track from the context menu (Figure 12).
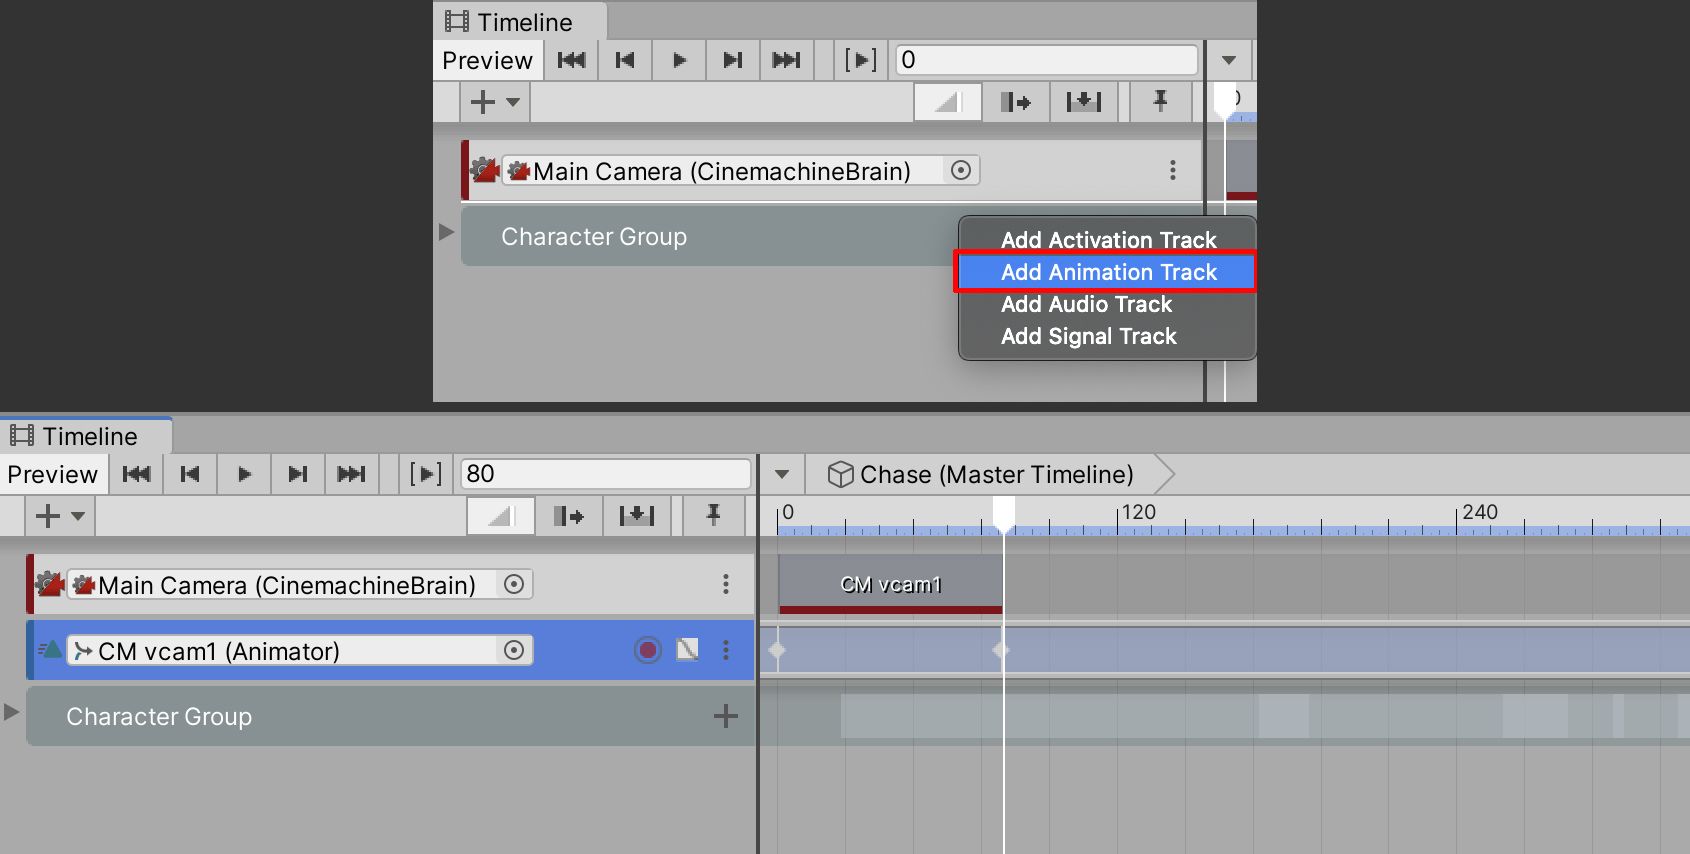
3. Set the Timeline's playhead to Frame 80. Next, drag and shorten the Virtual Camera clip in the Main Camera (CinemachineBrain) Track to Frame 80. This will set our boom camera shot to last 80 frames (Figure 13).

The duration of each Virtual Camera clip, or shot, determines how long the Main Camera will be controlled by that shot. We're always free to readjust the duration of any of our shots at any point.
7. Animating the First Shot
Now we are ready to start adding keyframes to the Virtual Camera so that it can descend over time. The process is similar to how we animated characters in Unit 4, except we no longer have to worry about configuring rigs.
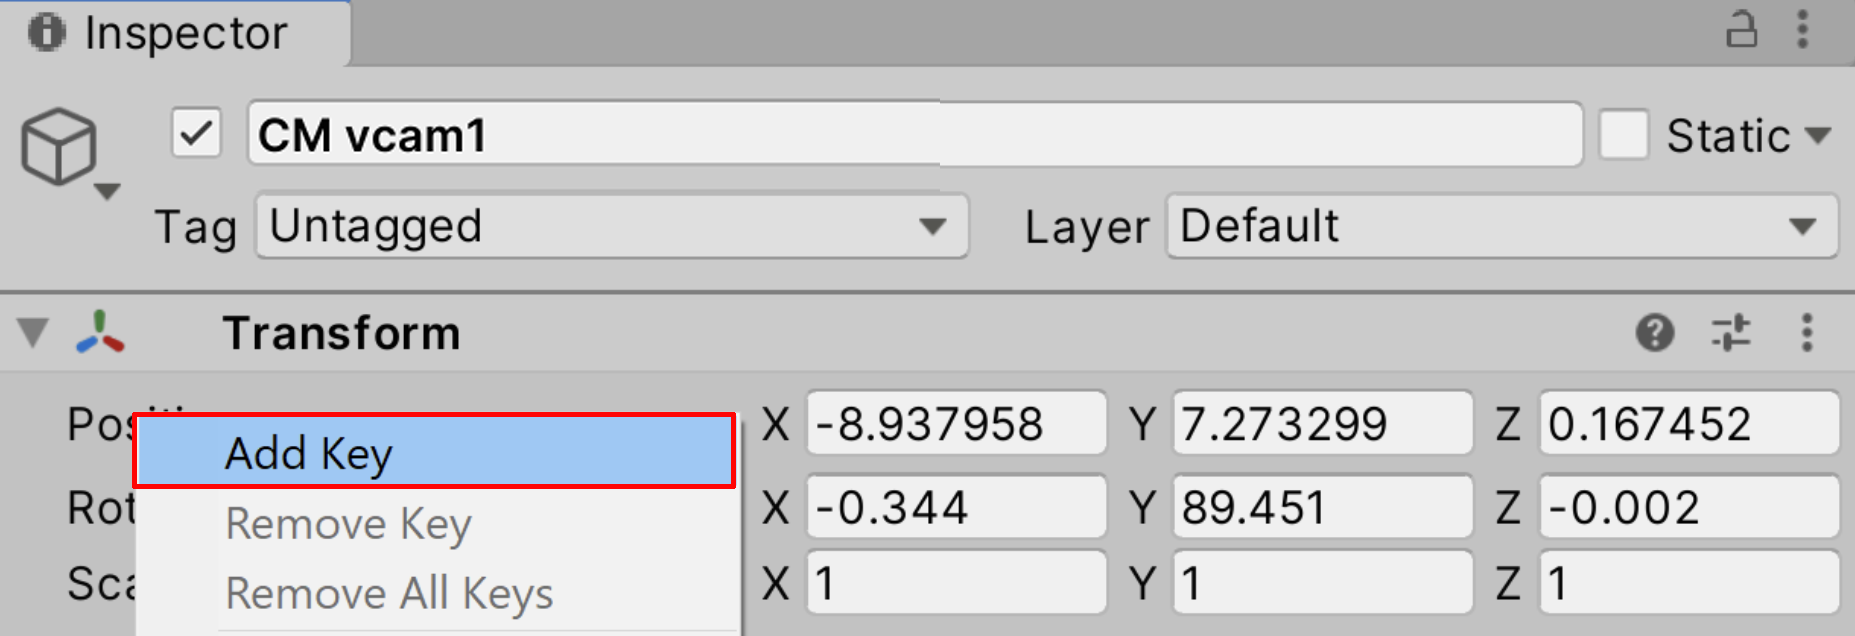
1. Set the Timeline's playhead to Frame 0, then select the red Record button on the Virtual Camera CM vcam1 Animation Track. In the Inspector, right-click under the Transform component and select Add Key to create our first keyframe (Figure 14).
2. Move the playhead to Frame 80. Next, transform the CM vcam1 camera’s Position down either in the Inspector or the Scene view until it matches the framing below (Figure 15).
3. A new keyframe will automatically be created. Select the Record button again to stop recording (Figure 16).
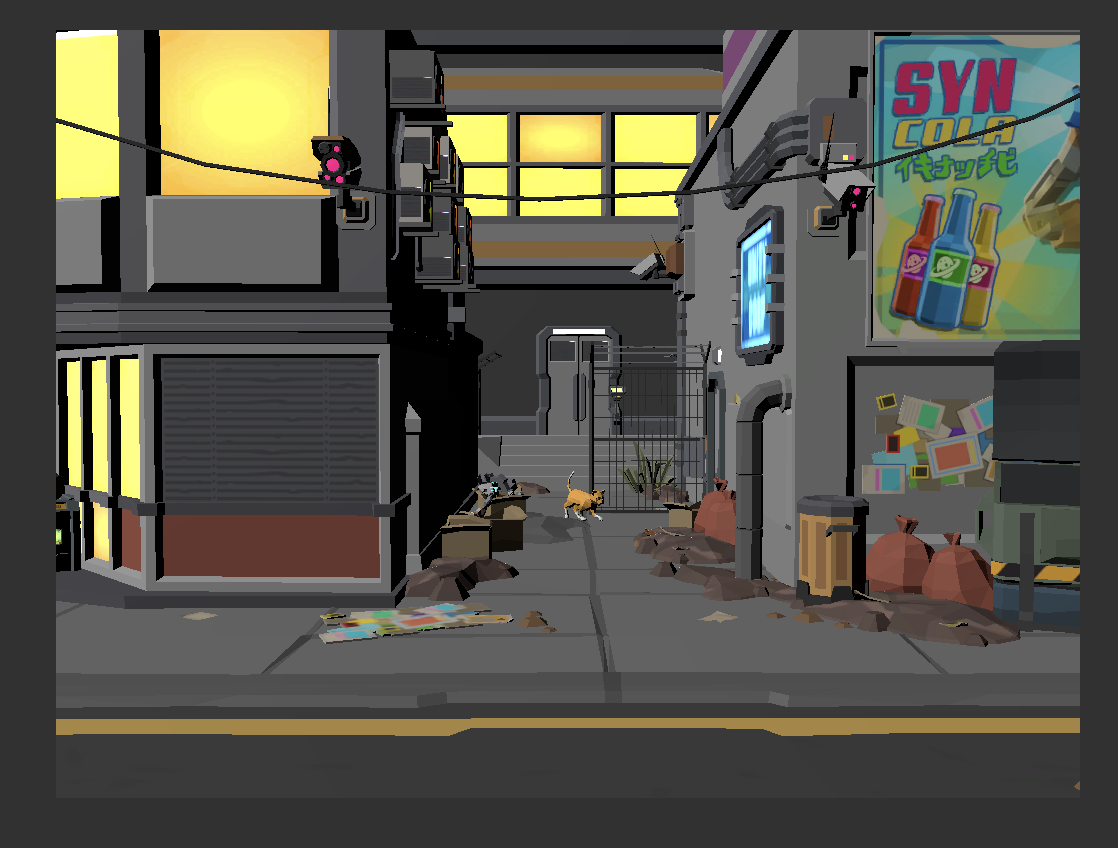

Now when you scrub the Timeline, you should see the Virtual Camera booming downward. With this knowledge, we're ready to animate our remaining shots.
8. Recap
In this lesson, you learned how to install Cinemachine, set up the Cinemachine Brain, and create a Virtual Camera in Timeline. Then we showed you how to animate the camera in a boom motion to establish our first camera shot.