
Lesson 5 - Customizing starter templates
Tutorial
intermediate
+0XP
10 mins
Unity Technologies
This tutorial outlines ways that you can manipulate the game template to customize it to your needs.
Languages available:
1. Overview
Each starter template is meant to be easily customizable to fit your specific content and AR needs. In this tutorial you will alter the game starter template with your own assets.
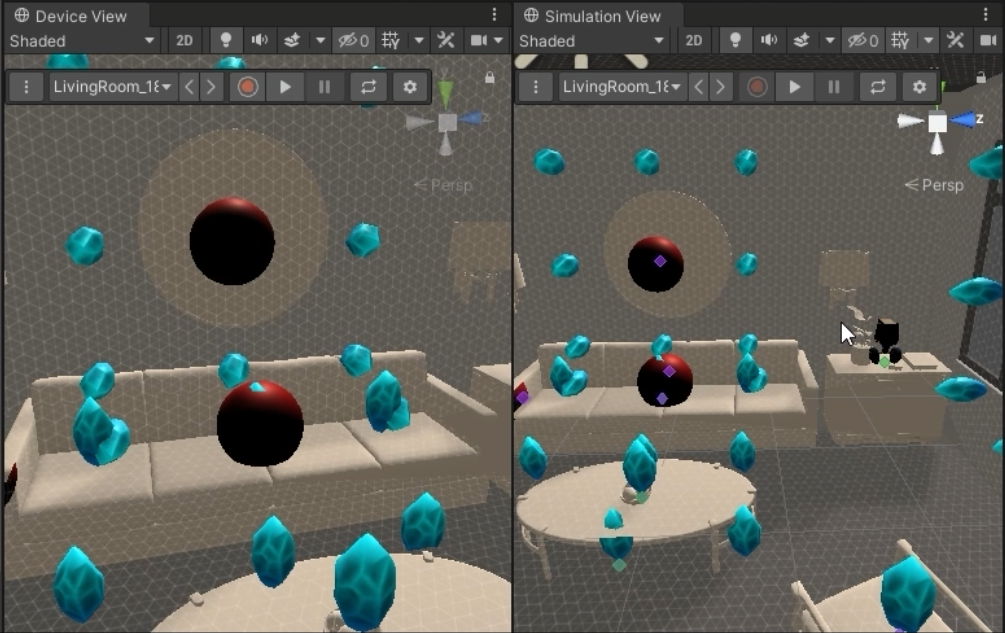
2. Add a new collectible on walls
We’ll use the existing collectible object as a basis for a new collectible to be placed on walls.
Instructional/Technical Steps:
- Highlight the Place crystals on all reasonable sized surfaces in the hierarchy view.
- Duplicate the Place crystals on all reasonable sized surfaces object by pressing ctrl+D
- Horizontal Surface is a child of this object. Rename it to Vertical Surface. Switch the Proxy’s Alignment Condition to Vertical. Crystals should appear on the walls
- Optionally Select Set Rotation: Vertical in the alignment condition if you want the scene view gizmo to reflect a vertical surface.
- Optionally remove some of the Crystal children from Vertical Surface if you want the walls to be less or more populated.
3. Customize the wall collectible
The Crystal collectible is a regular piece of digital Unity content. It can be tweaked, customized, or replaced as normal.
Instructional/Technical Steps:
- Highlight a Crystal child of Vertical Surface.
- Click on the target button in the Mesh Filter.
- Choose a new mesh, such as ‘Sphere’.
- Click on the target button of the Material field of the Mesh Renderer.
- Select a new material, such as ‘Standard Red’.
- Optionally replace the mesh and material with a piece of your own content or something from the asset store
4. Customize the character
The character is set up as a template for any digital avatar that can navigate the environment. New digital characters can be hooked up by replacing the existing asset references.
Instructional/Technical Steps:
- Have a character ready with the following animations
- Idle
- Walk
- Run
- Vertical-jump-ready (ie. crouching down to jump)
- Vertical-jump
- Horizontal-jump-ready
- Horizontal-jump
- Jump-land
- Duplicate Content/Samples/Game/AnimatorController/UnitE_Playable to Custom_Controller
- Double click Custom_Controller to open up the Animator window
- Replace each referenced clip in the base layer and blend trees with your new character’s animations
- Find Unit-E in your scene
- Delete Unit-E and create a new game object named Custom Character
- Add a Direct AR Character Controller to this object
- Drag your new character into the scene as a child of Custom Character. Fill in the Animator parameter of the Direct AR Character Controller to be the animator of this character.
- Set the Controller parameter of your character to be the Custom_Controller resource you made earlier
- Hit play to test out the new character in your scene
5. Conclusion
Now you have used the Game template as a basis for a new procedural AR experience with objects on the walls, and a brand new character.