
Lesson 6.1 - Adding Lighting to the Set
Tutorial
Beginner
+10XP
40 mins
(176)
Unity Technologies
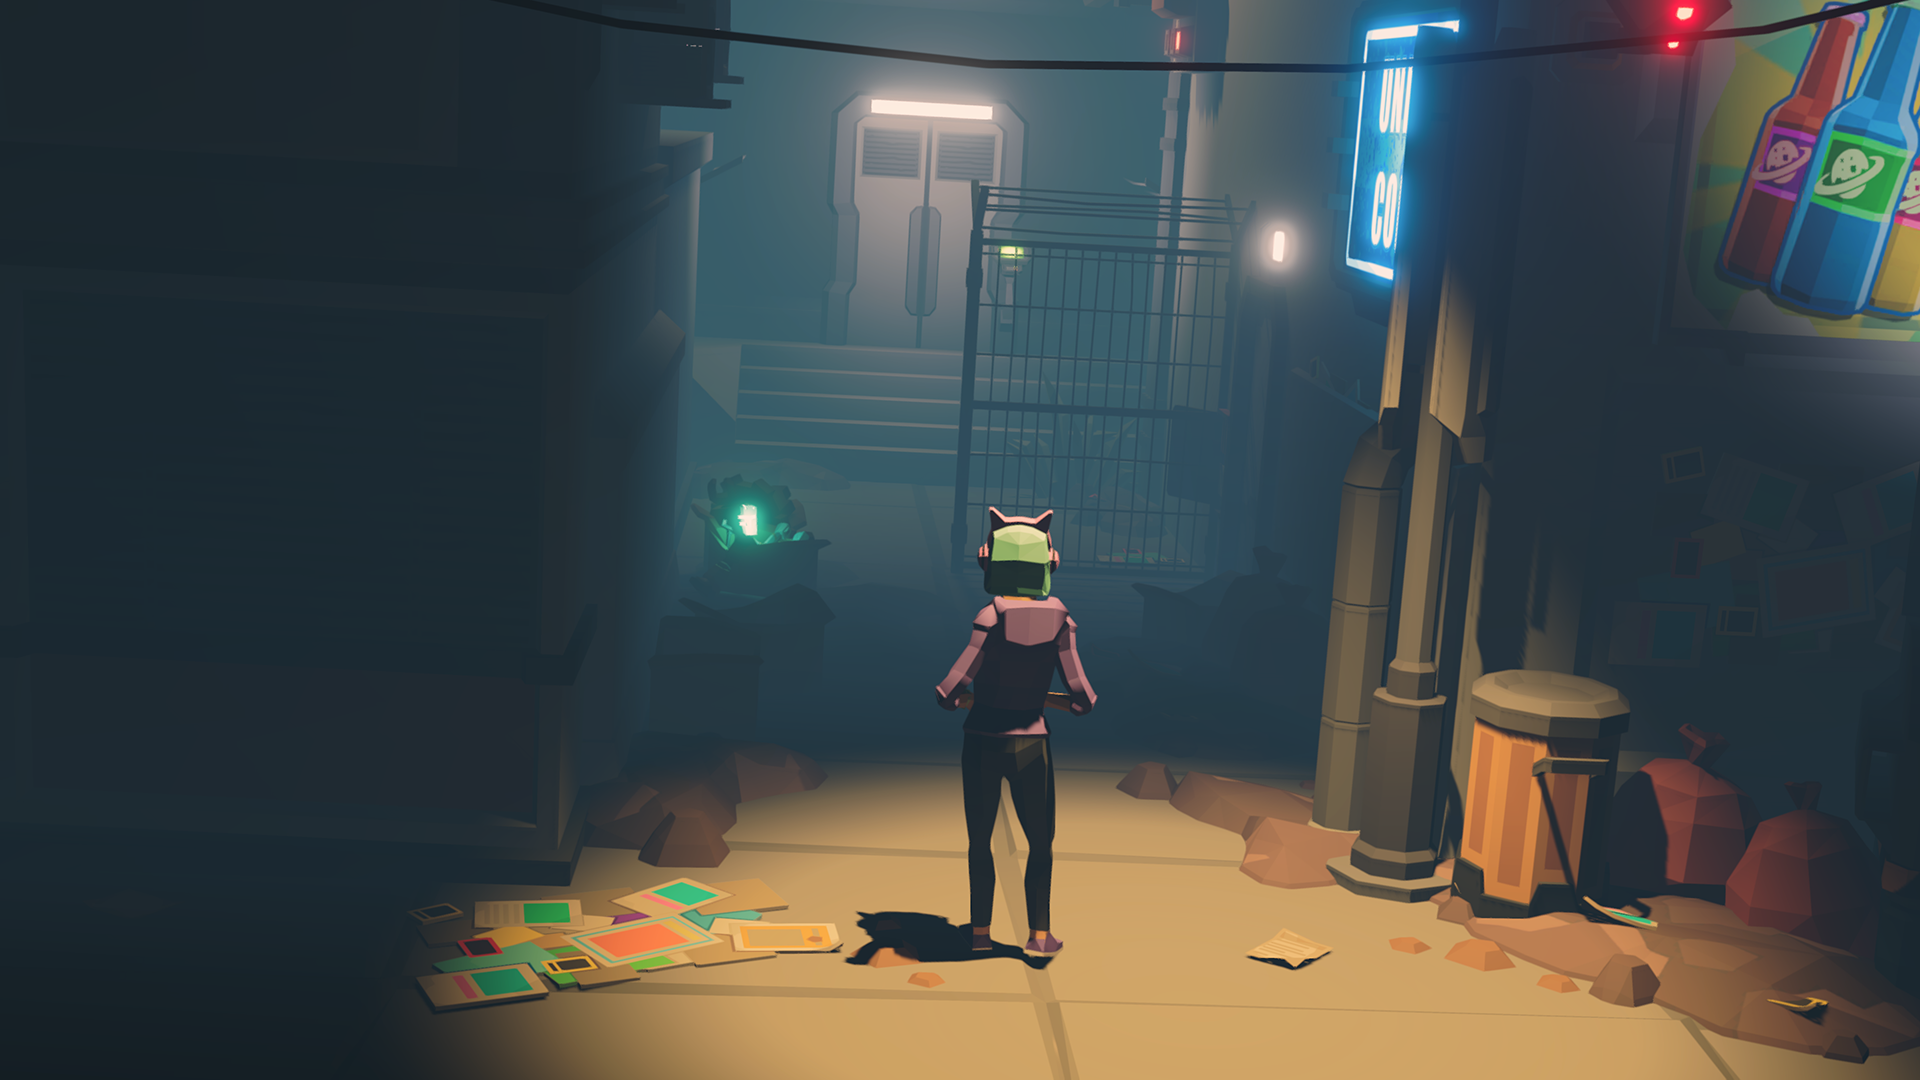
We’ll dive deep into nuances of Unity lighting in this lesson, beginning with adding Point Lights and Spotlights to different areas of our set to create mood and ambiance.
Languages available:
1. Lesson Overview
2. Setting up the Lighting Using Point Lights and Spotlights
Up to this point, we’ve relied mainly on the Directional Light source. In this lesson, the lighting in our project will be organized with separate and unique lighting conditions, incorporating both Point Lights and Spotlights, as introduced in Unit 3. We will be setting up these various lighting conditions, as well as learning how to customize their properties.
1. Download the Unit6_StarterFiles here. Unzip the folder and move it to an organized location on your computer, add the Project in the Unity Hub and open it.
2. Open the Unit6 scene found in Assets > Scenes.
3. Delete the Directional Light by selecting it in the Hierarchy, right-clicking, and then selecting Delete.
We will begin by first creating an organized folder structure to incorporate all of our lighting Assets.
4. Create an empty GameObject by selecting from the top menu drop-down GameObject > Create Empty. Rename it Lighting and set the Position coordinates to X=0, Y=0, and Z=0 in the Inspector.
We will organize the three Scene locations as separate GameObject categories inside our newly created Lighting GameObject.
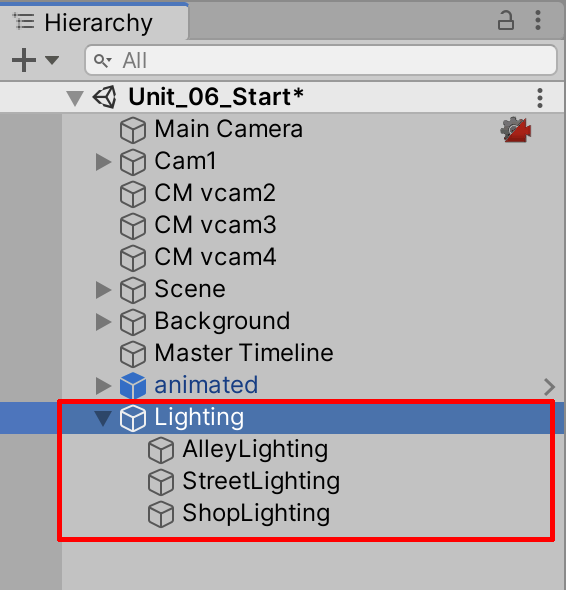
5. Select from the top menu drop-down GameObject > Create Empty. Rename it AlleyLighting and set the Position coordinates to X=0, Y=0, and Z=0 in the Inspector. Create two more empty GameObjects, rename them StreetLighting and ShopLighting and set their Position coordinates to X=0, Y=0, and Z=0.
6. Organize these three GameObjects as children of the Lighting object by selecting and dragging them into the Lighting GameObject in the Hierarchy window. (Figure 01).
3. Adding a Point Light to the Alley
Currently, the scene is too dark to navigate easily. We can use the Scene Lighting Toggle button to toggle between Scene lighting as seen in the Game View, or to the default Scene View camera lighting.
Select the Scene Lighting Toggle button (Figure 02) to make the scene more visible for editing

We will now add our lights to the Alley Scene location.
1. Orienting our view in the Scene window, establish the placement location of our first Point Light, above the door at the end of the alley.
2. Create a Point Light by selecting from the top menu drop-down GameObject > Light > Point Light and renaming it Door_Blue_Light. A Point Light has been added to our Scene. Organize the Point Light in the Hierarchy to be a child of the AlleyLighting GameObject.
We will now change the Door_Blue_Light X, Y, and Z coordinates, positioning the Point Light to be centered in front of the doorway in the Scene.
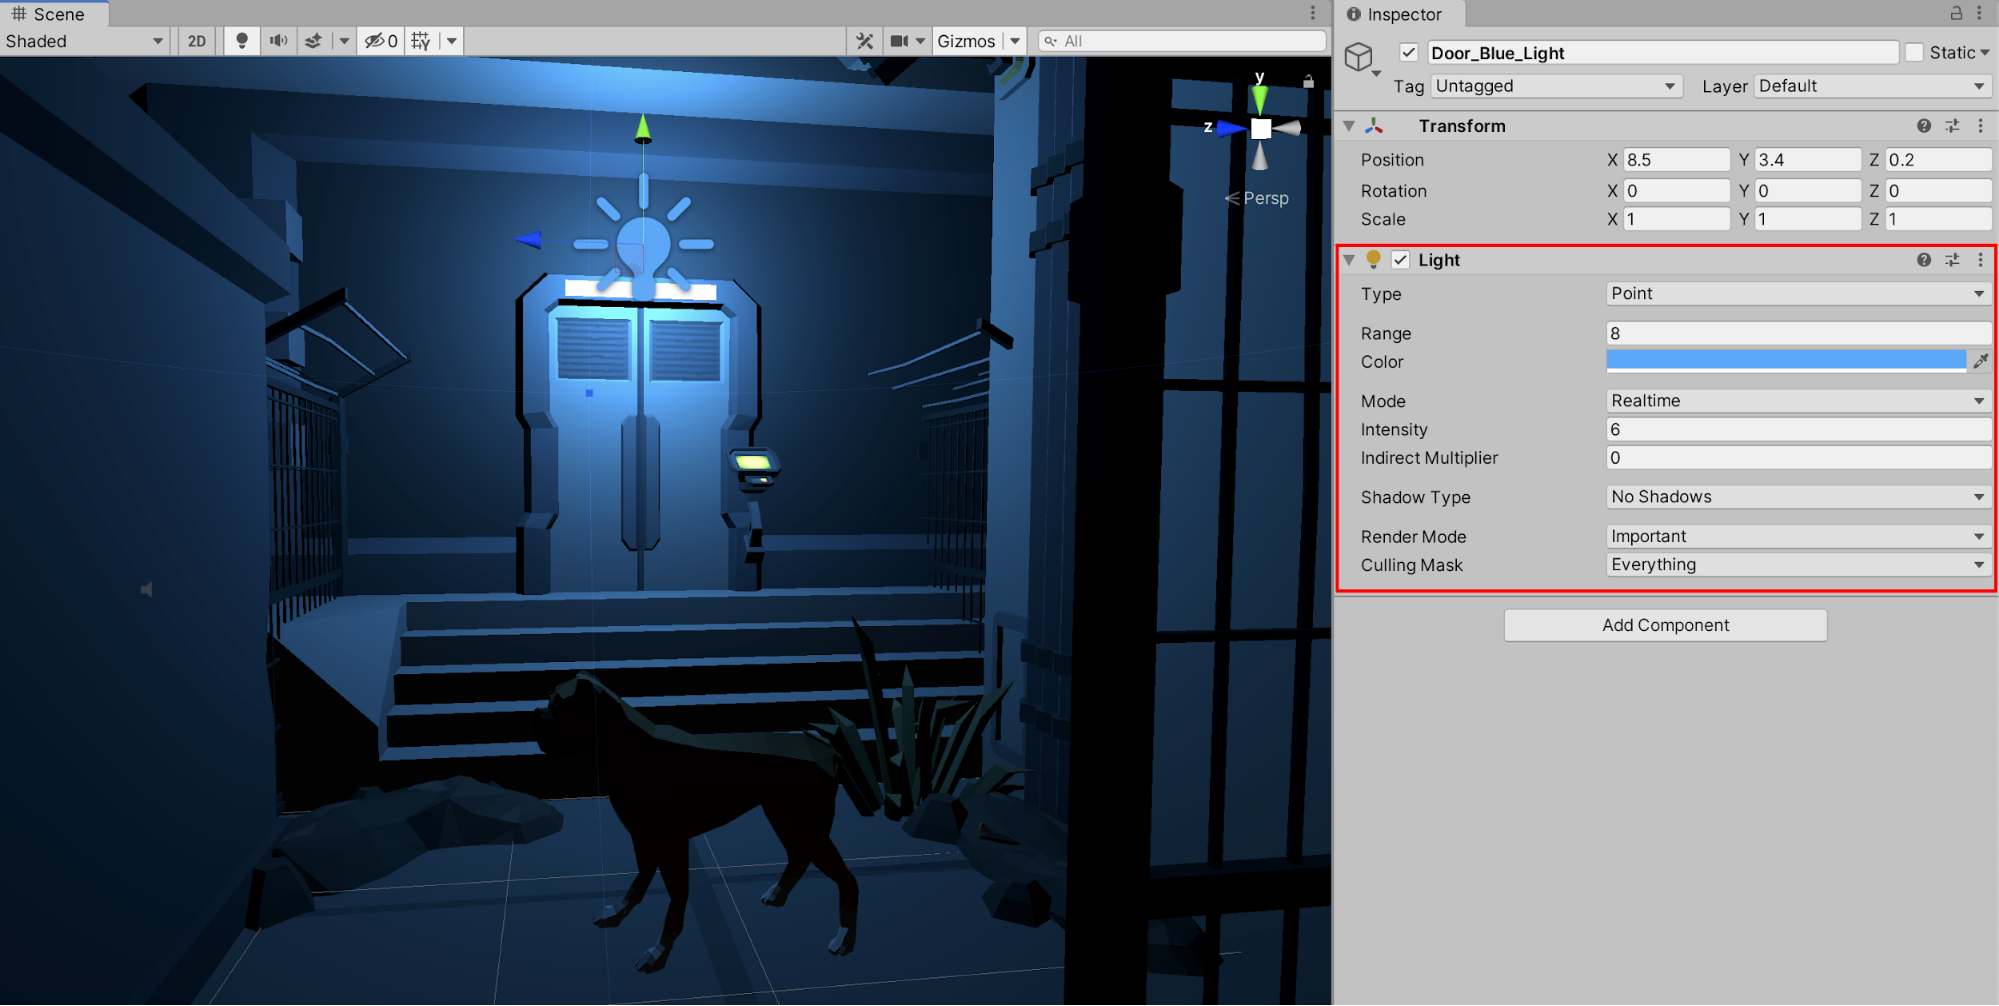
3. Using the Move Tool, or by adjusting the coordinate values in the Inspector window, set the Door_Blue_Light’s Transform Position to X=8.5, Y=3.4, and Z=0.2.
With the Door_Blue_Light selected in the Hierarchy window, you will notice a warning message in the Inspector that explains how shadows can’t “bounce” indirectly in real-time. Setting the Indirect Multiplier value to 0 in the next step will remove this warning.
4. Set the Indirect Multiplier to 0.
5. Change the light’s color by selecting the Color field and changing the color in the pop-up window to a shade of blue.
6. Lower the light’s Range to 8 to reduce how far the light is emitted from the center.
7. Increase the brightness by changing the Intensity to 6.
8. For rendering performance, change the Render Mode to Important.
The resulting light now displays changes made to its Range, Color, and Intensity properties. Make sure you toggle the Scene View Lighting again to see the desired results. The Scene contains the desired settings for its Indirect Multiplier and Render Mode settings, which will be explained in more detail later in this unit (Figure 03).
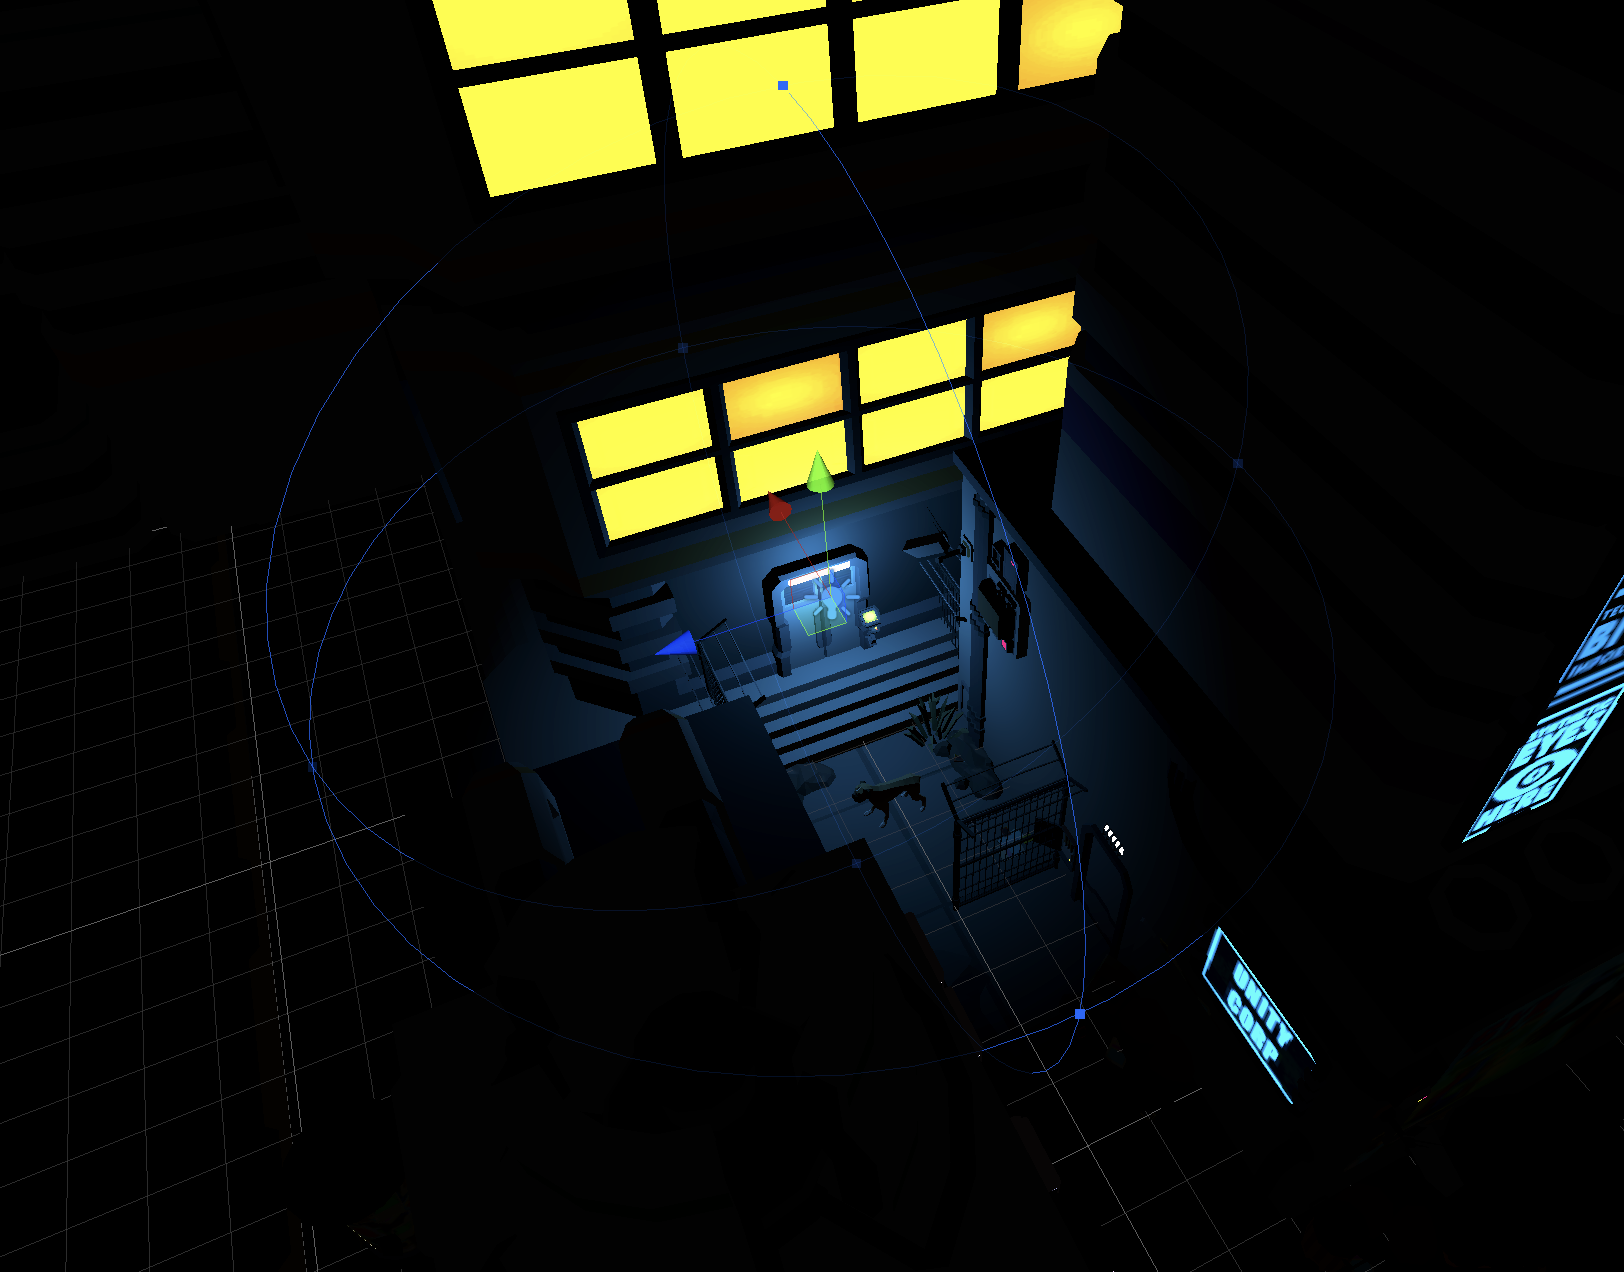
When zoomed out in the Scene window, you can also see the light’s range, outlined as a sphere (Figure 04).
We may need to toggle the Scene Lighting toggle button at any time during our development process to preview our lighting conditions.
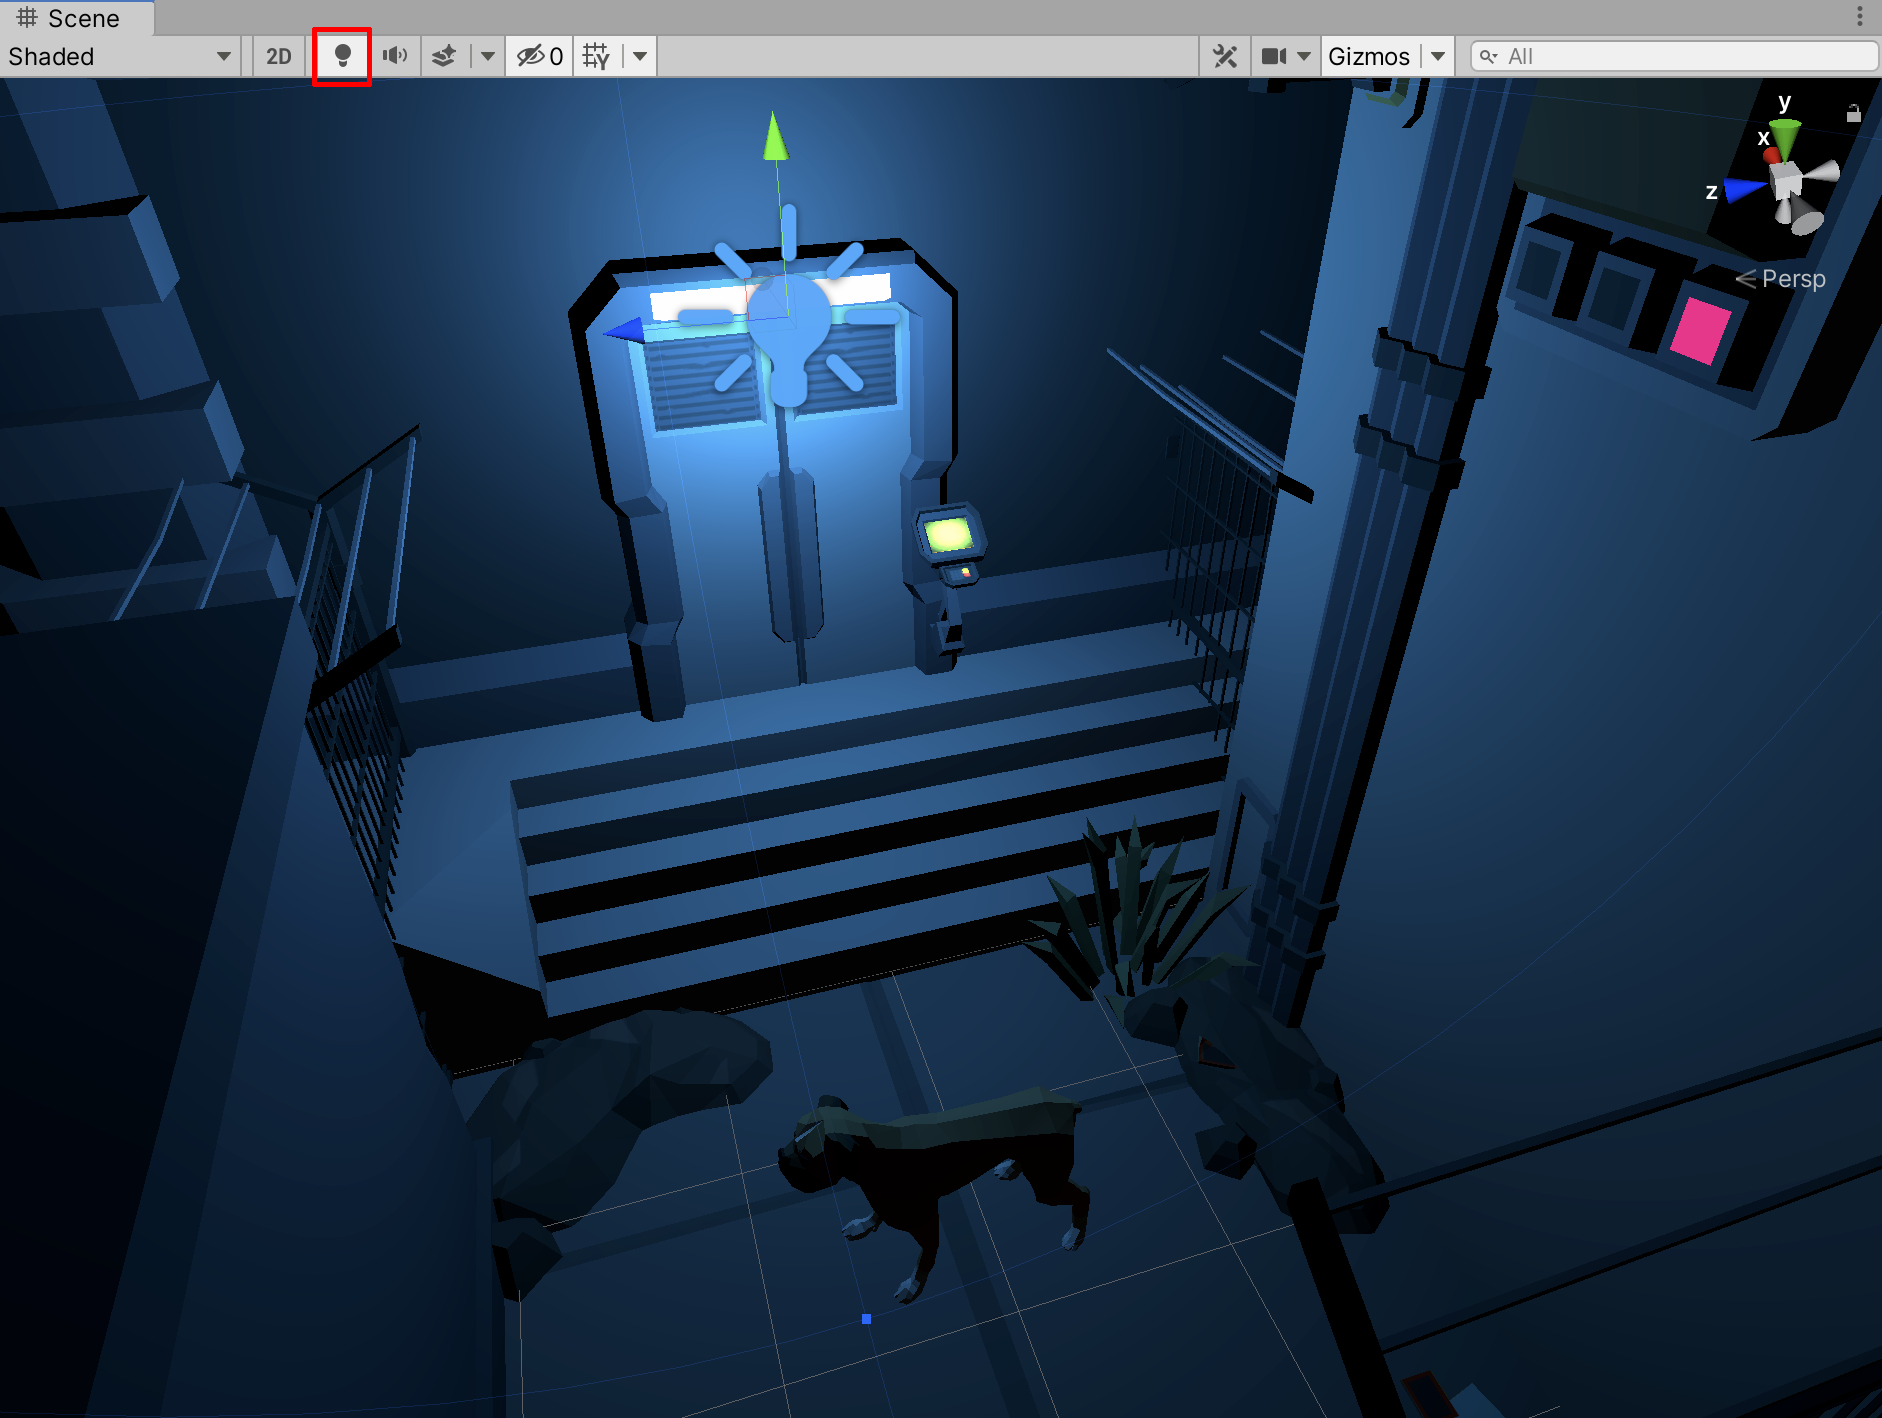
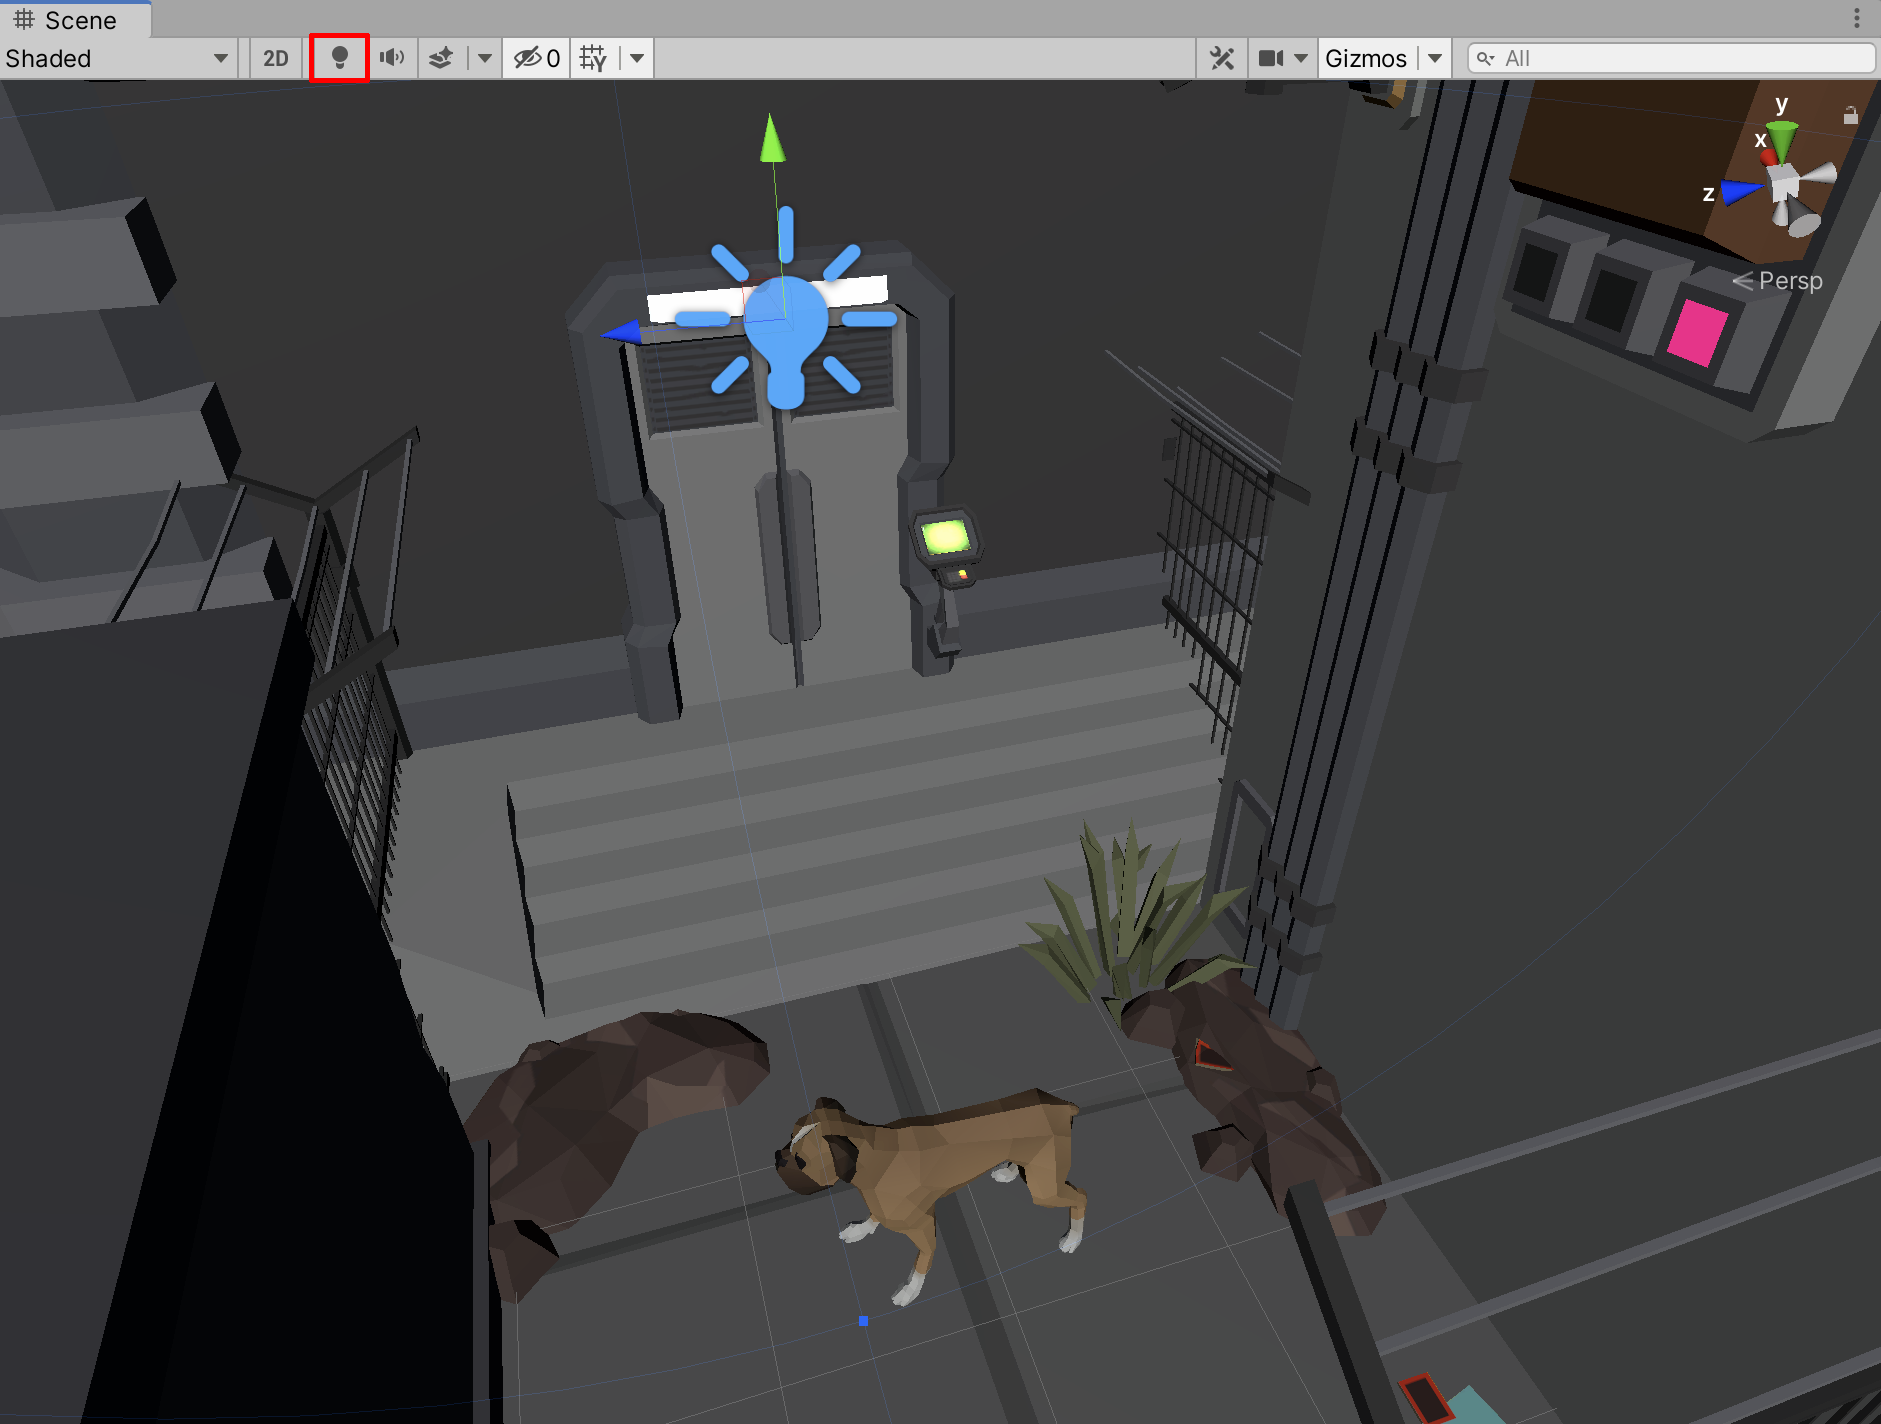
9. In order to make the Scene Lighting properties visible, select the Scene Lighting toggle button, represented by a light bulb icon (Figure 05). This displays the Scene’s current lighting conditions. Select it again to disable the Scene Lighting Toggle Button to view the set without the Scene Lighting (Figure 06).
4. Adding a Spotlight to the Alley
We will repeat the process of adding new lights, this time with a Spotlight.
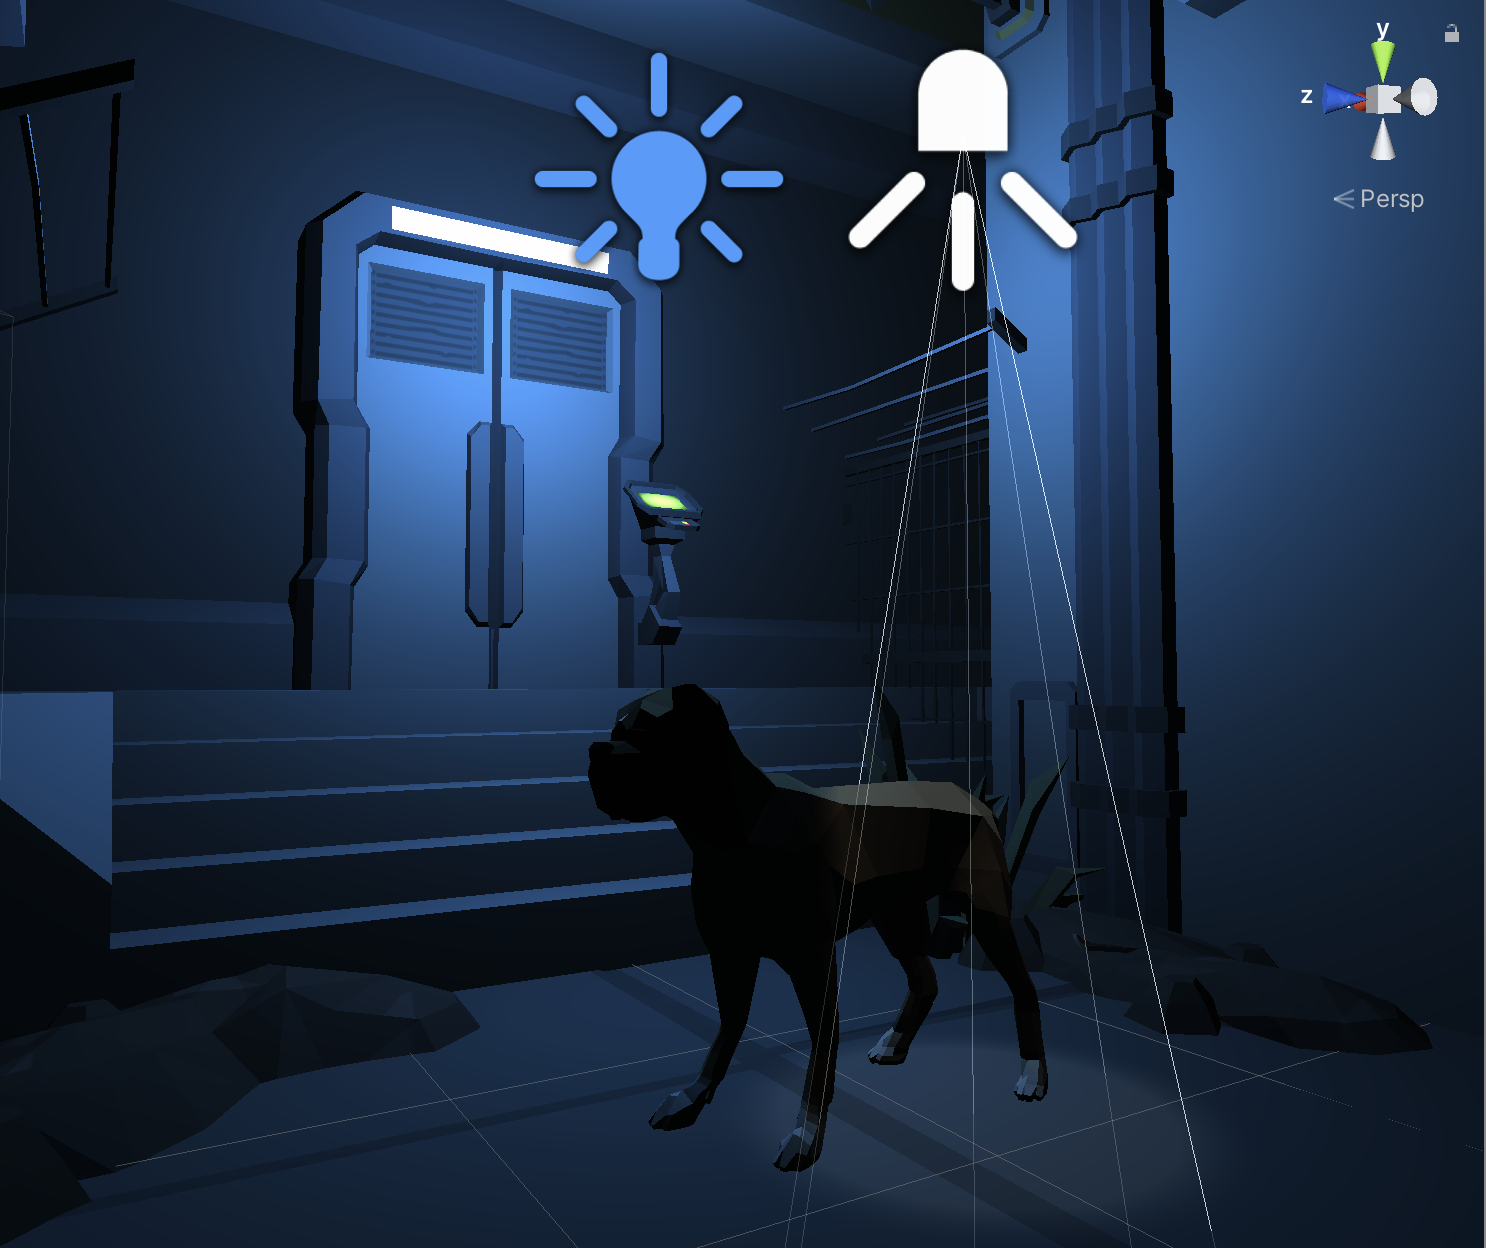
1. Select GameObject > Light > Spotlight from the top menu drop-down and rename it Door_White_Light. A Spotlight has been added to our Scene (Figure 07). Organize the Spotlight in the Hierarchy to be a child of the AlleyLighting GameObject.
Again, we will change and adjust the light’s properties to suit our Scene’s desired lighting conditions.
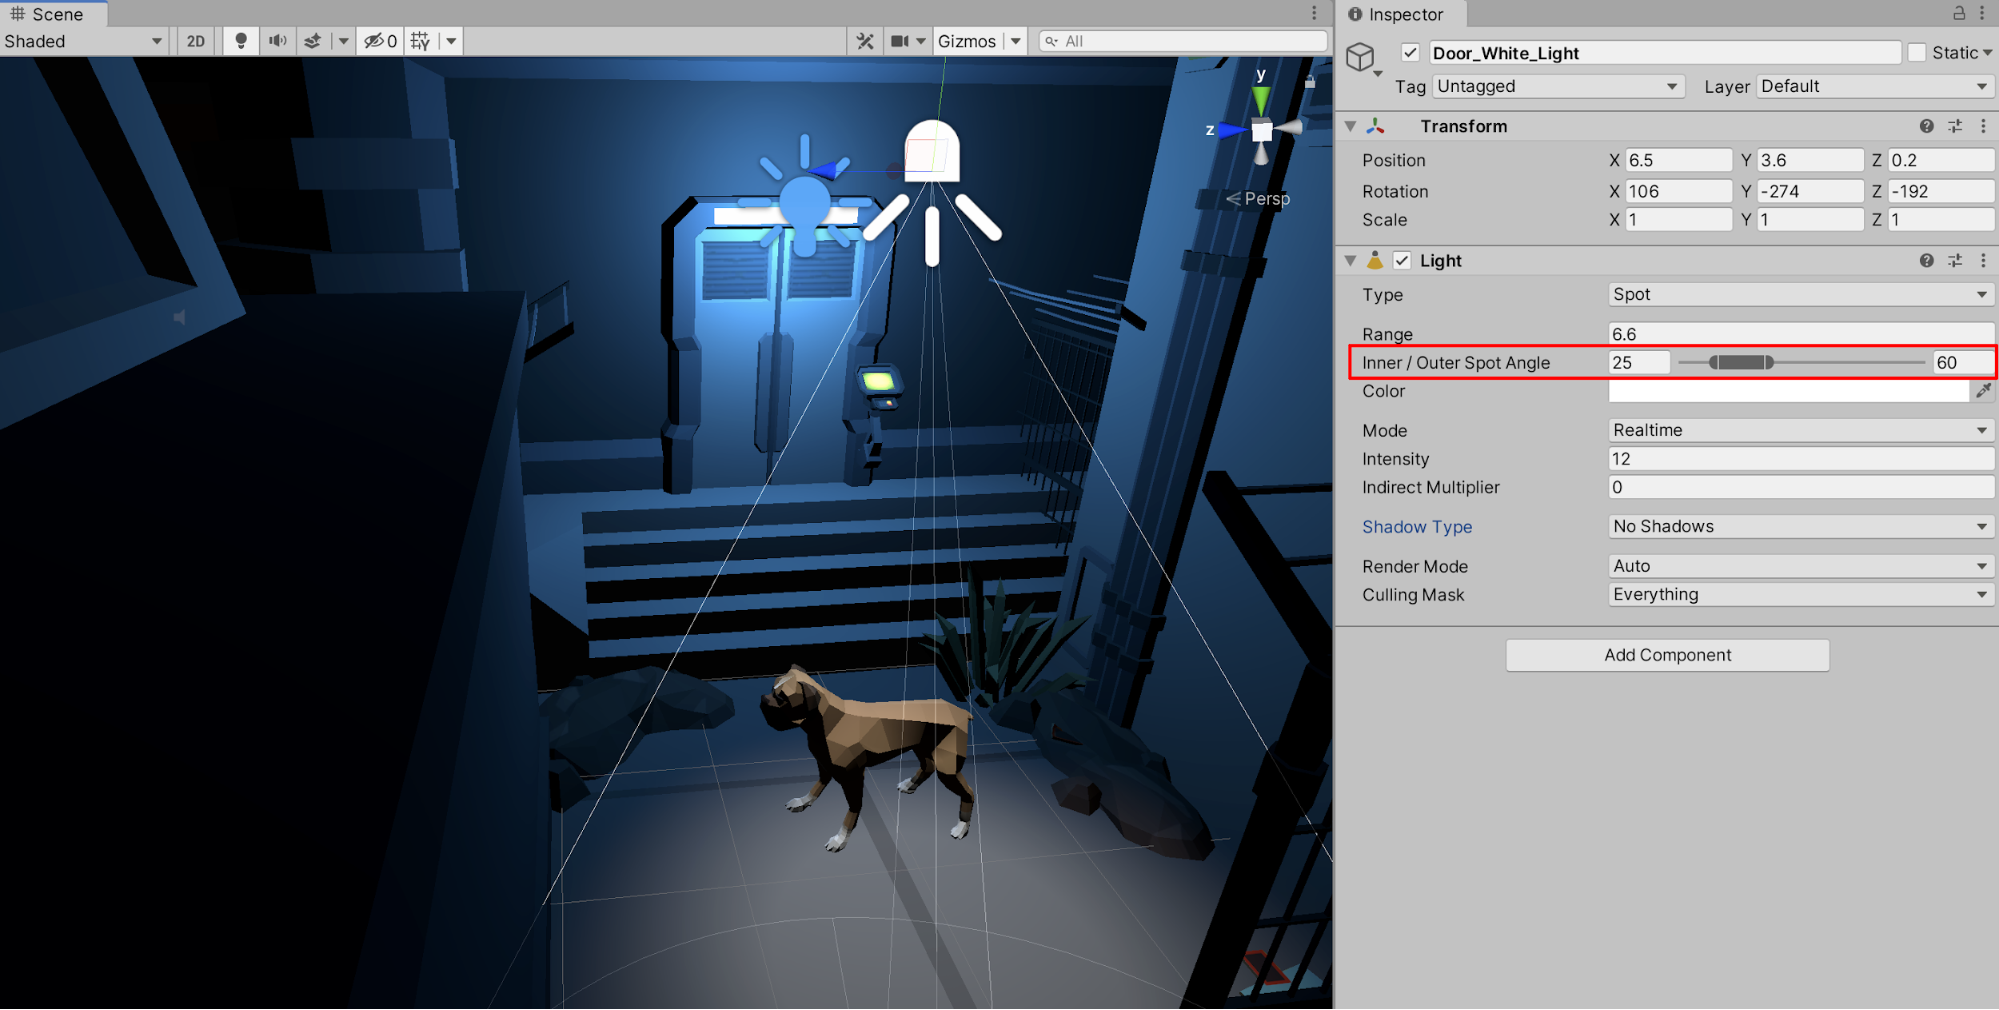
3. Position the Spotlight’s location to also illuminate the doorway by changing the X, Y, and Z positions to X=6.5, Y=3.6, and Z=0.2 in the Inspector window.
4. Rotate the Spotlight’s angle of direction by changing the X, Y, and Z axes’ Rotation to X=106, Y=-274, and Z=-192.
5. Lower the light’s Range to 6.6 to reduce how far the light is emitted.
6. Increase the brightness by changing the Intensity to 12.
7. Set the Indirect Multiplier to 0.
8. Adjust the Inner / Outer Spot Angle by selecting the slider and adjusting the values to widen the Inner Angle to 25 and the Outer Angle to 60 (Figure 08).
9. To enable a light’s ability to cast shadows, set the Shadow Type to Soft Shadows. Set the Render Mode to Important.
You will be able to see the changes in the light’s properties, especially the resulting shadow cast from the dog character (Figure 09).
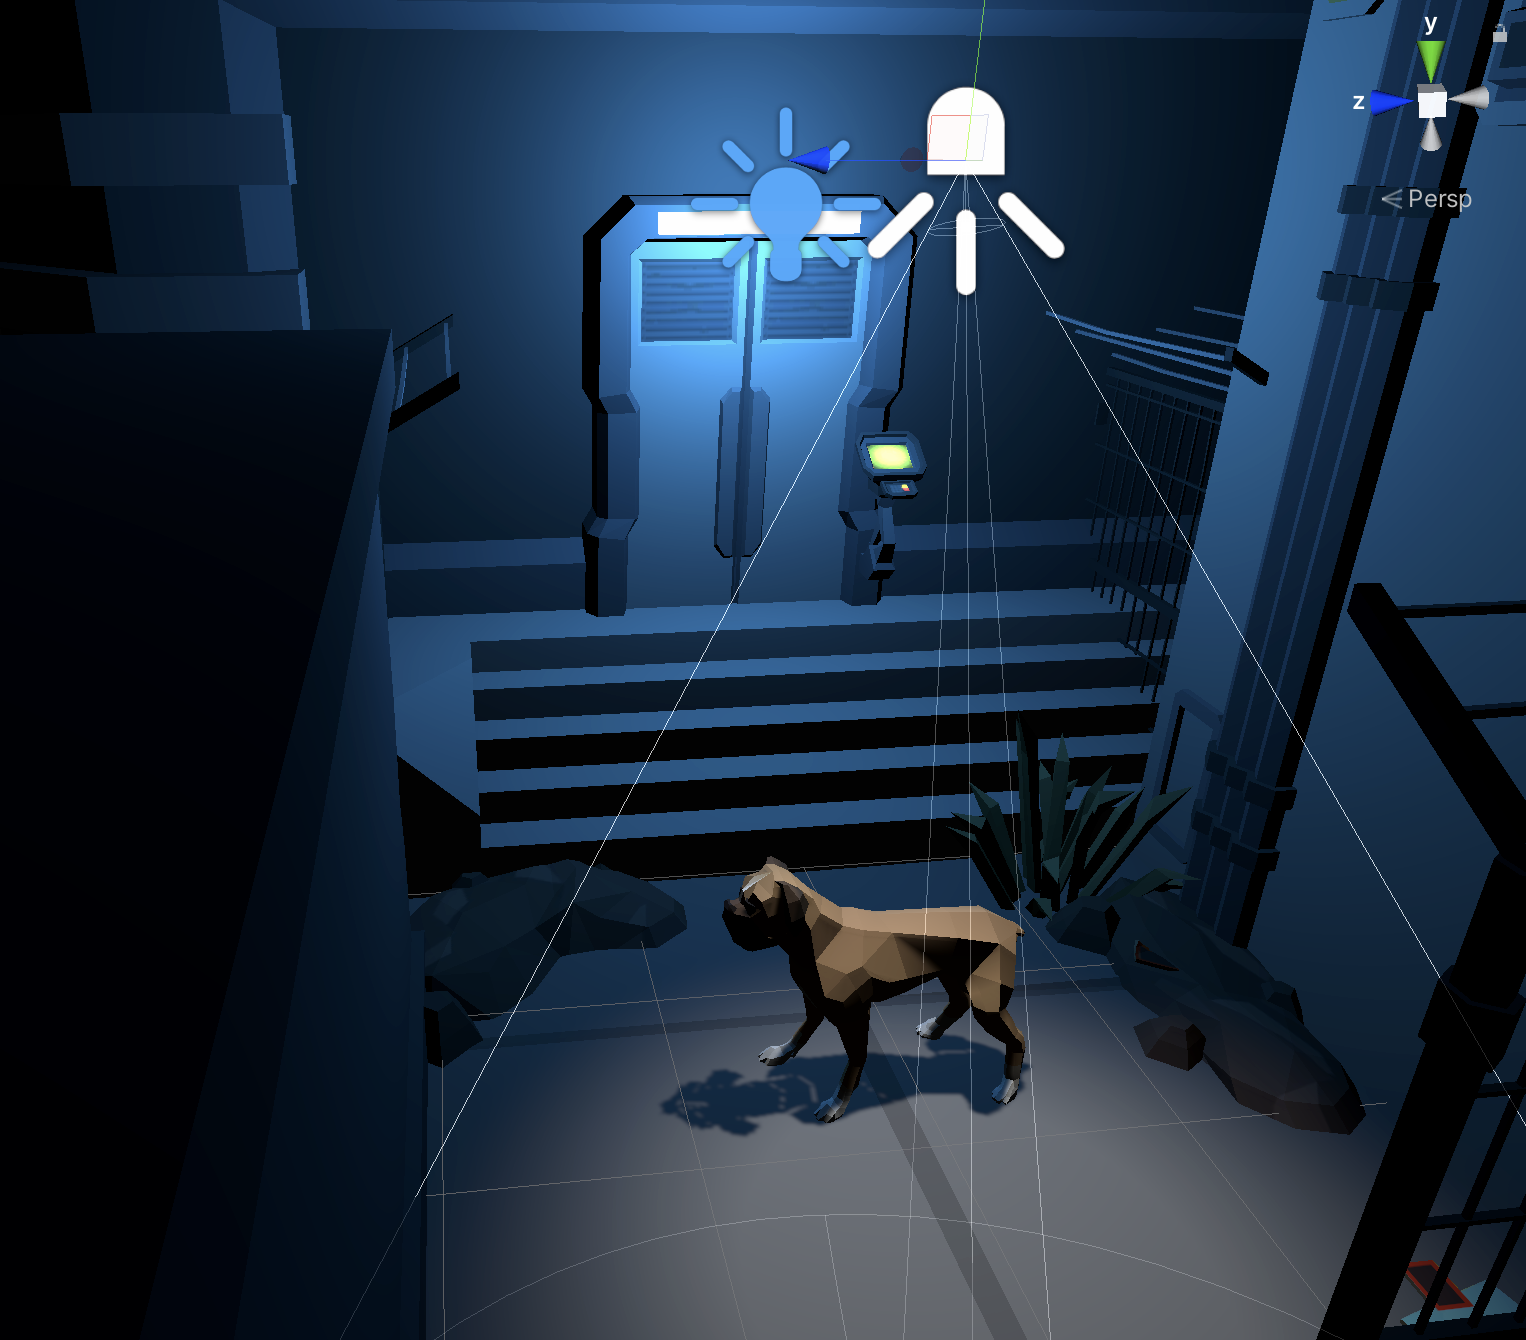
The dog character, just like any 3D GameObject, is able to cast a shadow if its properties are specified.
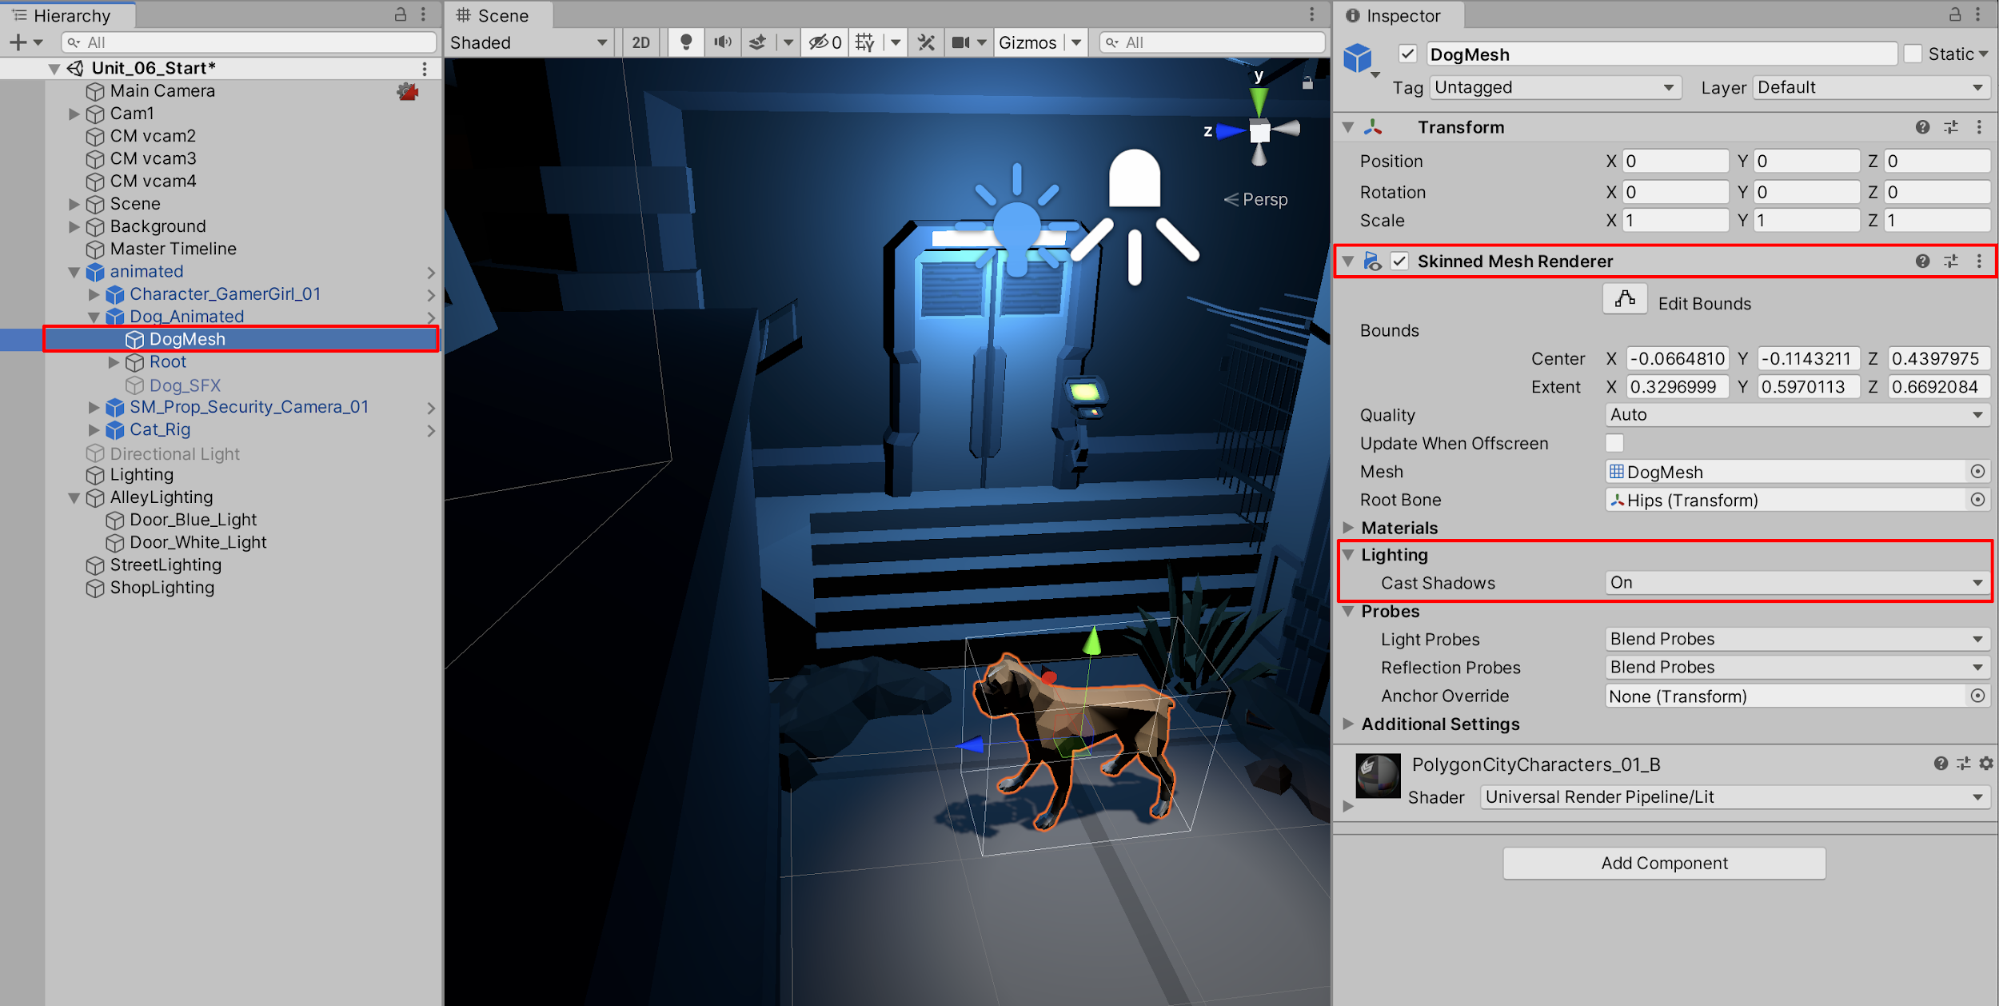
10. To ensure that the Dog GameObject can cast a shadow, first select it in the Hierarchy window by opening up the GameObject labelled Animated. Next, select Dog_Animated. Open up the Dog_Animated GameObject and select DogMesh. In the Inspector window, select to expand the triangle for the Skinned Mesh Renderer field. Under the Lighting category, ensure that the dog’s Cast Shadow field is set to On (Figure 10). This specifies that the dog’s geometry will create a shadow when a shadow-casting light illuminates it (such as the white light above the door).
5. Adding More Lights to Illuminate the Alley
Continuing to add lights to our Scene, we’ll place another Spotlight next to the other alley door above the cat character.
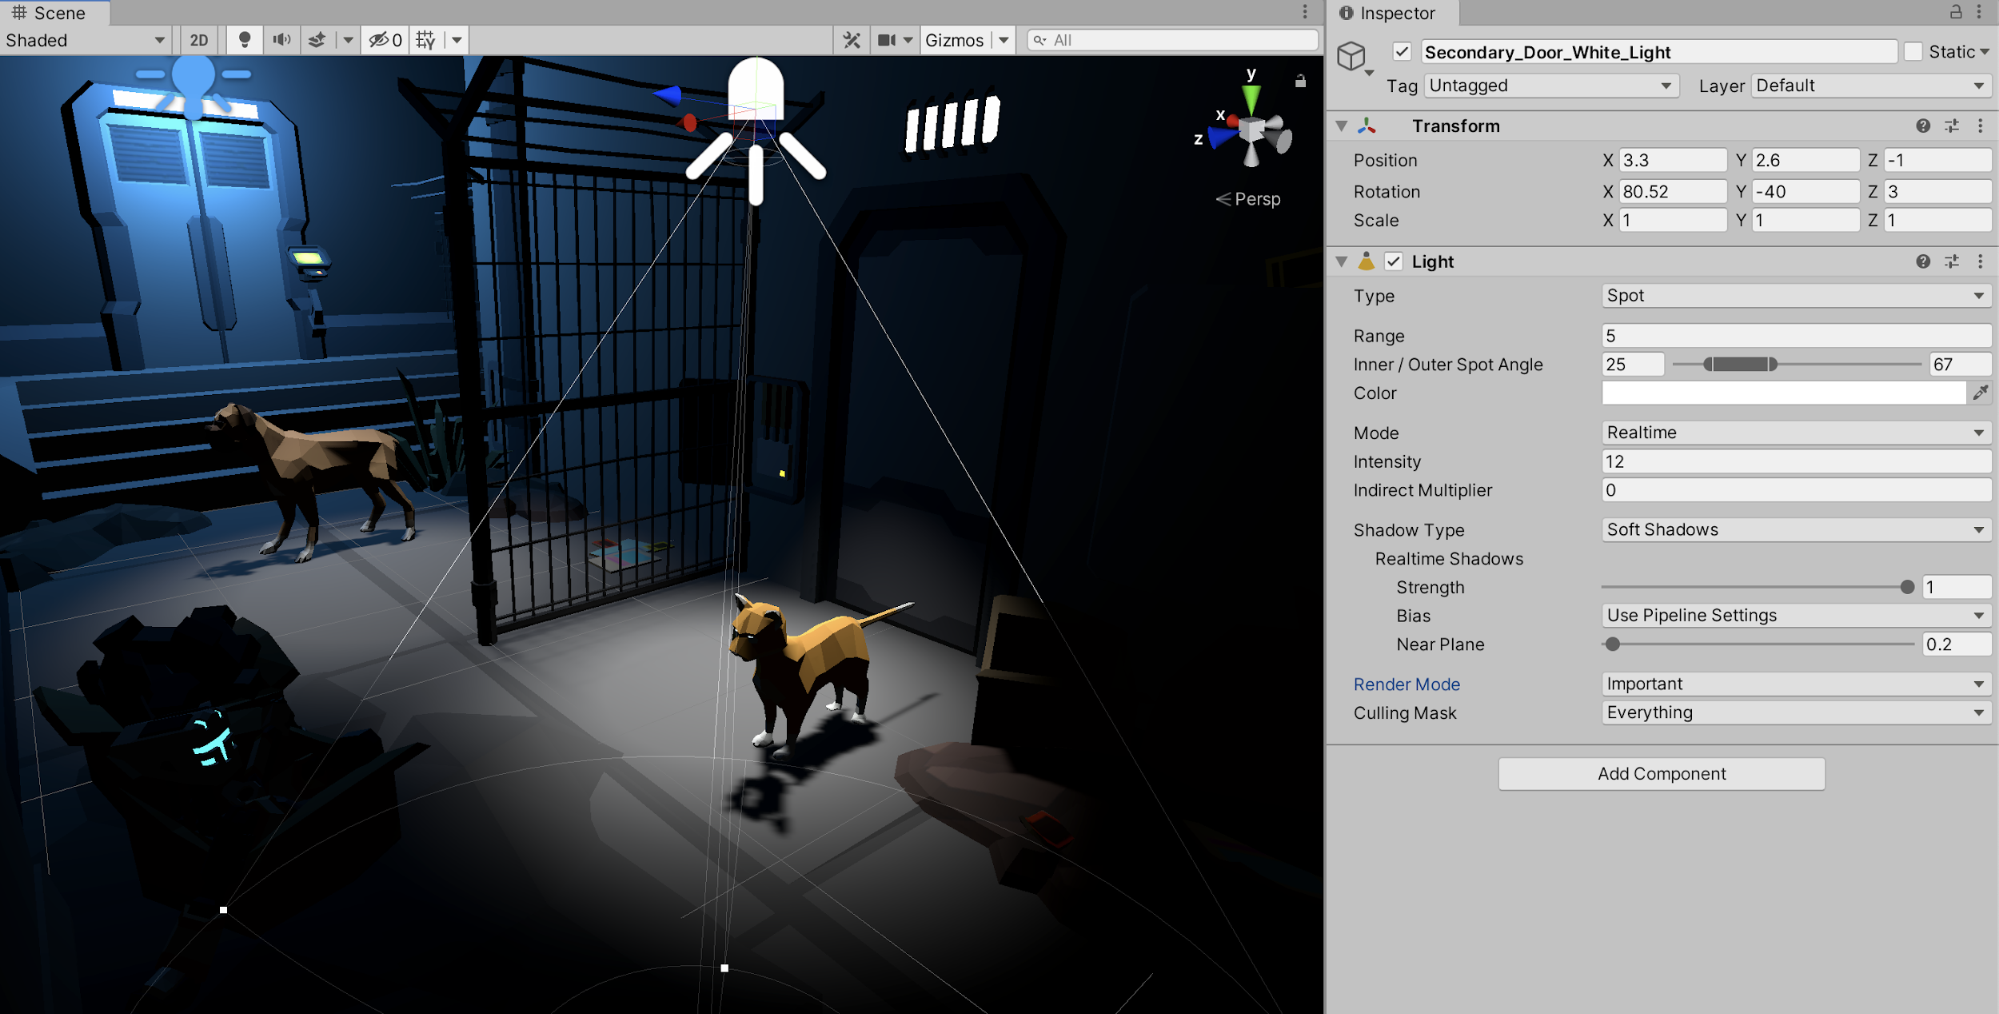
1. Make a duplicate copy of the Spotlight by selecting the Door_White_Light GameObject in the Hierarchy window, right-clicking, and then selecting Duplicate. A duplicate copy is added to your Scene. Rename it Secondary_Door_White_Light. Organize the Spotlight in the Hierarchy to be a child of the AlleyLighting GameObject.
2. Experiment with the lighting and practice making adjustments to the light’s properties. For our Scene, the Spotlight’s properties are adjusted to illuminate the cat character (Figure 11).
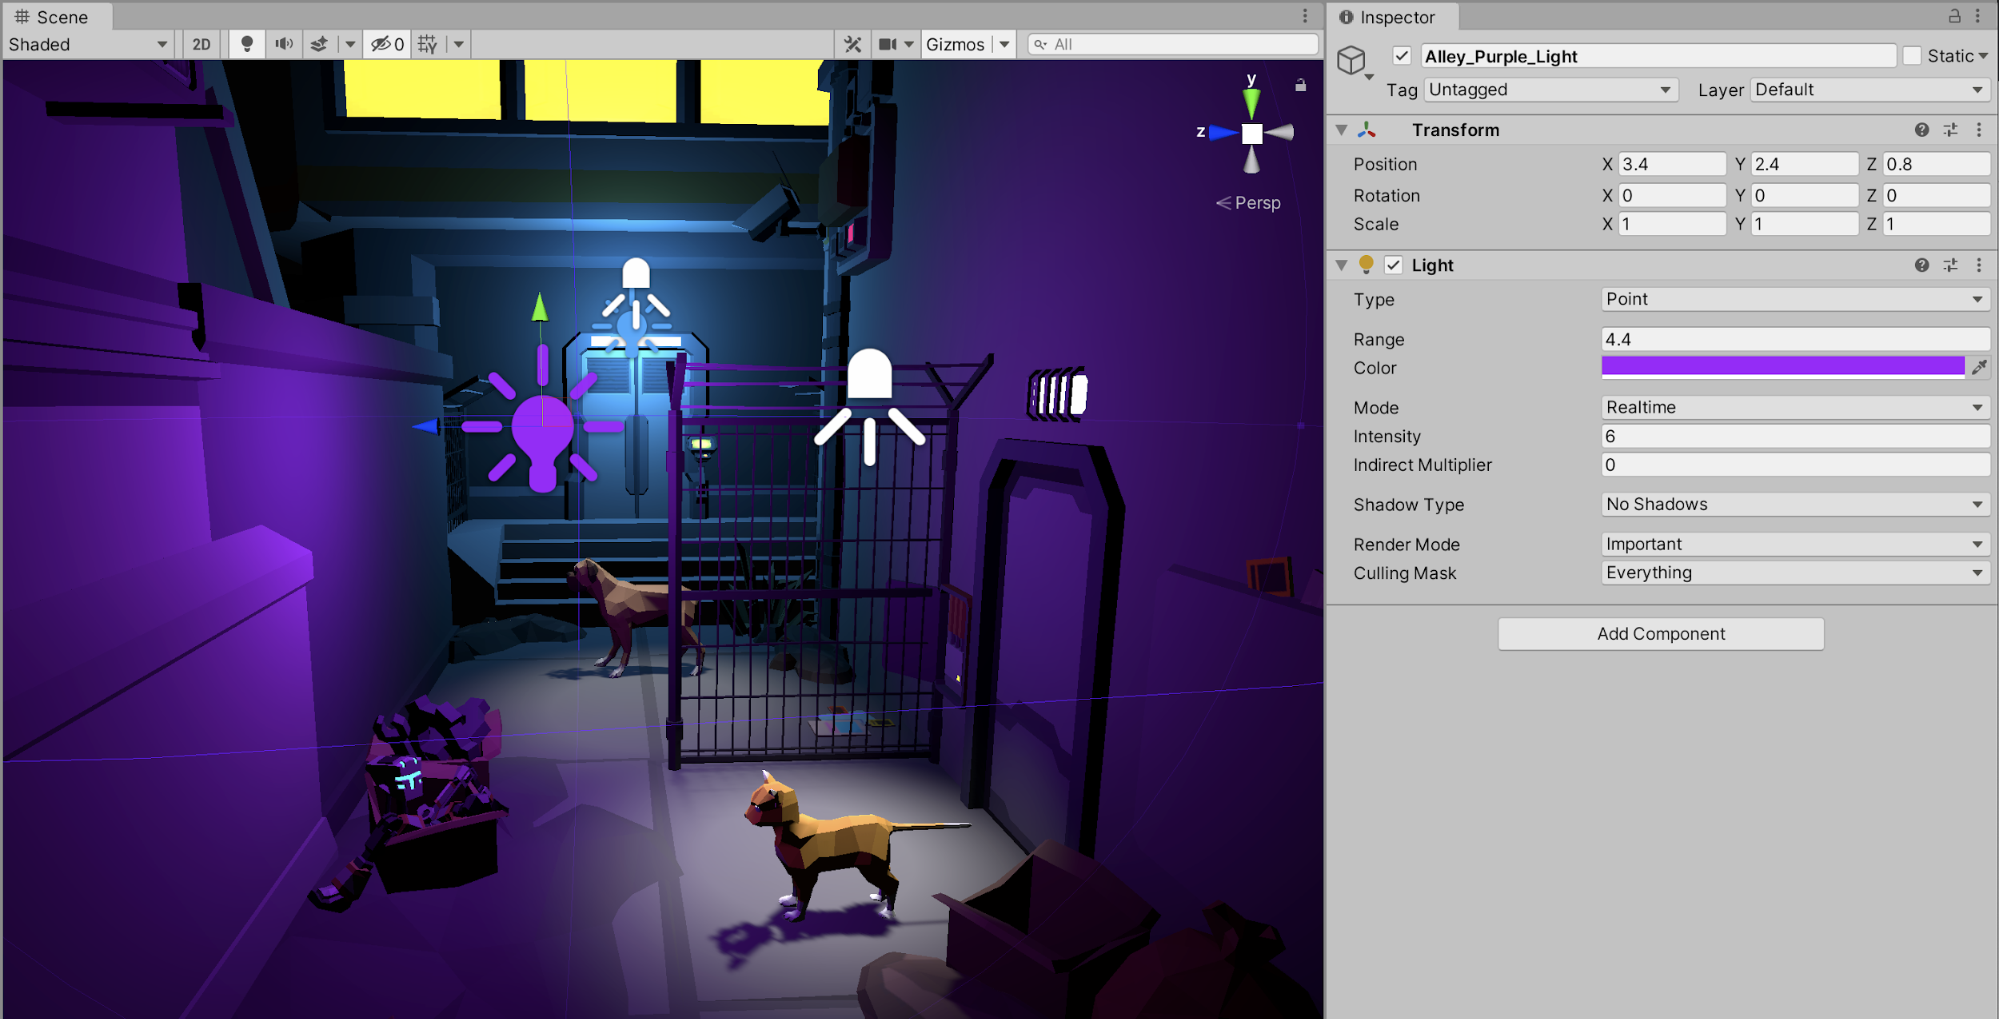
3. Duplicate the existing Point Light named Door_Blue_Light by selecting it in the Hierarchy, right-clicking, and selecting Duplicate. Alternatively create a new Point Light by selecting GameObject > Light > Point Light from the top menu drop-down and renaming it Alley_Purple_Light. Ensure the Point Light is organized in the Hierarchy to be a child of the AlleyLighting GameObject.
4. Position the Alley_Purple_Light above and to the left of the cat character, at a position of X=3.4, Y=2.4, and Z=0.8.
5. Set the Alley_Purple_Light’s properties to add a glowing ambiance and color to the Scene, as illustrated in the example below (Figure 12).
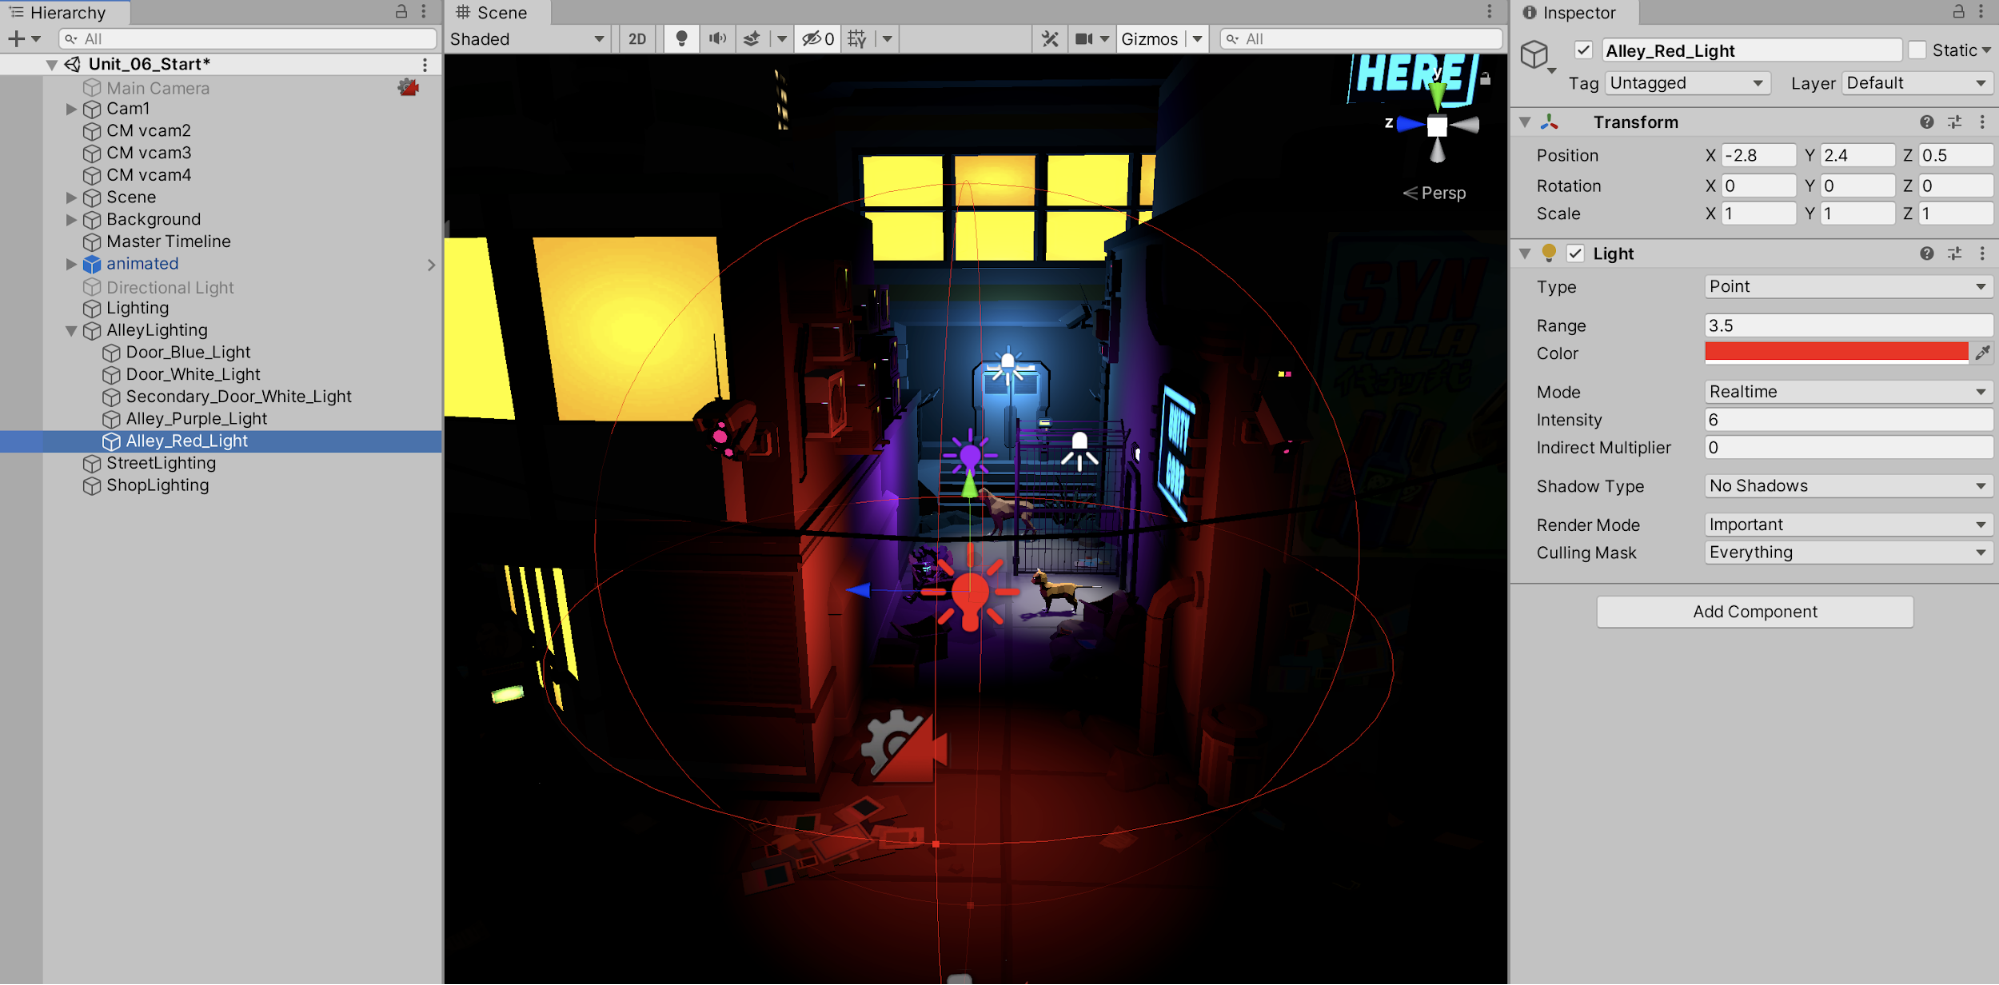
6. Moving farther down the alley toward the street, place another Point Light in a new position in the Scene. Rename it Alley_Red_Light. Adjust the light’s properties to add color to the Scene, as illustrated below (Figure 13).
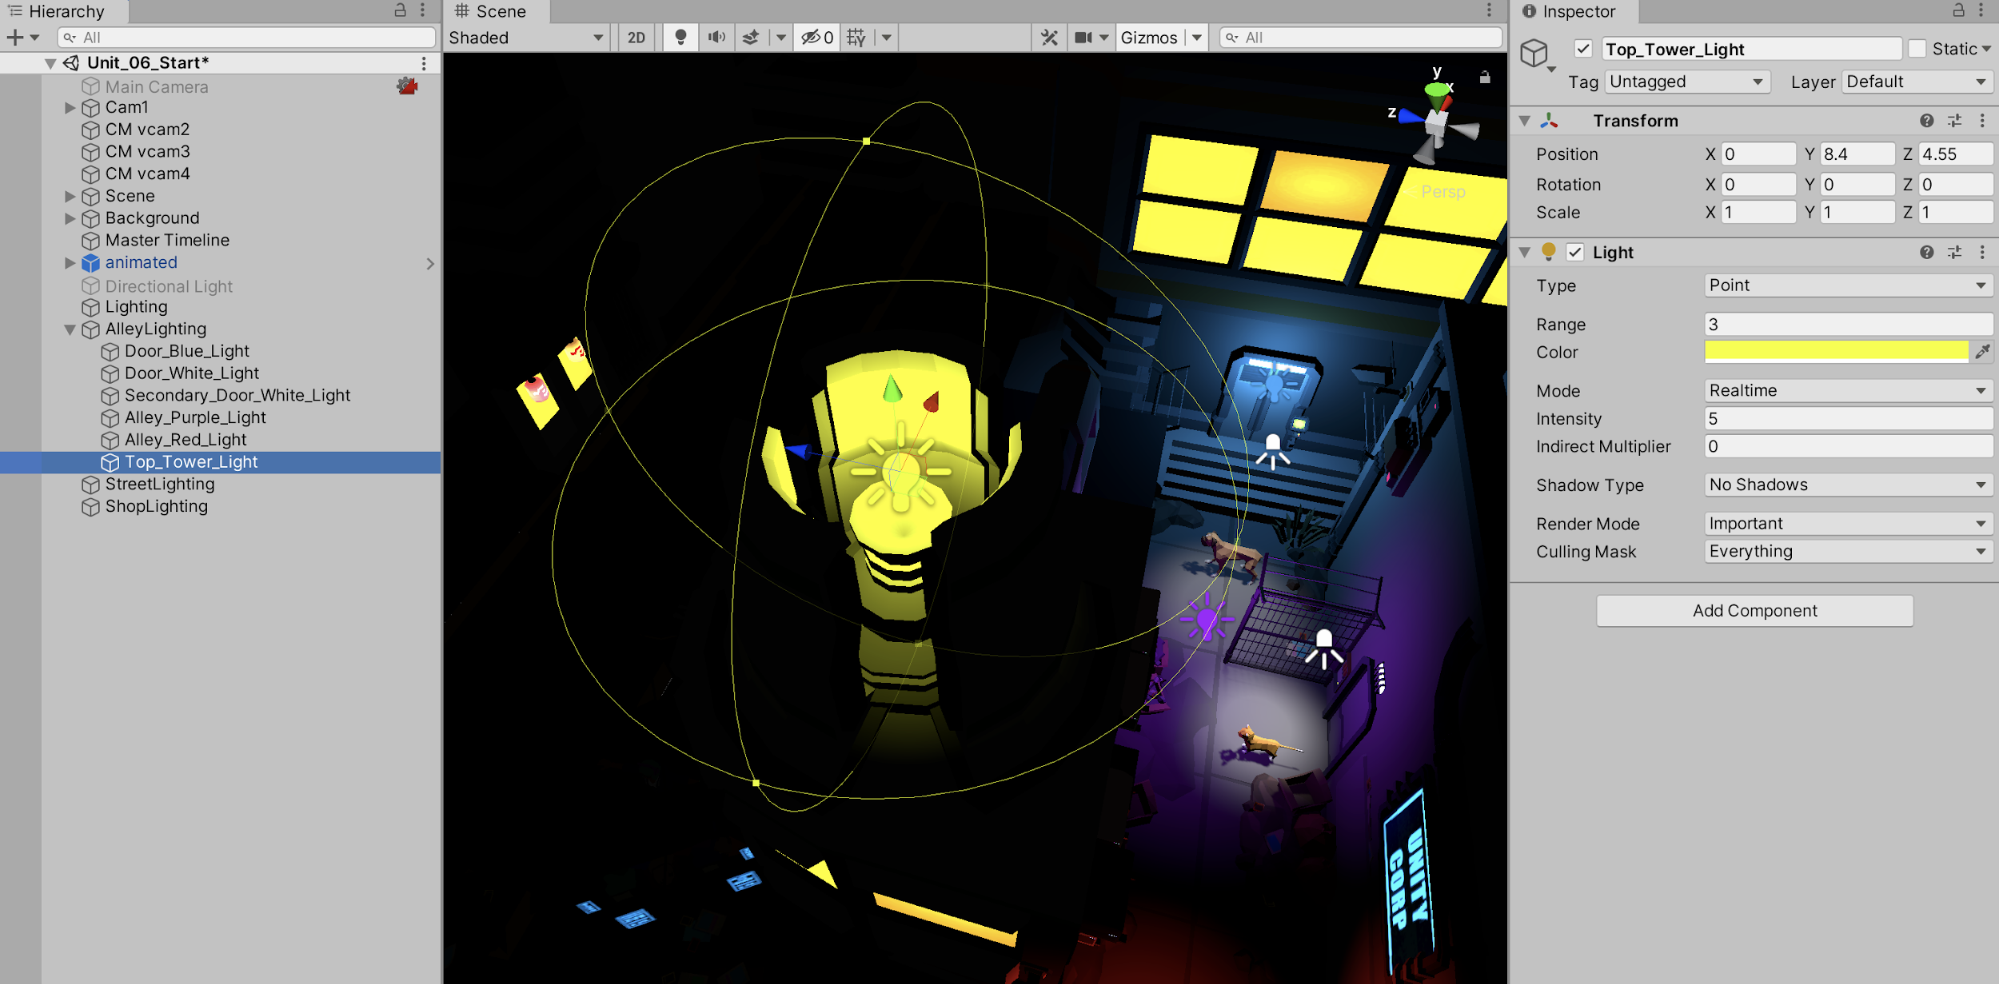
7. Duplicate an existing Point Light, or add another new Point Light to illuminate the lamp on the top of the building. Rename it Top_Tower_Light. Ensure that the Point Light is organized in the Hierarchy to be a child of the AlleyLighting GameObject. Position the Scene view to a higher vantage zoomed in to the top of the nearby building, and with the Top_Tower_Light selected in the Hierarchy window, select GameObject > Align With View, or directly position the light’s coordinates to X=0, Y=8.4, and Z=4.55. Adjust the Top_Tower_Light’s properties to illuminate the Scene from the perspective of a higher light source (Figure 14).
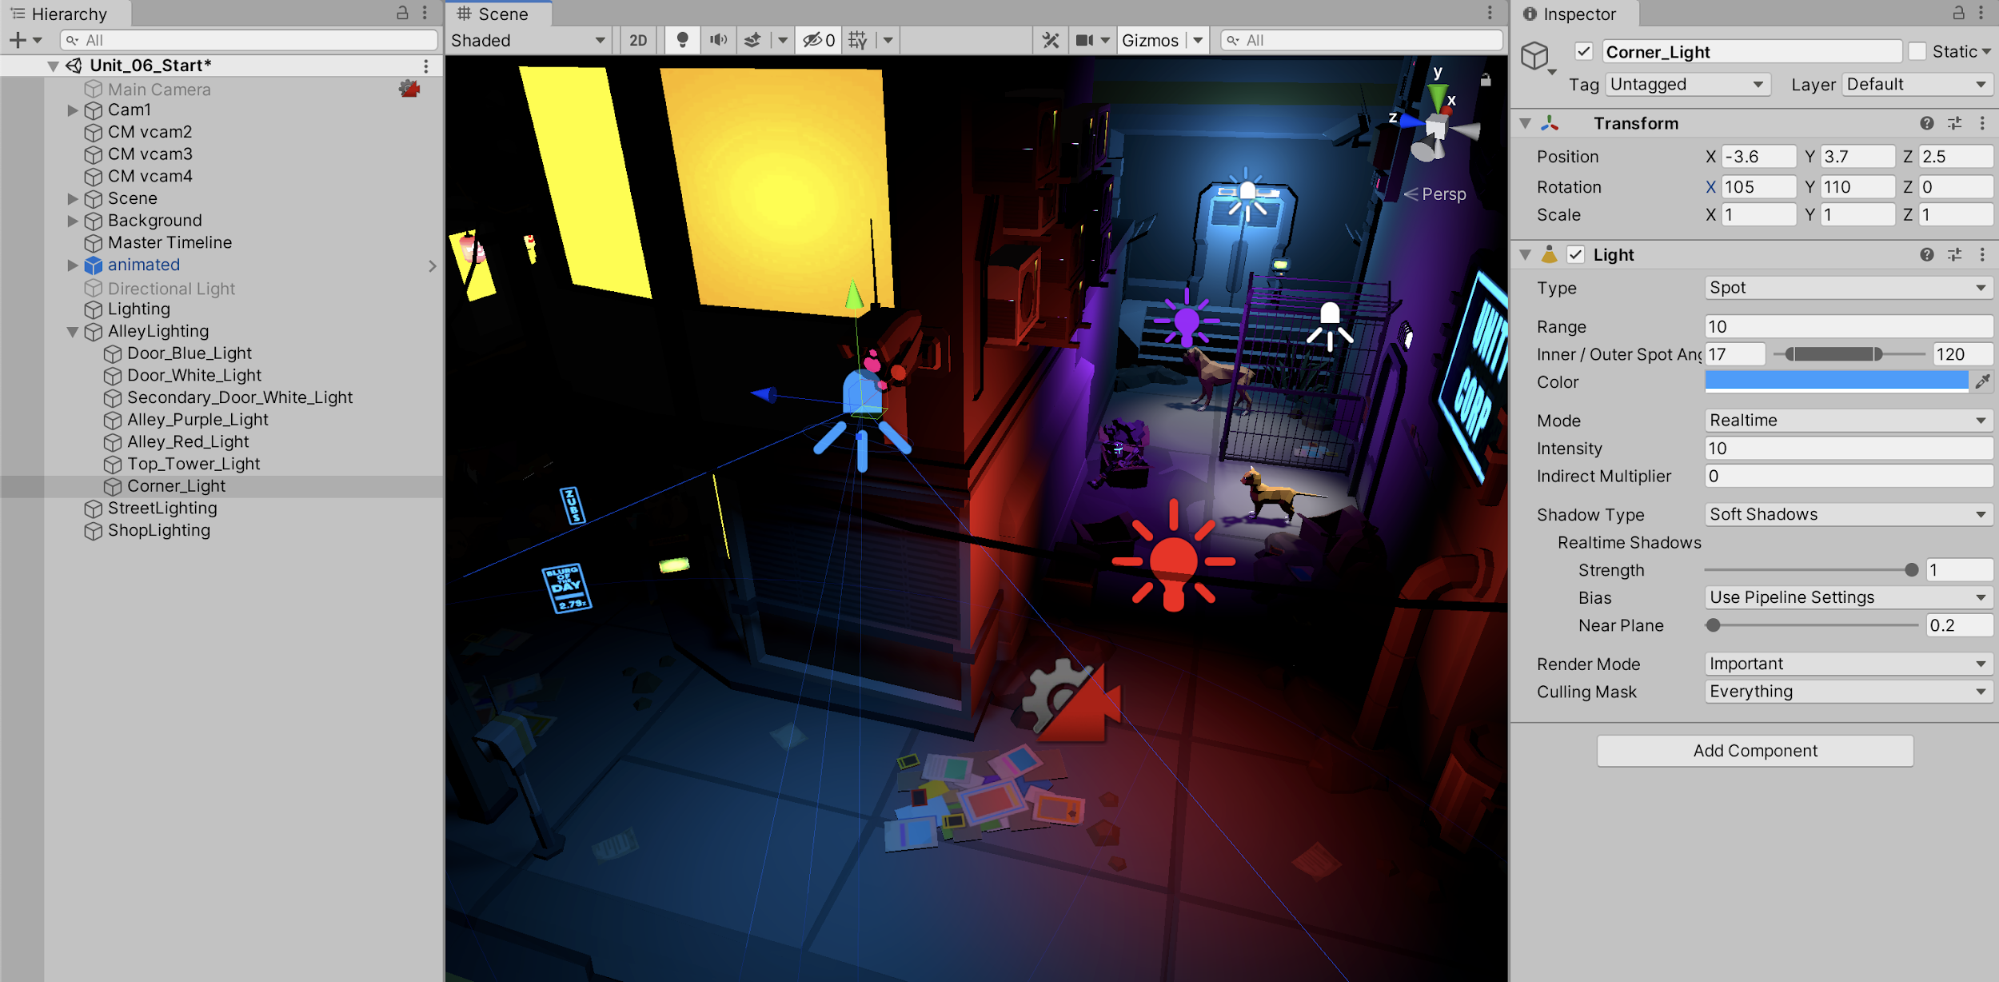
8. Add one more light to the alley Scene by duplicating an existing Spotlight, or adding a new Spotlight, and renaming it to Corner_Light. Ensure that the Spotlight is organized in the Hierarchy to be a child of the AlleyLighting GameObject. Position the Scene view to a vantage showing the street corner, and with the Corner_Light selected in the Hierarchy window, select GameObject > Align With View, or directly position the light’s coordinates to: X=-3.6, Y=3.7, and Z=2.5. Set the Rotation to X=105, Y=110, and Z=0. Adjust the Corner_Light’s Inner / Outer Spot Angle to 17 and 120, giving a wide angle cone of illumination where the alley meets the street corner in the Scene (Figure 15).
6. Adding Shop Lighting with Hard or No Shadows
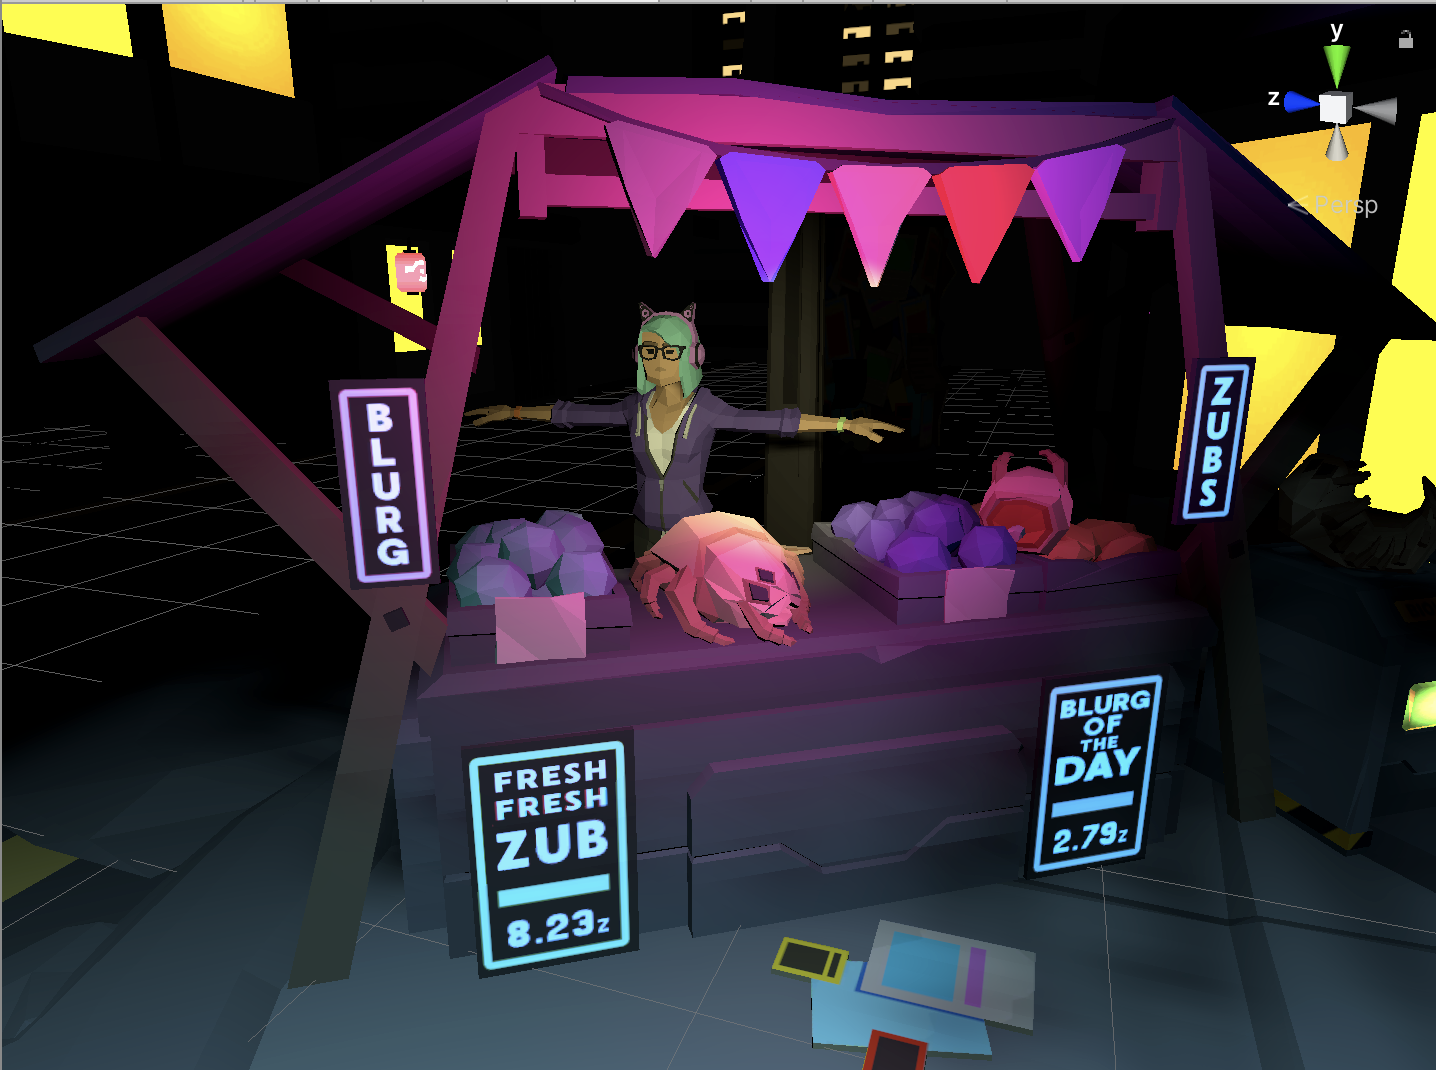
As the Chase Scene animation transitions down the street, the Cinemachine Virtual Camera pans to a sidewalk shop. You will create a combination of three lights, setting their Intensity, Orientation, and Position to illuminate the animated character behind the counter.
1. As a fun challenge, light the shop to approximate the lighting conditions in the example shown in (Figure 15). Create a combination of Point and Spot Lights. Organize them into their proper Hierarchy locations. Set their Positions and any Rotation angle they might have.
2. Set lighting properties that may include any adjusted values for Range, Angle, Color, or Intensity.
3. Set the Shadow Type to cast Soft, Hard, or No Shadows.
The Hard Shadow property setting produces shadows with a sharp edge. Hard shadows are not particularly realistic when compared to Soft Shadows; however, they involve less graphical processing and are quite acceptable for many purposes. As an artistic decision, or if you don’t want a light source to cast a shadow at all, set the Shadow Type to No Shadows.
The Shop is now lit by a combination of Spot and Point Lights (Figure 16).
7. Recap
Unity’s lighting system produces a high quality visual effect that is sophisticated and varied. The process for creating lighting in a Scene is intuitive, flexible, and highly specific — and the lighting system can be adapted to suit a variety of conditions. Unity’s lighting offers a visual fidelity that can enhance Scenes not only with the lights themselves, but also the shadows they cast, as well as through additional features like range, angle, color, and intensity.