Lesson 7.4 - Final Render
Tutorial
Beginner
+10XP
25 mins
134
Unity Technologies
You have finished your animation. Now you need to do a high-quality final render of your work. In this lesson, you’ll learn how to export a high-resolution movie and image sequence out of Unity that can later be compiled in a non-linear video editing tool.
Languages available:
1. Lesson Overview
2. Installing the Unity Recorder Package
You’ll use the Recorder Package to render out an animation. If you don’t already have the Recorder Package installed in your project, here’s a recap.
1. From the Unity Editor, select Window > Package Manager.
2. In the Package Manager window, select Advanced > Show Preview Packages (Figure 01).

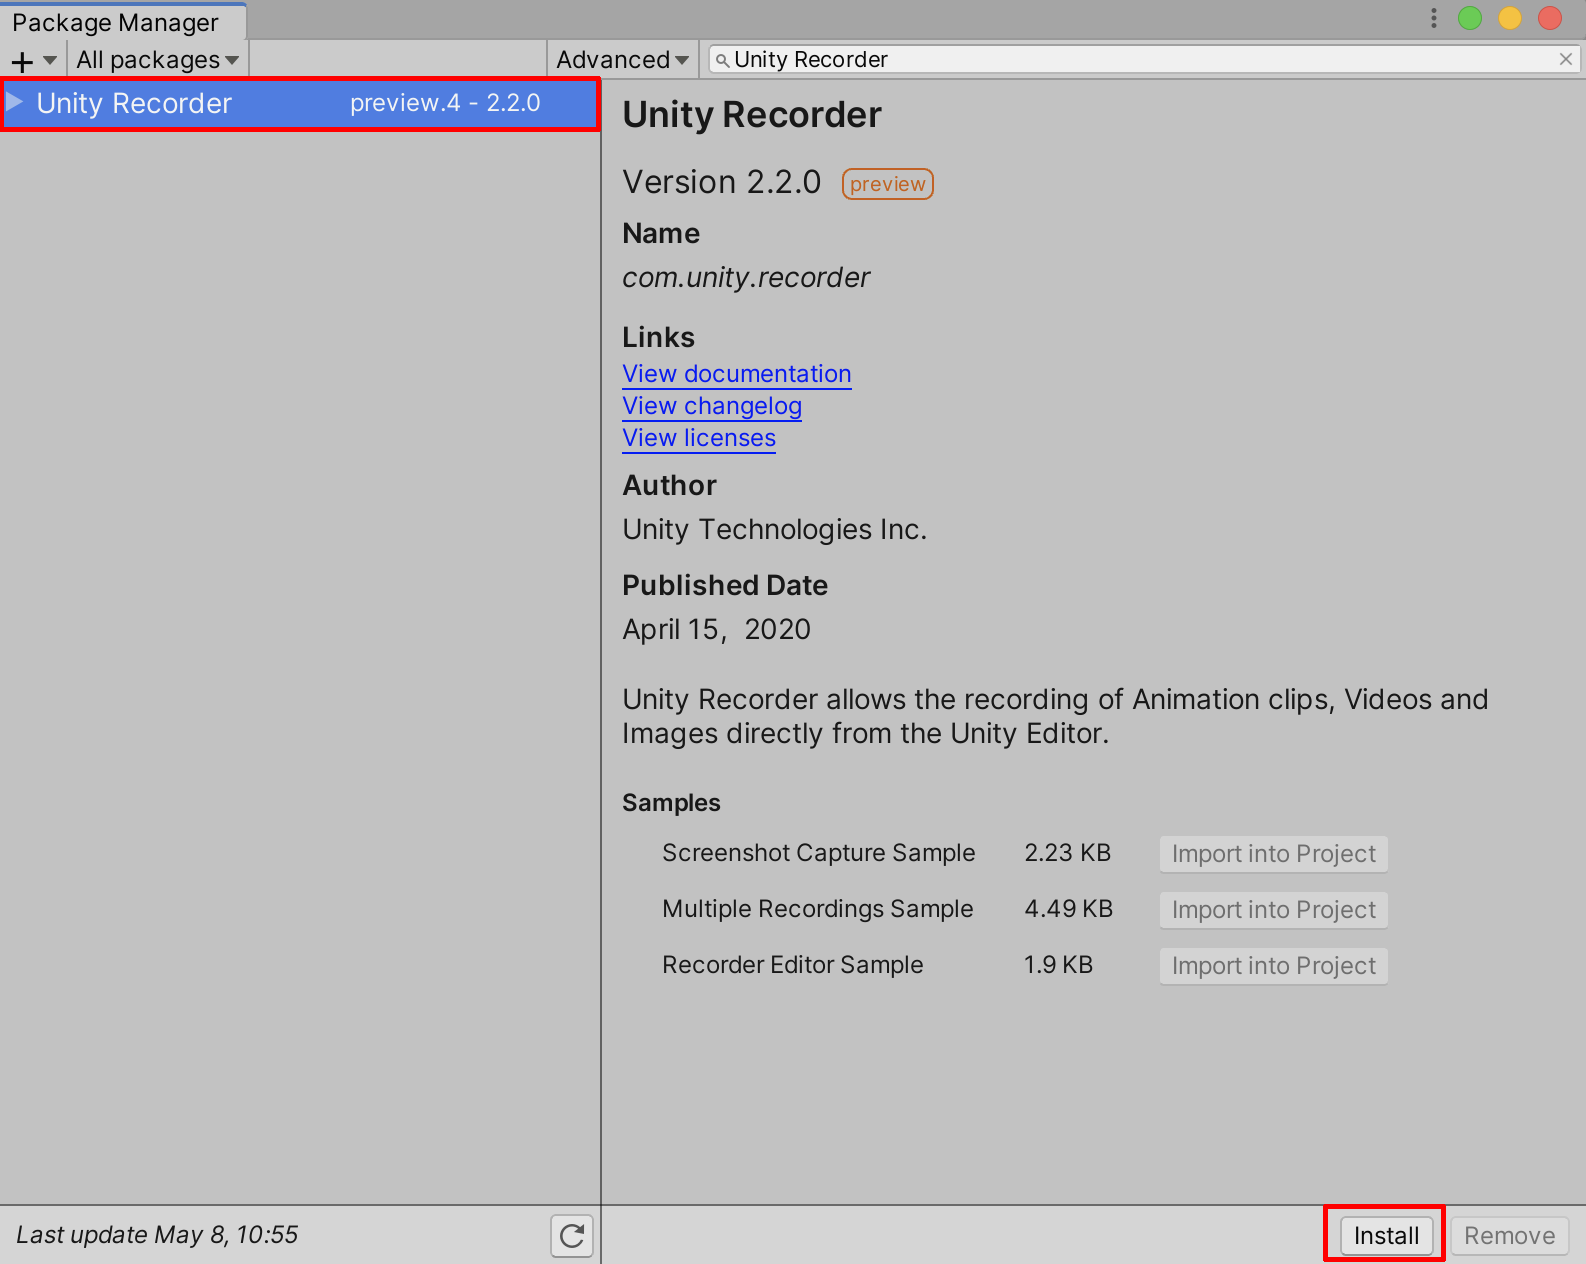
3. Search for and select Unity Recorder, then select Install (Figure 02).
4. Close the Package Manager window.
3. Using the Recorder
You’ll be able to render your movie files by recording directly from the Timeline.
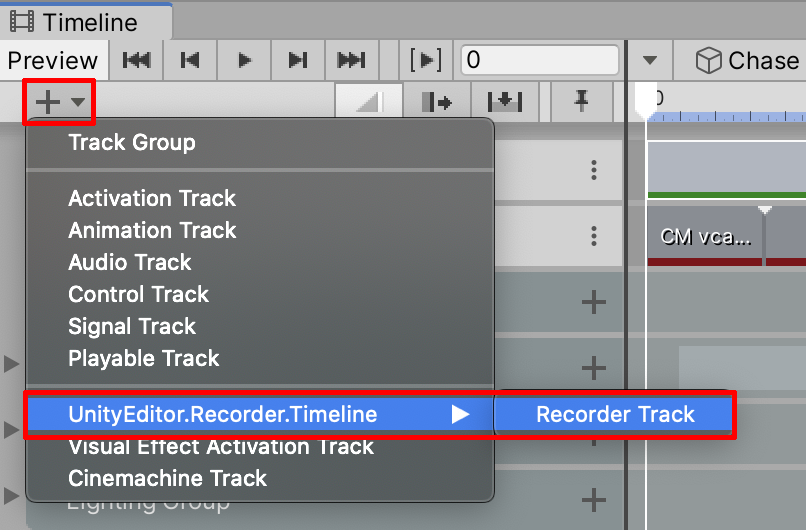
1. Select the Master Timeline in the Hierarchy window. We’ll use a Recorder Track to control the output of our project. To add a Recorder track, click + in the Timeline window and select UnityEditor.Recorder.Timeline > Recorder Track (Figure 03).
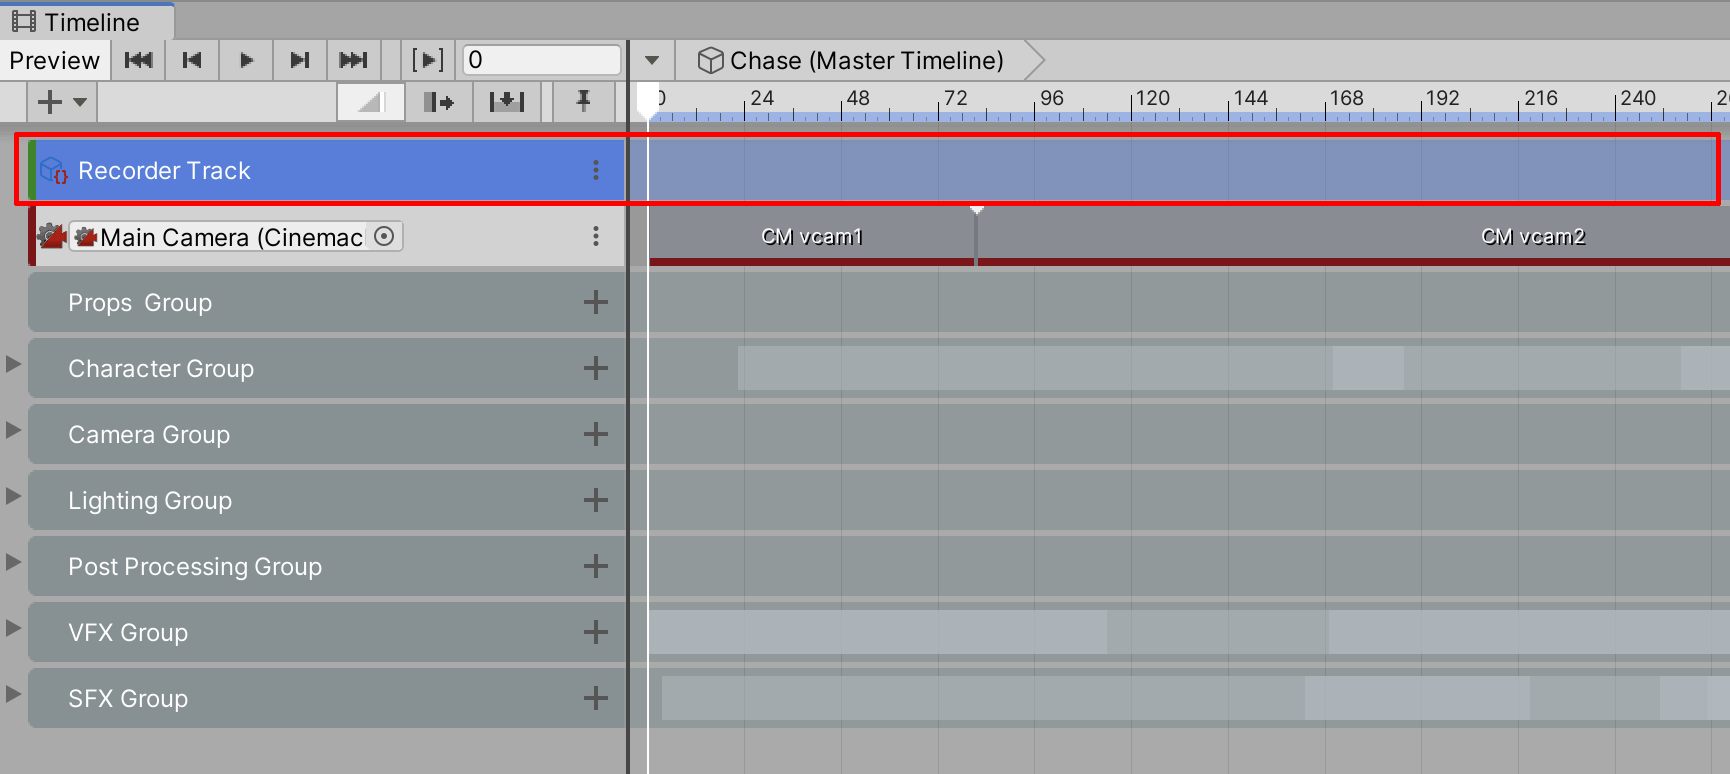
This will create a new Recorder Track for your Timeline sequence. It's recommended that you position the Recorder Track at the top of your Master Timeline’s Hierarchy (Figure 04).
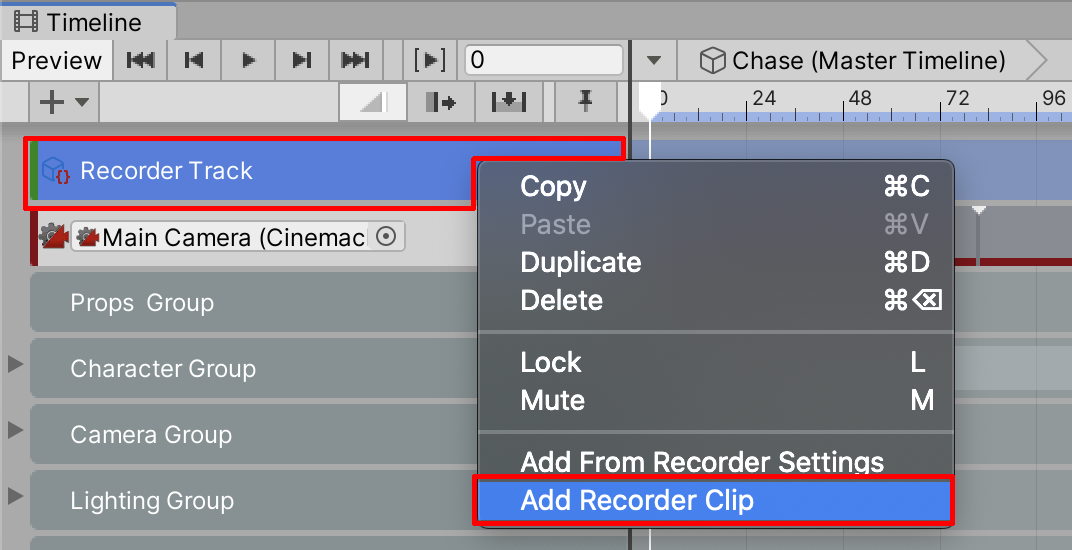
2. Once you’ve added the Recorder Track, select it by right-clicking and then selecting Add Recorder Clip, which will add the clip to the Timeline (Figure 05).
The Recorder Clip behaves like most other clips on the Timeline; you can move and adjust the length of the clip as desired. For instance, it may not be necessary to output a Timeline sequence in its entirety. You can configure the Recorder Track so it only records a designated section. In the example below, the Recorder Track is set to only record the second Cinemachine Camera’s view. With the trimmed Recorder Track shown, the rendered video will not include the remainder of the Timeline sequence (Figure 06).

3. Set the Recorder Clip back to include the full Timeline. Select the clip’s beginning and end positions and drag their trim handles to make sure the full length of the Timeline will be recorded from Frame 0 to Frame 539.
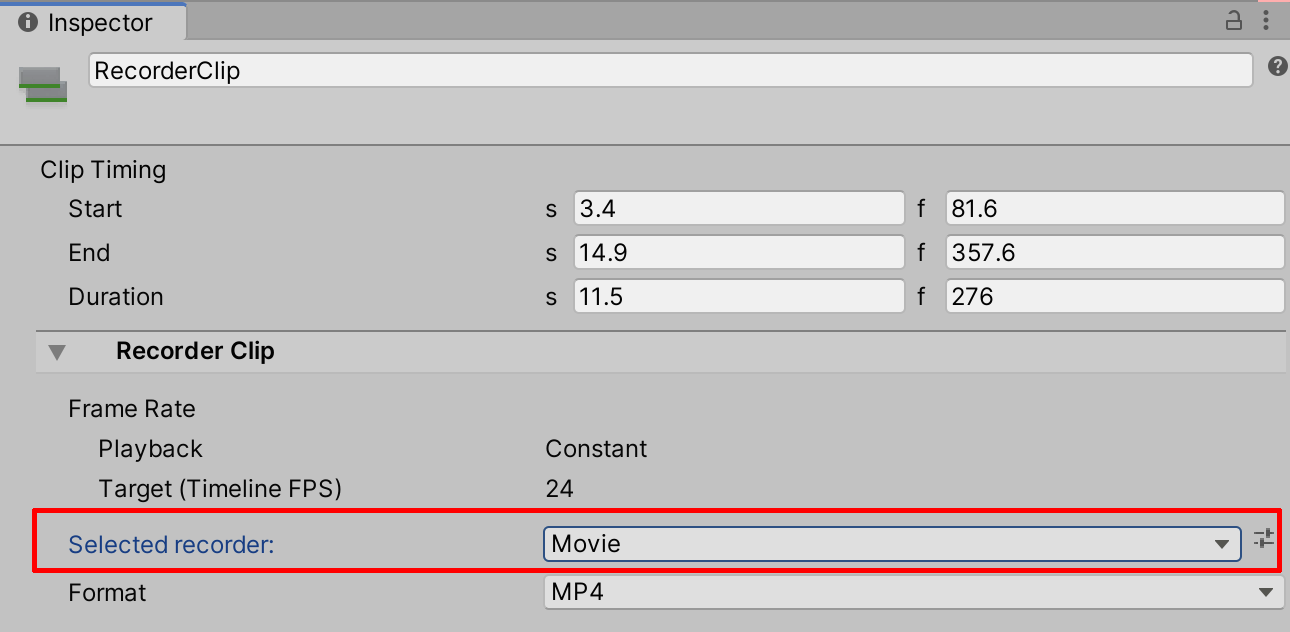
4. Select the Recorder Clip to establish the properties in the Inspector. In the Selected Recorder field, choose the output option. There are two main options for rendering an animated movie: Movie and Image Sequence. Select Movie (Figure 07).
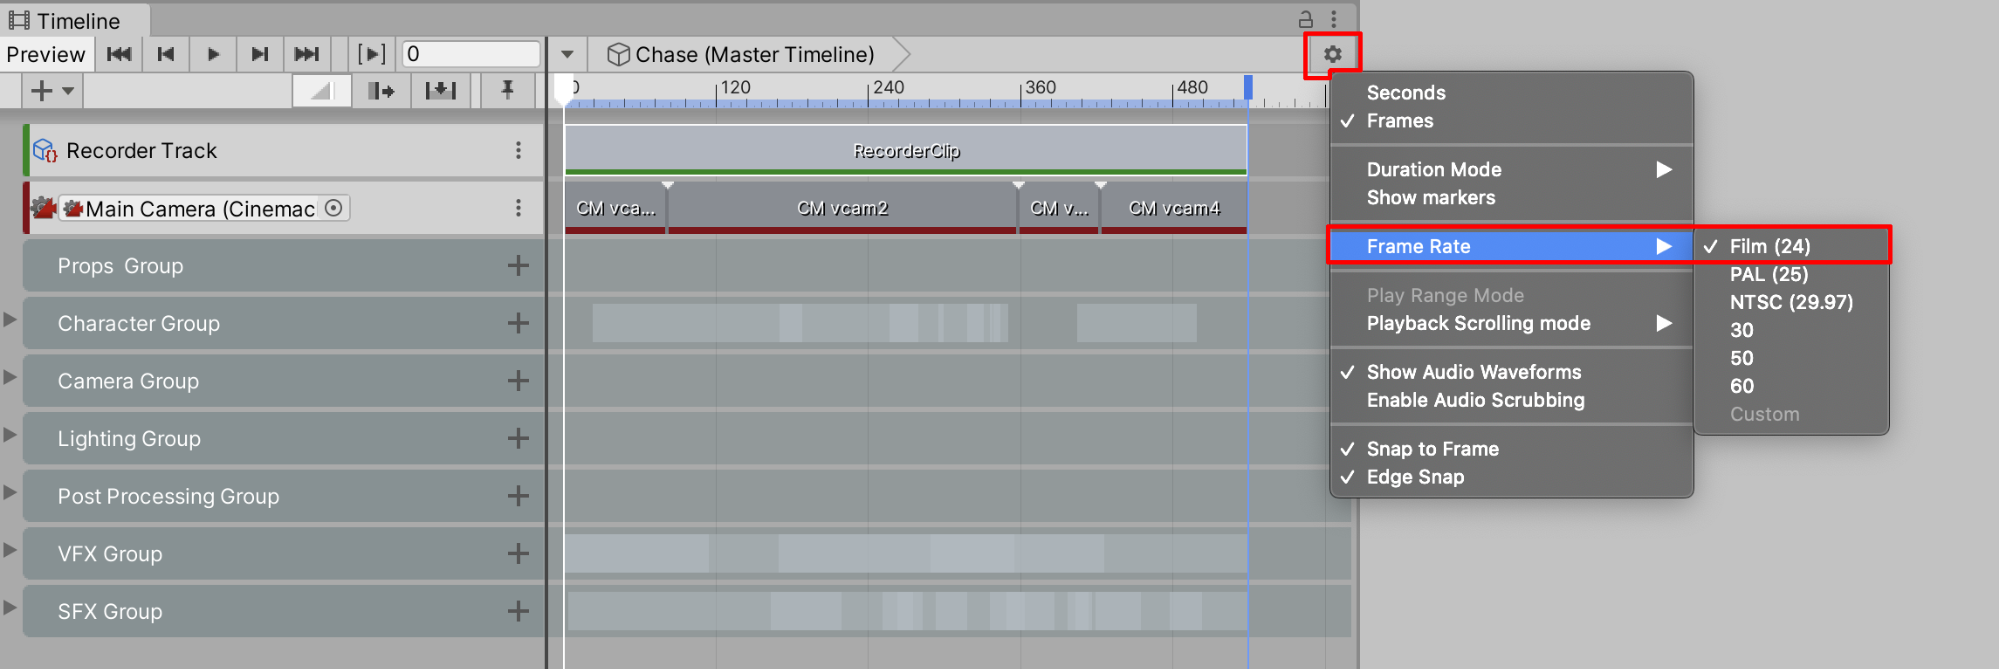
5. We will render our final animation as a .mp4 file. When rendering a movie file as a .mp4, the Recorder Clip will match the frame rate designated in the Timeline. To change the frame rate, select the Options gear icon to the right of the Timeline window, and then select Frame Rate. Select from the designated frame-rate options. We will keep our project’s frame rate consistent with a film animation of 24 frames per second (Figure 08).
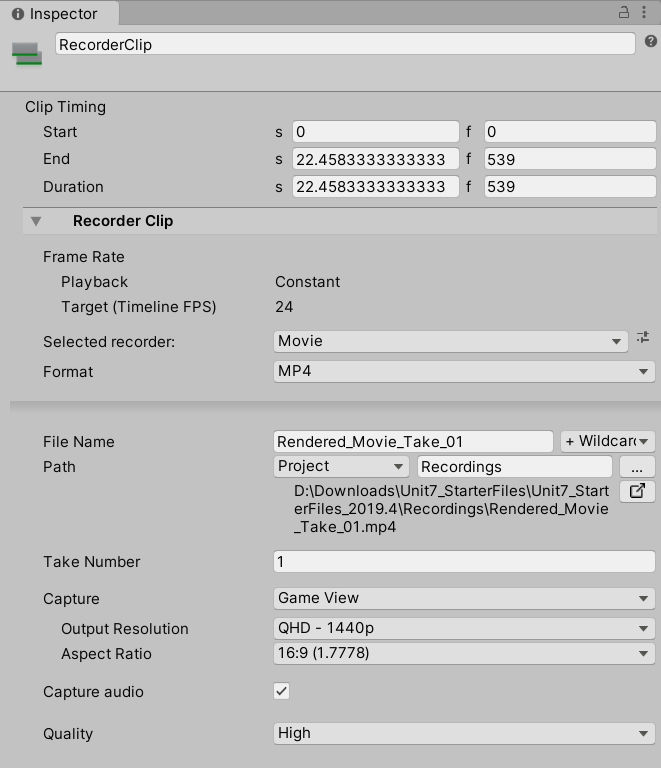
The Recorder settings will render your video files to a folder in your project titled Recordings. You can keep the file name set to Rendered_Movie_take-001.mp4 or give it a different name.
6. For the highest possible video quality, set the Output Resolution to 4K - 2160 p. Otherwise, set the Output Resolution to match your project’s needs. You won’t be able to tell the increased resolution if you render higher than your monitor resolution, so stick to the resolution of your display.
7. Look over all of your Recorder Clip’s settings to ensure that they match the specifications below. Note that your file’s path will look different, being unique to your computer (Figure 09).
8. Select Play to enter Play Mode in the Game window and render the exported .mp4 file (Figure 10).
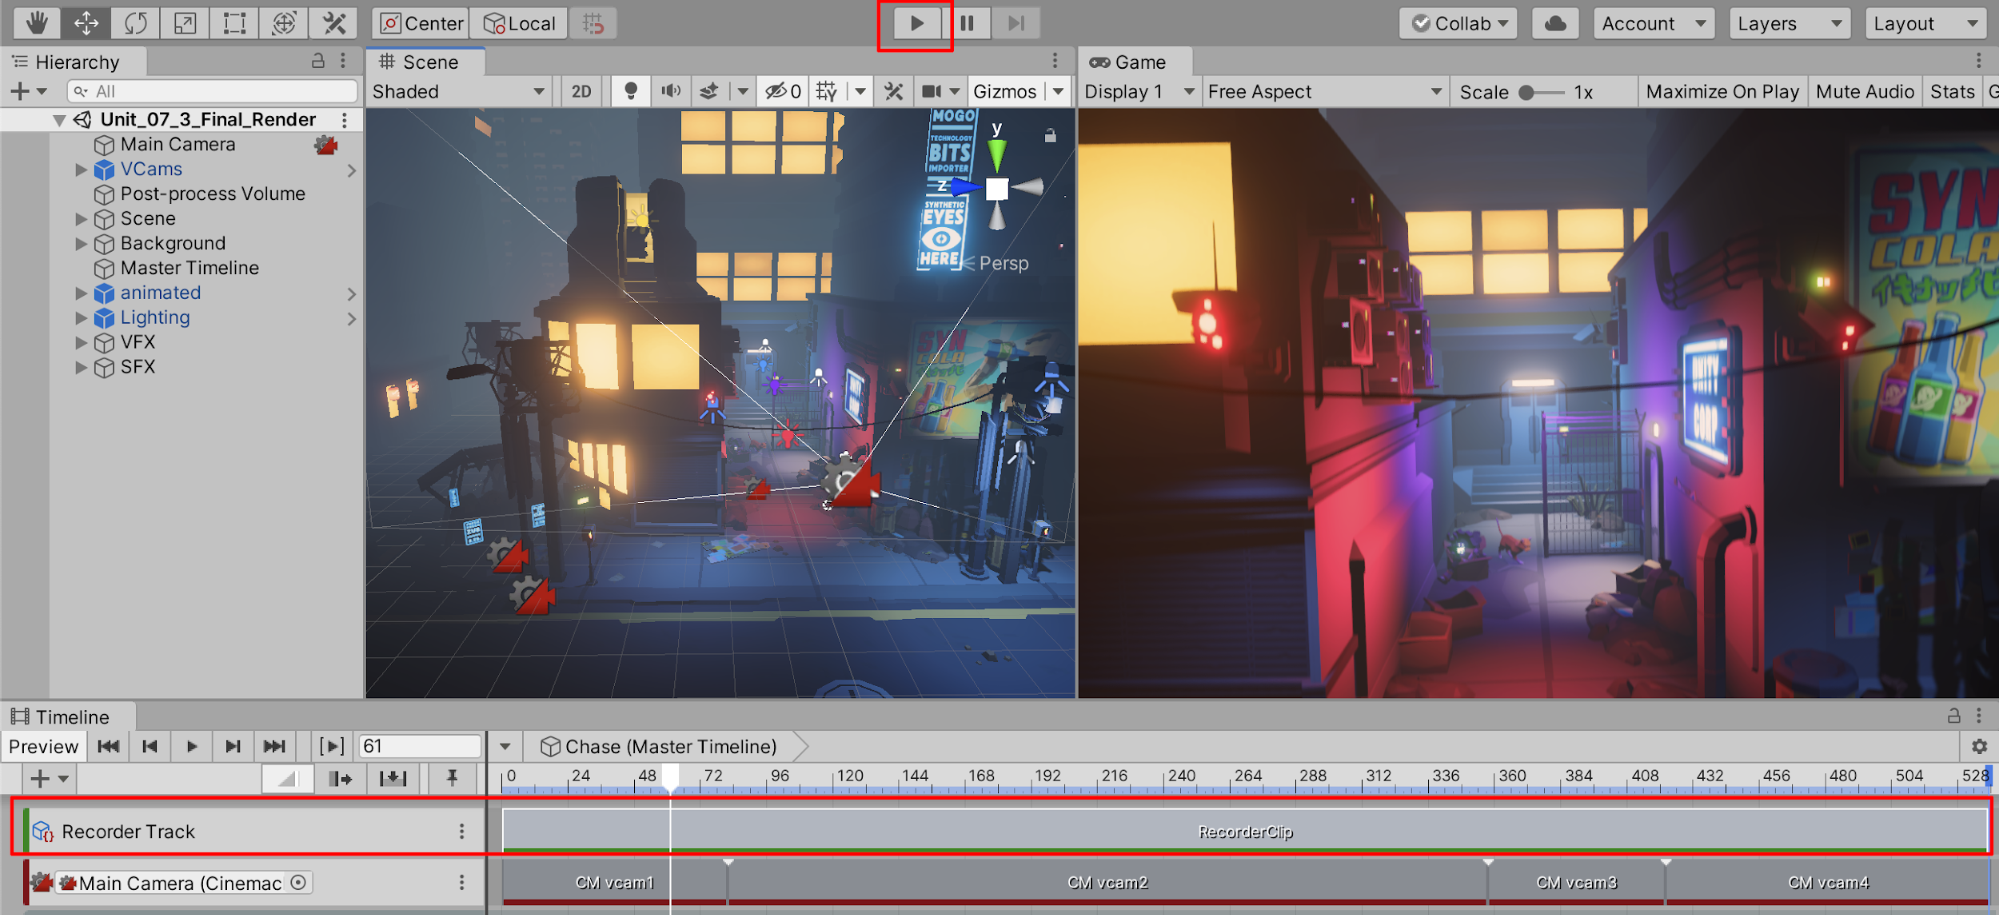
At this point, since the Recorder is now enabled, it’s important to note that several changes are happening. First, you’ll notice that the audio is not playing back in real time during Play Mode. The Recorder will render the audio into the final video file, even though you can’t hear the sound play at the same time.
Unless your Recorder Track is muted, every time you enter Play Mode, it will render a new file. Navigate to your projects folder titled “Recordings” and preview your render by opening it up in a video player.
If you want to preview your animation as you’d normally do without rendering a file, it’s important to remember that you will need to mute the Recorder Track in the Timeline.
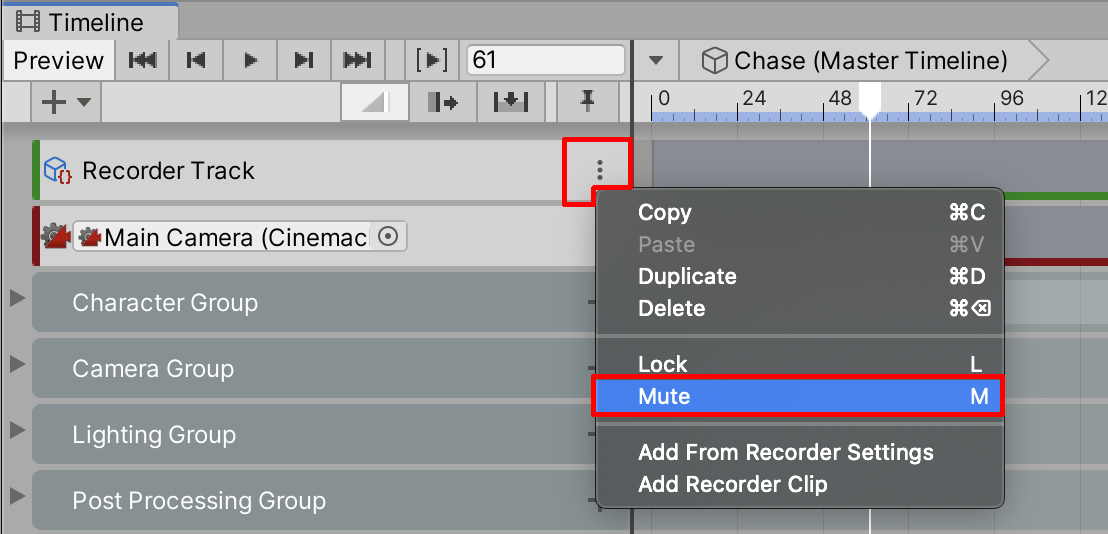
9. After your Scene has played through one time and the movie file has been exported — and with the Recorder Track visible at the top of the Timeline — select the track’s menu and select Mute to disable recording during Play Mode (Figure 11).
4. Exporting as an Image Sequence
For most cases, rendering a movie file in high-quality 4K resolution will be all that you need to do. For the highest-quality master rendering of your project, however, and as an optional step, you can further adjust the Recorder’s properties to export each frame as a separate image file in 8K resolution.
1. In the Inspector window, change Selected Recorder from Movie to Image Sequence and the Format to PNG. Increase the Output Resolution to 8K - 4320p (Figure 12).
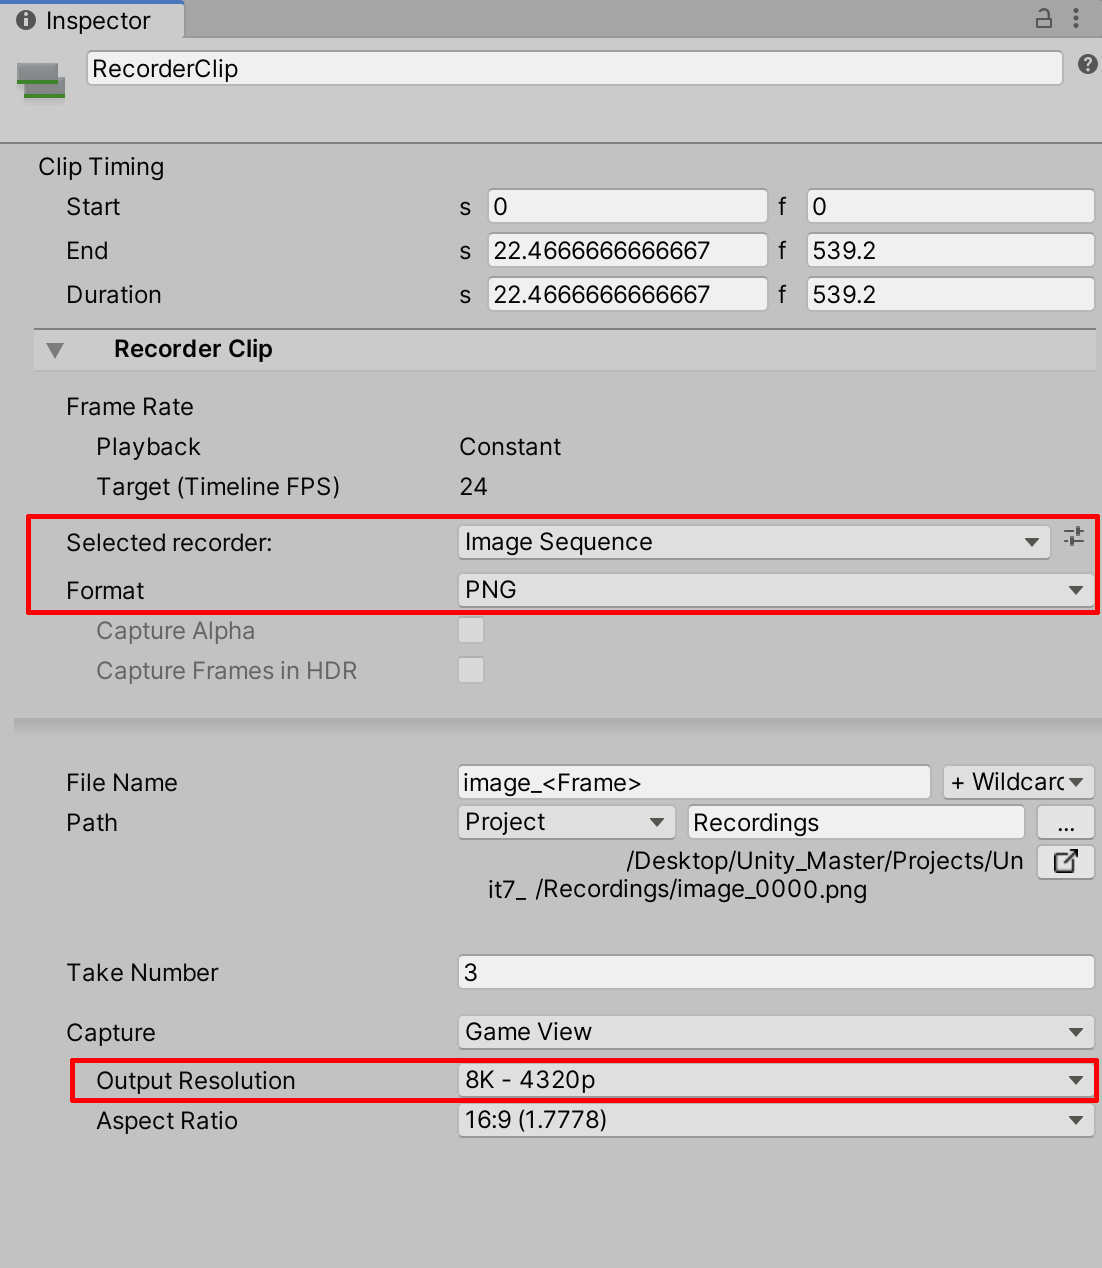
By exporting each frame as a separate image file, you’re better able to customize the encoding settings afterwards using video editing software, such as Adobe Premiere or DaVinci Resolve. When the individual .png images are rendered and saved to a designated folder, the resulting frames can be brought into the video editing system for further encoding. By first saving high-resolution 8K frames from Unity, you’re able to process them further using your customized workflow and eventually render them back into 4K video resolution. Note that the audio tracks will need to be brought in to the video editing software separately.
5. Recap
Congratulations! You’ve successfully rendered a final export of the project’s cinematic animation. The Unity Recorder essentially produces a final mixdown of the Scene into either a saved movie or a series of still frames for further processing. You now have a high-quality completed movie with the resolution of your choosing and playable in a format that nearly all device platforms support.
You’ve earned your stripes learning the Unity Editor! Now that you’ve gained experience working within the Editor, you’ll be able to realize your vision for cinema, animation, and storytelling. May your efforts be productive and may all of your synapses spark creativity! Experiment and produce with full confidence and a sense of adventure. The world awaits what you will create.