Lesson 7.3 - Titles
Tutorial
Beginner
+10XP
50 mins
165
Unity Technologies
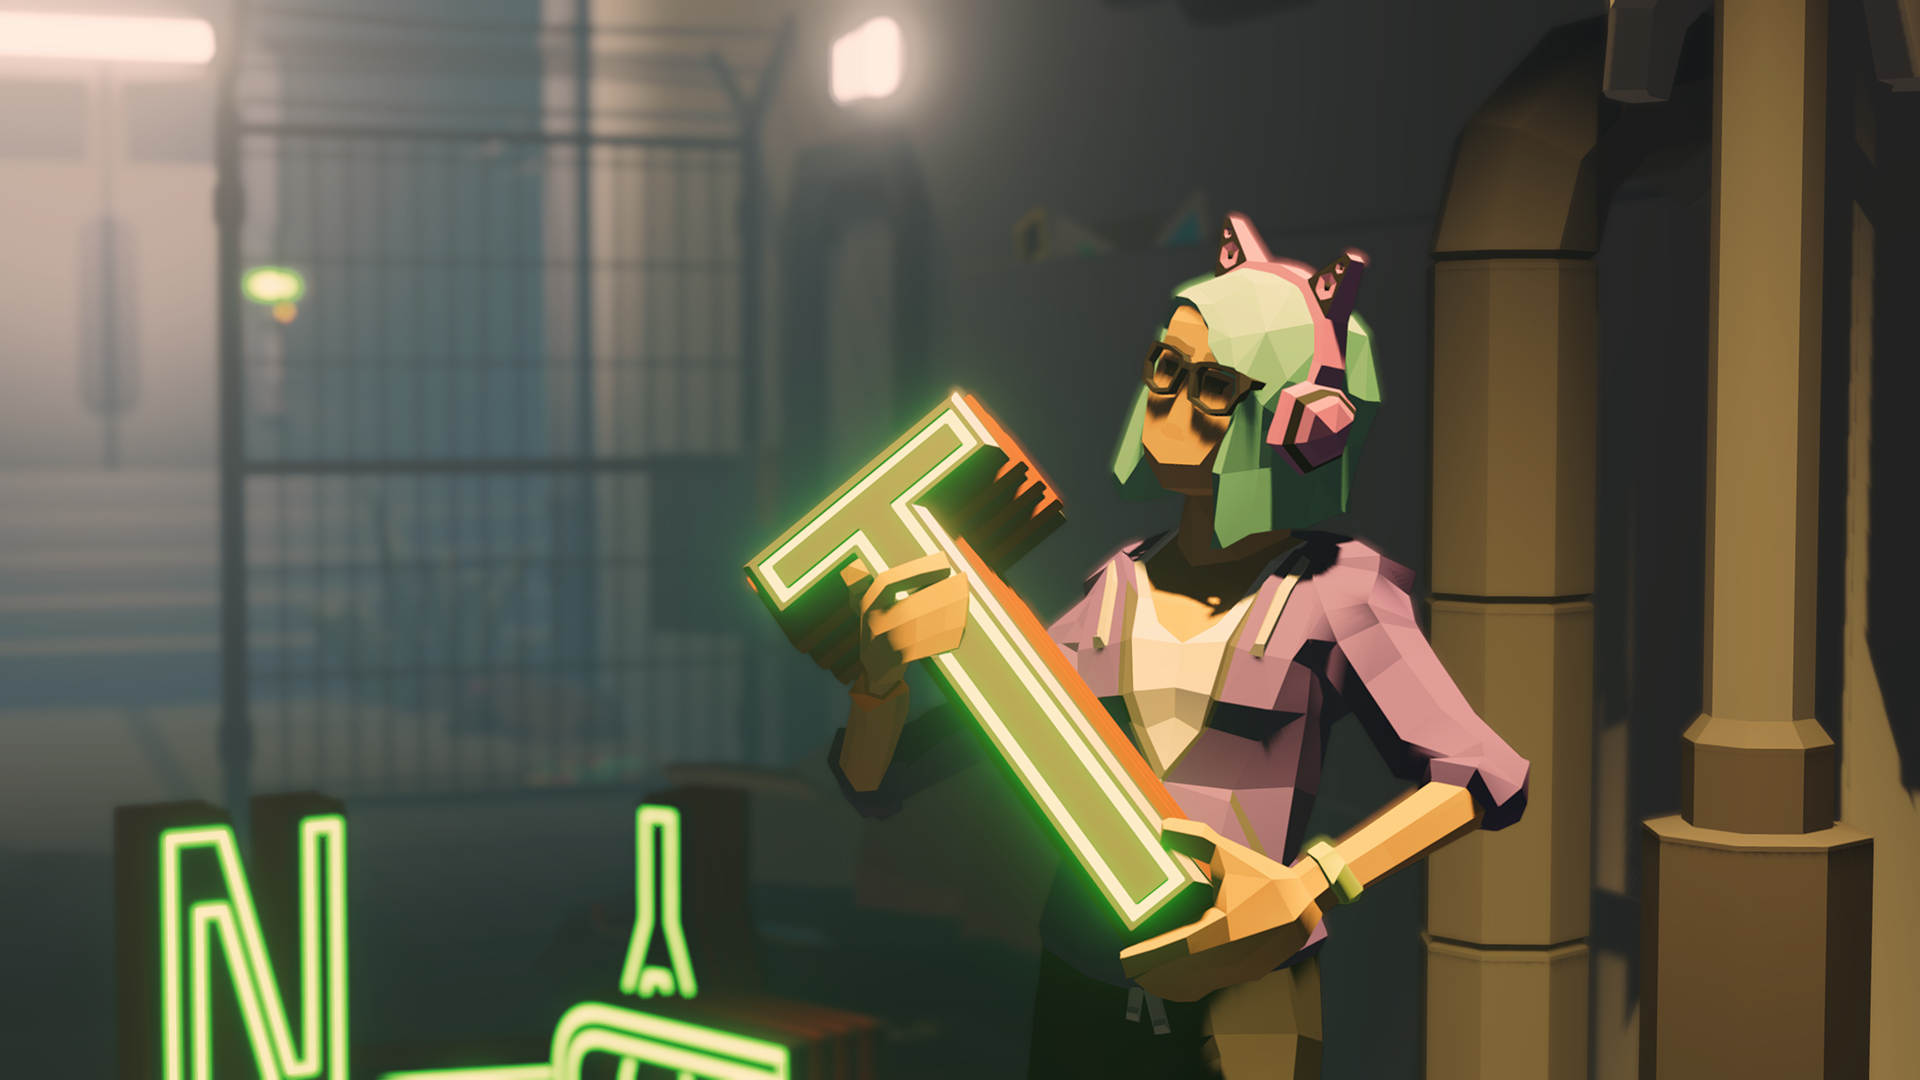
Every movie has titles. In this lesson, we’ll show you how to add titles to your project.
Languages available:
1. Lesson Overview
2. Installing TextMeshPro
TextMesh Pro is a package capable of creating stylish text in Unity. Import the TextMesh Pro essential resources and fonts into your project.
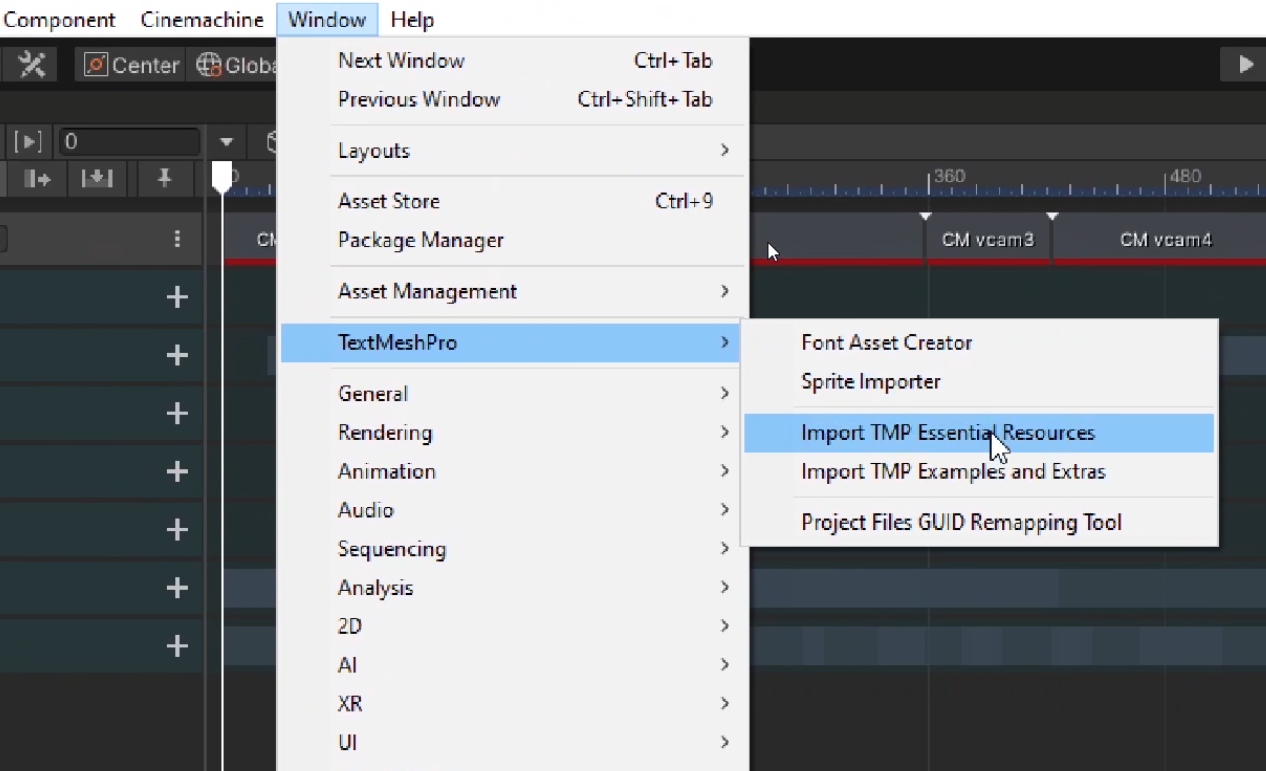
1. From the top menu dropdown, select: Window > Text Mesh Pro > Import TMP Essential Resources (Figure 01).
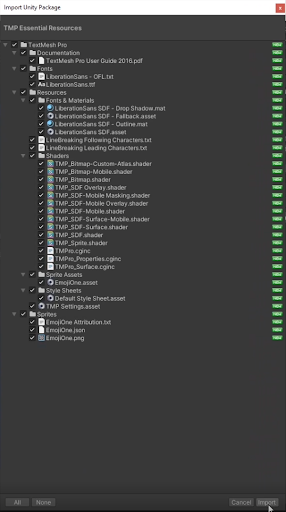
2. Make sure the entire TextMesh Pro package is selected and click import (Figure 02).
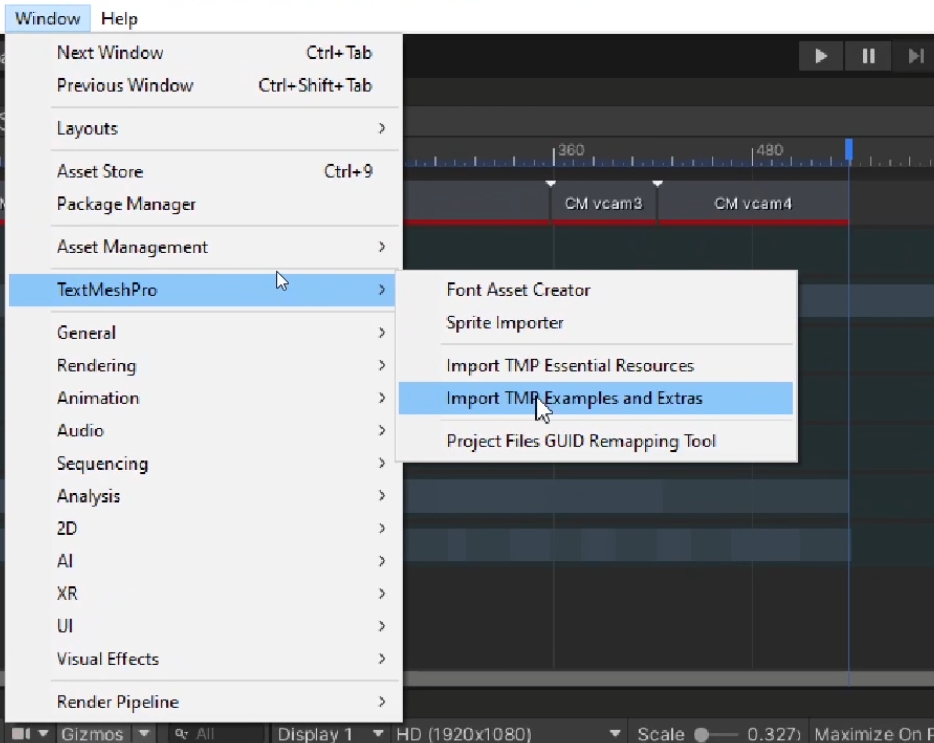
3. From the top menu dropdown, select:
Window > TextMeshPro > Import TMP Examples and Extras (Figure 03).
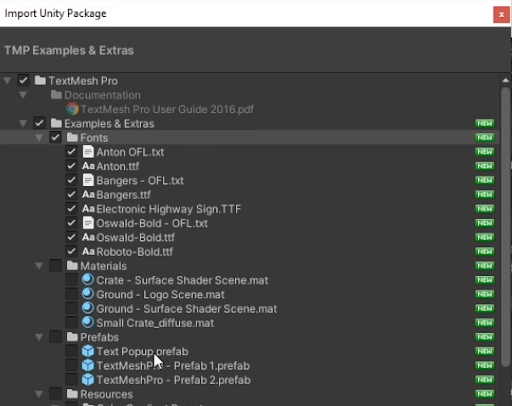
4. You only need the Fonts package here. Uncheck the TextMesh Pro box to deselect the unnecessary boxes. Check the Fonts box in order to only select the fonts package and click import (Figure 04).
3. Adding and Styling Text
Now that you have the necessary tools in your project, it’s time to create your title. You will be using a font called Bangers. You will begin by creating the Font Asset.
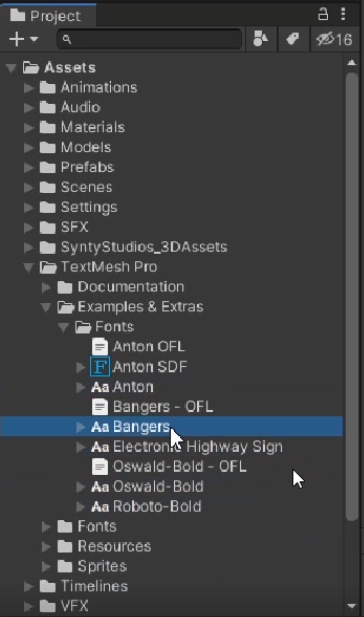
1. Create a new Font Asset by going to the TextMesh Pro folder in Assets then navigating to Examples and Extras > Fonts > Bangers (Figure 05).
2. Right click on Bangers and then select: Create > TextMesh Pro > Font Asset (Figure 06).
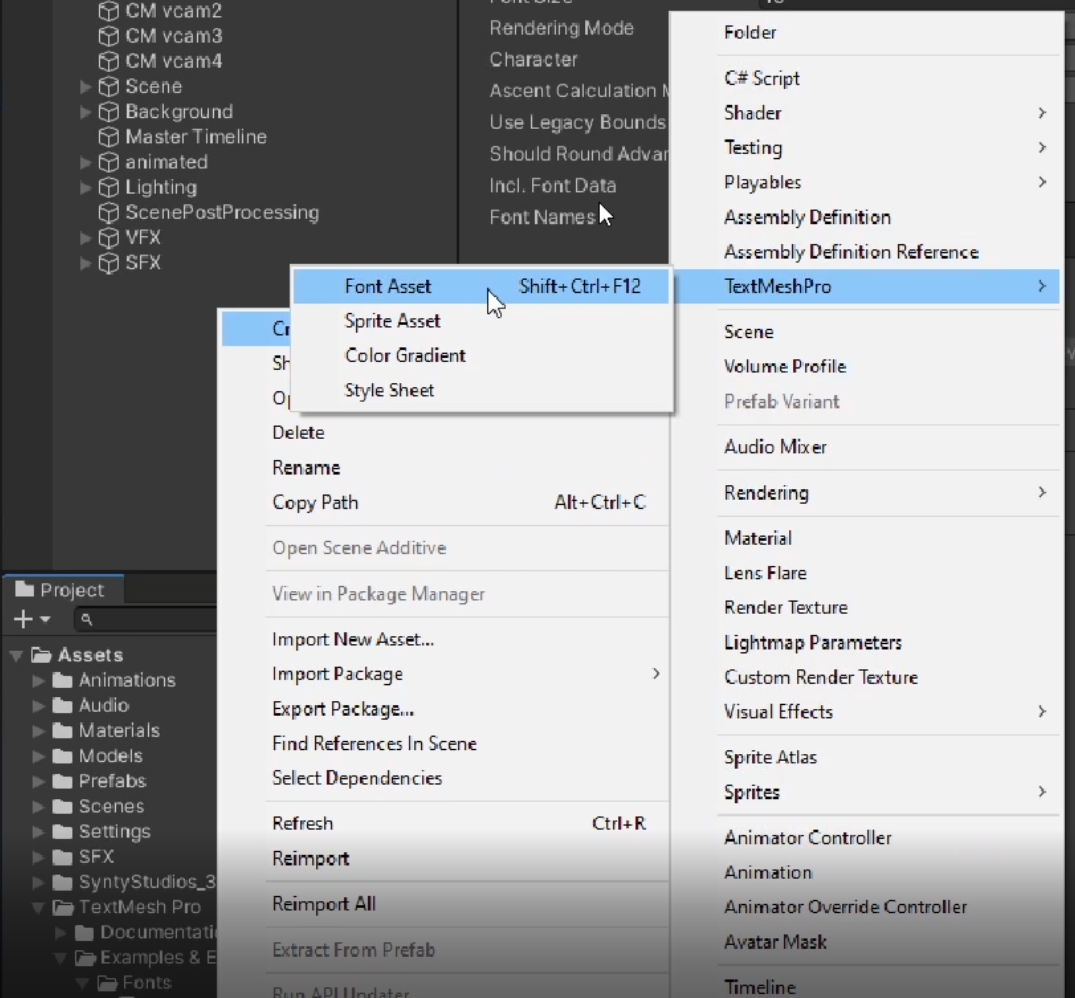
This will create “Bangers SDF,” (Figure 07) a new Font Asset in your Fonts folder.

Now that you have your Font Asset available, you will create the title itself.
3. Right click in the Hierarchy and navigate to UI > Text - TextMeshPro (Figure 08) to create a new TextMesh Pro GameObject in your scene.
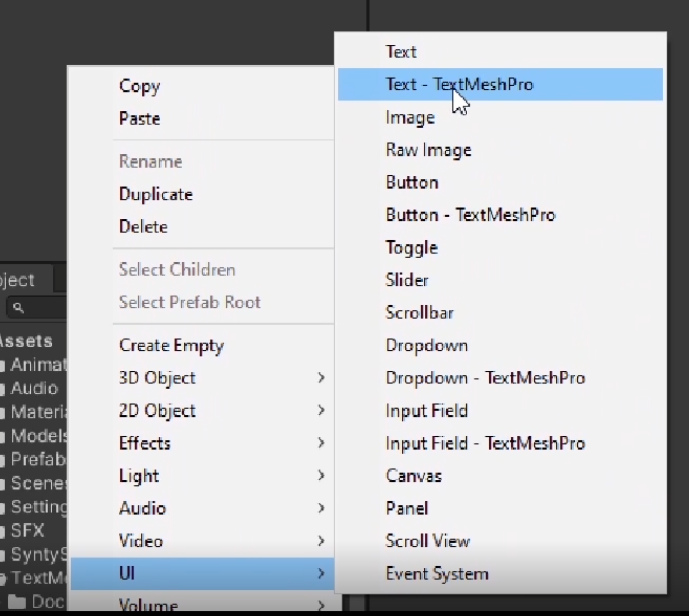
You should now see some text in your Game view (Figure 09).
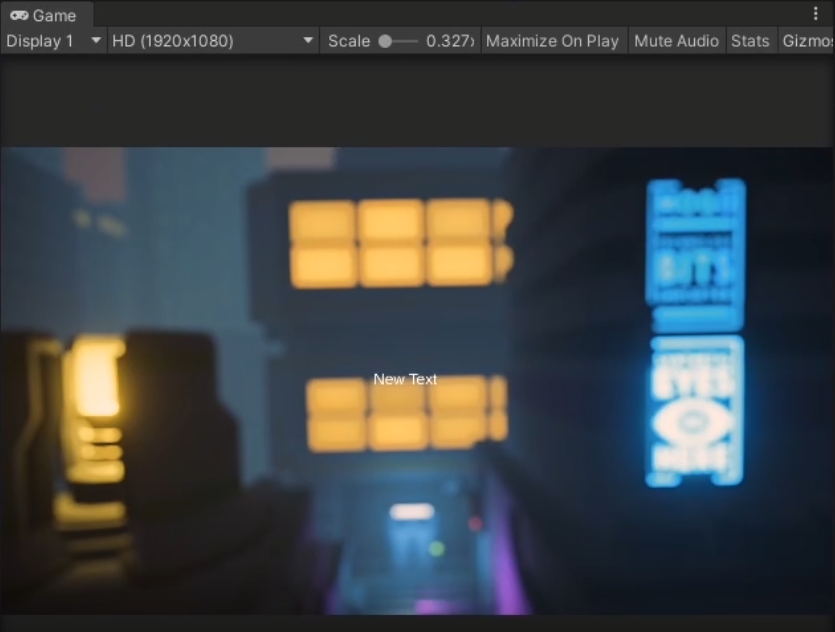
4. This step will also create a Canvas, which will be the parent of your Text (TMP) GameObject. Rename this “TitleCanvas.” (Figure 10)
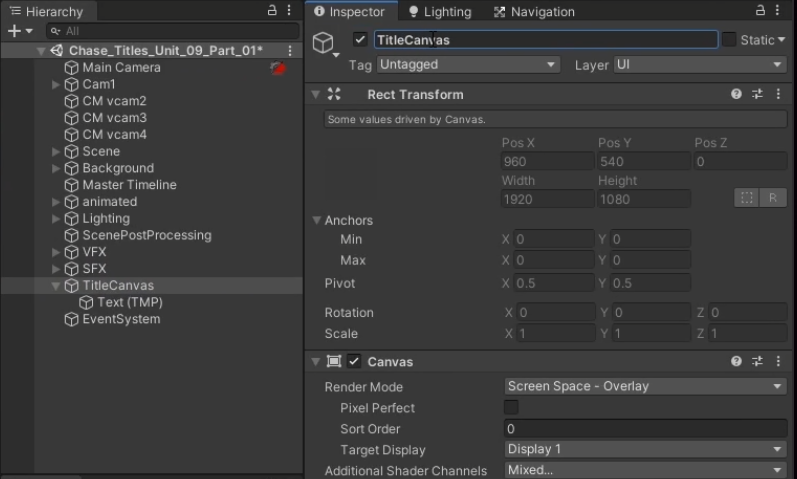
- Make sure TitleCanvas is selected. In the Inspector under Canvas Scaler, change the UI Scale Mode from Constant Pixel Size to Scale With Screen Size (Figure 11) in order to keep the title proportionate to the 16:9 aspect ratio.

5. Change the Reference Resolution under Canvas Scaler to X: 1920 Y: 1080 and change the Match value to 0.5 (Figure 12) so that our title remains centered, proportionate to our screen resolution.

6. Back in the Hierarchy window, rename Text (TMP) to “Title.” (Figure 13)
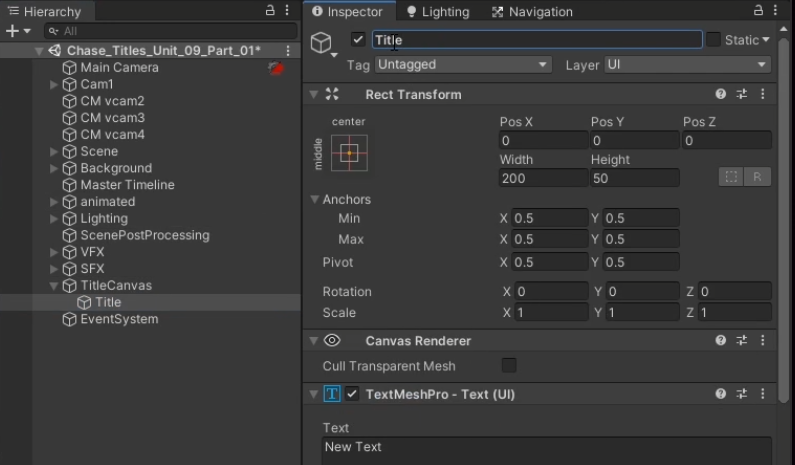
7. In the Inspector, go to TextMeshPro - Text (UI) and change “New Text” to “The Chase.” (Figure 14)

8. Under Rect Transform, change the Width to 1280 and the Height value to 250 (Figure 15) so that it evenly scales our title to a transform position on the screen. Additionally, change your X and Y position values to 0 in order to get our title where it needs to be on screen.
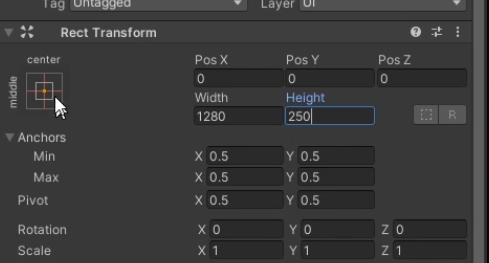
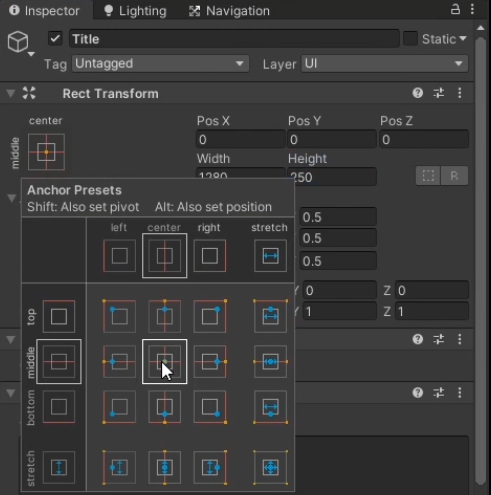
9. In the Anchor Presets, click the center, middle box to keep our title positioned and centered in view(Figure 16).
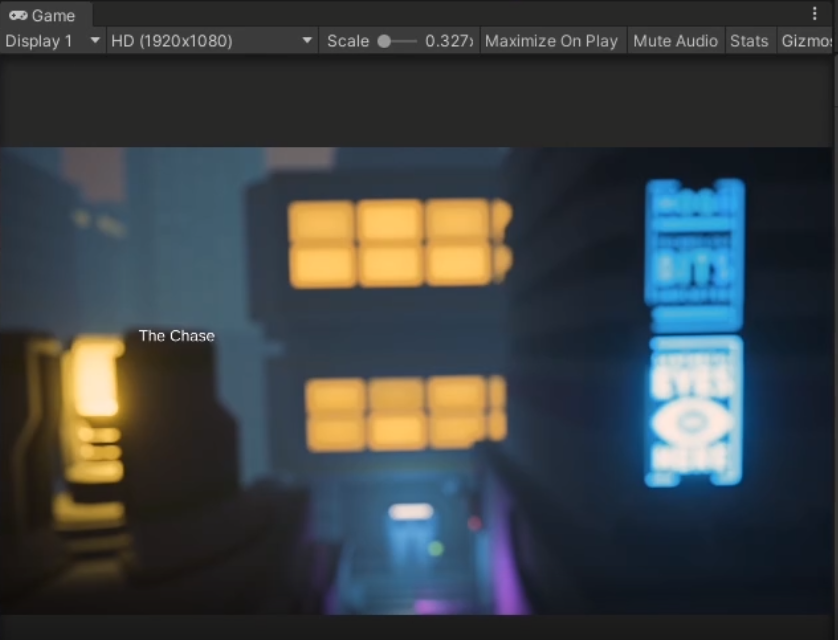
At this point, here’s what your title should look like (Figure 17). Notice that it does not yet appear centered. This will change when we increase its size:
Now that you have your title asset created, it’s time to give it a stylized look that will match the aesthetic of your film.
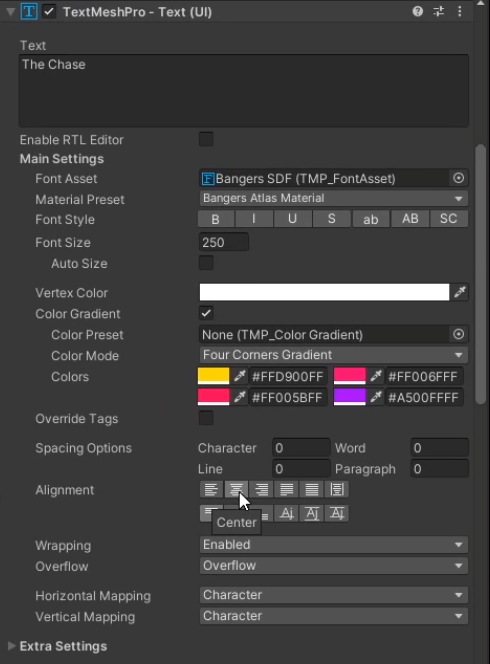
10. Go back to the TextMesh Pro - Text (UI) tab in the Inspector (Figure 18).
- Change the Font Asset to Bangers SDF.
- Change the Font Size to 250.
- You can either have one colour for your font by changing Vertex Color, or you can use a gradient by enabling Color Gradient. Enable this checkbox and made the first color “#FFD900FF,” the second color “#FF006FFF,” the third color “#FF005BFF,” and the fourth color “#A500FFFF.”
- Change the Alignment to center.
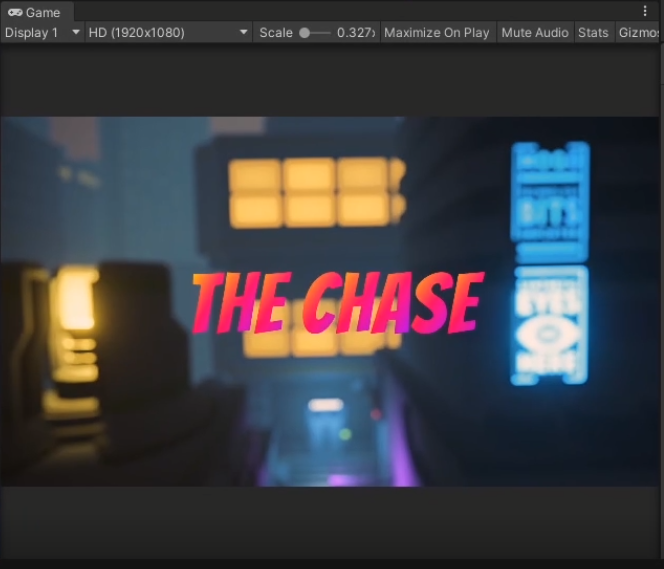
The result should look like this (Figure 19):
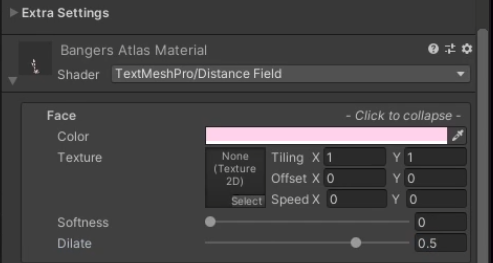
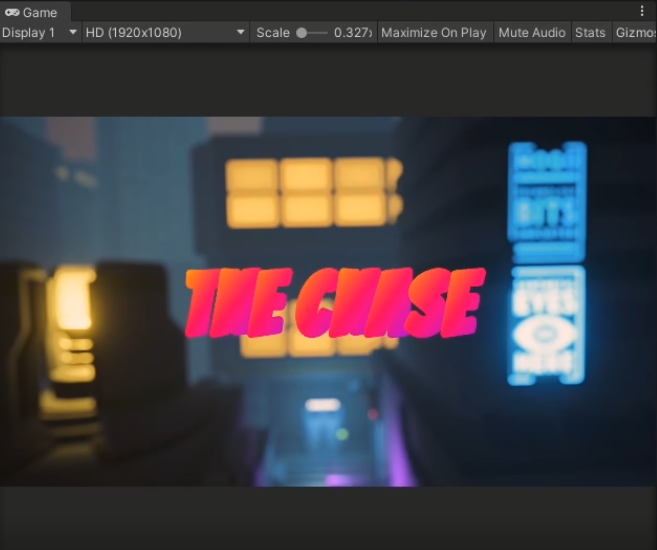
11. In the Inspector, below Extra Settings, expand the triangle for Bangers Atlas Material, and then in the setting labelled Face, change Color to light pink and change the Dilate value to 0.5 (Figure 20). Doing this will make the title appear fuller and get letters to overlap.
The result will look like this (Figure 21):
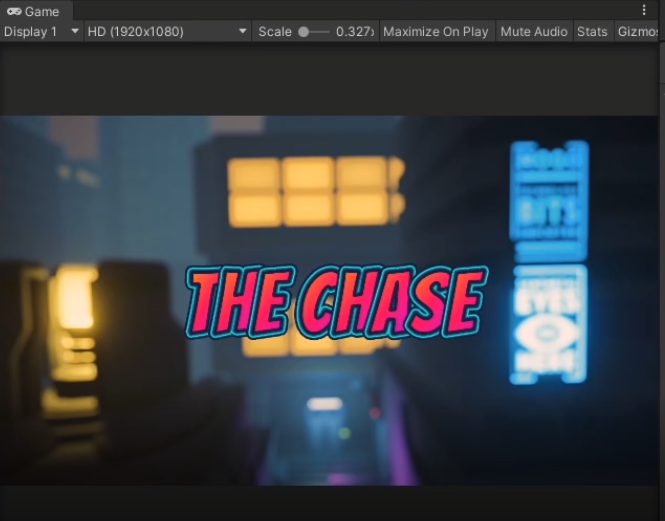
12. Create a 3-color border around the text that will really help it pop out (Figure 22).
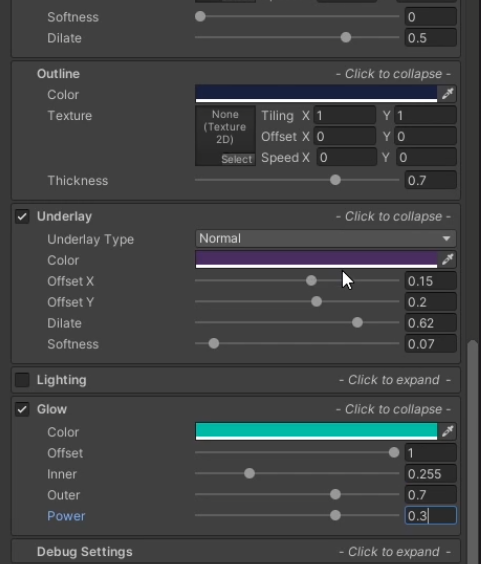
- Under Outline change Color to Navy Blue and change the Thickness value to 0.7. The Outline is the outer edge of the text and the outermost border element.
- Underlay is the innermost border element. Enable the Underlay checkbox, and then select the Underlay field again to expand its properties. Change Underlay Color to Purple (make sure the Alpha in the Color settings is set to 255), Offset X to 0.15, the Offset Y to 0.2, the Dilate value to 0.62, and the Softness value to 0.07.
- Glow is the color in between Outline and Underlay. Enable the Glow checkbox, and then select the Glow field again to expand its properties. Change Glow Color to Turquoise, again with the Alpha set to 255. Make the Offset value 1, the Inner value 0.255, the Outer value 0.7, and the Power value 0.3.
Your title should now look like this (Figure 23):
TextMesh Pro offers a lot of flexibility in terms of styling text. Continue experimenting with your title’s settings if you want to give it an even more unique look.
4. Fading Text In and Out
You now have your stylized title. It’s now time to fade your title in and out at the beginning of your film. You will do this by animating its opacity or alpha channel value. You will start by creating an Animation Track for the title.
1. In the Timeline window, right click to create a new Track Group (Figure 24).
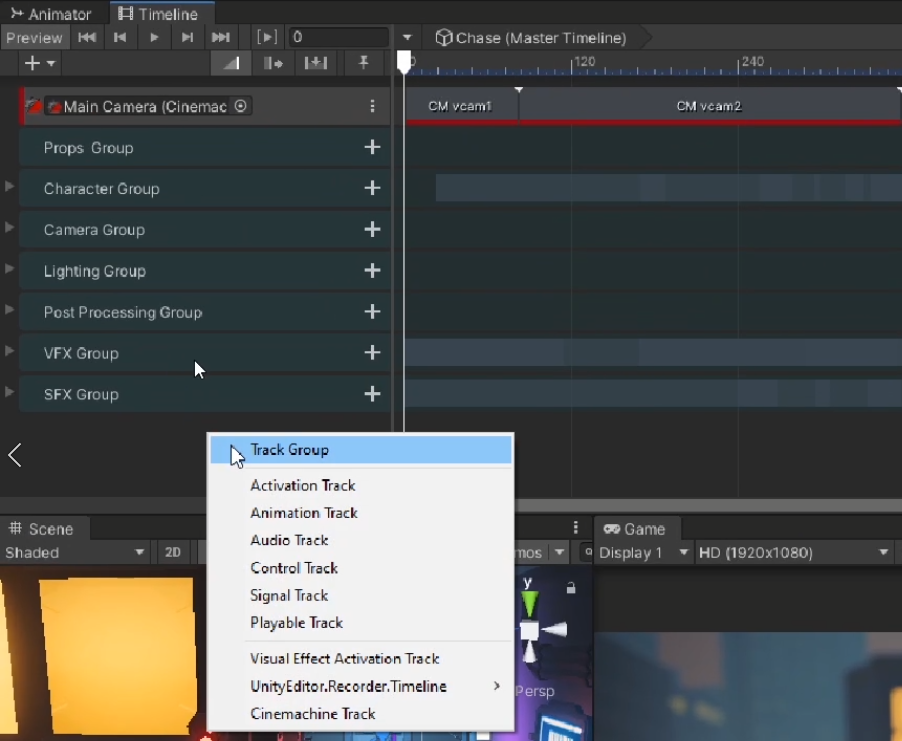
2. Rename the Track Group “Title Group.”
3. Add an Animation Track to Title Group for the title (Figure 25).
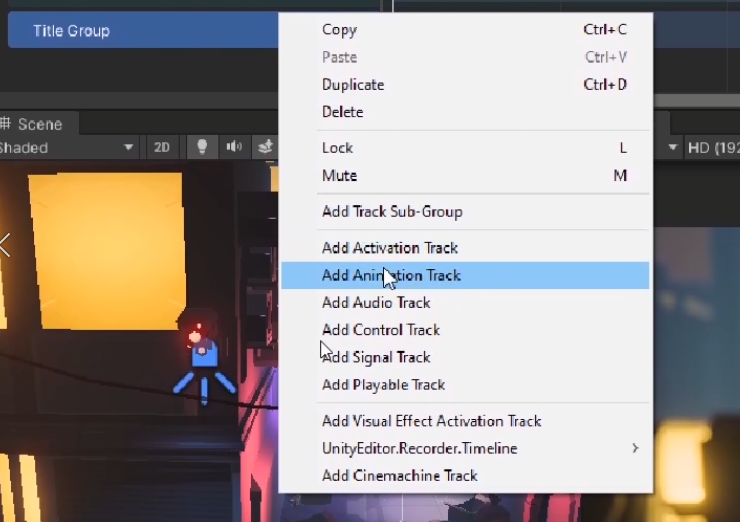
4. Drag your “Title” GameObject in your Hierarchy to the empty animation track and click Create Animator on Title (Figure 26).

Now that you have your animation track for the title, you will animate its opacity.
5. Click the red record button to begin animating the title.

6. With the Timeline playhead cursor set to Frame 0, ensure that the "Title" GameObject is selected in the Hierarchy window. Next, select the Vertex Color in the Inspector window, within the TextMeshPro - Text (UI) component (Figure 28).
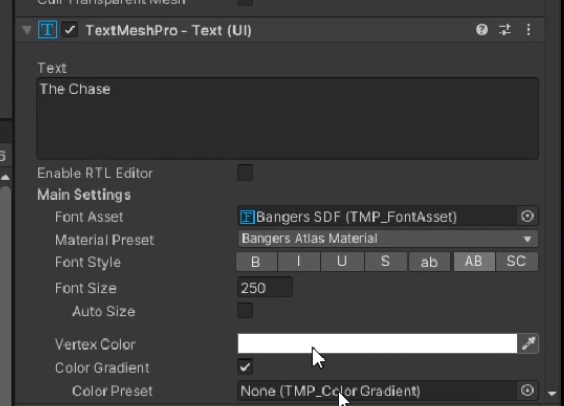
7. Change the A (alpha) value to 0 to make the title transparent (Figure 29).
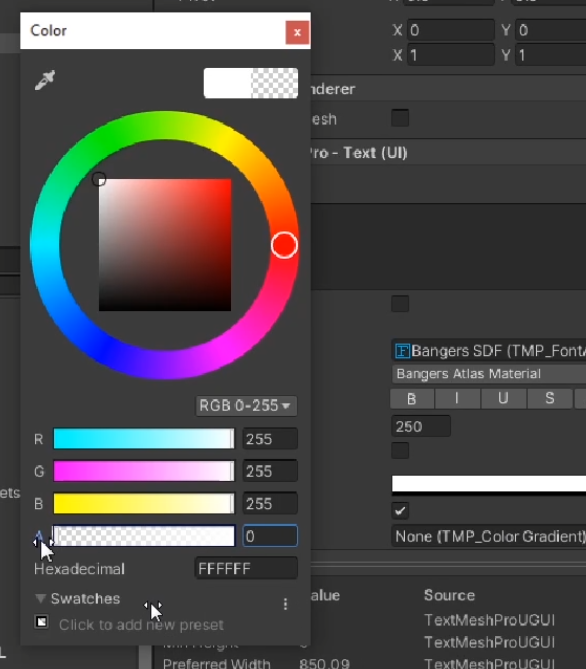
8. In the Timeline, scrub forward to Frame number 20 in and change the title’s alpha value back to 255 to make it visible once again. The title will now fade in from being completely clear (Figure 30).
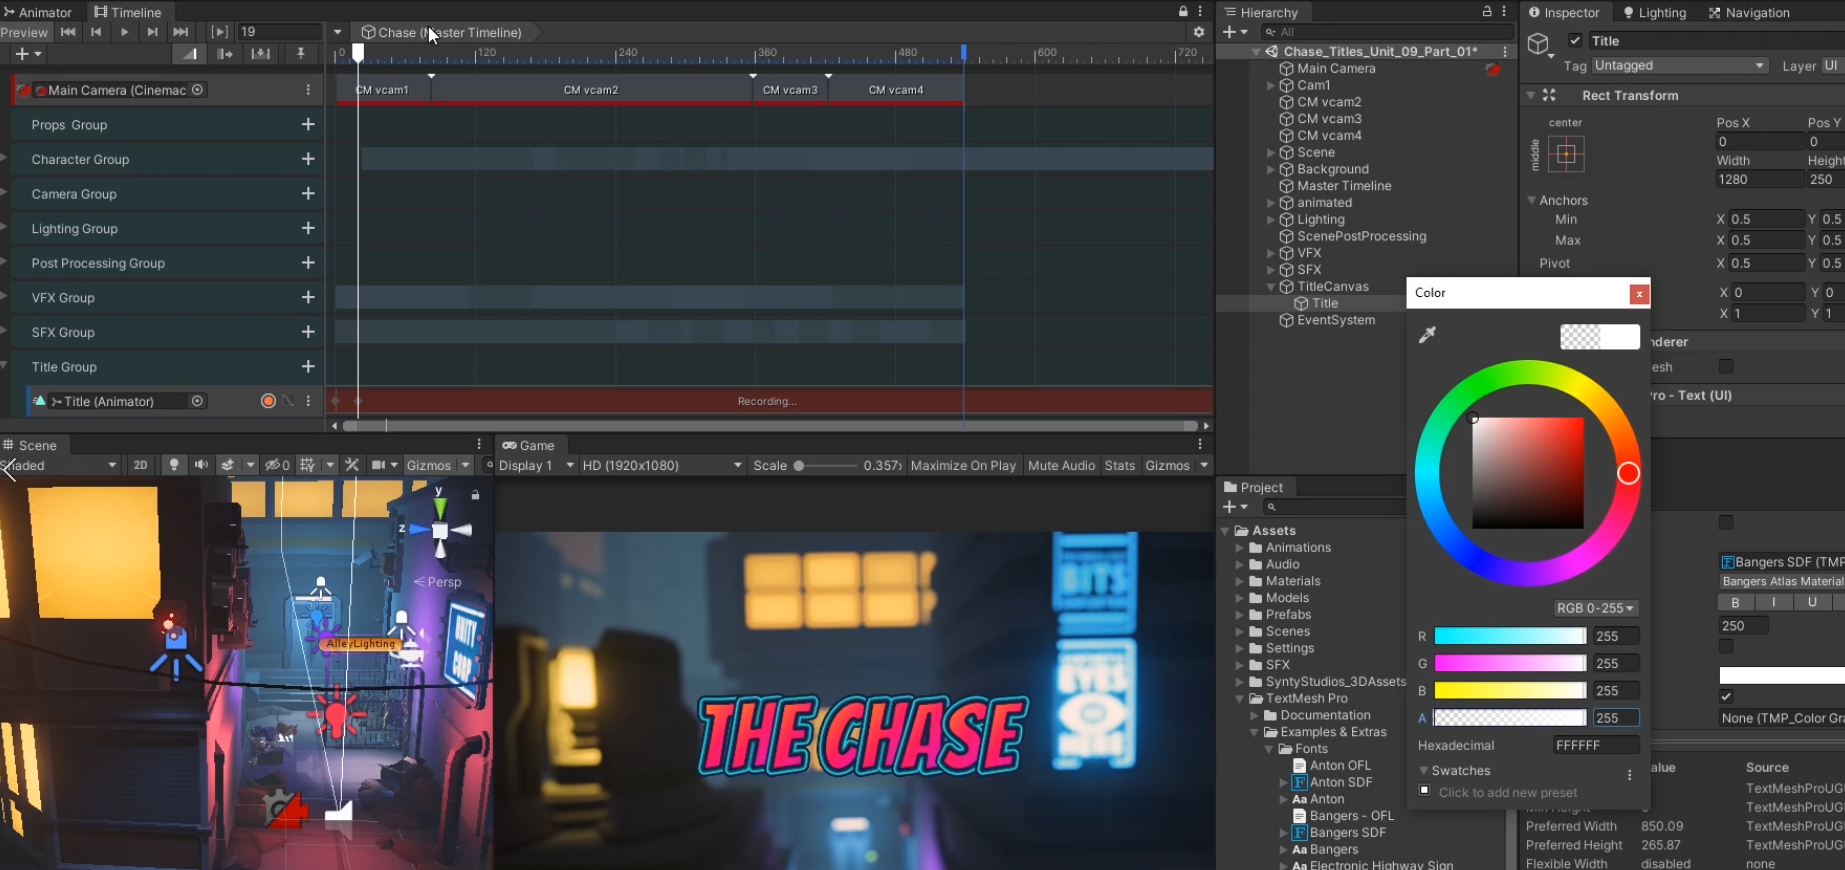
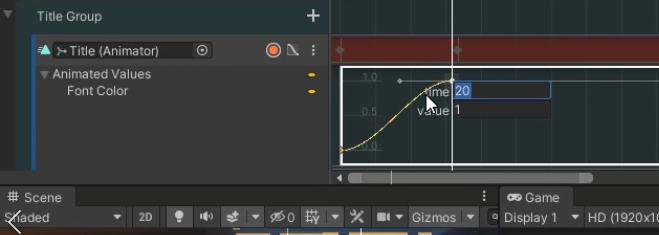
9. You can further adjust the look of the title fade in by going into the graph editor and adjusting the time and values of the individual keys, which you can do by right clicking on them and selecting Edit Key. Try changing the key’s starting time from 20 frames in to 35 frames in to make the fade in time lengthen (Figure 31) and (Figure 32).
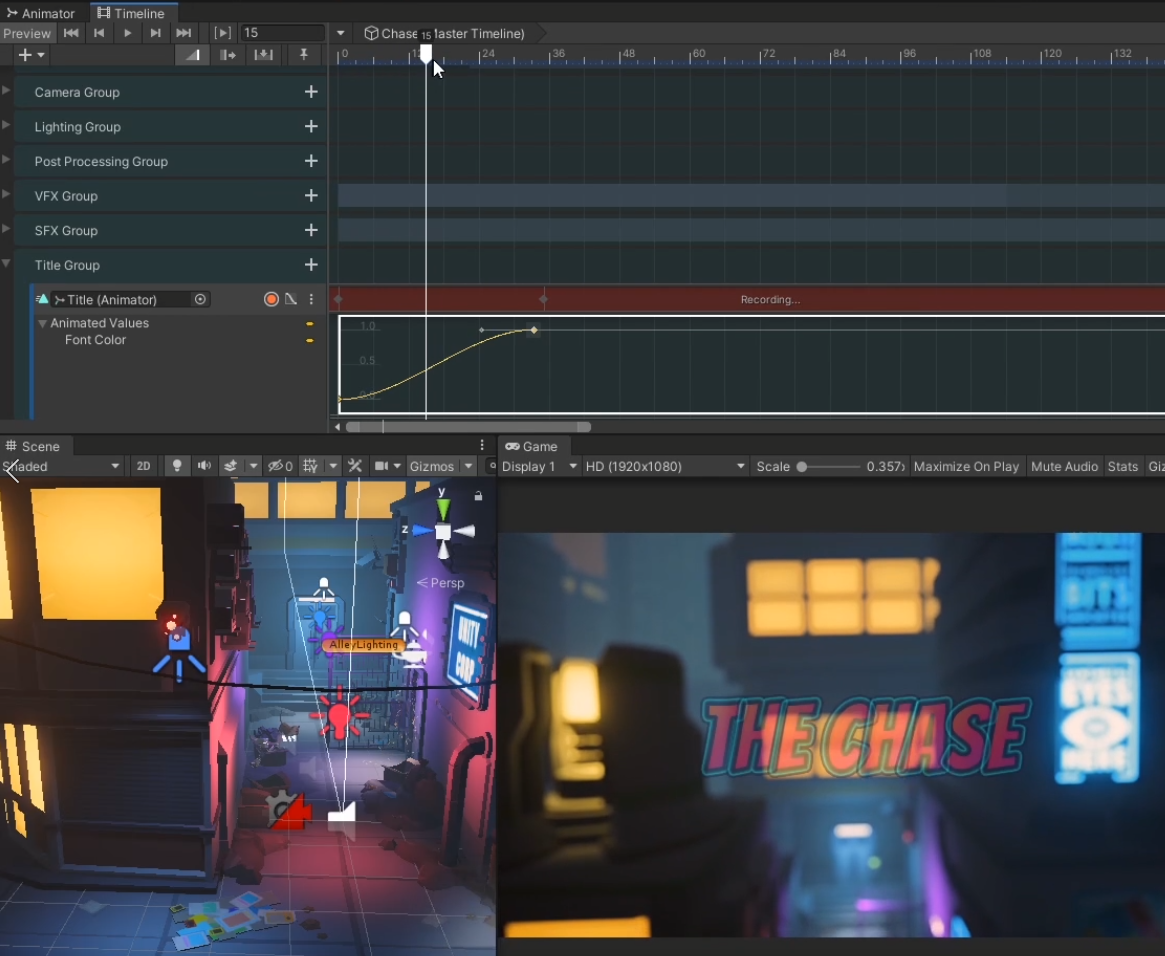
Now that your title fades in, it’s time to fade it back out as the action begins.
10. Scrub the Timeline to about 81 frames in and right click the graph editor to add a new key (Figure 33). This should add a new keyframe with the same 255 alpha value of the title.
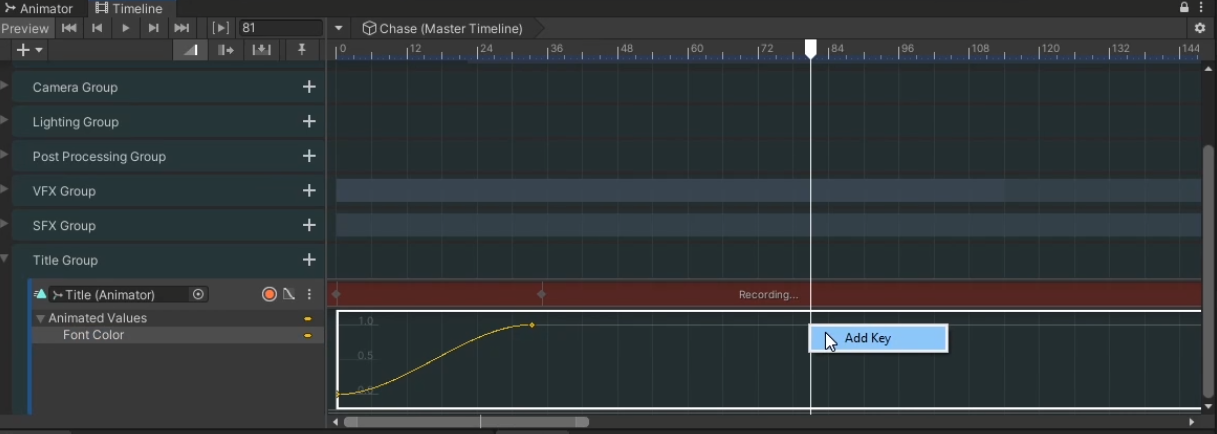
11. Scrub a little bit further forward to about 89 frames in and change the title’s alpha value to 0 to create the fade out (Figure 34).
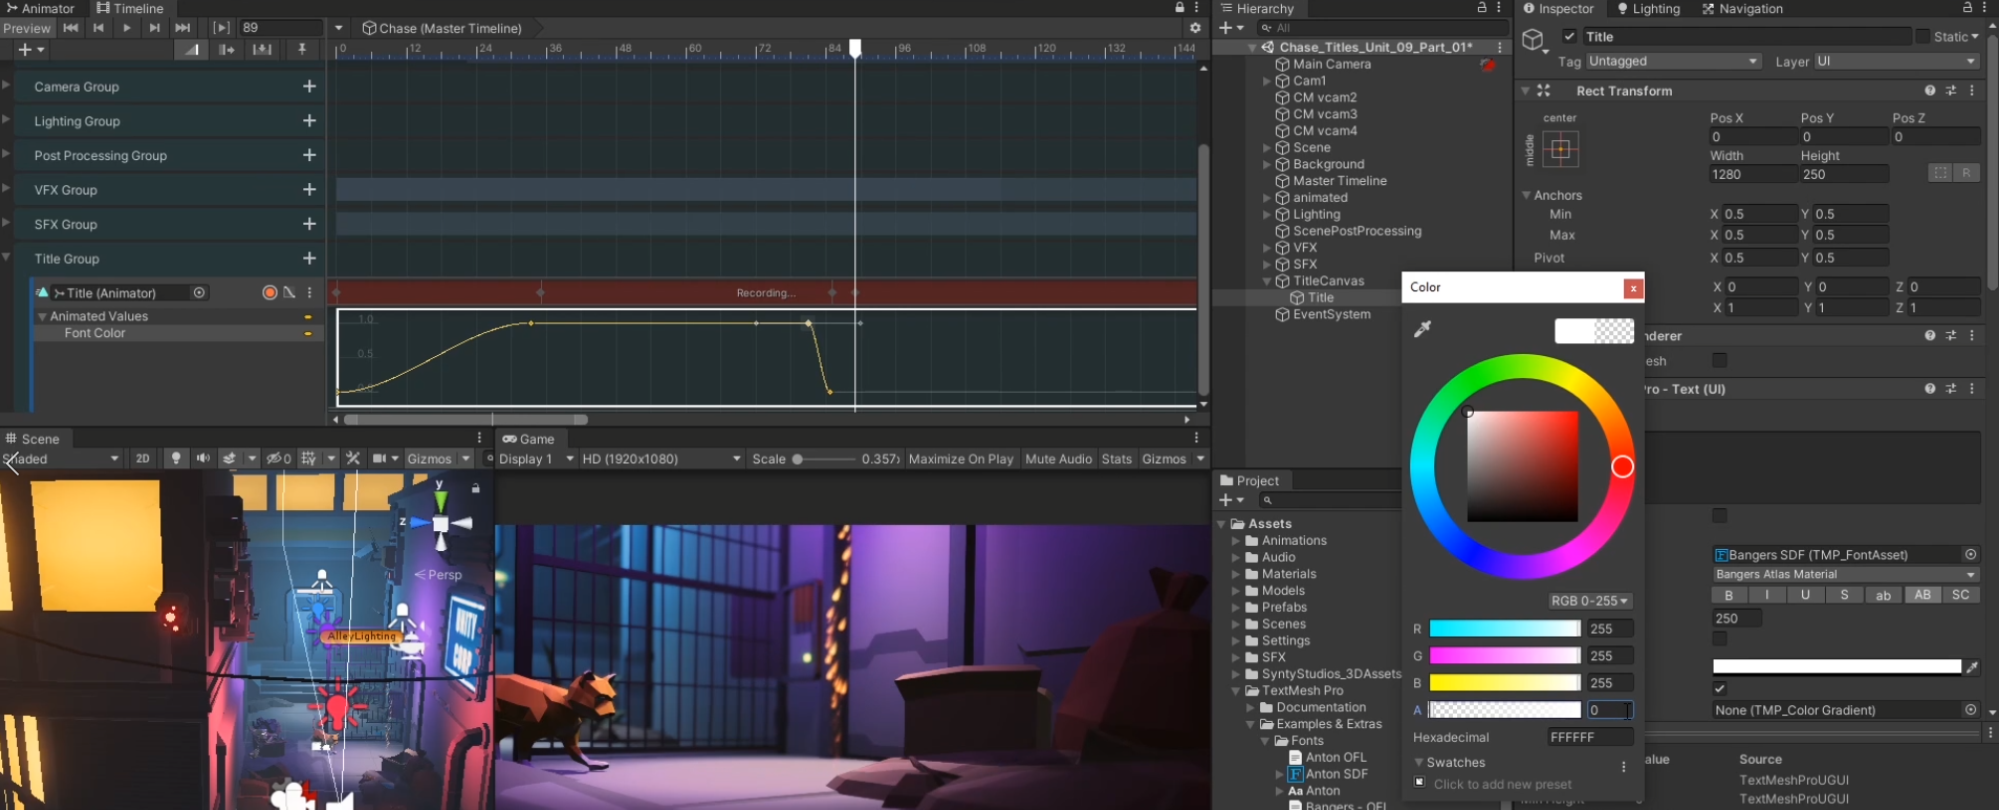
You can now adjust the settings of the fade out to make it look more gradual and better match up with the timing of the film.
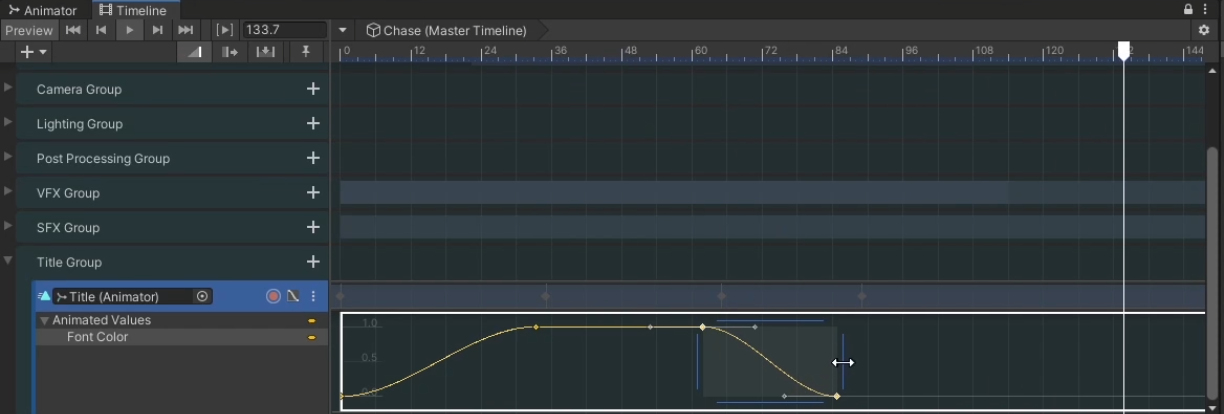
12. Right click the third keyframe, select Edit Key, and change its time to 65 frames. Right click the fourth keyframe, select Edit Key, and change its time to 75 frames (Figure 35).

13. Be sure to click the flashing red circle and save to finish editing this animation (Figure 36).

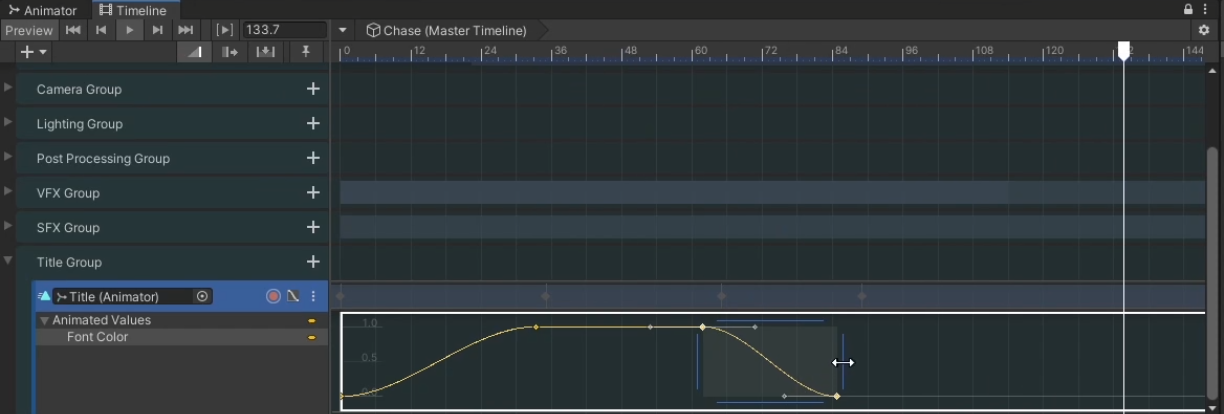
14. You can also make further adjustments by clicking and dragging transitions until the timing looks right (Figure 37). Try dragging the final keyframe out to 85 frames (Figure 38).
5. Fading the Video In and Out
Finally, you will want to add a fade in and fade out to the beginning and end of our film. You will do this by creating a black image and adjusting its opacity, much like we did with our title.
First, create a black image that will cover the canvas.
1. In the Hierarchy, right click on the TitleCanvas and select UI > Image (Figure 39).
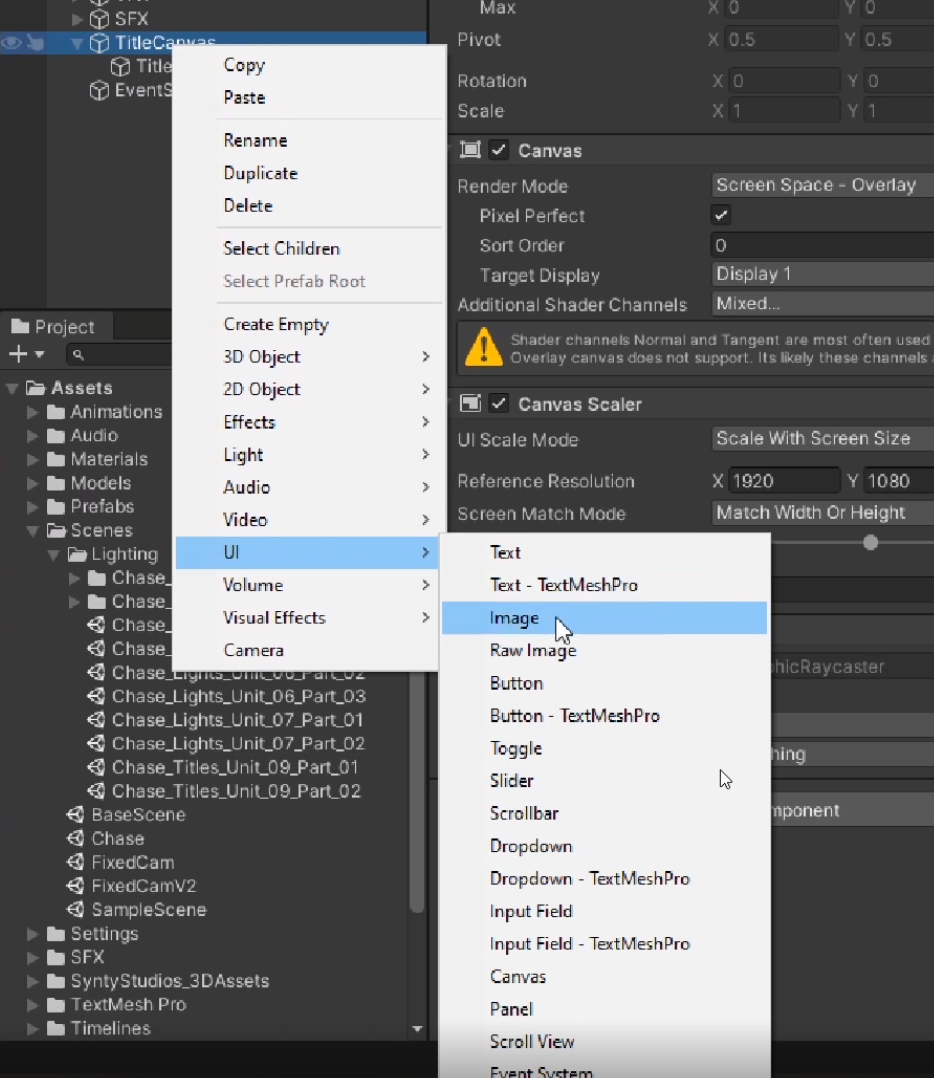
This will create an Image GameObject that is a child of TitleCanvas (Figure 40).

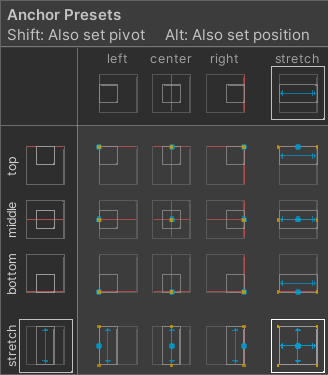
2. In the Inspector, change the Anchor Presets under Rect Transform to Stretch, Stretch while holding down the Alt/Option and Shift keys in order to stretch the image to fit over the entire view (Figure 41). You should immediately see a white image cover the entirety of your Game View.
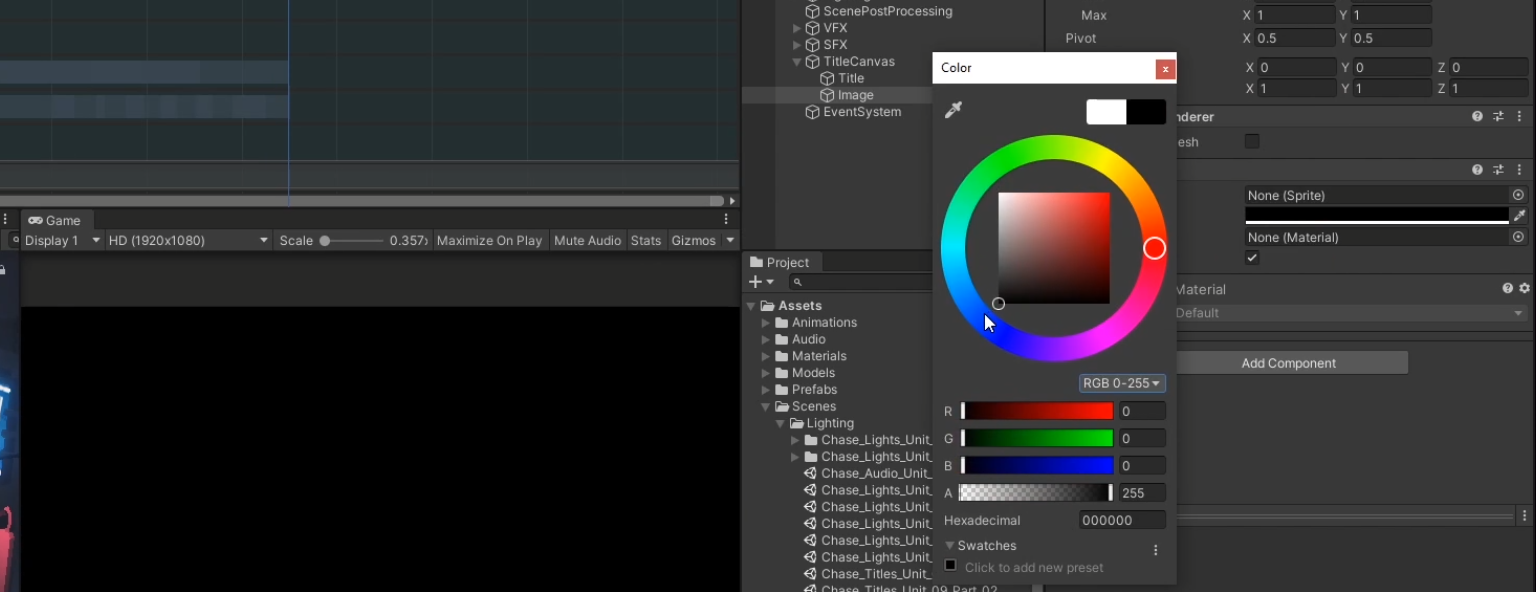
3. Below, under Image, change the color from white to black (Figure 42). Doing this should change the color of the Game view from white to black.
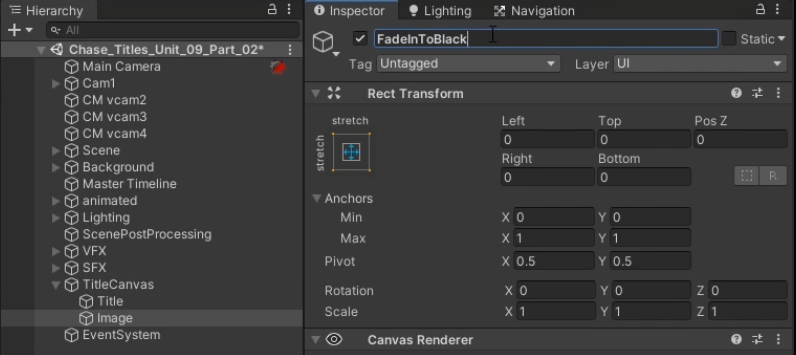
4. Now change the name of Image to “FadeInToBlack” (Figure 43).
You now have the black image. It’s time to animate its opacity to create a fade in and fade out just like you did with your title.
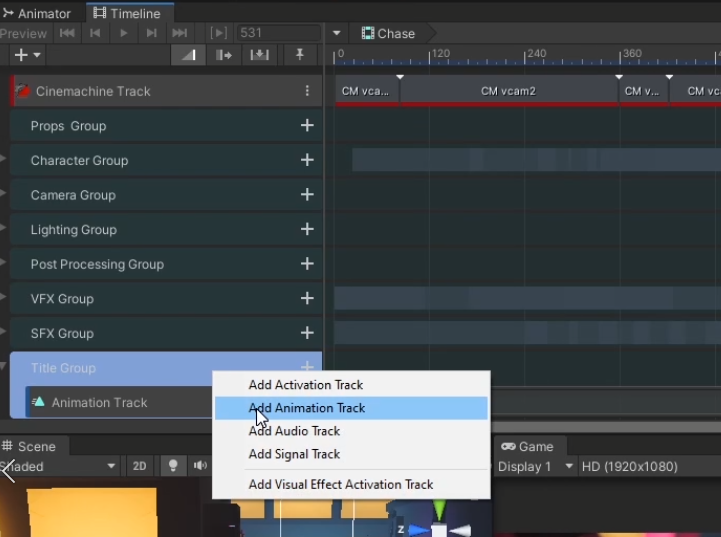
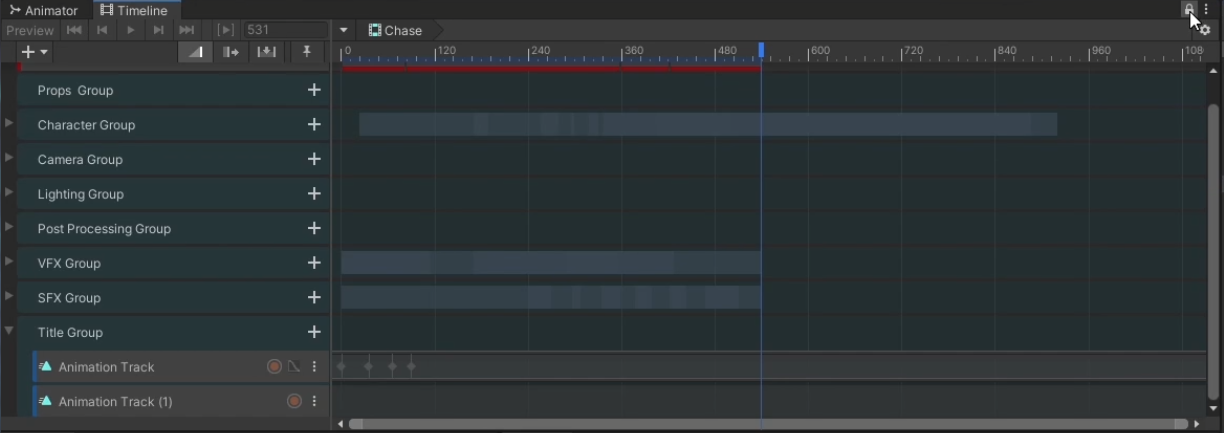
5. In the Timeline, right click the Title Group and select Add Animation Track (Figure 44).
To edit the new animation track you’ve created whilst changing values in the Inspector for the FadeToBlack GameObject, click the lock on the top right corner of the Timeline to lock it (Figure 45).
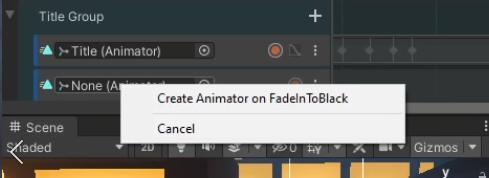
6. Drag FadeInToBlack onto the empty Animation Track and select Create Animator on FadeInToBlack (Figure 46).
7. Press the record button to animate the FadeInToBlack GameObject’s opacity.
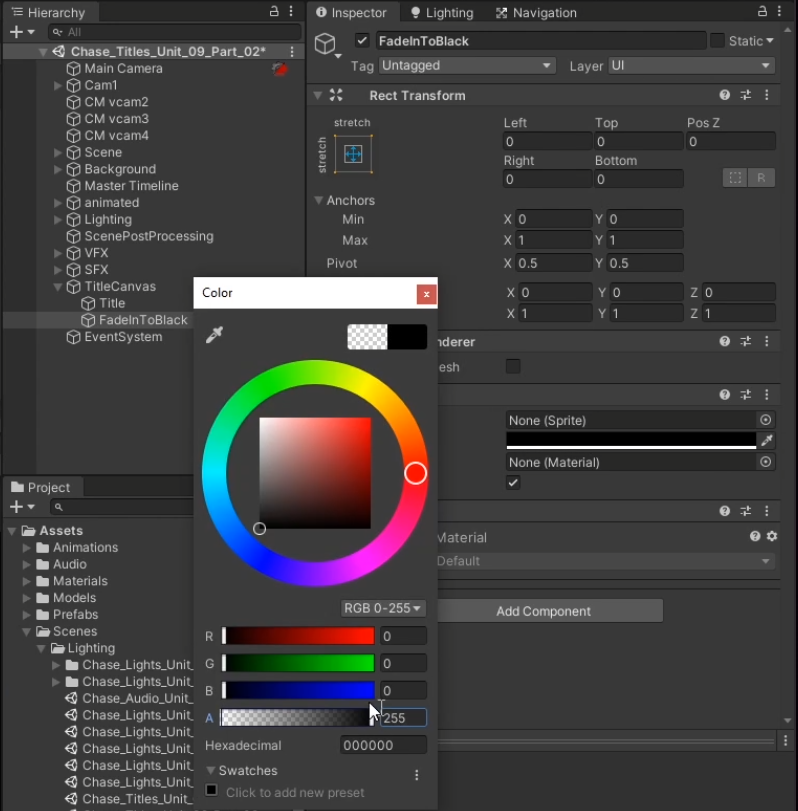
a. Scrub the Timeline to 0 frames and in the Inspector under Image, click the color and change the A (alpha value) to 255 (Figure 47).
b. Scrub to 10 frames and change the A value to 0. The video should now fade in.
c. To fade out, create a new key at frame 485 frames and make sure FadeInToBlack’s alpha value remains set to 0.
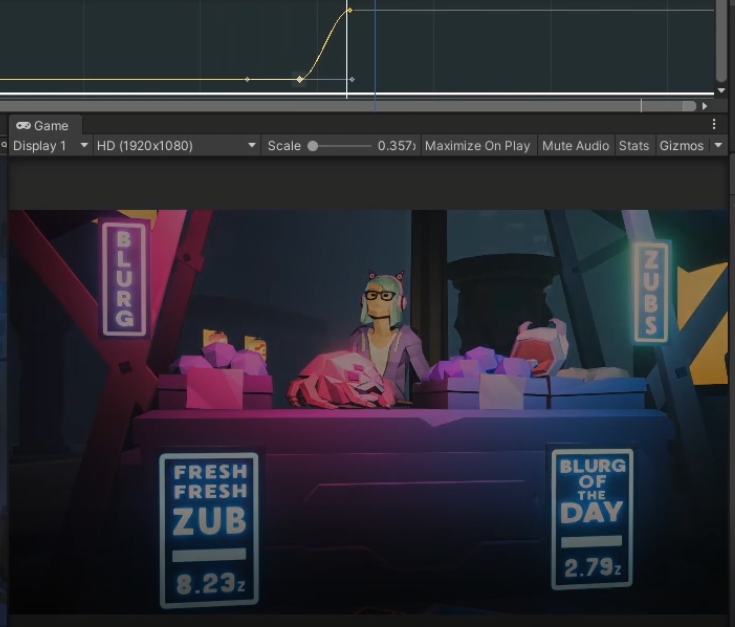
d. Create one final frame at 515 frames and set the FadeInToBlack’s alpha value to 255. The fade out should look something like this on the graph editor (Figure 48). Feel free to tweak these values depending on how drastic of a fade in and fade out you want.
6. Recap
In this lesson, we learned how to use TextMesh Pro to create a stylish title and how to use the Timeline to fade the title and video itself in and out.