
Locomote in VR Using Teleportation
Tutorial
Beginner
+10XP
30 mins
(6)
Unity Technologies
This tutorial will teach you how to add the ability to freely teleport in an environment using Oculus Go and customize where the VR user can explore.
Resources
Languages available:
1. Why Teleportation?
Aside from traditional input devices, such as a mouse, keyboard, and game controllers, desktop head-mounted displays (HMDs), such as Oculus Rift, HTC Vive, HTC Vive Pro, and Windows Mixed Reality Headsets, allow users to simply walk around within the range of the positional tracking devices in their room. One challenge this raises, though, is the available space of a real-world room. While VR developers have created some solutions to this problem, it remains an ongoing challenge in need of even better solutions.
There are a few constraints to VR locomotion:
- Avoid acceleration
- Provide a frame of reference for users
- Give users agency in the movement
Given these constraints, a common solution is teleportation, which refers to movement from one place to another instantaneously. Teleportation allows a user to explore a virtual space without having to move in the real world. Since virtual worlds can be larger than the real-world room, it's important to be able to navigate around the virtual space.
By the end of this tutorial, you’ll be able to:
1. Add the ability to freely teleport in an environment using the Oculus Go
2. Customize where the VR user can explore
--------------------
In the previous teleportation tutorial, you learned how to teleport to a series of set locations, called waypoints. In this tutorial, you will learn the other primary form of teleportation, called free movement. Free movement allows your VR user to choose where they teleport to in the VR space rather than be limited to a set of predetermined waypoints. You will learn how to use Unity's Free Teleport component to move to a location based on where the user points the controller or controller gaze.
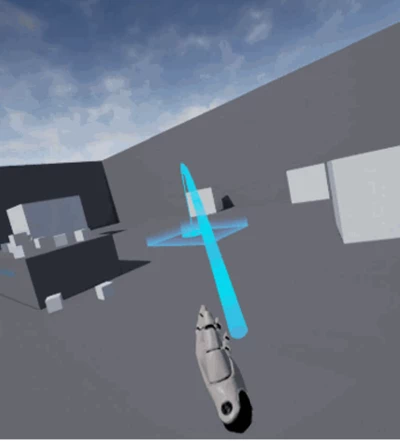
Navigating around the construction site allows a user to explore the site and view the scene from different viewpoints. We will explore the Free Teleport component and see how it can be used to teleport around the site and allow the user to explore freely.
In this tutorial, you will add the ability to teleport around the scene so users can view an object from any viewpoint, regardless of the physical limitations of their real-world space.
To do so, you will:
0. (optional) Apply Colliders to surfaces you would like your user to be able to freely navigate
1. Attach the FreeTeleport script component to the OVRCameraRig
2. Set the script parameters and references accordingly
3. Test it in the Editor
2. Add a Collider (Reference Step)
In the object’s Inspector window, add a Mesh Collider
- Select the Ground GameObject that needs a Collider (in the provided Scene, the Prototype Plane is the surface on which the user should be able to teleport).
- In the Inspector window, click Add Component.
- Search for and select the Mesh Collider component.
--------------------
What are Colliders?
Colliders define the shape of an object for the purposes of physical collisions. In this case, we are using Colliders to determine where the teleport arc hits the ground and thus where you can and cannot teleport to. To learn more about Colliders and their uses in Unity, click here.
You must use Colliders on all teleportable surfaces.
Tip — Existing Colliders
You should always check to see if a Collider exists on a GameObject before going through the process of adding an additional Collider. You can easily check the Inspector window to see if a Collider exists on the object.
Tip — Collider Types
To optimize the Collider, you can often choose a simplified Collider component: Box Collider, Sphere Collider, or Capsule Collider. To learn more about the trade-offs of each Collider, click here.
Tip — Layers
Layers are most commonly used by Cameras to render only a part of the Scene, and by lights to illuminate only parts of the Scene. But they can also be used by raycasting to selectively ignore Colliders or to create collisions.
The Free Teleport component will ignore objects that use the Ignore Raycast Layer. This prevents the user from accidentally teleporting onto surfaces with Colliders that are not intended for teleporting.
3. Attach the Free Teleport Component
Add the Free Teleport component to the OVRCameraRig.
- Navigate to the OVRCameraRig in the Hierarchy.
- In the Inspector, click Add Component.
- Search for and select Free Teleport.
What is the Free Teleport Component?
The Free Teleport component allows users to freely teleport around the virtual Scene. In a previous tutorial, you configured Waypoint Teleportation, which allows users to jump between predetermined positions in the Scene. With the Free Teleport component, you specify which surface the user can move along and then allow the user to freely navigate the surface with the use of the Oculus Go controller.
4. Set the Free Teleport Parameters and References Accordingly
Configure the Free Teleport component to work in your Scene.
- Set the parameters appropriately on the FreeTeleport component in the Inspector window.
- Set Controller to R Tracked Remote.
- Set the Controller Transform to RightHandAnchor.
- Set the Button to Primary Index Trigger.
- Assign the Teleport Marker to TeleportMarker Prefab.
Tip — Inspector Lock
Lock the Inspector window to avoid accidentally changing windows when assigning references.
Don’t forget to unlock afterward!
5. Test it in the Editor
Click Play and use the mouse and the WASD keys to test the functionality in the Editor.
- Click the Play button.
- Left-click in the Game window to teleport around the Scene.
- You can also use the A key to rotate left and the D key to rotate right.
6. Key Takeaways
You've successfully configured teleportation movement.
By completing this module, you are now able to:
- Add a Collider to any ground GameObject in your Scene
- Add and configure the Free Teleport component to allow your user to freely teleport around your Unity Scene
- Test the functionality of the component in the Editor