
Locomotion and Teleportation in the XR Interaction Toolkit
Tutorial
Beginner
+10XP
20m
(128)
Unity Technologies
In this tutorial, we'll check out the Locomotion System in the XR Interaction Toolkit, which provides movement for the XR Rig. We'll look at how the Locomotion System works with the XR Rig, implement teleportation, configure snap turns, and create two example Locomotion Providers.
Languages available:
1. Locomotion and Teleportation in the XR Interaction Toolkit
This tutorial has been verified using Unity 2019.4.12f1 LTS, XR Interaction Toolkit 0.9.3-preview, and Oculus XR Plugin 1.4.3
In this tutorial, we'll check out the Locomotion System in the XR Interaction Toolkit, which provides movement for the XR Rig. We'll look at how the Locomotion System works with the XR Rig, implement teleportation, configure snap turns, and create two example Locomotion Providers.
To move/turn an XR Rig, a Locomotion Provider first checks to see if the Locomotion System is busy. If not, it requests exclusive control of the system. If the request is granted, it then moves or turns the XR Rig. When finished, it gives up its exclusive control.
Using the Locomotion System is fairly straightforward. We assume you have a project and Scene loaded that uses an XR Rig and has a ground plane or other kind of floor for locomotion.
1. To the XR Rig, add the following three components:
Locomotion System
Teleportation Provider
Snap Turn Provider
2. The Locomotion System and Teleportation Provider components have no adjustable properties, so let's focus on the Snap Turn Provider.
- Turn Input Source: This determines whether the Snap Turn Provider uses the primary 2D axis (X/horizontal) or secondary to turn.
- Controllers: Determines which controller(s) will be used for turning.
- Turn Amount: Sets how many degrees to turn.
- Dead Zone: The trigger will need to be moved past the dead zone to activate a snap turn.
- Activation Timeout: This determines how much time can pass before another snap turn can be activated.
For now, set the size of the controllers to 2, drag and drop your left and right-hand controllers into the slots, and leave the other options at their defaults (Figure 01).
3. Before we can teleport, we need somewhere to teleport to. Create an empty GameObject by selecting Create Empty from the GameObject drop-down. Name it TeleportationAnchor.
4. Add a Sphere or Box Collider and set Convex and Is Trigger to True.
5. Add a Teleportation Anchor component.
(You may wish to add a visual cue, such as a primitive, as a child Transform. If you use a mesh, remember to remove its Collider.)
6. Duplicate your Teleportation Anchor and distribute it around your Scene.
7. Select your ground plane/floor and add a Teleportation Anchor or Teleportation Area component.
8. Build and launch your project.
9. Try turning around using the parameters you set in the Snap Turn Provider. You may wish to adjust the turn amount, dead zone, and activation timeout.
10. Try casting your Ray Interactor at a Teleportation Anchor and teleporting.
2. Creating a Teleportation Area
An entire surface can be designated as a Teleportation Area. This gives users the ability to roam freely without experiencing the discomfort common when walking in VR.
1. Using the same Scene from earlier, click to select the ground plane.
2. Just as with the Teleportation Anchor, a Teleportation Area interacts via Colliders. If there is not already an attached Collider set to Is Trigger, create one. If you use a Mesh Collider, there are two restrictions: it needs to be set to Convex and there is a 256 polygon limit. If you’re adding a Teleportation Area component to a large or varied surface, consider using multiple simple Colliders.
3. If there is an existing non-trigger Collider, right-click the Collider header in the Inspector and select Copy Component. Right-click again and select Paste Component As New. Set this duplicated Collider to Convex and Is Trigger.
4. Add a Teleportation Area component.
Teleportation Area Properties
Just like when a Teleportation Anchor is created, an XR Interaction Manager is created if there isn’t already one in the Scene. The Teleportation Area automatically uses any Trigger Colliders that are attached to the same GameObject, or any of its child GameObjects. Colliders can also be manually assigned to the Teleportation Area by dropping them (more specifically, their GameObjects) on the Colliders header. By default, the Teleportation Area works with Interactors on all layers. If desired, the Layer Mask can be restricted. This can be useful in multiplayer scenarios to confine each player’s or faction’s freedom of movement to their own areas.
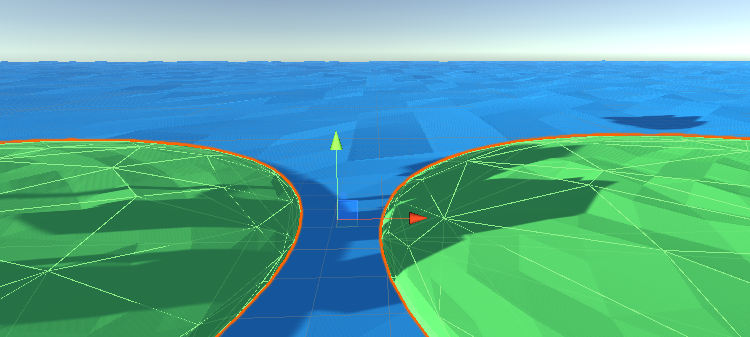
5. Try duplicating your mesh with the Teleportation Area and distributing it around the Scene, similar to the Teleportation Anchors earlier.
Build and launch your project on your target device. Try teleporting around the world. How does it feel to be able to roam freely, versus having specially designated Teleportation Anchors? With the added freedom, it becomes even more important to make it clear to users where they need to (or even can) go in your world.
3. Conclusion
The Locomotion System makes turning a snap and movement just a trigger pull or button press away. Teleportation Anchors work similarly to stepping stones, and are a good fit for projects with a well-defined path, such as adventure or turn-based projects. Teleportation Areas give users freedom to roam anywhere they choose and is suitable for AEC visualization or other open-world projects.